Nokia 1112 User Manual
Hide thumbs
Also See for 1112:
- User manual (62 pages) ,
- Quick start manual (2 pages) ,
- User instructions (2 pages)
Table of Contents
Advertisement
Available languages
Available languages
Quick Links
Advertisement
Chapters
Table of Contents

Related Manuals for Nokia 1112


Summary of Contents for Nokia 1112
- Page 1 User Guide Manual del Usuario...
- Page 2 Nokia 1112 User Guide 9248264 Issue 1 Nota: La traducción en español de este manual inicia en la Página 41.
- Page 3 The information contained in this user guide was written for the Nokia 1112 product. Nokia operates a policy of ongoing development. Nokia reserves the right to make changes to any of the products described in this document without prior notice.
- Page 4 TO, THE IMPLIED WARRANTIES OF MERCHANTABILITY AND FITNESS FOR A PARTICULAR PURPOSE, ARE MADE IN RELATION TO THE ACCURACY AND RELIABILITY OR CONTENTS OF THIS DOCUMENT. NOKIA RESERVES THE RIGHT TO REVISE THIS DOCUMENT OR WITHDRAW IT AT ANY TIME WITHOUT PRIOR NOTICE.
-
Page 5: Table Of Contents
5. Battery information.... 25 Switch on or off ........12 Demo mode..........12 Charging and discharging....25 Shortcuts in the standby mode..13 Nokia battery Lock the keypad........13 authentication guidelines....26 6. Enhancements..... 29 2. Call functions...... 14 Care and maintenance..... 30 Make and answer a call ....... -
Page 6: For Your Safety
F o r y o u r s a f e t y For your safety Read these simple guidelines. Not following them may be dangerous or illegal. Read the complete user guide for further information. SWITCH ON SAFELY Do not switch the phone on when wireless phone use is prohibited or when it may cause interference or danger. - Page 7 F o r y o u r s a f e t y USE SENSIBLY Use only in the normal position as explained in the product documentation. Do not touch the antenna unnecessarily. QUALIFIED SERVICE Only qualified personnel may install or repair this product. ENHANCEMENTS AND BATTERIES Use only approved enhancements and batteries.
-
Page 8: About Your Device
F o r y o u r s a f e t y ■ About your device The wireless device described in this guide is approved for use on the GSM 850 and GSM 1900 networks. Contact your service provider for more information about networks. - Page 9 ACP-7 and ACP-12 chargers. Warning: Use only batteries, chargers, and enhancements approved by Nokia for use with this particular model. The use of any other types may invalidate any approval or warranty, and may be dangerous.
-
Page 10: General Information
G e n e r a l i n f o r m a t i o n General information ■ Access codes • The security code, supplied with the phone, helps to protect your phone against unauthorized use. The preset code is 12345. •... -
Page 11: Get Started
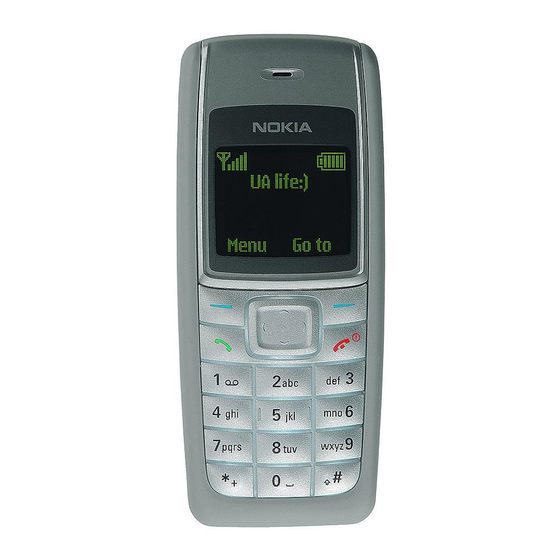
G e t s t a r t e d 1. Get started ■ Keys and parts When the phone is ready for use and no characters have been keyed in, the phone is in the standby mode. • Network intensity (1) •... -
Page 12: Charge The Battery
G e t s t a r t e d 1. Press the back cover release button (1), open the back cover, and remove it (2, 3). Lift the battery from the finger grip, and remove it (4). 2. Carefully lift the SIM card holder from the finger grip of the phone (5). Insert the SIM card, ensuring that the bevelled corner is on the upper right side and that the gold-colored contact is facing downward (6). -
Page 13: Switch On Or Off
G e t s t a r t e d 3. When the battery is fully charged, the bar stops scrolling. Disconnect the charger from the phone and the ac outlet. The battery provides up to 5 hours and 30 minutes of talk time, and up to 14 days of standby time. -
Page 14: Shortcuts In The Standby Mode
G e t s t a r t e d ■ Shortcuts in the standby mode Scroll up to access Call log. Scroll down to access the names and numbers saved in Contacts. Scroll left to write a message. Scroll right to access the demo mode. Press and hold * to activate the speaking clock. -
Page 15: Call Functions
C a l l f u n c t i o n s 2. Call functions ■ Make and answer a call To make a call, do the following: 1. Enter the phone number, including the area code and country code, if necessary. 2. -
Page 16: Write Text
W r i t e t e x t 3. Write text You can enter text in two different ways: traditional text input, indicated by or predictive text input, indicated by To use traditional text input, repeatedly press the key marked with the letter that you want until the letter appears. -
Page 17: Menu Functions
M e n u f u n c t i o n s 4. Menu functions In the standby mode, select Menu and the desired menu and submenu. Select Exit Back to exit the current level of menu. Press the end key to return to the standby mode directly. -
Page 18: Read A Text Message
M e n u f u n c t i o n s To create a message, do the following: 1. In the standby mode, select Menu > Messages > Create message. 2. Write the message. 3. To send the message, select Options >... -
Page 19: Contacts
M e n u f u n c t i o n s Note: The picture message function can be used only if it is supported by your network operator or service provider. Only compatible devices that offer picture message features can receive and display picture messages. The appearance of a message may vary depending on the receiving device. -
Page 20: Call Log
M e n u f u n c t i o n s Memory in use—To select whether the names and phone numbers are saved in Phone card. When you change the SIM card, SIM card memory is automatically selected. Contacts view—To select how the names and phone numbers are shown. -
Page 21: Tone Settings
M e n u f u n c t i o n s Tone settings Select Menu > Settings > Tone settings and from the available options: Ringing tone—To set the tone for incoming calls Ringing volume—To set the volume level for the ringing and message alert tones. If you Ringing volume to be level 2 or above, your phone rings with the ringing volume ascending from level 1 to the level you have set when there is an incoming call. -
Page 22: Call Settings
M e n u f u n c t i o n s Call settings Select Menu > Settings > Call settings, and the following options: Select Call forwarding (network service) to forward your incoming calls to your voice mailbox or to some other phone number. Scroll to the forward option you want and select Activate to set the selected forward option on and... -
Page 23: Clock
M e n u f u n c t i o n s Note: When no more charging units or currency units are left, calls may only be possible to the official emergency number programmed into the device. In-call timer—To turn the call time display on or off Call summary—To turn the approximate call time report on or off Call costs... -
Page 24: Reminders
M e n u f u n c t i o n s If the alarm time is reached while the device is switched off, the device switches itself on and starts sounding the alarm tone. If you select Stop, the device asks whether you want to activate the device for calls. -
Page 25: Sim Services
M e n u f u n c t i o n s In the standby mode, select Menu > Extras > Converter. To access your last five conversions, select Last 5 conv. You can also select from the six predefined unit categories. -
Page 26: Battery Information
The battery can be charged and discharged hundreds of times, but it will eventually wear out. When the talk and standby times are noticeably shorter than normal, replace the battery. Use only Nokia approved batteries, and recharge your battery only with Nokia approved chargers designated for this device. -
Page 27: Nokia Battery Authentication Guidelines
If you have any reason to believe that your battery is not an authentic original Nokia battery, you should refrain from using it and take it to the nearest authorized Nokia service point or dealer for assistance. Your authorized Nokia service point or dealer will inspect the battery for authenticity. -
Page 28: Authenticate Hologram
B a t t e r y i n f o r m a t i o n Authenticate hologram 1. When looking at the hologram on the label, youshould see the Nokia connecting hands symbol from one angle and the Nokia Original Enhancements logo when looking from another angle. - Page 29 B a t t e r y i n f o r m a t i o n What if your battery is not authentic? If you cannot confirm that your Nokia battery with the hologram on the label is an authentic Nokia battery, please do not use the battery. Take it to the nearest authorized Nokia service point or dealer for assistance.
-
Page 30: Enhancements
E n h a n c e m e n t s 6. Enhancements A few practical rules about accessories and enhancements: • Keep all accessories and enhancements out of the reach of small children. • When you disconnect the power cord of any accessory or enhancement, grasp and pull the plug, not the cord. -
Page 31: Care And Maintenance
C a r e a n d m a i n t e n a n c e Care and maintenance Your device is a product of superior design and craftsmanship and should be treated with care. The suggestions below will help you protect your warranty coverage. •... - Page 32 C a r e a n d m a i n t e n a n c e • Use chargers indoors. • Always create a backup of data you want to keep (such as contacts and calendar notes) before sending your device to a service facility. All of the above suggestions apply equally to your device, battery, charger, or any enhancement.
-
Page 33: Additional Safety Information
A d d i t i o n a l s a f e t y i n f o r m a t i o n Additional safety information Your device and its enhancements may contain small parts. Keep them out of the reach of small children. - Page 34 A d d i t i o n a l s a f e t y i n f o r m a t i o n Switch off your device in health care facilities when any regulations posted in these areas instruct you to do so.
-
Page 35: Potentially Explosive Environments
A d d i t i o n a l s a f e t y i n f o r m a t i o n Only qualified personnel should service the device, or install the device in a vehicle. Faulty installation or service may be dangerous and may invalidate any warranty that may apply to the device. -
Page 36: Emergency Calls
A d d i t i o n a l s a f e t y i n f o r m a t i o n ■ Emergency calls Important: Wireless phones, including this device, operate using radio signals, wireless networks, landline networks, and user-programmed functions. - Page 37 SAR values may vary depending on national reporting and testing requirements and the network band. Additional SAR information may be provided under product information at www.nokia.com. Your mobile device is also designed to meet the requirements for exposure to radio waves established by the Federal Communications Commission (USA) and Industry Canada.
-
Page 38: Technical Information
A d d i t i o n a l s a f e t y i n f o r m a t i o n Technical information Feature Specification 80g (2.8 oz.) with BL-5CA Li-Ion battery Weight Volume: 69 cm (4.2 in Size Length: 103.8 mm (4.1 in) -
Page 39: Index
I n d e x Index answer a call 14 delete messages 18 automatic answer 22 display settings 20 battery authenticate 26 end key 10 charge 11 enhancements 29 charge indicator 10 information 29 information 25 settings 22 insert 10 keypad 10 calculator 23 keypad lock and unlock 13... - Page 40 I n d e x picture 17 shared memory 9 read 17 shortcuts send 17 call log 13 settings 16 contacts 13 define 22 in standby mode 13 organize 22 phone settings 19 SIM card picture messages 17 insert 10 predictive text 15 memory 19 profiles 20...
- Page 41 Notes...
- Page 42 Nokia 1112 Manual del Usuario 9247817 Edición 2 Importante: Para prevenir cualquier malfuncionamiento y evitar daños, lea detalladamente este manual de instrucciones antes de conectar y operar este aparato. Conserve el manual para referencias futuras.
- Page 43 La información en este manual del usuario fue escrita para el producto Nokia 1112. Nokia opera bajo un sistema de desarrollo continuo. Nokia se reserva el derecho de hacer cambios y mejoras en cualquier producto descrito en este manual sin previo aviso.
- Page 44 IMPLÍCITA, INCLUYENDO, PERO SIN LIMITARSE A, GARANTÍAS IMPLÍCITAS DE MERCADEO Y DE CAPACIDAD PARA UN PROPÓSITO PARTICULAR, EN CUANTO A LA PRECISIÓN Y FIABILIDAD O CONTENIDO DE ESTE DOCUMENTO. NOKIA SE RESERVA EL DERECHO DE REVISAR ESTE DOCUMENTO O DESCONTINUAR SU USO EN CUALQUIER MOMENTO SIN PREVIO AVISO.
- Page 45 C o n t e n i d o Contenido Para su seguridad...... 45 4. Funciones del menú..... 57 Mensajes............ 57 Información general ....49 Contactos ..........59 Códigos de acceso ........49 Registro............60 Memoria compartida ......49 Configuraciones........61 Reloj ............
-
Page 46: Para Su Seguridad
P a r a s u s e g u r i d a d Para su seguridad Lea estas sencillas normas. El incumplimiento de ellas puede ser peligroso o ilegal. Lea el manual del usuario completo para obtener más información. ENCIENDA EL TELÉFONO EN FORMA SEGURA No encienda el teléfono donde el uso de teléfonos móviles esté... - Page 47 P a r a s u s e g u r i d a d ÚSELO CORRECTAMENTE Use el dispositivo sólo en la posición normal como se explica en la documentación del producto. Evite el contacto innecesario con la antena. SERVICIO TÉCNICO CALIFICADO Sólo personal de servicio técnico calificado puede instalar o reparar este producto.
-
Page 48: Acerca De Su Dispositivo
P a r a s u s e g u r i d a d ■ Acerca de su dispositivo El dispositivo móvil descrito en este manual está aprobado para su uso en redes GSM 850 y GSM 1900. Comuníquese con su proveedor de servicios para obtener más información sobre redes. -
Page 49: Cargadores Y Accesorios
ACP-7 y ACP-12. Advertencia: Utilice sólo baterías, cargadores y accesorios aprobados por Nokia para este modelo particular. El uso de cualquier otro tipo de batería, cargador o accesorio puede anular toda aprobación o garantía y podría resultar peligroso. -
Page 50: Información General
I n f o r m a c i ó n g e n e r a l Información general ■ Códigos de acceso • El código de seguridad, facilitado con el teléfono, le ayuda a proteger el teléfono contra su uso no autorizado. El código predeterminado es 12345. •... -
Page 51: Introducción
I n t r o d u c c i ó n 1. Introducción ■ Teclas y partes Cuando el teléfono está listo para su funcionamiento y ningún carácter ha sido ingresado, el teléfono está en el modo standby. Intensidad de la red (1) Nivel de carga de la batería (2) Funciones de la tecla de selección (3) Teclas de selección (4) -
Page 52: Cargar La Batería
I n t r o d u c c i ó n 1. Pulse el botón de liberación de la cubierta posterior (1), abra la cubierta posterior y retírela (2, 3). Levante la batería de las agarraderas y retírela (4). 2. -
Page 53: Encender/Apagar Su Teléfono
I n t r o d u c c i ó n 3. Cuando la batería esté totalmente cargada, la barra dejará de oscilar. Desconecte el cargador del teléfono y del tomacorriente CA. La batería suministra hasta cinco horas y treinta minutos de tiempo de conversación y hasta catorce días de tiempo de reserva. -
Page 54: Accesos Directos En El Modo Standby
I n t r o d u c c i ó n ■ Accesos directos en el modo standby Desplácese hacia arriba para acceder a Registro. Desplácese hacia abajo para acceder a los nombres y números guardados en Contactos. Desplácese hacia la izquierda para escribir un mensaje. Desplácese hacia la derecha para acceder al modo de demostración. -
Page 55: Funciones De Llamada
F u n c i o n e s d e l l a m a d a 2. Funciones de llamada ■ Realizar y contestar una llamada Para realizar una llamada, haga lo siguiente: 1. Ingrese el número telefónico, incluyendo el código de área y código del país, si es necesario. -
Page 56: Escribir Texto
E s c r i b i r t e x t o 3. Escribir texto Puede ingresar texto de dos maneras diferentes: ingreso de texto tradicional indicado o ingreso de texto predictivo indicado por Para usar el ingreso de texto tradicional, pulse repetidamente la tecla marcada con la letra que desea hasta que ésta aparezca. - Page 57 E s c r i b i r t e x t o A continuación se mencionan sugerencias para escribir texto usando el ingreso de texto tradicional y predictivo. • Para agregar un espacio, pulse 0. • Para cambiar rápidamente el método de ingreso de texto cuando está escribiendo texto, pulse # repetidamente y verifique el indicador en la parte superior de la pantalla.
-
Page 58: Funciones Del Menú
F u n c i o n e s d e l m e n ú 4. Funciones del menú En el modo standby, seleccione Menú y el menú y submenú deseados. Seleccione Salir Atrás para salir del nivel actual del menú. Pulse la tecla Finalizar para regresar directamente al modo standby. -
Page 59: Leer Un Mensaje De Texto
F u n c i o n e s d e l m e n ú La cantidad de caracteres disponibles y el número actual de parte de un mensaje compuesto aparecen en la parte superior derecha de la pantalla, por ejemplo, 447/1. Para crear un mensaje, haga lo siguiente: 1. -
Page 60: Contactos
F u n c i o n e s d e l m e n ú Nota: puede usar la función de mensajes con imagen solamente si su operador de red o proveedor de servicios la admite. Sólo los dispositivos compatibles que ofrecen la función de mensajes con imagen pueden recibir y mostrar este tipo de mensajes. -
Page 61: Registro
F u n c i o n e s d e l m e n ú Configuraciones para contactos Seleccione Menú > Contactos > Configuraciones y una de las opciones disponibles: Memoria en uso: para guardar los nombres y números telefónicos en Teléfono Tarjeta SIM. -
Page 62: Configuraciones
F u n c i o n e s d e l m e n ú Nota: el tiempo real facturado por su proveedor de servicios para las llamadas y servicios podría variar según los servicios de red, redondeo de la factura, impuestos, etc. -
Page 63: Configuraciones De Hora
F u n c i o n e s d e l m e n ú Perfiles Podrá personalizar los perfiles para usar ciertas funciones, como los tonos de timbre y protector de pantalla. Seleccione Menú > Configuraciones > Perfiles, el perfil que desea modificar y Personalizar. - Page 64 F u n c i o n e s d e l m e n ú Seleccione Remarcación automática para que el teléfono intente conectar una llamada hasta diez veces tras haber intentado sin éxito. Servicio de llamada en espera (servicio de red) para que la red le notifique de una llamada entrante mientras tiene una en progreso.
-
Page 65: Reloj
F u n c i o n e s d e l m e n ú Configuración de accesorios Seleccione Menú > Configuraciones > Configuración de accesorios > Auricular Audífono. Seleccione Respuesta automática para que el teléfono responda las llamadas entrantes automáticamente después de cinco segundos. -
Page 66: Recordatorios
F u n c i o n e s d e l m e n ú ■ Recordatorios Para guardar una nota de texto corto con una alarma, seleccione Menú > Recordatorios > Agregar nuevo. Cuando el recordatorio emite la alarma a la hora programada, seleccione Salir para detener la alarma o... -
Page 67: Servicios Sim
F u n c i o n e s d e l m e n ú Compositor Seleccione Menú > Extras > Compositor y un tono. Para crear sus propios tonos de timbre ingrese las notas. Por ejemplo, pulse 4 para la nota f. Pulse 8 para acortar (-) y 9 para alargar (+) la duración de la nota o silencio. -
Page 68: Información Sobre Las Baterías
Cuando los tiempos de conversación y de reserva sean notablemente más cortos de lo normal, cambie la batería. Utilice únicamente las baterías aprobadas por Nokia y recárguelas sólo con los cargadores aprobados por Nokia para este dispositivo. - Page 69 Si tiene alguna razón para creer que su batería no es batería auténtica y original de Nokia, evite usarla y llévela al centro más cercano de servicio autorizado por Nokia o a un distribuidor Nokia para pedir asistencia. Su distribuidor Nokia o centro de servicio Nokia inspeccionará...
- Page 70 I n f o r m a c i ó n s o b r e l a s b a t e r í a s Autenticación del holograma 1. Al mirar el holograma en la etiqueta, debería ver el símbolo de Nokia: las manos conectadas desde un ángulo y el logo Nokia Original Enhancements desde otro ángulo.
- Page 71 I n f o r m a c i ó n s o b r e l a s b a t e r í a s ¿Qué ocurre si la batería no es auténtica? Sí no puede confirmar que su batería Nokia con el holograma en la etiqueta es una batería auténtica de Nokia, no la use. Llévela al centro más cercano de servicio autorizado Nokia o distribuidor para pedir asistencia.
-
Page 72: Accesorios
A c c e s o r i o s 6. Accesorios Algunas reglas prácticas sobre los accesorios: • Mantenga todos los accesorios fuera del alcance de los niños. • Cuando desconecte el cordón eléctrico de cualquier accesorio, sujete el enchufe, no el cordón. -
Page 73: Cuidado Y Mantenimiento
C u i d a d o y m a n t e n i m i e n t o Cuidado y mantenimiento Su dispositivo es un producto de diseño y fabricación excelentes y debe tratarse con cuidado. Las sugerencias a continuación le ayudarán a proteger la cobertura de su garantía. - Page 74 C u i d a d o y m a n t e n i m i e n t o • Utilice sólo la antena suministrada o un repuesto aprobado. El uso de antenas, modificaciones o accesorios no aprobados podrían dañar el dispositivo e infringir los reglamentos sobre el uso de dispositivos de radio.
-
Page 75: Información Adicional De Seguridad
I n f o r m a c i ó n a d i c i o n a l d e s e g u r i d a d Información adicional de seguridad Su dispositivo y accesorios pueden contener partes pequeñas. Manténgalos fuera del alcance de los niños. - Page 76 I n f o r m a c i ó n a d i c i o n a l d e s e g u r i d a d ■ Dispositivos médicos Los aparatos de radiotransmisión, incluidos los teléfonos móviles, pueden interferir con el funcionamiento de dispositivos médicos que no estén protegidos adecuadamente.
- Page 77 I n f o r m a c i ó n a d i c i o n a l d e s e g u r i d a d ■ Vehículos Las señales de RF pueden afectar los sistemas electrónicos de vehículos de motor que no estén bien instalados o protegidos, como los sistemas electrónicos de inyección directa, sistemas electrónicos de frenos antirresbalantes (antibloqueo), sistemas electrónicos de control de velocidad o sistemas de bolsas de aire.
-
Page 78: Entornos Potencialmente Explosivos
I n f o r m a c i ó n a d i c i o n a l d e s e g u r i d a d ■ Entornos potencialmente explosivos Apague el dispositivo en áreas donde puedan producirse explosiones y obedezca todas las señales e instrucciones. - Page 79 I n f o r m a c i ó n a d i c i o n a l d e s e g u r i d a d 2. Pulse la tecla Finalizar tantas veces como sea necesario para borrar la pantalla y preparar el dispositivo para las llamadas.
- Page 80 El uso de accesorios podría resultar en diferentes valores SAR. Los valores SAR podrían variar según los requisitos de información y evaluación nacionales y de la banda de red. Información adicional sobre SAR podría ser provista en la sección de información de productos en www.nokia.com (texto en inglés).
- Page 81 I n f o r m a c i ó n a d i c i o n a l d e s e g u r i d a d Su dispositivo móvil también está diseñado para cumplir los requerimientos que rigen la exposición a las ondas de radio los cuales fueron establecidos por la Comisión Federal de Comunicaciones (Federal Communications Commission) (EE.UU.) e Industria Canadiense.
- Page 82 I n f o r m a c i ó n a d i c i o n a l d e s e g u r i d a d Información técnica Función Especificación Peso 80 g (2,8 oz) con la batería de Li-Ion BL-5CA Tamaño Volumen: 69 cm...
-
Page 83: Índice
Í n d i c e Índice accesos directos 53 desbloquear el teclado 53 altavoz 54 escribir texto 55 batería autenticar 68 cambiar 51 hora, configuraciones 62 cargar 67 indicador de carga 50 información 67 insertar 50 llamada bloquear el teclado 53 contestar 54 marcar 54 resumen 60... - Page 84 Í n d i c e perfiles 62 tarjeta SIM, insertar 50 tecla Finalizar 50 teclado, bloquear o desbloquear 53 teclas de desplazamiento 50 recordatorios 65 teclas de selección 50 texto 55 texto predictivo 55...
- Page 85 Notas...
- Page 86 Notas...
- Page 87 Notas...
- Page 88 Notas...
- Page 89 Notas Nokia 1112 User Guide Nokia 1112 Manual del Usuario 9248623...