Table of Contents
Advertisement
Advertisement
Table of Contents

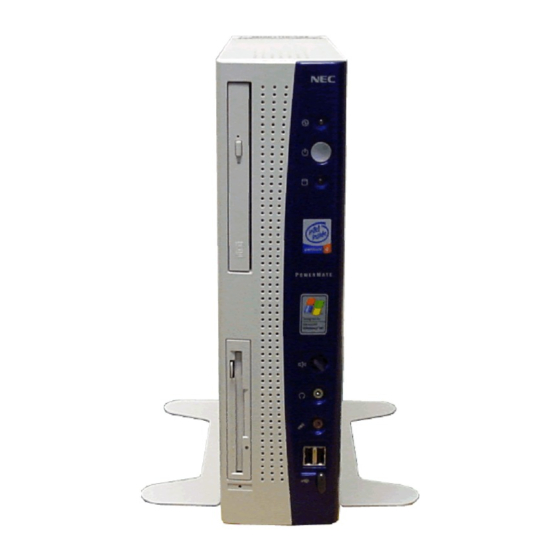
Summary of Contents for NEC PowerMate ML5
- Page 1 PowerMate ML5 Disassembly Manual...
-
Page 2: Table Of Contents
Removing the Power Supply Unit.........................11 Removing the Auxiliary System Fan ........................11 Removing the CPU...............................12 Removing the Second Serial Port ........................12 Removing the Switch/LED board .........................13 Removing the Internal Speaker..........................13 Removing the Motherboard..........................14 Notice ...................................15 Page 2 NEC PowerMate ML5 Disassembly Manual... -
Page 3: Overview
Overview This document contains step-by-step disassembly instructions for the PowerMate ML5 chassis. The instructions are illustrated where necessary with images of the part that is being removed or disassembled. Furthermore, the screws that are removed are shown next to the image of the parts themselves. -
Page 4: Hazardous Voltage
Inside the power supply are hazardous avviare il sistema senza aver prima messo a voltages that can cause serious personal injury. Always posto il coperchio return a defective power supply to your dealer. Page 4 NEC PowerMate ML5 Disassembly Manual... -
Page 5: Removing The Stabilisers
Fig. 2: Unlocking the cover of the chassis 3. Slide the cover towards the front of the chassis a few centimetres, then carefully lift the cover away from the system and set it aside. Page 5 NEC PowerMate ML5 Disassembly Manual... -
Page 6: Removing The Riser Board Bracket And The Raiser Board
3. Remove the one screw holding the riser board in place 4. Slide the riser board as shown to free it from the latch and put the riser board and the riser board bracket aside. Page 6 NEC PowerMate ML5 Disassembly Manual... -
Page 7: Removing A Pci Or Cnr Expansion Card
1. Remove the screw holding the AGP expansion card in place. 2. Unlock the AGP expansion card by putting the AGP lock in the unlocked position. Fig. 6: Removing an AGP expansion card Page 7 NEC PowerMate ML5 Disassembly Manual... -
Page 8: Removing The Floppy Disk Drive
Fig. 8: Removing the floppy disk drive assembly 3. Carefully disconnect the flat cable from the floppy disk drive and take away the floppy disk drive assembly. Fig. 9: Disconnecting floppy disk drive cable Page 8 NEC PowerMate ML5 Disassembly Manual... -
Page 9: Removing The Optical Device Drive
Fig. 11: Extracting the optical device drive assembly 3. Remove the two screws securing the converter board to the optical device drive bracket, disconnect the converter board and put it aside. Page 9 NEC PowerMate ML5 Disassembly Manual... -
Page 10: Removing The Hard Disk Drive
1. Disconnect the IDE cable and the power cable corresponding to the drive you want to remove. 2. Press the latch against the handle of the hard disk drive bracket to unlock it 3. Slide the hard disk drive bracket out of the chassis, and put it aside. Page 10 NEC PowerMate ML5 Disassembly Manual... -
Page 11: Removing The Power Supply Unit
3. Slide the power supply unit towards the front of the system and lift it out of the chassis. Removing the Auxiliary System Fan To remove the auxiliary system fan, first remove the stabilisers (see Removing the Stabilisers), open the chassis (see Opening the Chassis), then follow the next steps: Page 11 NEC PowerMate ML5 Disassembly Manual... -
Page 12: Removing The Cpu
Stabilisers), open the chassis (see Opening the Chassis), then follow the next steps: 1. Disconnect the serial cable from the header on the motherboard. 2. Remove the screws shown in the picture below. Page 12 NEC PowerMate ML5 Disassembly Manual... -
Page 13: Removing The Switch/Led Board
To remove the internal speaker, first remove the stabilisers (see Removing the Stabilisers), open the chassis (see Opening the Chassis), then follow the next steps: 1. Remove the screws and the connector shown in the picture Page 13 NEC PowerMate ML5 Disassembly Manual... -
Page 14: Removing The Motherboard
4. Disconnect the serial port cable from the header on the motherboard. 5. Remove the four screws shown in the picture below. Fig. 22: Removing the motherboard 6. Carefully lift the motherboard out of the chassis and put it aside. Page 14 NEC PowerMate ML5 Disassembly Manual... -
Page 15: Notice
This guide contains information protected by copyright. No part of this guide may be photocopied or reproduced in any form or by any means without prior written consent from NEC Computers International BV. NEC COMPUTERS INTERNATIONAL BV SHALL NOT BE LIABLE FOR TECHNICAL OR EDITORIAL ERRORS OR OMISSIONS CONTAINED HEREIN;...

