
Related Manuals for Philips ORT7500


Summary of Contents for Philips ORT7500
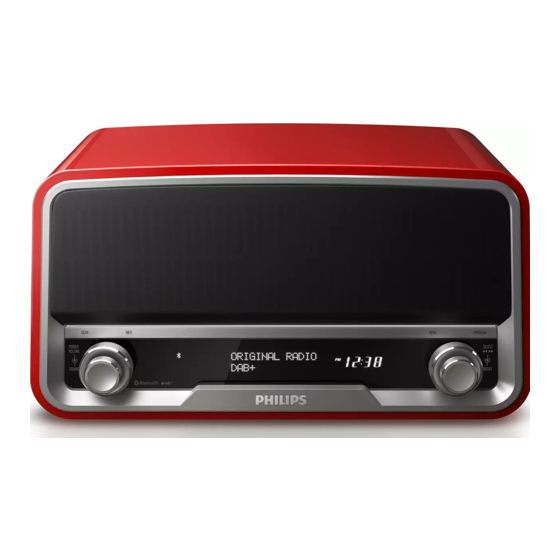
- Page 1 Always there to help you Register your product and get support at www.philips.com/welcome ORT7500 Question? Contact Philips User manual...
-
Page 3: Table Of Contents
Contents 1 Safety 11 Product information Important notes for users in the U.K. General information Tuner Amplifier 2 Your DAB+ Radio Speakers Introduction Bluetooth What's in the box Overview of the product 12 Troubleshooting General 3 Get started About Bluetooth connection Connect power Turn on 13 Notice... -
Page 4: Safety
If liquids are spilt on or into the product, by the manufacturer. disconnect it from the power outlet Risk of overheating! immediately. Contact Philips Consumer • Never install this product in a confined Care to have the product checked before space. - Page 5 Caution: To conform with the EMC directive (2004/108/EC), do not detach the plug from the power cord. How to connect a plug The wires in the power cord are colored as follows: blue = neutral (N), brown = live (L). If the colors do not correspond with the colors on your plug, identify the terminals in your plug as follows:...
-
Page 6: Your Dab+ Radio
Digital radio b User manual Congratulations on your purchase, and c Audio in cable welcome to Philips! To fully benefit from the support that Philips offers, register your product d AC power cord at www.philips.com/welcome. e UK power cord... -
Page 7: Overview Of The Product
• Press to switch the system between Overview of the product standby mode and normal mode. • Turn to adjust the volume. a INFO • In FM mode, turn to tune to a radio • Press repeatedly to display available station manually. -
Page 8: Get Started
3 Get started • Press to enter or exit FM or DAB menus. i LCD screen j AC MAIN~ Always follow the instructions in this chapter in • Connect to the AC power cord. sequence. k AUDIO IN • Connect to an external device by an audio in cable. -
Page 9: Listen To Fm Radio Stations
4 Listen to FM » Minute digits blink. Turn the knob to set the minute. radio stations Press the knob to confirm. Turn the knob to select whether to synchronize the DAB clock and then press knob to confirm Turn the SOURCE knob to switch the product to FM mode. -
Page 10: Program Radio Stations Manually
Display RDS information Radio Data System (RDS) is a service that allows FM stations to transmit additional information. When you tune to an FM radio station that transmits RDS signals, the station name is displayed. 2 sec. Tune to an RDS station. Press INFO repeatedly to scroll through the following information (if available): •... -
Page 11: Adjust Fm Settings
• : Convert stereo signals FOLK M Light music Folk Music to monophonic output even if the station transmits strong stereo audio LIGHT DOCU- Light classical Documen- signals. MENT music tary Press the knob to confirm the option. CLAS- TEST Classical music Alarm Test SICS... -
Page 12: Listen To Dab Radio Stations
5 Listen to DAB • H: The station is one of your 10 favorite stations. radio stations • ?: The station is unavailable or inactive. • : The station is a primary station with secondary service. • : The station is a secondary station. Note Program radio stations •... -
Page 13: Use Dab Menus
• Signal error rate Tune to a station manually • Bitrate codec • Time With this feature, you can tune to a specific • Date channel/frequency manually. In addition to antenna orientation for better radio reception, the optimal reception can also be obtained with Use DAB menus this feature. -
Page 14: Use System Menus
6 Use system Remove invalid stations menus This option lists active stations and removes any stations that are in the list but have no service in your area. In front of the station name of an invalid station, a question mark (?) is displayed. Use the system menus to •... -
Page 15: Listen To An External Device
Go to www.philips.com/support. Search for support information about You can also listen to an external audio device, your product with "ORT7500/12" as the for example, MP3 player, through this product. keyword. Turn the SOURCE knob to switch the »... -
Page 16: Play Audio Via Bluetooth
8 Play audio via On your device, search for Bluetooth devices. In the device list, select ORT7500. Bluetooth • If a message prompts for the permission for Bluetooth connection with ORT7500, confirm it. » If the connection succeeds, [BT Connected] is displayed on the LCD With this product, you can stream audio from a display of this product. -
Page 17: Charge Your Devices
Turn the knob. the back of the product. » Once the device is recognized, the charging starts. Note • Philips does not guarantee the compatibility of this product with all devices. • The USB socket is for charging only. -
Page 18: Product Information
11 Product Frequency Response 60 Hz - 16 kHz, ±3 dB information Signal to Noise Ratio > 65 dB Aux Input 0.5 V RMS 20 kohm Note Speakers • Product information is subject to change without prior notice. Speaker Impedance 6 ohm Speaker Driver 2 X 3"... -
Page 19: 12 Troubleshooting
If the problem remains The audio quality is poor after connection unsolved, go to the Philips Web page (www. with a Bluetooth-enabled device. philips.com/support). When you contact Philips, make sure that the product is nearby and the •... -
Page 20: 13 Notice
Portable Document Format local regulations regarding the disposal of (PDF) version of the user manual at www. packaging materials, exhausted batteries and old philips.com/support. equipment. Trademark notice This is CLASS II apparatus with double The Bluetooth® word mark and logos are insulation, and no protective earth provided. - Page 24 All registered and unregistered trademarks are property of their respective owners. 2013 © WOOX Innovations Limited. All rights reserved. Philips and the Philips’ Shield Emblem are registered trademarks of Koninklijke Philips N.V. and are used by WOOX Innovations Limited under license from Koninklijke Philips N.V.