Table of Contents
Advertisement
Quick Links
Download this manual
See also:
User Manual
Advertisement
Table of Contents

Related Manuals for Philips OR7200


Summary of Contents for Philips OR7200
- Page 1 Always there to help you Register your product and get support at www.philips.com/welcome OR7200 Question? Contact Philips User manual...
-
Page 3: Table Of Contents
Reset the product Upgrade the software 9 Listen to an external device 10 Adjust the volume 11 Troubleshooting Congratulations on your purchase, and welcome to Philips! To fully benefit from the support that Philips offers, register your product at www.philips.com/welcome. -
Page 4: Safety
1 Safety Risk of injury or damage to the product! • This product shall not be exposed to dripping or splashing! • Do not place any sources of danger on this Read and understand all instructions before you product (e.g. liquid filled objects, lighted use this product. -
Page 5: What's In The Box
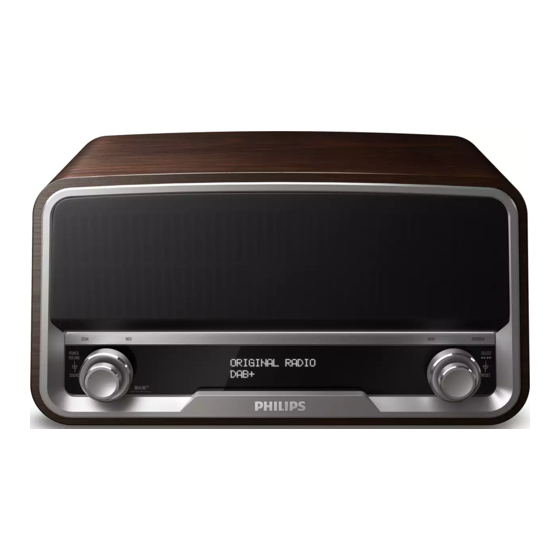
2 What's in the OR7200 User Manual... -
Page 6: Connect Power
3 Connect power... -
Page 7: Turn On
4 Turn on knob or turn the SOURCE knob. Press the » The product switches to the last » selected source. • To switch the product to standby mode, press the knob again. -
Page 8: Set The Clock
5 Set the clock In standby mode, press and hold the knob for 2 seconds. (12-hour time format) or » » (24-hour time format) blinks. Turn the knob to select a time format, and then press the knob to confirm. »... -
Page 9: Listen To Fm Radio Stations
6 Listen to FM Store radio stations radio stations automatically Turn the SOURCE knob to switch the product to FM mode. Search for radio stations automatically or manually. Note 2 sec. • For optimal reception, fully extend the antenna and adjust its position. -
Page 10: Display Rds Information
Repeat steps 1-4 to program more radio stations. • To tune to a preset radio station, turn the PRESET knob until its frequency is displayed. Note • If you store a radio station with the sequence number of another one, the earlier one is overwritten. Display RDS information Radio Data System (RDS) is a service that allows FM stations to transmit additional... -
Page 11: Rds Program Types
RDS program types Program type Description Program type Description NEWS News services FINANCE Finance AFFAIRS CHILDREN Politics and current affairs Children's programs INFO SOCIAL Special information programs Social affairs SPORT RELIGION Sports Religion EDUCATE PHONE IN Education and advanced training Phone in DRAMA TRAVEL... -
Page 12: Adjust Fm Settings
System menus Adjust FM settings In FM mode, press MENU to access FM menus. Turn the knob to toggle through the Press the knob to access system menus. menus. Turn the knob to select a sub-menu. • For details, refer to the section 'Use Scan setting system menus'. -
Page 13: Listen To Dab Radio Stations
7 Listen to DAB Turn the knob to select a station, and then press the knob to start listening. radio stations • You can re-scan to update the list of stored stations (see "Use DAB menus" > "Re-scan for stations"). •... -
Page 14: Display Dab Information
Re-scan for stations Display DAB information Full scan is used to perform a wide range On the display of DAB broadcasting, the first search for DAB radio stations. line shows station name, and the second line shows the service information for the current station. - Page 15 DRC (Dynamic Range Control) System menus DRC adds or removes a degree of compensation for the differences in the dynamic range between radio stations. Press the knob to access system menus. Turn the knob to select a sub-menu. • For details, refer to the section 'Use system menus'.
-
Page 16: Use System Menus
Search for support information about this • upgrade the software, and product with "OR7200/10" as the keyword. • reset the product to factory default status. » When an upgrade packet is available, »... -
Page 17: Listen To An External Device
9 Listen to an external device You can also listen to an external audio device, for example, MP3 player, through this product. Turn the SOURCE knob to switch the product to MP3-Link mode. Connect the audio input cable to the MP3-LINK socket on the back •... -
Page 18: Adjust The Volume
10 Adjust the volume Turn the knob. -
Page 19: Troubleshooting
If you encounter problems when using this device, check the following points before requesting service. If the problem remains unsolved, go to the Philips Web page (www. philips.com/support). When you contact the Consumer Care, make sure that the product is nearby and the model number and serial number are available. -
Page 20: Product Information
12 Product General information information AC Power Rating 220-240 V~, 50 Hz Operation Power 10 W Consumption Note Dimensions 325 x 175 x 167 mm (Main Unit) • Product information is subject to change without prior Weight (Main Unit) 3.5 kg notice. -
Page 21: Notice
2014 © WOOX Innovations Limited. All rights This is CLASS II apparatus with double reserved. insulation, and no protective earth provided. Philips and the Philips’ Shield Emblem are registered trademarks of Koninklijke Philips N.V. Care of the environment and are used by WOOX Innovations Limited under license from Koninklijke Philips N.V. - Page 22 2014 © WOOX Innovations Limited. All rights reserved. Philips and the Philips’ Shield Emblem are registered trademarks of Koninklijke Philips N.V. and are used by WOOX Innovations Limited under license from Koninklijke Philips N.V. OR7200_10_UM_V2.0...