Toshiba DKT2004-CT User Manual
Cordless digital telephone
Hide thumbs
Also See for DKT2004-CT:
- User manual (77 pages) ,
- User manual (111 pages) ,
- User manual (107 pages)
Table of Contents
Advertisement
Quick Links
Download this manual
See also:
User Manual
Advertisement
Table of Contents
Troubleshooting

Related Manuals for Toshiba DKT2004-CT


Summary of Contents for Toshiba DKT2004-CT
- Page 1 726+,%$ Telecommunication Systems Division Digital Business Telephone Systems Cordless Digital Telephone User Guide May 1999...
- Page 2 Telecommunication Systems Division, also reserves the right, without prior notice, to make such changes in equipment design or components Strata is a registered trademark of Toshiba Corporation. Stratagy is a as engineering or manufacturing methods may warrant. registered trademark of Toshiba America Information Systems, Inc.
- Page 3 Before you read anything else, please observe the following: WARNING! Toshiba does not represent this unit to be waterproof. To reduce the risk of fire, electrical shock, or damage to the unit, do not expose this unit to rain or moisture.
-
Page 5: Table Of Contents
Contents Introduction Organization ............................vi How To Use This Manual ........................vi Conventions ............................vii Important Safety Instructions ......................viii Related Documents ..........................x Chapter 1 – The Grand Tour Applications ............................12 Benefits ..............................12 Cordless Digital Telephone Standard Parts ..................14 Base Unit Controls and Functions ......................15 Features ..............................16 Chapter 2 –... - Page 6 Chapter 4 – The Handset Handset Controls ..........................29 Handset Volume Level ........................29 Ringer Volume Level ........................29 Mute ...............................30 Using the Handset ..........................30 Charging the Handset ...........................31 Switching a Call to Your Cordless Digital Telephone .................32 Switching a Call to the Desk Telephone ....................33 Using Memory ............................34 Chain Dialing ..........................36 Chapter 5 –...
- Page 7 Call Forward-All Calls ........................53 Call Forward-Busy .........................54 Call Forward-No Answer .......................54 Call Forward-Busy/No Answer ......................55 Call Forward-Cancel ........................56 Call Forward-External ........................56 Call Forward-Fixed ........................57 Call Park Orbits (Release 3 or later) .....................58 Call Park and Page .........................59 Call Pickup ............................59 Directed Call Pickup ........................59 Group Pickup ..........................60 Calls to Other Groups ........................61...
- Page 8 Speed Dial .............................77 Storing Station Speed Dial Numbers .....................77 Stored Station or System Speed Dial Calling ................78 Timed Reminders ..........................79 Toll Restriction Override ........................81 Two (Tandem) Line Connection ......................82 Using a [DN] Button ........................82 Using Line Buttons ........................83 Appendix A – Appendix Installing Optional Headset ........................86 Troubleshooting ............................87 Range and Performance ........................88...
- Page 9 Index ................................113 Tables CO Line Access Codes ......................85 Paging Groups .........................86 External Paging Zones ......................86 Speed Dial Access Codes ......................87 Speed Dial Number Linking ....................87 Contents...
- Page 10 Strata DK Cordless Digital Telephone 5/99...
-
Page 11: Introduction
Introduction This guide describes the features and operation of the Toshiba DKT2004-CT 900 MHz Cordless Digital Telephone with Strata DK Business Telephone Systems. To get the most from your cordless digital telephone, please read this guide thoroughly. The Strata DK systems... -
Page 12: Organization
Organization –––––––––––––––––––––––––––––––––––––––––––––––––––––––––––––––––––––––––––––––––– Organization This user guide is divided as follows: Chapter 1—The Grand Tour covers an equipment overview by describing the features associated with the cordless digital telephone. Chapter 2—Installation covers instructions for installing your cordless digital telephone with your Strata DK System. Chapter 3—Configuration covers the configuration options for optimizing the performance of your cordless phone. -
Page 13: Conventions
–––––––––––––––––––––––––––––––––––––––––––––––––––––––––––––––––––––––––––––––––– Conventions Conventions Elaborates specific items or references other information. Note Calls attention to important instructions or information. Important! CAUTION! Advises you that hardware, software applications, or data could be damaged if the instructions are not followed closely. Alerts you to precautions noted both on the equipment and in this guide. WARNING! Alerts you when the given task could cause personal injury or death. -
Page 14: Important Safety Instructions
Important Safety Instructions ––––––––––––––––––––––––––––––––––––––––––––––––––––––––––––––––––––– Important Safety Instructions WARNING! When using your telephone equipment, always follow basic safety precautions to reduce the risk of fire, electrical shock, and personal injury, including the following. Read and understand all instructions. Follow all warnings and instructions marked on the product. Unplug this product from the wall outlet before cleaning. - Page 15 If you cannot find the information you need, contact Toshiba for assistance. Do not open or mutilate the battery pack. Released electrolyte is corrosive and may cause damage to the eyes or skin, and, if swallowed, may be toxic.
-
Page 16: Related Documents
Related Documents –––––––––––––––––––––––––––––––––––––––––––––––––––––––––––––––––––––––––––– Related Documents The following documents can be used to reference more information about the Strata DK systems. Strata DK Programming Manual provides all instructions necessary to program the system and system record sheets, including ACD. It also contains the user guides in a reduced-size format. -
Page 17: Chapter 1 - The Grand Tour
The Grand Tour Your cordless digital telephone is designed and engineered to work with your Toshiba digital telephone system and provide you with reliability, long life, and outstanding performance. The cordless digital telephone is compatible with all Strata DK systems that support digital telephones (except Strata DK24/56/96 Release 3). -
Page 18: Applications
Applications –––––––––––––––––––––––––––––––––––––––––––––––––––––––––––––––––––––––––––––––––– Twenty-speed dial memory (stored in the telephone separate from 40 individual and system speed dial numbers) Your cordless digital telephone offers two different modes of operation. You can use it either in conjunction with a 2000-series digital telephone, or on a stand-alone basis. When used with a DKT, both the cordless digital telephone and the DKT share the same digital station port on the PDKU. - Page 19 DKT telephone to the single-line telephone (SLT). An SLT cordless is not only a cumbersome alternative to the Toshiba digital cordless; but also, if you forget to forward your calls, you cannot receive the calls on your SLT cordless.
-
Page 20: Cordless Digital Telephone Standard Parts
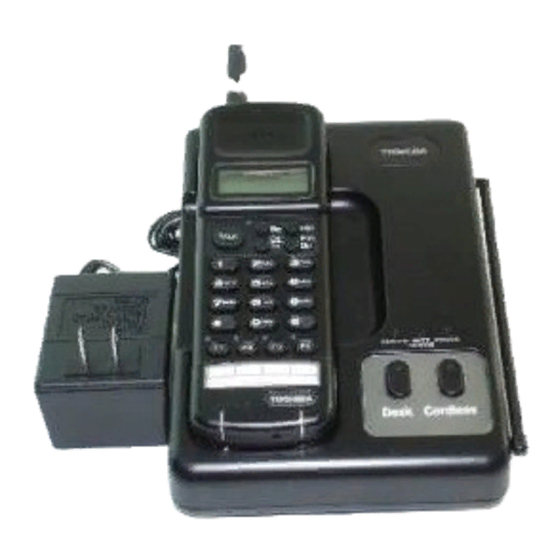
Cordless Digital Telephone Standard Parts –––––––––––––––––––––––––––––––––––––––––––––––––––––––––– Cordless Digital Telephone Standard Parts Your Toshiba cordless digital telephone includes the following items: 1173 2583 If any of these items are missing or damaged, contact your System Administrator. Strata DK Cordless Digital Telephone 5/99... -
Page 21: Base Unit Controls And Functions
–––––––––––––––––––––––––––––––––––––––––––––––––––––––––––––––––– Base Unit Controls and Functions Base Unit Controls and Functions Base Unit Antenna CHARGE LED BATT CHARGE LED POWER ON LED DESK Button/LED CORDLESS Button/LED 1398 AC Adapter Line In Line Out The Grand Tour... -
Page 22: Features
Features ––––––––––––––––––––––––––––––––––––––––––––––––––––––––––––––––––––––––––––––––––––– Features Super Long Range 900 MHz Spread Spectrum 2-line, 10-digit LCD Display Headset Jack Ringer Volume Control Handset Volume Control Message Waiting LED Single button access to Conference, Hold, Message Waiting, and Transfer features Four Flexible Function Keys (First four keys of DKT port in Strata DK) 20-Number Memory Store and Search Battery Charging System for Optional Standby Battery 2-Way Handset Mounting... -
Page 23: Chapter 2 - Installation
Installation Important! Your telephone system must be programmed for Auto Preference for your button to work. If there is a shared digital telephone, you receive internal system dial tone automatically after picking up the handset of your deskset. For example, in a DK424 system, Program 32 must have a setting other than “00.”... - Page 24 Step 3: Connect and Apply Power to Base Unit ––––––––––––––––––––––––––––––––––––––––––––––––––––––– To use as a stand-alone telephone Connect the modular jack labeled “Line In” to the telephone wall jack. Wide To use with a desk telephone AC Adapter Blade 1. Unplug the telephone line cord from your desk telephone.
- Page 25 ––––––––––––––––––––––––––––––––––––––––––––––––––––––– Step 3: Connect and Apply Power to Base Unit Use only the AC adapter supplied with your cordless digital telephone. CAUTION! 2. Plug the AC adapter into a standard 120 VAC wall outlet. 3. Route the power cord where it is not a trip hazard, and where it cannot become chafed and create a fire or electrical hazard.
- Page 26 Step 4: Attach Belt Clip to Handset (optional) –––––––––––––––––––––––––––––––––––––––––––––––––––––––– Step 4: Attach Belt Clip to Handset (optional) To attach the belt clip to the handset 1. Snap the tabs of the belt clip into the notches on the sides of the handset.
-
Page 27: Removing And Charging Your Battery Pack
–––––––––––––––––––––––––––––––––––––––––––––––––––––––––– Removing and Charging Your Battery Pack Removing and Charging Your Battery Pack Important! Before using your new cordless digital telephone, the battery must be charged continuously for six to eight hours. To remove the handset’s battery pack 1. Press in on the battery pack release latch. 2. -
Page 28: Charging Extra Battery Packs
Removing and Charging Your Battery Pack –––––––––––––––––––––––––––––––––––––––––––––––––––––––––– Charging Extra Battery Packs The base unit of your cordless digital telephone is equipped with a battery charger for charging an extra battery pack. This compartment has a latch that keeps the battery pack in place during charging. Charging Battery To charge extra battery packs... -
Page 29: Tips On Extending Battery Pack Life
–––––––––––––––––––––––––––––––––––––––––––––––––––––––––––––––– Tips on Extending Battery Pack Life Tips on Extending Battery Pack Life Battery Memory Effect All rechargeable nickel cadmium batteries can develop a “memory” (reduced charge capacity) caused by repeated charge and discharge cycles. Batteries that have developed this effect do not operate to their fullest capacity. - Page 30 Tips on Extending Battery Pack Life –––––––––––––––––––––––––––––––––––––––––––––––––––––––––––––––– Strata DK Cordless Digital Telephone 5/99...
-
Page 31: Chapter 3 - Configuration
Configuration You can configure three items in your cordless digital telephone that affect the way it works with the Strata DK business telephone system. These are: SOFT KEY (On) causes the deskset to turn on the soft keys whenever the mode is changed from cordless to DKT. (Off) causes the deskset to turn off the soft keys whenever the mode is changed from cordless to DKT. -
Page 32: Entering Program Mode
Entering Program Mode ––––––––––––––––––––––––––––––––––––––––––––––––––––––––––––––––––––––––– Entering Program Mode To enter the program mode 1. Remove the handset from the base unit. 2. Press and hold at the same time. 1178 3. While holding and , press 1178b 4. Release all three keys. Strata DK Cordless Digital Telephone 5/99... - Page 33 ––––––––––––––––––––––––––––––––––––––––––––––––––––––––––––––––––––––––– Entering Program Mode 5. Press the button on You see the following screens on the cordless LCD the upper right side of the prompting you to configure your handset: cordless handset until you toggle to the DATA STORE settings screen. P R O G R A M 6.
- Page 34 Entering Program Mode ––––––––––––––––––––––––––––––––––––––––––––––––––––––––––––––––––––––––– Strata DK Cordless Digital Telephone 5/99...
-
Page 35: Chapter 4 - The Handset
The Handset Handset Controls Handset Volume Level Press the button on the side of the handset while on a call to select a loud or soft volume level. R/VOL MUTE Ringer Volume Level 1161 While the telephone is idle, press the button on the side of the handset to select ring volume. -
Page 36: Mute
Using the Handset ––––––––––––––––––––––––––––––––––––––––––––––––––––––––––––––––––––––––––––– Mute Press and hold the button to consult another person in the room without the caller hearing you. Release the button to continue the conversation. Using the Handset Pick up the handset and press You may see: A Q U I R I N G L I N K 1186... -
Page 37: Charging The Handset
––––––––––––––––––––––––––––––––––––––––––––––––––––––––––––––––––––––––––– Charging the Handset Charging the Handset For more information see Page To charge your handset Place the handset on the base unit either face down or face up, with or without the belt clip attached. (The battery pack in the handset automatically recharges in either position.) The Handset... -
Page 38: Switching A Call To Your Cordless Digital Telephone
Switching a Call to Your Cordless Digital Telephone ––––––––––––––––––––––––––––––––––––––––––––––––––– Switching a Call to Your Cordless Digital Telephone You can switch a call from the deskset to the cordless digital telephone or vice versa whether idle or talking. Transferring while idle or when calls are on hold results in a steady light (skipping the Note flashing state). -
Page 39: Switching A Call To The Desk Telephone
––––––––––––––––––––––––––––––––––––––––––––––––––––––––––––– Switching a Call to the Desk Telephone Switching a Call to the Desk Telephone 1. Press on the base unit. The DESK LED flashes. 1246 2. Pick up the handset on your The DESK LED lights steady. desk telephone. 3. -
Page 40: Using Memory
Using Memory ––––––––––––––––––––––––––––––––––––––––––––––––––––––––––––––––––––––––––––––––– Using Memory To store a number 1. Remove the handset from the base unit. 2. Press You hear a beep and see: P H O N E # — 1181 3. Enter the number (up to 16 digits) you want to store. - Page 41 ––––––––––––––––––––––––––––––––––––––––––––––––––––––––––––––––––––––––––––––––– Using Memory 2. Press twice. You see: D E L E T E # — 1184 3. Press the memory location You hear a long beep and number you want to clear. see a screen confirming D E L E T E D that you have erased that number from memory.
-
Page 42: Chain Dialing
Using Memory ––––––––––––––––––––––––––––––––––––––––––––––––––––––––––––––––––––––––––––––––– Chain Dialing On certain occasions, after dialing a number, you may be requested by the party or service you are calling to enter a special access code, such as when performing a banking transaction. The access code can be stored in one of the 20 memory locations. 1. -
Page 43: Chapter 5 - Features
Features This chapter gives you all of the cordless digital telephone features in alphabetical order beginning on Page 47. Your cordless digital telephone provides many of the same features as a 2000-series corded digital telephone. In addition to the functions, you can use your cordless digital telephone’s buttons to invoke the features listed below or to gain multiple-line access. -
Page 44: Before You Begin
Before You Begin –––––––––––––––––––––––––––––––––––––––––––––––––––––––––––––––––––––––––––––– “Access Codes” on Page 92 for Feature Access Code sequences that match your Toshiba telephone system. Also see the Digital Telephone User Guide for more information. Before You Begin If you are a new user of the cordless digital telephone, find out if your Strata DK system has Tone or Voice First Signaling. -
Page 45: Quick Reference
––––––––––––––––––––––––––––––––––––––––––––––––––––––––––––––––––––––––––––––– Quick Reference Quick Reference The following topics are quick references for using your telephone’s standard features. Making an Outside Call You can make calls to or receive calls from telephones outside of the Strata DK system by dialing direct or and using CO Line Access Codes. To direct dial an outside number 1. -
Page 46: Making An Outside Call To An Isdn Trunk
Quick Reference ––––––––––––––––––––––––––––––––––––––––––––––––––––––––––––––––––––––––––––––– Making an Outside Call to an ISDN Trunk 1. Access an outside CO line 2. Dial the number. 3. Press The dialed digits will not be sent until you press this button or until the timer expires. See “ISDN Outgoing Calling”... -
Page 47: Answering Calls
––––––––––––––––––––––––––––––––––––––––––––––––––––––––––––––––––––––––––––––– Quick Reference Answering Calls To answer a call on a CO Line or [DN] Press the flashing [DN], The LED changes from the flashing incoming call rate , or button. to steady. To answer a call on Pooled Line Grp 1. -
Page 48: Conferencing Calls
Quick Reference ––––––––––––––––––––––––––––––––––––––––––––––––––––––––––––––––––––––––––––––– 3. Announce the call. After dialing, you hear a single tone. Note If the call was made with Tone Signaling instead of Voice First Signaling, you hear ringing tone. If the called station does not answer, you receive a recall ring (when your station or [DN] is idle). - Page 49 ––––––––––––––––––––––––––––––––––––––––––––––––––––––––––––––––––––––––––––––– Quick Reference To add a second Line 1. Press You hear dial tone. The [DN] or Line LED flashes at the conference rate if the call is on a [DN] or button. 2. Dial the next telephone number. 3. Press after the party All parties are conferenced.
-
Page 50: Placing/Retrieving Calls On Hold
Quick Reference ––––––––––––––––––––––––––––––––––––––––––––––––––––––––––––––––––––––––––––––– Placing/Retrieving Calls on Hold Calls on hold may be released automatically if the held party hangs up and the network provides a hold-release signal. See Page 45 for the Automatic Hold feature. To hold a call that appears on a Line or [DN] button Press The Line or [DN] LED flashes green at the on-hold rate. -
Page 51: Using Automatic Hold
––––––––––––––––––––––––––––––––––––––––––––––––––––––––––––––––––––––––––––––– Quick Reference To place a call on Exclusive Hold Exclusive Hold enables you to place a call on hold so that only you or somebody using a Call Pickup code at another station can retrieve it. Press twice. The Line LED flashes at the exclusive hold rate. -
Page 52: Calling The Attendant Console
Quick Reference ––––––––––––––––––––––––––––––––––––––––––––––––––––––––––––––––––––––––––––––– Calling the Attendant Console There are three ways to call the Attendant Console depending upon system programming. You can call any Attendant Console, a particular Attendant Console, or all Attendant Consoles. To call any console Press a [DN] + . The call rings the Attendant Console. -
Page 53: Account Code Calls
––––––––––––––––––––––––––––––––––––––––––––––––––––––––––––––––––––––––––––– Account Code Calls When originating or receiving a new call, the system automatically places the line in Note the dial pulse mode. Account Code Calls Account Codes can be entered before or after a call. Some of the code applications include billing, tracking, and line restriction. -
Page 54: Voluntary Account Codes
Alarm Reset –––––––––––––––––––––––––––––––––––––––––––––––––––––––––––––––––––––––––––––––––– Voluntary Account Codes Voluntary Account Codes are optional and can be entered after accessing a CO Line or during a call that you originated or received. The outside party cannot hear the tones you are entering. Voluntary Account Codes can be set in system programming to change the Toll Restriction classification of your station. -
Page 55: Alert Signaling
––––––––––––––––––––––––––––––––––––––––––––––––––––––––––––––––––––––––––––––––– Alert Signaling Alert Signaling Alert Signaling enables you to send an alert sound to a predesignated (partner) station by pressing a single button. This feature is based on the “buzz” key, where, for example, a manager might alert his/her administrative assistant to enter the office. You can have as many as four (s) to send or receive an Alert Signal to/from other telephones. -
Page 56: Automatic Callback
Automatic Callback ––––––––––––––––––––––––––––––––––––––––––––––––––––––––––––––––––––––––––––– If the [DN] or Line is available, the [DN] or Line and Spkr LEDs flash. The called telephone number rings, and your telephone receives ring tone. If your station is busy, ABR does not attempt Note a recall. 3. -
Page 57: Line Queuing With Automatic Callback
––––––––––––––––––––––––––––––––––––––––––––––––––––––––––––––––––––––––––––– Automatic Callback If you receive a busy tone after answering the callback, the called party has already received or originated another call. Your request is not cancelled. To cancel Automatic Callback (busy or DND stations) Press a [DN] + Line Queuing with Automatic Callback Automatic Callback enables a waiting queue for an available line after attempting access to a line group when all lines are busy. -
Page 58: Auto Redial
Auto Redial ––––––––––––––––––––––––––––––––––––––––––––––––––––––––––––––––––––––––––––––––––– Auto Redial This feature enables you to automatically redial the last number (outside or [DN]) called by pressing . The feature button must be programmed as one of the four flexible keys on the telephone. To redial the last number dialed 1. -
Page 59: Call Forward-All Calls
–––––––––––––––––––––––––––––––––––––––––––––––––––––––––––––––––––––––––––––––––– Call Forward When you forward calls to another destination, you see a message indicating the: Type of Call forward. Forwarded from [PhDN] and/or [DN]. Forwarded to destination number. Note Call Forward–All Calls, Call Forward–No Answer, and Call Forward–Busy can only be activated when Speed Dial is assigned to an “... -
Page 60: Call Forward-Busy
Call Forward –––––––––––––––––––––––––––––––––––––––––––––––––––––––––––––––––––––––––––––––––– Call Forward-Busy Calls to your telephone while you are busy on another call or in the DND mode forward immediately if this feature is set. Calls ring as normal if your telephone is idle. To set Call Forward-Busy 1. -
Page 61: Call Forward-Busy/No Answer
–––––––––––––––––––––––––––––––––––––––––––––––––––––––––––––––––––––––––––––––––– Call Forward 3. Press You can omit this step if you pressed in Step 1, and you do not want to change the ...or . length of time that your telephone rings before it forwards. Initially, your telephone rings 12 seconds before it forwards. -
Page 62: Call Forward-Cancel
Call Forward –––––––––––––––––––––––––––––––––––––––––––––––––––––––––––––––––––––––––––––––––– 3. Press You can omit this step if you pressed in Step 1, and you do not want to change ...or . the length of time that your telephone rings before it forwards. Initially, your telephone rings 12 seconds before it forwards. -
Page 63: Call Forward-Fixed
–––––––––––––––––––––––––––––––––––––––––––––––––––––––––––––––––––––––––––––––––– Call Forward Only perform the following procedure the first time Call Forward External is set Important! or when you change the destination. It is not necessary to store the destination each time you set Call Forward External; it remains in system memory. To set Call Forward-External Press Incoming calls forward to... -
Page 64: Call Park Orbits (Release 3 Or Later)
Call Park Orbits (Release 3 or later) –––––––––––––––––––––––––––––––––––––––––––––––––––––––––––––––– Call Park Orbits (Release 3 or later) The Call Park Orbit feature enables you to hold a call temporarily in an orbit for anyone to retrieve. You can have the same station or a different station. There are 20 General Park Orbits for the system and one Personal Park Orbit for each station. -
Page 65: Call Park And Page
––––––––––––––––––––––––––––––––––––––––––––––––––––––––––––––––––––––––––––––––––– Call Pickup Call Park and Page 1. Press while The Line or [DN] LED flashes at the on an internal or outside call. consultation-hold rate..or 2. Enter a General Orbit The Line LED flashes at an on-hold rate (the [DN] Number ( ) or a LED is off). -
Page 66: Group Pickup
Call Pickup ––––––––––––––––––––––––––––––––––––––––––––––––––––––––––––––––––––––––––––––––––– To pick up a ringing CO Line in a tenant system Press After you press a particular button, you are connected to a new incoming call for that particular Tenant Group. buttons correspond to Tenant Groups 1~4. You are connected to a new incoming ringing call (in any Tenant Group) after dialing the access code. -
Page 67: Calls To Other Groups
––––––––––––––––––––––––––––––––––––––––––––––––––––––––––––––––––––––––––––––––––– Call Waiting Calls to Other Groups You can pick up calls directed to other pickup groups by following the steps on the left. To pick up a call ringing another group 1. Press a [DN]. You hear dial tone. 2. -
Page 68: Direct Station Selection Buttons (Hotline)
Direct Station Selection Buttons (Hotline) –––––––––––––––––––––––––––––––––––––––––––––––––––––––––––– Direct Station Selection Buttons (Hotline) This optional feature enables you to connect directly to another station [PDN] by pressing a Direct Station Selection button. The button’s LED shows status (idle/busy). If connected to a CO Line, press this button to put the outside party on hold. Transfer the call as you would normally, by voice announcing or camping on by hanging up or by pressing the button. -
Page 69: Door Lock
–––––––––––––––––––––––––––––––––––––––––––––––––––––––––––––––––––––––––––––––––––– Door Lock Door Lock Your telephone may have an button(s), which unlocks a door lock when pressed. You may use the following to record the locations of each door. _____________________ _____________________ _____________________ _____________________ _____________________ To unlock a door lock Press the corresponding The door unlocks for three or six seconds when you button (... -
Page 70: Isdn Outgoing Calling
ISDN Outgoing Calling –––––––––––––––––––––––––––––––––––––––––––––––––––––––––––––––––––––––––– To call/monitor a door telephone 1. Press a [DN]. You hear dial tone and the LED lights steady. 2. Dial the [DN] for the desired door location. [DN] [DN] #151 Location_________________ #157 Location___________________ #152 Location_________________ #158 Location___________________ #153 Location_________________ #159 Location___________________ #154 Location_________________... -
Page 71: Subaddress
The new information is stored and appears on the T O S H I B A display. For example, if E X T . 2 0 0 the name is “TOSHIBA 1203 EXT. 200”, that appears on the display. Features... -
Page 72: Messaging
Messaging ––––––––––––––––––––––––––––––––––––––––––––––––––––––––––––––––––––––––––––––––––– To clear name/number display 1. Press You hear a confirmation tone, then a busy tone. 2. Press When a user name is set, your title appears on the LCD during direct, forwarded, and hunted calls. On override or OCA calls, the LCD does not display the title. -
Page 73: Cancelling A Calling Station Message
––––––––––––––––––––––––––––––––––––––––––––––––––––––––––––––––––––––––––––––– Message Waiting Cancelling a Calling Station Message To cancel a message that has been set at your station Press The LCD Msg Select LED goes out..or press a [PDN] + The LED lights..or press The LED goes out. A personal message (10~19) remains stored in memory. - Page 74 Message Waiting –––––––––––––––––––––––––––––––––––––––––––––––––––––––––––––––––––––––––––––– To cancel Message Waiting Press to answer The Msg indication is cancelled when the called party answers..or press The Msg indication cancels without calling the telephone or VM device which set the Msg indication on your telephone. To set a Message Waiting light on another telephone 1.
-
Page 75: [Phdn/Mw] Message Waiting
––––––––––––––––––––––––––––––––––––––––––––––––––––––––––––––––––––––––––––––– Message Waiting [PhDN/MW] Message Waiting To use this feature, your telephone must be programmed for both [PhDNs] and Message Waiting ( ) buttons. Your telephone has one built-in Message Waiting ( ) button that works with your [PDN] (see Message Waiting for a detailed explanation of this feature.). To set a Message Waiting indication for a [PhDN/MW] Follow the same procedure used to set a message light on another telephone. -
Page 76: Off-Hook Call Announce (Oca)
Off-hook Call Announce (OCA) –––––––––––––––––––––––––––––––––––––––––––––––––––––––––––––––––––– Off-hook Call Announce (OCA) This feature enables you to call and speak through either the handset or the speaker of an off-hook, busy digital telephone. There are two kinds of OCA: Handset Off-hook Call Announce (HS-OCA)–enables an announcement to be made through the handset. -
Page 77: Speaker Off-Hook Call Announce (Sp-Oca)
–––––––––––––––––––––––––––––––––––––––––––––––––––––––––––––––––––– Off-hook Call Announce (OCA) To make an HS-OCA call with Tone Signaling 1. Press and call the desired station. 2. Press to speak If you receive busy tone after pressing , the called to the called station. station is either busy on a speakerphone call or does not have the OCA option set in system programming. -
Page 78: Override Calls
Override Calls ––––––––––––––––––––––––––––––––––––––––––––––––––––––––––––––––––––––––––––––––– To dial an SP-OCA call with Tone Signaling 1. Press and call the desired station. 2. If you receive busy or If you receive busy tone after pressing , the called ring tone, press telephone is either busy on a speakerphone call or does not have the OCA option set in system programming. -
Page 79: Dnd Override
––––––––––––––––––––––––––––––––––––––––––––––––––––––––––––––––––––––––––– Page Announcements DND Override To initiate a DND Override signal Press after reaching a A tone signal is heard at the DND station indicating that a DND station. call is coming in. Your station must be enabled in system programming to send a DND Override signal. Also, a telephone can be enabled in system programming to block DND Override from all other telephones. -
Page 80: Privacy On-Line
Privacy On-Line ––––––––––––––––––––––––––––––––––––––––––––––––––––––––––––––––––––––––––––––– Privacy On-Line This option blocks a user at a station programmed with Privacy Override from entering a line conversation by pressing a common button. Your station must be assigned with the button in system programming to activate this feature. The button does not block Busy Override or Executive Override. -
Page 81: Privacy Release
––––––––––––––––––––––––––––––––––––––––––––––––––––––––––––––––––––––––––––––– Privacy Release Privacy Release If you press the optional button, any other station user can enter your call on a private common button just by pressing on their telephone. Your station must be assigned Privacy Release in system programming to activate this feature. Up to two stations can enter an existing external call (allowing up to three stations to be connected to a line). -
Page 82: Release And Answer
Release and Answer –––––––––––––––––––––––––––––––––––––––––––––––––––––––––––––––––––––––––––– Release and Answer This feature enables you to automatically disconnect or transfer an active call and answer a new call via the push of a button, instead of with the handset. Notes This feature requires that you are currently connected to an existing call. Your telephone must have been programmed with the button. -
Page 83: Speed Dial
–––––––––––––––––––––––––––––––––––––––––––––––––––––––––––––––––––––––––––––––––––– Speed Dial Speed Dial Speed Dial enables you to call a telephone number with a brief access code or an optional feature button. Strata DK provides two types of Speed Dial numbers–Station and System. Station Speed Dial numbers are assigned by individual station users to their own station and can only be dialed at their station. -
Page 84: Stored Station Or System Speed Dial Calling
Speed Dial ––––––––––––––––––––––––––––––––––––––––––––––––––––––––––––––––––––––––––––––––––– 4. Enter the telephone number (up to 20 digits). 5. To store [DN] button access, followed by a CO Line access code before the telephone number to allow one-touch dialing of telephone numbers, “Access Codes” on Page 6. -
Page 85: Timed Reminders
–––––––––––––––––––––––––––––––––––––––––––––––––––––––––––––––––––––––––––––– Timed Reminders To call with a Speed Dial access code 1. Access a line. (See “Access Codes” on Page 92 information on CO Line access codes.) 2. Press Note Speed Dial cannot appear on any button position if the port that the cordless is ...or if your telephone does connected to uses... - Page 86 Timed Reminders –––––––––––––––––––––––––––––––––––––––––––––––––––––––––––––––––––––––––––––– 3. Press for an every day reminder, or for a one-time reminder only. 4. Enter desired LCD The first 16 characters only display when the timed message number, station reminder calls back. number ( ), system code ( ), or 5.
-
Page 87: Toll Restriction Override
––––––––––––––––––––––––––––––––––––––––––––––––––––––––––––––––––––––––– Toll Restriction Override Toll Restriction Override Stations can be individually restricted from making toll calls. Each station can be allowed or denied specific area and office codes, long distance information calls, international calls and/ or operator-assisted calls. You can completely override Toll Restriction at selected stations or you can change the station’s Toll Restriction class. -
Page 88: Two (Tandem) Line Connection
Two (Tandem) Line Connection ––––––––––––––––––––––––––––––––––––––––––––––––––––––––––––––––––– Two (Tandem) Line Connection Using a [DN] Button This feature enables you to connect two lines, then drop out of the conversation. To connect two outside lines (using a [DN] button) 1. Press while You hear dial tone, the [DN] LED flashes at the talking to an external conference rate. -
Page 89: Using Line Buttons
–––––––––––––––––––––––––––––––––––––––––––––––––––––––––––––––––––– Two (Tandem) Line Connection Using Line Buttons This feature enables a station user to connect two lines, then drop out of the conversation. Both buttons (or buttons) must appear on your telephone to allow tandem connection to be established from your telephone. To connect two outside lines using the Line button 1. - Page 90 Two (Tandem) Line Connection ––––––––––––––––––––––––––––––––––––––––––––––––––––––––––––––––––– To supervise a tandem call and release it 1. Press either a [DN] or You are connected to both lines and both Line LEDs light button. steady. 2. Go back on-hook if the Both Line LEDs turn off and the connection is released. parties have hung up ...or and hang-...
-
Page 91: Appendix A - Appendix
Appendix This appendix contains additional information for your cordless digital telephone. It is divided into: Installing Optional Headset Troubleshooting Range and Performance Nine Simultaneous Conversation Channels Radio Interference Specifications Available Optional or Replacement Items Access Codes Appendix... -
Page 92: Installing Optional Headset
Installing Optional Headset ––––––––––––––––––––––––––––––––––––––––––––––––––––––––––––––––––––––– Installing Optional Headset The optional headset provides a hands-free option for the cordless digital telephone. Only use headsets especially designed or modified for use with radio frequency equipment. With the headset installed, you can use the belt clip to carry the handset and conduct a conversation using the headset. -
Page 93: Troubleshooting
–––––––––––––––––––––––––––––––––––––––––––––––––––––––––––––––––––––––––––––––– Troubleshooting Troubleshooting If your cordless telephone is not performing to your expectations, try these suggestions. If you are still unable to resolve the problems, contact your telephone system administrator. Do not attempt to service this unit yourself. All service must be done by qualified service personnel. Problem Suggestion CHARGE LED does not come on... -
Page 94: Range And Performance
Range and Performance ––––––––––––––––––––––––––––––––––––––––––––––––––––––––––––––––––––––––– Range and Performance The cordless digital telephone is designed to operate up to 1.1 miles from the base in a completely unrestricted test environment. Typically, ranges of 300 to 400 feet are possible, depending upon the structure of the building the telephone is used in. For optimum range and performance from your cordless digital telephone, try the following options: Place the base units at least 3 to 6 feet away from the deskset;... -
Page 95: Nine Simultaneous Conversation Channels
–––––––––––––––––––––––––––––––––––––––––––––––––––––––––– Nine Simultaneous Conversation Channels Nine Simultaneous Conversation Channels The cordless digital telephone has nine operating channels available. A common misconception is that this limits a customer to nine cordless phones. This is not the case. Each cordless digital telephone can operate on any of the nine channels. When you turn on a cordless digital telephone, the phone selects an available channel within its’... -
Page 96: Specifications
Specifications ––––––––––––––––––––––––––––––––––––––––––––––––––––––––––––––––––––––––––––––––– Specifications General Frequency Control Frequency Synthesizer Modulation Operating Temperature -10 to 50 C Base Unit Receive/Transmit Frequency 903.20 to 924.95 MHz (9 channels) Power Requirements 10VDC from supplied AC adapter Size Width 5.0 inches Depth 7.5 inches Height 3.7 inches Weight Approximately 1 lb., 5 oz. -
Page 97: Available Optional Or Replacement Items
–––––––––––––––––––––––––––––––––––––––––––––––––––––––––––– Available Optional or Replacement Items Available Optional or Replacement Items Contact your telephone system administrator for the following optional accessories and replacement parts. 1191 2583 AC Adapter 400 mAh Battery 730 mAh Battery Base Unit Wall Mount User Guide Belt Clip Desktop/Wallmount Charger Battery Backup... -
Page 98: Access Codes
Speed Dial buttons. The following table provides an overview of the Feature Access Codes for various Important! Toshiba business telephone systems. This table may not cover all Feature Code entries. For example, “ ” and “ ” in this table are variable entries that may change with different Feature Access Codes. - Page 99 ––––––––––––––––––––––––––––––––––––––––––––––––––––––––––––––––––––––––––––––––– Access Codes Strata DK14, DK40, DK16e, Strata DK8 & DK16, Feature DK424, DK280 DK24/56/96 Call Park and Page (Release 3) Call Park Retrieve (Release 3) Call Pickup - External Page Call Pickup - Held Line Call Pickup - Int Pg, DoorPhone Call Pickup - Other Groups Call Pickup - Own Group Call Pickup - Ringing Line...
- Page 100 Access Codes ––––––––––––––––––––––––––––––––––––––––––––––––––––––––––––––––––––––––––––––––– Strata DK14, DK40, DK16e, Strata DK8 & DK16, Feature DK424, DK280 DK24/56/96 or ) + Speed Dial - System ) or ( Timed Reminder - Cancel Timed Reminders + No. + No. Toll Restr Override Trunk Access - LCR/General + No.
-
Page 101: Co Line Access Codes
–––––––––––––––––––––––––––––––––––––––––––––––––––––––––––––––––––––––––– CO Line Access Codes CO Line Access Codes CO lines are used when you dial an outside number. If your telephone does not have a button, you can enter the appropriate code listed in Table 1 to access an outside line. You can also store the code on a button for one-touch access. -
Page 102: Feature Access Codes
Feature Access Codes –––––––––––––––––––––––––––––––––––––––––––––––––––––––––––––––––––––––––– Feature Access Codes Refer to the list of codes on Page Paging Group Codes Your telephone can be assigned to page groups. Telephones can be a member of more than one group and each group can have as many as 120 stations. Station users can access each group separately by dialing an access code (Tables 2~3). -
Page 103: Speed Dial Access Codes
–––––––––––––––––––––––––––––––––––––––––––––––––––––––––––––––––––––––– Speed Dial Access Codes Speed Dial Access Codes The number of station and system speed dial numbers available to you depends on the size of your company’s telephone system. Check with your System Administrator to find out which codes apply to your system. Once you store a telephone number on any of the codes listed below, you can dial the number by entering the code, such as Table 4... -
Page 104: Speed Dial Access Codes
Speed Dial Access Codes ––––––––––––––––––––––––––––––––––––––––––––––––––––––––––––––––––––––– Strata DK Cordless Digital Telephone 5/99... -
Page 105: Index
Index before you begin busy override access codes CO Line speed dial account code calls call account codes attendant console verified hold voluntary other groups alarm reset override alert signaling park and page answering park orbits a transferred call pickup calls stored station attendant console... -
Page 106: Installing Optional Headset
CO line charging button controls queuing with automatic callback volume level tandem connection CO Line access codes configuration installation installing optional headset ISDN – dial buttons a stored number internal calls direct station selection buttons (hotline) directed call pickup low battery indicator [DN] buttons name/number display do not disturb... -
Page 107: Troubleshooting
on-line release verified account codes voluntary account codes radio interference range release and answer ringer volume level simultaneous conversation channels speaker off-hook call announce (SP-OCA) specifications speed dial access codes SP-OCA tone first signaling spread spectrum technology start (ISDN button) store a number station speed dial numbers... -
Page 108: Range And Performance
Strata DK Cordless Digital Telephone 5/99...