Table of Contents
Advertisement
Quick Links
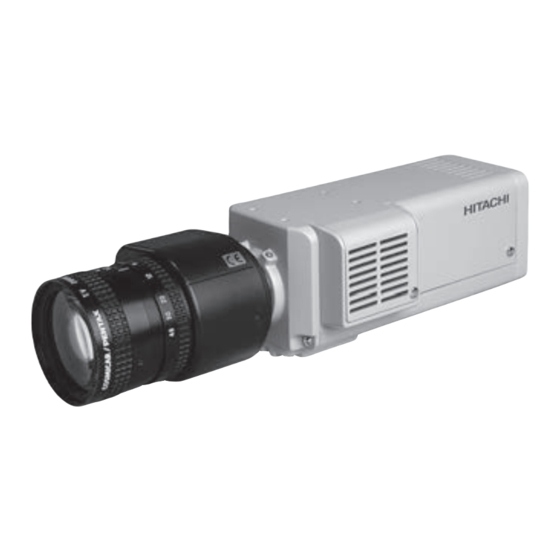
CCD Camera
KP-DE500
KP-E500
This manual is applied to the product since "R1".
Operation manual
Before using the camera, please read this operation manual
carefully and keep this manual on file for ready reference in
the future.
Table of contents
CAUTION FOR SAFE OPERATION...............
IMPORTANT NOTICE.................................
General....................................................
Features..................................................
Operating considerations...........................
Section names and functions.....................
Connections.............................................
Lens.........................................................
Recommended lenses..............................
Note on lens selection...............................
Installation of CS-mount lens......................
Lens selector switch.................................
Flange back adjustment............................
Camera mounting......................................
A
Setting menu description..........................
Setting menu composition........................
J
Menu operations.....................................
1
Main Menu.............................................
1
Camera Title Menu..................................
2
Light Control Menu..................................
3
AGC setting...........................................
4
Shutter Speed setting...............................
6
Sensitivity enhance setting........................
7
7
White Balance Menu................................
8
Sub Menu.............................................
8
9
Remote menu operation............................
10
Specifications..........................................
Accessories.............................................
11
Supplied accessories...............................
Optional accessories...............................
12
12
13
13
14
16
19
22
23
24
26
30
33
34
35
35
35
Advertisement
Table of Contents

Related Manuals for Hitachi KP-DE500


Summary of Contents for Hitachi KP-DE500
-
Page 1: Table Of Contents
CCD Camera KP-DE500 KP-E500 This manual is applied to the product since “R1". Operation manual Before using the camera, please read this operation manual carefully and keep this manual on file for ready reference in the future. Table of contents CAUTION FOR SAFE OPERATION…………... -
Page 2: General
General Features The KP-DE500 is an ultra high sensitivity color camera Ultra high sensitivity that utilizes electron multiplication type Ultra high sensitivity is possible due to the electron (EM-CCD) image sensor. multiplication (EM) CCD which multiplies the charge on the individual pixels before the charge is converted to a... -
Page 3: Phenomena Inherent To Ccd Image Device
Phenomena inherent to CCD imaging device Following are the phenomena inherent to a CCD imaging device, and not defects 2) Fixed pattern noise 1) Smear and blooming When the camera is operated in a high temperature, When strong light (lamp, fluorescent lamp, and fixed pattern noise may appear on the entire screen. -
Page 4: Section Names And Functions
Section names and functions Tripod adaptor holes See camera mounting Lens mount screws on page 11. See page 10. Lens mount ring See flange back adjustment on page 8. C-mount adaptor Lens connector LENS See installation of CS-mount Connect lens cable when lens on page 8. -
Page 5: Connections
3C-2V 150m 5C-2V 200m 7C-2V 300m 10C-2V 400m DC input connector KP-DE500 KP-E500 Monitor 1 Monitor 2 Monitor 3 75-ohm coaxial cable Set the 75 switch of only the final monitor to on. Set the 75 switch of other monitors to off. -
Page 6: Note On Lens Selection
Installation of CS-mount lens Note on lens selection C-mount adaptor is provided for the camera in the factory. Observe the maximum size limit (A in the figure) When installing the lens. Internal damage can occur When using a CS-mount lens, unscrew and remove the If a larger lens is used. -
Page 7: Lens Selector Switch
Lens connector Lens selector switch When using an auto iris lens, install the lens plug on the lens Cable as indicated in the figures. Refer to the lens instructions Set the switch according to the type of auto-iris lens. Regarding the signals and wire colors. The factory setting is DC. -
Page 8: Camera Mounting
Color-B/W selection (page 24 ) (*) Gamma White Balance Menu (page 26 ) (*) Chroma gain adjustment Black reference level adjustment Sub Menu (page 30 ) Detail adjustment Polarity Digital noise reduction (*) Note: Only KP-DE500 Burst signal Camera reset... -
Page 9: Menu Operations
Menu operations Main Menu 1) Press the SET button for at least 2 seconds to display Three rear panel setup buttons are used to shift the cursor and the main menu on the monitor screen. select items from the menus. ↵... -
Page 10: Light Control Menu
: The input characters can be edited by using the Press the UP and DOWN buttons to shift the characters arrow symbols. horizontally. Afterwards, press SET to confirm the display position and return to the main menu. Set the flashing cursor to either of the arrow symbols and Press SET button. - Page 11 Setting of BLC NOTE In the case where there is a strong light source and sunlight in The video level adjustment for lenses that use a video the background, the lens iris will close according to the scene signal type lens, is adjusted using the binding screws on brightness, causing the desired object in the scene to appear the side of the lens as shown in the method below.
- Page 12 Shift the cursor to “PK/AV” and push the SET button, peak / AGC Menu average ratio value changes. As the peak value is enlarged Setting AGC mode It reacts to spot light. Factory setting is “15/85”. Press the SET button for longer than 2 seconds to display SET button : 15/ 85 30/ 70 50/ 50 75/ 25 100/ 0 the “MAIN MENU”.
-
Page 13: Agc Setting
Notes when AGC gain is set Please note that there is a limitation in operation of using together with the function to show in the following when the amplification level is set to 251 or more. SHUTTER SPEED setting 1/100 From 1/125 to 1/2000 FIX. -
Page 14: Sensitivity Enhance Setting
MANU x128 NOTE Raising sensitivity by color-B/W selection Enhanced sensitivity can cause blurring of moving [Only KP-DE500 type] images. In the following types of cases, reduce the sensitivity Press the SET button for longer than 2 seconds to display multiple. -
Page 15: White Balance Menu
Therefore, the IR cut filter is removed to take advantage of sensitivity in the infrared region. ATW (auto tracking white balance) White Balance Menu [Only KP-DE500 type] Ordinarily use this mode, which is suitable for lighting color temperature from 2,500K to 8,000K. - Page 16 There are 9 white detect areas selected by the UP and Setting WB detection area DOWN buttons. Select the areas from nos. 1 to 9 that Use the UP and DOWN buttons to shift the cursor to include the subject of main interest. (Factory setting is NO.1) “WB AREA”.
-
Page 17: Sub Menu
“DETAIL”, then press the SET button. The adjustment value SUB MENU (ITEM: PICTURE) at the right of value flashes. CHROMA [Only KP-DE500 Type] Change the “DETAIL” by pressing the UP and DOWN The optimum color level has been set at the factory. If necessary, buttons. - Page 18 =1.0 OFF : =0.45 POLARITY BURST [Only KP-DE500 type] Use the UP and DOWN buttons to shift the cursor to Burst signal ON/OFF when a monochrome image is output is set. “POLARITY”. Use the UP and DOWN buttons to shift the cursor to Press the SET button to shift the mode in the sequence “BURST”.
-
Page 19: Remote Menu Operation
Remote menu operation An optional remote plug is available to enable operating NOTE the camera mode and set buttons by remote control. Be sure to switch off the camera power before Confirm the plug is properly wired as indicated in the connecting or disconnecting the remote plug. -
Page 20: Specifications
12. Electronic shutter speeds Ver. 59.94Hz Selectable in 7 steps & AES internal ( Factory setting is 1/60 ) 5.Sync system KP-DE500 VBS1.0Vp-p/75 1/60,1/100,1/125,1/250,1/500,1/1000,1/2000 6. Video signal output KP-E500 VS1.0Vp-p/75 AES:From 1/60 second to 1/2000 second Digital processing ( input 10 bits ) 13. -
Page 21: Accessories
Accessories Selectable in 3 modes 16. White balance Supplied accessories Only KP-DE500 (Factory setting is ATW) (color) Auto-tracking[ATW] / preset[AWC] / Operation manual R/B gain manual control[MANUAL] DC input plug (R03-P3F) 22 characters (number, alphabet, and mark) 17. Text display Selectable in 3 modes (Factory setting is OFF) 18.