
Related Manuals for LG DP181


Summary of Contents for LG DP181
-
Page 1: Portable Dvd Player
DP181P_AA5ILLW_ENG Portable DVD Player Owner’s Manual Model: DP181 Before connecting, operating or adjusting this product, please read this instruction booklet carefully and completely. P/No.: MFL30593042... -
Page 2: Safety Precautions
Safety Precautions CAUTION: VISIBLE AND INVISIBLE LASER RADIATION WHEN OPEN CAUTION AND INTERLOCKS DEFEATED. RISK OF ELECTRIC SHOCK CAUTION: DO NOT OPEN This product employs a Laser System. CAUTION: TO REDUCE THE RISK OF ELECTRIC SHOCK To ensure proper use of this product, please read this owner’s manual DO NOT REMOVE COVER (OR BACK) carefully and retain it for future reference. - Page 3 Safety Precautions (Continued) CAUTION concerning the Power Cord This product is manufactured to comply with the radio interference requirements of EEC DIRECTIVE Most appliances recommend they be placed upon a dedicated 89/336/EEC, 93/68/EEC and 73/23/EEC. circuit; That is, a single outlet circuit which powers only that appliance and has no additional outlets or branch circuits.
-
Page 4: Table Of Contents
Table of Contents Introduction Playing an Audio CD or MP3/WMA file ......28 Programmed Playback ........29 Safety Precautions . -
Page 5: Before Use
Before Use To ensure proper use of this product, please read this owner’s Notes on Discs manual carefully and retain for future reference. Handling Discs Do not touch the playback side of the disc. Hold the disc by the This manual provides information on the operation and mainte- edges so that fingerprints do not get on the surface. -
Page 6: Maintenance And Service
Before Use (Continued) Maintenance and Service Maintaining the Unit The DVD player is a high-tech, precision device. If the optical Refer to the information in this chapter before contacting a service pick-up lens and disc drive parts are dirty or worn, the picture technician. -
Page 7: Types Of Playable Discs
Before Use (Continued) Types of Playable Discs Customers should note that permission is required in order to download MP3 / WMA files and music from the Internet. Our company has no right to grant such permission. Permission (8 cm / 12 cm disc) should always be sought from the copyright owner. -
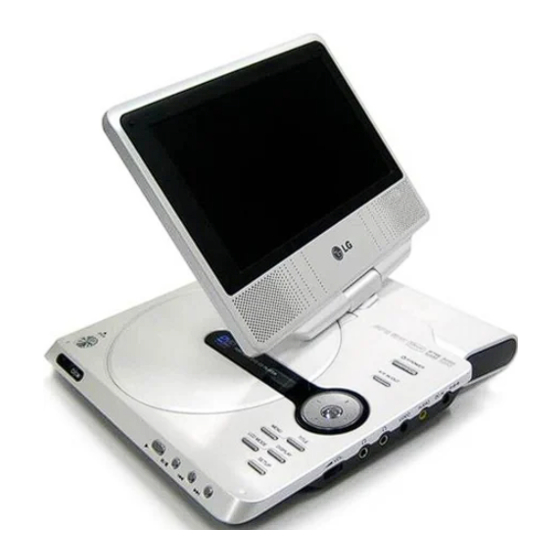
Page 8: Identification Of Controls
Identification of Controls 1. LCD screen Main Unit 2. Speaker 3. Power : Switches the player ON or OFF. 4. MODE : Selects the source. 5. • b B v V (left/right/up/down) : Selects an item in the menu. • b B : Adjusts the COLOR/BRIGHT. •... -
Page 9: Main Unit
Identification of Controls (continued) Main Unit CHG. c d e a Volume Control f Remote sensor b Earphone jack Receive the signal from the Remote Control for operation. c AUDIO In/Out jack (OPTICAL OUT) g Battery charge indicator d VIDEO In/Out jack During recharging, charge indicator is red. -
Page 10: Remote Control
Identification of Controls (continued) 1. AUDIO 6. 0-9 number buttons Remote Control Selects an audio language (DVD). Selects numbered items in a menu. 2. POWER 7. SUBTITLE Switches DVD Player ON or OFF. Selects a subtitle language. 3. • Reverse SKIP/SEARCH ( S 8. -
Page 11: Identification Of Controls
Identification of Controls (continued) Insert the battery (Lithium battery) Button-type battery (Lithium battery) 1. Pinch the battery holder clip together then pull the tab to remove the battery holder. 2. Insert the battery with the + facing in the same direction as the + on the battery holder. -
Page 12: Power Connections
Power Connections AC Adapter Follow steps 1 to 2 to connect. When disconnecting, reverse the order. Caution AC adapter • Do not connect the power plug to a power outlet other than that • This AC adapter operates on 100-240V~ 1.5A 50-60Hz. indicated on the label, as this can result in a risk of fire or electric •... -
Page 13: Automotive Adapter
Power Connections (continued) This DVD player and its automotive adapter are designed for use in vehicles that have 12 volt, negative ground Automotive electrical systems. (This is standard for most vehicles.) If your vehicle has a different type of electrical system, the Adapter DC power system cannot be used. - Page 14 Power Connections (continued) Battery Pack Charge the battery pack before using it for the first time. N O T E S • Do not detach the battery pack during playback. Attaching the battery pack • Be careful not to drop the battery pack. 1.
-
Page 15: Battery Pack
Power Connections (continued) Charging the battery pack Recharging and play times 1. Attach the battery pack to the player. Recharging Play time 2. Connect the AC power adapter to the player and Standby LCD On LCD Off the plug into an AC outlet. Approx. -
Page 16: Rotating The Lcd
Rotating the LCD POWER POWER A/V IN/OUT A/V IN/OUT ENTER TITLE TITLE MENU MENU DISPLA DISPLAY LCD MODE LCD MODE OPEN OPEN SETUP SETUP COLOR/BRIGHT COLOR/BRIGHT CHG. CHG. You can rotating LCD clockwise an angle of 180 degrees. After rotating LCD completely, you can fold the LCD screen as However, if you turn it by force, it can cause serious damage. -
Page 17: Playing A Disc
Playing a Disc 1. Prepare the power supply. The picture mode and size The picture shown on the LCD depends on the display mode 2. Open the outer cover and press POWER button. and the size recorded on the disc. 3. -
Page 18: Displaying Disc Information On-Screen
On-Screen Display Displaying Disc Information Initial Settings on-screen By using the Setup menu, you can make various adjustments to You can display various information about the disc loaded on- items such as picture and sound. You can also set a language for screen. -
Page 19: Initial Settings
Initial Settings DISPLAY LANGUAGE TV Aspect Menu Language Select a language for the Setup menu and on-screen display. 4:3: Select when a standard 4:3 TV is connected. 16:9 Wide: Select when a 16:9 wide TV is connected. Disc Audio / Subtitle / Menu Select the language you prefer to the audio track (disc audio), Display Mode subtitles, and the disc menu. -
Page 20: Audio
Initial Settings (continued) AUDIO Sample Freq (Frequency) If your receiver or amplifier is NOT capable of handling 96 kHz sig- Each DVD disc has a variety of audio output options. Set the play- nals, select 48 kHz. When this choice is made, this unit automati- er’s AUDIO options according to the type of audio system you use. -
Page 21: Lock (Parental Control)
Initial Settings (continued) LOCK (Parental Control) 3. Select a rating from 1 to 8 using the v / V buttons. Rating 1-8: Rating one (1) has the most restrictions and rating eight (8) is the least restrictive. Unlock If you select unlock, parental control is not active and the disc plays in full. - Page 22 Initial Settings (continued) Password Area Code You can enter or change password. Enter the code of the area whose standards were used to rate the DVD video disc, based on the list in the reference chapter. 1. Select Password on the LOCK menu then press B. 1.
-
Page 23: Others
Initial Settings (continued) OTHERS DivX(R) VOD The PBC, Auto Play and DivX(R) VOD settings can be changed. ® We provide you the DivX VOD (Video On Demand) registration ® code that allows you to rent and purchase videos using the DivX VOD service. -
Page 24: General Features
General Features Moving to another CHAPTER/TRACK Use the b B v V buttons to select the title/chapter you want to During playback, press SKIP (. or >) to go to the next view, then press ENTER to start. Press TITLE or MENU to return chapter/track or to return to the beginning of the current to the menu screen. - Page 25 General Features (Continued) Still Picture and Frame-by-Frame Playback Repeat VCD1.1 During playback, press REPEAT repeatedly to select a desired repeat mode. During playback, press PAUSE/STEP to pause playback. DVD Video Discs : Chapter/Title/Off DivX Video CDs, Audio CD discs : TRACK(TRK)/All/Off Press PAUSE/STEP repeatedly to play Frame-by-Frame.
-
Page 26: General Features
General Features (Continued) Title Menu Subtitles DivX If the current DVD title has a menu, the title menu appears on the Press SUBTITLE repeatedly during playback to see the different screen. Otherwise, the disc menu may appears. subtitle languages. Disc Menu N O T E If there is no information or there is a code that can not read in the Press MENU and the disc menu is displayed. -
Page 27: Additional Features
Additional features Marker Search Last Scene Memory DivX VCD1.1 To enter a Marker This player memorizes last scene from the last disc that is viewed. The last scene remains in memory even if you remove the disc You can start playback from up to nine memorized points. To enter from the player or switch off the player. -
Page 28: Playing An Audio Cd Or Mp3/Wma File
Playing an Audio CD or MP3/WMA file The DVD player can play MP3/WMA formatted recordings on MP3 / WMA file compatibility with this player is limited as CD-ROM, CD-R, or CD-RW discs. follows: • Sampling frequency: within 8 - 48 kHz (MP3), MP3/ WMA/ Audio CD within 32 - 48kHz (WMA) Once you insert an MP3/WMA files recorded media or Audio CD, a... -
Page 29: Programmed Playback
Programmed Playback The program function enables you to store your favorite tracks Erasing a Track from program list from any disc in the player memory. 1. Use v / V to select the track that you wish to erase from the A program can contain 30 tracks. -
Page 30: Viewing A Jpeg File
Viewing a JPEG file Using this DVD Player you can view discs with JPEG files. Slide Show If you want to view a slide show, to select a file in the 1. Insert a JPEG files recorded media. The Photo menu appears folder then press ENTER. -
Page 31: Jpeg File Compatibility With This Player Is Limited As Follows
Viewing a JPEG file (continued) JPEG file compatibility with this player is limited as follows: • Depending upon the size and number of JPEG files, it could take a long time for the DVD player to read the disc’s contents. If you don’t see an on-screen display after several minutes, some of the files may be too large —... -
Page 32: Playing A Dvd Vr Format Disc
Playing a DVD VR format Disc This unit will play DVD-RW discs recorded using the Video Recording (VR) format. 1. Insert a disc and close the tray. The DVD-VR menu appears on the screen. 2. Press v / V to select a track then press PLAY or ENTER and playback starts. -
Page 33: Playing A Divx Movie File
Playing a DivX Movie file Using this DVD Player you can play DivX file. Notice for displaying the DivX subtitle If the subtitle does not display properly during playback, press and 1. Insert a DivX file recorded media. The Movie menu appears on hold SUBTITLE about 3 seconds then press v / V to select another the screen. -
Page 34: Divx File Compatibility With This Player Is Limited As Follows
Playing a DivX Movie Disc (Continued) DivX disc compatibility with this player is limited as follows: Playable DivX file “.avi”, “.mpg”, “.mpeg” • Available resolution size of the DivX file is under 720x576 (W x H) pixel. Playable Subtitle format •... -
Page 35: Playing An Usb
Playing an USB 1. Connect the USB device to the USB port on the unit after N O T E S power is on. • Do not extract the USB device in operating. • Music files (MP3/WMA), image files (JPEG) and DivX files can 2. -
Page 36: Setting Up The Player
Setting up the Player The picture and sound of a nearby TV, VCR, or radio may be dis- torted during playback. If this occurs, position the player away from the TV, VCR, or radio, or turn off the unit after removing the disc. -
Page 37: Audio Connection To Optional Equipment
Setting up the Player (continued) Audio Connection to Optional Equipment Amplifier equipped with 2-channel analog stereo or Dolby Pro Logic ll / Pro Logic: Connect the AUDIO OUT jacks on the DVD Connect the DVD player to your optional equipment for audio player to the audio left and right IN jacks on your amplifier, receiv- output. -
Page 38: Troubleshooting
Troubleshooting Symptom Cause Correction No power. • The power cord is disconnected. • Plug the power cord into the wall outlet securely. • The battery is discharged. • Recharge the battery. No picture on the LCD • The video cable is not connected securely. •... -
Page 39: Language Code
Language Codes Use this list to input your desired language for the following initial settings: Disc Audio, Disc Subtitle, Disc Menu. Language Code Language Code Language Code Language Code Abkhazian 6566 Fiji 7074 Lingala 7678 Singhalese 8373 Afar 6565 Finnish 7073 Lithuanian 7684... -
Page 40: Area Codes
Area Codes Choose an area code from this list. Area Code Area Code Area Code Area Code Afghanistan Ethiopia Malaysia Saudi Arabia Argentina Fiji Maldives Senegal Australia Finland Mexico Singapore Austria France Monaco Slovak Republic Belgium Germany Mongolia Slovenia Bhutan Great Britain Morocco South Africa... -
Page 41: Specifications
Specifications DVD Player Liquid Crystal Display Power supply: Panel size: 7 inches wide (diagonal) DC 9.5V (AC adapter terminal), DC 7.4V (Battery) Projection system: R.G.B. stripe Power consumption: 12W with battery Driving system: TFT active matrix Weight: 1.58 lbs (0.72 kg) (without battery pack) Resolution: 234 x 480 x 3 (effective pixel rate: more than External dimensions (W x H x D): 99.99%)