
Related Manuals for LG DP170


Summary of Contents for LG DP170
-
Page 1: Portable Dvd Player
DP170BP_AA2ALL_ENG Portable DVD Player Owner’s Manual Model: DP170 Before connecting, operating or adjusting this product, please read this instruction booklet carefully and completely. P/NO : MFL30593001... -
Page 2: Safety Precautions
Safety Precautions CAUTION RISK OF ELECTRIC SHOCK DO NOT OPEN CAUTION: TO REDUCE THE RISK OF ELECTRIC SHOCK DO NOT REMOVE COVER (OR BACK) NO USER-SERVICEABLE PARTS INSIDE REFER SERVICING TO QUALIFIED SERVICE PERSONNEL. This lightning flash with arrowhead symbol within an equilateral triangle is intended to alert the user to the presence of uninsu- lated dangerous voltage within the product’s enclosure that may be of sufficient magnitude to constitute a risk of electric shock to... - Page 3 Safety Precautions (Continued) CAUTION concerning the Power Cord Most appliances recommend they be placed upon a dedicated circuit; That is, a single outlet circuit which powers only that appliance and has no additional outlets or branch circuits. Check the specifi- cation page of this owner's manual to be certain.
-
Page 4: Before Use
To ensure proper use of this product, please read this owner’s manual carefully and retain for future reference. This manual provides information on the operation and mainte- nance of your DVD player. Should the unit require service, contact an authorized service location. Symbol Used in this Manual Indicates special notes and operating features. -
Page 5: Types Of Playable Discs
Before Use (Continued) Types of Playable Discs (8 cm / 12 cm disc) Video CD (VCD) (8 cm / 12 cm disc) Audio CD (8 cm / 12 cm disc) In addition, this unit plays DVD±R, DVD±RW, SVCD and CD-R or CD-RW that contains audio titles, MP3, WMA or JPEG files. Manufactured under license from Dolby Laboratories. -
Page 6: Table Of Contents
....... . .29 Using this DVD Player you can view discs with JPEG files. -
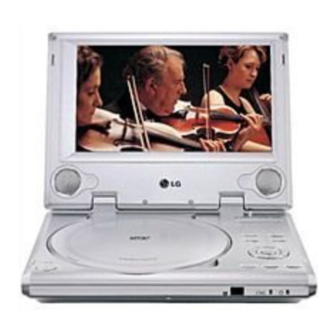
Page 7: Identification Of Controls
Identification of Controls Main Unit POWER A/V IN/OUT A/V IN/OUT ENTER TITLE MENU ANGLE LCD MODE LCD MODE OPEN SETUP COLOR/BRIGHT 1. LCD screen 2. Speaker 3. Power ON/OFF : Switches the player ON and OFF. 4. A/V IN/OUT : Selects the source. 5. -
Page 8: Main Unit
Identification of Controls (Continued) Main Unit c d e a Volume Control b Earphone jack c AUDIO In/Out jack (OPTICAL OUT) d VIDEO In/Out jack If the VIDEO IN signal is not connected in AV IN mode, this unit will automatically power off in 10 minutes to prevent battery dis- charge. -
Page 9: Remote Control
AUDIO Remote Selects an audio language (DVD). Control b POWER Switches DVD Player ON and OFF. c • Reverse SKIP/SEARCH ( . ) Search backward*/ go to beginning of current chapter or track or go to previous chapter or track. -
Page 10: Identification Of Controls
Identification of Controls (Continued) Insert the battery (Lithium battery) otes • Do not expose the Remote Control sensor to bright light. • Do not place obstacles between the Remote Control sensor and the Remote Control. Replacing the button-type battery The battery normally lasts for about a year. Replace the battery if the Remote Control fails to operate the unit when used within the operation range. -
Page 11: Power Connection
Power Connection Adapter Caution • Do not connect the power plug to a power outlet other than that indicated on the label, as this can result in a risk of fire or electric shock. • Do not connect or disconnect the power plug with wet hands. -
Page 12: Automotive Adapter
Power Connection (Continued) This DVD player and its automotive adapter are designed for use in vehicles that have 12 volt, negative ground Automotive electrical systems. (This is standard for most vehicles.) If your vehicle has a different type of electrical system, the Adapter DC power system cannot be used. -
Page 13: Battery Pack
Power Connection (Continued) Battery Pack • Charge the battery pack before using it for the first time. Attaching the battery pack (supplied) 1. Match the hooks of the battery pack into the holes on the bottom of the player. 2. Press and slide the battery pack until the hooks click. Hooks ATTENTION The product that you have purchased contains a rechargeable battery. - Page 14 Power Connection (Continued) Charging the battery pack 1. Attach the battery pack to the player. 2. Connect the AC adapter to the player and then plug into an AC outlet. Player Battery Pack AC adapter cord insert jack (DC IN 9.5V) Charge indicator When charging starts, the charge indicator lights up in red.
- Page 15 VCR, otherwise the DVD image could be distorted by the copy protection system. Video: Connect the VIDEO jack on the DVD player to the video in jack on the TV using the video cable. Audio Connection to Your TV: Connect the AUDIO jacks of the DVD Player to the audio left and right IN jacks on the TV using the audio cables.
-
Page 16: Audio/Video Connection
Audio/Video Connection Audio Connection to Optional Equipment Connect the DVD player to your optional equipment for audio output. OPTICAL DIGITAL INPUT AUDIO INPUT Amplifier equipped with 2-channel analog stereo or Dolby Pro Logic ll / Pro Logic: Connect the AUDIO OUT jacks on the DVD player to the audio left and right IN jacks on your amplifier, receiver, or stereo system, using the audio cables. -
Page 17: Rotate The Lcd
Rotate the LCD You can rotate LCD clockwise an angle of 180 degrees. However, if you turn it by force, it can cause serious damage. OPEN After rotating LCD completely, you can fold the LCD screen as shown above. POWER A/V IN/OUT ENTER TITLE... -
Page 18: Initial Settings
Initial Setting By using the Setup menu, you can make various adjustments to items such as picture and sound. You can also set a language for the subtitles and the Setup menu, among other things. For details on each Setup menu item, see pages 18 to 23. -
Page 19: Display
Initial Setting (Continued) DISPLAY DISPLAY TV Aspect Letterbox Display Mode Progressive Scan TV Output Select YPbPr Move Select Exit TV Aspect 4:3: Select when a standard 4:3 TV is connected. 16:9: Select when a 16:9 wide TV is connected. Display Mode Display Mode setting works only when the TV Aspect mode is set to “4:3”. -
Page 20: Audio
Select Exit Dolby Digital / DTS / MPEG Bitstream: Select “Bitstream” if you connect the DVD Player’s DIGITAL OUT jack to an amplifier or other equipment with a Dolby Digital, DTS or MPEG decoder. PCM (for Dolby Digital / MPEG): Select when connected to a two-channel digital stereo amplifier. -
Page 21: Lock (Parental Control)
Initial Setting (Continued) LOCK (Parental Control) LOCK Rating Unlock Password Area code Move Select Exit Rating Some movies contain scenes that may not be suitable for children to view. Many of these discs contain parental control information that applies to the complete disc or to certain scenes on the disc. - Page 22 Initial Setting (Continued) Password You can create or change password. 1. Select Password on the LOCK menu then press B. The “Change” is highlighted 2. Press ENTER then the password window will appear. 3. To make a new password: When the “New Password” section is highlighted, enter a 4-digit password using the numbered buttons then press ENTER.
-
Page 23: Others
You can set up the DVD Player so a DVD disc automatically starts playing whenever the DVD is inserted. If Auto Play mode is set to On, this DVD player will search for title that has the longest playback time and then play back the title automatically. -
Page 24: General Feature
General Feature On-Screen Display Some items can be changed using the menu. 1. Press DISPLAY during playback. 2. Press to select an item. b /B The selected item is highlighted. 3. Press v / V to change the setting. Press ENTER. You can also use the number buttons if appropriate (e.g. -
Page 25: Search
General Feature Search 1. Press and hold SKIP/SEARCH . or > for about two sec- onds during playback. The player will now go into SEARCH mode. 2. Press and hold SKIP/SEARCH . or > repeatedly to select the required speed: (backward) or X16, X100 (forward). -
Page 26: Repeat A-B
Screen Saver The screen saver appears when you leave the DVD player in Stop mode for about five minutes. If the Screen Saver is displayed for five minutes, the DVD Player automatically turns itself off. -
Page 27: Playing An Audio Cd And Mp3/Wma Disc
• They should not contain special letters such as / ? * : “ < > l etc. • The total number of files on the disc should be less than 648. This DVD player requires discs and recordings to meet certain technical standards in order to achieve optimal playback quality. Pre-recorded DVDs are automatically set to these standards. -
Page 28: Audio Cd And Mp3/Wma Disc Features
Playing an Audio CD or MP3/WMA Disc Audio CD and MP3 / WMA Disc Features Pause 1. Press PAUSE during playback. 2. To return to playback, press PLAY, ENTER or press PAUSE again. Moving to another Track 1. Press SKIP ( ) briefly during playback to go to the >... -
Page 29: Viewing A Jpeg Disc
• Depending upon the size and number of JPEG files, it could take a long time for the DVD player to read the disc’s contents. If you don’t see an on-screen display after several minutes, some of the files may be too large —... -
Page 30: Programmed Playback
Programmed playback The program function enables you to store your favorite tracks from any disc in the player memory. A program can contain 30 tracks (Audio CD, MP3/WMA). 1. Insert a disc. (Audio CD, MP3 or WMA.) 2. Press v / V to select the desired file. 3. -
Page 31: Maintenance And Service
Do not use strong solvents such as alcohol, benzine, or thinner, as these might damage the surface of the unit. Maintaining the Unit The DVD player is a high-tech, precision device. If the optical pick-up lens and disc drive parts are dirty or worn, the picture quality could be diminished. -
Page 32: Language Code List
Language Code List Language Code Language Abkhazian 6566 Fiji Afar 6565 Finnish Afrikaans 6570 French Albanian 8381 Frisian Ameharic 6577 Galician Arabic 6582 Georgian Armenian 7289 German Assamese 6583 Greek Aymara 6588 Greenlandic Azerbaijani 6590 Guarani Bashkir 6665 Gujarati Basque 6985 Hausa Bengali;... -
Page 33: Area Code List
Area Code List Choose an area code from this list. Area Code Area Afghanistan Ethiopia Argentina Fiji Australia Finland Austria France Belgium Germany Bhutan Great Britain Bolivia Greece Brazil Greenland Cambodia Heard and McDonald Islands Canada Hong Kong Chile Hungary China India Colombia... -
Page 34: Troubleshooting
• Adjust the brightness. • Select the appropriate video input mode on the TV so the picture from the DVD player appears on the screen. • Select the correct input mode of the audio receiver so you can listen to the sound from the DVD player. -
Page 35: Specifications
Specifications DVD Player Power supply: DC 9.5V (AC adapter terminal), DC 7.4V (Battery) Power consumption: 12W with battery Weight: 1.6 lbs (0.74 kg) (without battery pack) External dimensions (W x H x D): 7.5 x 6.8 x 1.5 inches (191 x 174 x 39 mm)