
Related Manuals for LG LAN9700R


Summary of Contents for LG LAN9700R
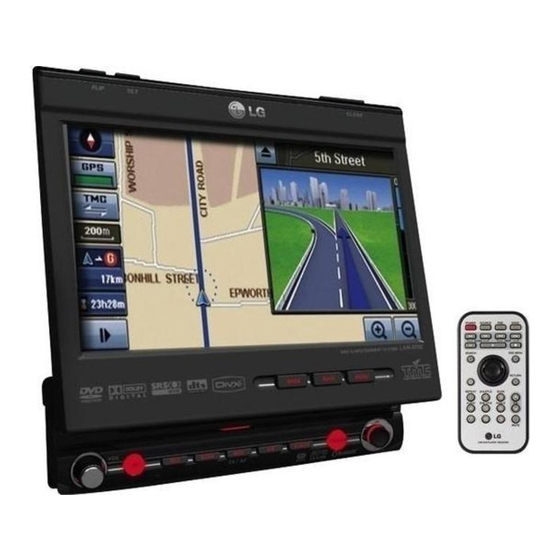
- Page 1 LAN9700R.DGBRLLR_LGEUK_ENG_MFL37340895 LAN9700R In Dash Navi & Infotainment System ENGLISH with Bluetooth Read the manual carefully before using the unit.
-
Page 2: Safety Notes
Safety notes CAUTION RISK OF ELECTRIC SHOCK DO NOT OPEN CAUTION : TO REDUCE THE RISK OF ELECTRIC SHOCK DO NOT SPLIT COVER(OR BACK) NO USER SERVICEABLE PARTS INSIDE. REFER SERVICING TO QUALIFIED SERVICE PERSONNEL. To reduce the risk of fire or electric The lightning flash with the shock, do not expose this product to arrowhead symbol, within an... -
Page 3: About This Unit
Safety notes About this unit Before installing the unit • This product is for vehicles with a 12-volt battery and negative earthing. Check the battery voltage of your vehicle before installation. • To avoid shorts in the electrical system, be CAUTION : sure to disconnect the (–) battery cable This product uses a Laser System. -
Page 4: Types Of Playable Discs
Safety notes Types of Playable Discs Precautions of handling discs and player DVD (12 cm disc) • A defective or soiled disc inserted into the unit can cause sound to Video CD (VCD) (12 cm disc) drop during playback. • Handle the disc by holding its innerouter edges. - Page 5 Safety notes About the Symbol Display NOTES ON COPYRIGHTS When you are watching a DVD and attempt to It is forbidden by law to copy, broadcast, perform an operation, it may not be performed show, broadcast via cable, play in public, or due to the programming on the disc.
-
Page 6: Table Of Contents
Table of contents Control panel/Monitor ..........8 Remote control . - Page 7 Table of contents DVD/VCD operation ......... . .46-48 Playing a DVD/VCD disc .
-
Page 8: Control Panel/Monitor
Control Panel/Monitor 11. RDS • Selects the TA on/off. (Press a short time.) • Selects the AF on/off. (Press a long time.) 12. EQ Selects various equalizer curves. 13. EJECT 10 11 12 13 1617 Ejects a disc from the unit. 14. -
Page 9: Remote Control
Remote Control 4. v v /V V /b b /B B (up/down/left/right) Selects an item in the menu. ENTER Confirms menu selection. 5. 0-9 number buttons • Selects numbered items in the menu. • Selects a stored radio station frequency (1-6). -
Page 10: Accessories
Remote Control / Accessories Accessories Install the battery of remote control Protective Case Pull the tray on the back of battery of remote control outward with a pencil or ball point pen Remote Control and insert the battery with the plus (+) minus (-) poles pointing in the proper direction. -
Page 11: Connection
Connection Connecting the system Vehicle connector Power cord Yellow TO BATTERY (+)- To the car battery, continuos +12 V DC. Blue POWER ANTENNA- To the power antenna Orange DIMMER- This lead is for the dimmer line connection. TO IGNITION- To the terminal from which the power is supplied when the ignition switch is set to ACC. -
Page 12: Connecting To Serarately Sold Auxiliary Device
Connection Connecting to serarately sold auxiliary device To VIDEO IN To VIDEO OUT Auxiliary Device AUX V (CAR TV, etc) (AUX Video) AUX-R (Sold seperately.) To AUDIO IN (AUX Right) To AUDIO OUT AUX-L (AUX Left) To VIDEO IN Rear view camera CAM V (Sold seperately.) To VIDEO OUT... -
Page 13: Connecting The Radio Antenna Of The Vehicle
Connection Connecting the radio antenna of • The GPS antenna is installed with a magnet. When installing the GPS antenna, be care- the vehicle ful not to scratch the vehicle body. Connect the radio antenna of the vehicle to • Do not paint the GPS antenna, as this may the antenna jack of the unit. -
Page 14: Connecting To A Rear View Camera
Connection Connecting to a rear view camera When using the unit with a rear view camera, automatic switching to video from a rear view camera is possible when the gearshift is moved to REVERSE (R) position. Rear view mode also allows you to check what is behind you while driving. Notes •... -
Page 15: Installation
Installation ISO-DIN Installation Basic installation 1. Slide the unit into the ISO-DIN frame. Before installing, make sure that the ignition- 2. Install screws removed from the old unit. switch is set to OFF and remove the terminal 3. Slide the unit and frame into the dash of the car battery to avoid short-circuiting. -
Page 16: Basic Operation
Basic operation Turning the unit on Mute Press the “VOL” knob while listening to any Press any other buttons (POWER on the source. remote control) except or EJECT button To resume the previous volume level, press on the control panel. the button again. -
Page 17: Selecting A Eq (Equalizer)/ Rear Seat Entertainment
Basic operation Selecting a EQ (Equalizer) Rear Seat Entertainment Press the “EQ” button repeatedly to select a You can output any other sources via front equalizer. monitor when you are playing a disc via The mode switches as follows. monitor for rear seat connected to RSE OUT. FLAT t POP t CLASSIC t ROCK t 1. -
Page 18: Selecting A Source With Remote Control/ Selecting A Source On The Screen
Basic operation Selecting a source with remote : Touch when you want to play an auxiliary device. control : Touch when you don’t want to Press SRC (SOURCE on the remote control) select a source. (A Time, date and repeatedly to select a source. day appear on the screen.) The mode switches as follows. - Page 19 Basic operation SCREEN Language There are seven kinds of screen menu : You can set the display language. Brightness/Contrast, Change Color, Adjust Dimmer, Language, Clock, Setback, Rear Camera Touch the language button you want. Note Brightness/Contrast to scroll up or down one page You can set the brightness and contrast of if necessary.
- Page 20 Basic operation Rear Camera User Equalizer You can adjust the sound modes and store your own adjustments in memory. • On: The rear view through the rear view camera is automatically displayed on the monitor when the rear gear is Touch to adjust the level of each applied.
- Page 21 Basic operation • : Confirm the entered code. There are four kinds of DVD menu: • : Delete the previous character at the DVD Language, Aspect Ratio, Lock, DivX cursor position. Registration • : Cancels the functions. Aspect Ratio Select the monitor type of your unit to play a DVD recorded with an aspect ratio of 16:9.
- Page 22 Basic operation Lock You can secure the device against unautho- 1. Touch the v or V buttons to select the rized use by assigning a password. In addi- area code. tion, you can specify a rating level. If you set See page 59 to find the area code.
-
Page 23: Basic Operation
Basic operation TA Mode There are two kinds of RDS menu: PI Mode, TA Mode When the newly tuned station does not receive TP information for 5 seconds, the PI Mode receiver retunes to the next station which has the same TP information as well as the same PI as the last station. -
Page 24: Getting Started With Navigation
Getting started with navigation 4. Select a destination by simply touching What is GPS? and dragging the map on the screen and The Global Positioning System (GPS) is a the cross hairs arrears on the screen. satellite-based navigation system made up of a network of 24 satellites placed into orbit by Current position the U.S. - Page 25 Getting started with navigation Finding the registered the destination Guide mode Touch on the screen. (Refer to the 1. Press “NAVI MENU” button on the map step 6 on the page 24.) screen. Mode in which guidance is given as you drive 2.
- Page 26 Getting started with navigation Simulation mode 3. Touch Touch on the screen. “WHOLE ROUTE OVERVIEW” screen appears on the screen. This is a demonstration function for shops. After a route is set, the simulation of the route guidance to a destination is automatically dis- played.
-
Page 27: Indicators Of The Map Screen
Getting started with navigation Indicators of the map screen GPS status indicator You can check reception signals from the GPS satellite, such as information about your satellite fix, latitude, longitude and speed of your car. The current location of your vehicle The arrow icon (or car icon) indicates your heading, and the display moves automatically as you drive. -
Page 28: Getting Started With Navigation
Getting started with navigation A communication system for Arriving time to the destination informing drivers of the latest traf- fic information using FM multiplex Remaining time to the destination broadcast. Information such as traffic jams or A speed limit on the road that accidents can be checked on the you’re driving now. -
Page 29: Navigation Menu
Navigation menu Navigation menu list General operations of naviga- tion menu 1. Turn the unit on. 2. Press OPEN/CLOSE to open the monitor. 3. Press NAVI MENU. The navigation menu appears. 4. Touch , or to select the desired option and the menu moves to the second level. -
Page 30: Dest. (Destination)
Navigation menu DEST. (DESTINATION) Touch Drive in accordance with the screen and You can seach the destination by selecting voice information. the registered location. Favorites You can register the location up to 100 in the “Favorites” menu. You can find the registered destination by using the “Favorites”... - Page 31 Navigation menu POI Search Searching the POI near the point you set 1. Touch The POI list is a collection of hundreds of interesting or useful places organized by easy-to-find categories. Information about various facilities (Points of Interest POI), such as gas stations, amuse- ment parks or restaurants is available.
- Page 32 Navigation menu Name search 3. Touch the desired items. You can search the POI within the selected region. You can search a city. 1. Touch You can search the address in city, street , house number order. You can search the address in postcode, city, street, house number order.
-
Page 33: Route
Navigation menu 2. Touch the desired items. Finding User1/ User2 location After you set your User1/User2 location, you can route to it at any time. 1. Press NAVI MENU. You can set the current position to home/ User1/ User2. 2. Touch DEST. > User1/User2. You can set the address you search to home/ User1/ User2. - Page 34 Navigation menu Route Summary Note Press NAVI MENU. > Touch ROUTE > Route The avoid function is used to search for a Summary. path to avoid Tolls, Motorways and Ferry The “TURN BY TURN SUMMARY” screen crossings. appears on the screen. However, Toll, Motorways and Ferry may be included in some paths where bypass to the destination is severe.
-
Page 35: Rds Tmc
Navigation menu RDS TMC You can set the address you search to You can check traffic information transmitted way point. by the FM radio service through the Radio Data System (TMC) on the display. Such traf- You can set the POI you search to way fic information is updated periodically. - Page 36 Navigation menu Display Icons Notes The name of the displayed traffic information • A line indicates the length of the traffic jam. items and list of icons appears on the screen. It appears only when the scale on the map 1.
-
Page 37: Setup
Navigation menu SETUP Volume You can set the sound volume for navigation. Map Display • Dimension Touch buttons to change the guid- 2D: The 2D view is the straight-forward ance volume. two-dimensional view. This is the Mute : Mutes navigation volume. default map view. -
Page 38: Navigation Menu
Navigation menu Color Display Note You can set the background color. You can listen to the voice about road name only when the language set for TTS and the nation that you’re driving now. The voice information and its pronunciation may not be correct or be played back with low quality. -
Page 39: Bluetooth Operation
Bluetooth operation Understanding Bluetooth 3. Touch The “ ” pop-up wireless technology screen appears on the screen. Bluetooth wireless technology establishes a wireless link between two devices, such as your phone and the unit. The first time you use two devices together you must connect them by establishing a relationship using a PIN code. -
Page 40: Disconnecting/Connecting Again The Bluetooth Phone
Bluetooth must be turned on in your phone. displayed when answering calls. Refer to your phone’s user guide. • If connecting through LAN9700R, initiate the 1. Enable the phone’s Bluetooth component. hands-free connection first. If your Bluetooth This might be in a menu called Settings, phone does not support the hands-free con- Bluetooth, Connections, or Hands-free. -
Page 41: Making A Call With Phone Number/ Switching The Sound Path During A Call
Bluetooth operation Making a call with phone Making a call with speed dial numbers number To make a call from a speed dial numbers, Connect your unit and bluetooth phone before press for a long after pressing the you make a call. speed dial number assigned to the Bluetooth 1. -
Page 42: Answering Calls/ Using Your Phone Book
Bluetooth operation Answering calls Searching the phone number You can search a contacts entry you want. 1. When you receive a call, your phone rings 1. Touch on the “PHONE BOOK” and the “Call from” pop-up screen is dis- screen. played on the screen. - Page 43 Owner’s manual.) 3. Press “Sending the phone number” in Bluetooth phone. 4. The telephone number is transmitted to the LAN9700R from the Bluetooth phone. 2. Touch . And then change the informa- tion. Note This is only available for on the “PHONE Note BOOK”...
-
Page 44: Setup
Bluetooth operation SETUP - Info. (Information) Touch and the pop-up screen displays You can make various adjustments to items in the screen. by using the setup menu. 1. Press the PHONE ( ) button on the control panel. And then Touch The “SETUP”... -
Page 45: Bluetooth Operation
Mic Volume ( Adjust the microphone volume by touching Show ( )/ Hide ( You can select whether bluetooth phones are able to search the LAN9700R or not. Note Touch the button in the current screen to exit previous screen. -
Page 46: Dvd/Vcd Operation
DVD/VCD operation This is available only for Playing a DVD/VCD disc 1. Touch the screen in the menu screen. The disc is drawn in, and “Disc reading” appears on the display window, and playback starts automatically. If playback does not start, touch the screen and then touch 2. -
Page 47: Still Picture And Frame-By-Frame Playback/ Slow Motion
DVD/VCD operation Still picture and frame-by-frame play- MENU back The menu may contain camera angles, spo- ken language, subtitle options and chapters 1. Press (X on the remote control) during for the title. playback. 1. Touch the screen during playback. The unit will now go into the PAUSE mode. -
Page 48: Repeat/ Audio/ Subtitle/ Angle/Using
DVD/VCD operation REPEAT ANGLE Touch the “ ” button during playback. Touch the “ ” button during playback. The menu item changes as follows. If the disc contains multi-angle views, you can OFF t CHAPTER t TITLE... change to a different camera angle during ALL t TRACK t ALL... -
Page 49: Divx Operation
DivX operation Play Playing a DivX disc The disc is drawn in, and “Disc reading” Touch the button to start playback. appears on the display window, and playback starts automatically. Stop If playback does not start, touch the screen Touch the button to stop. -
Page 50: Slow Motion/ Search/ Repeat/ Audio/ Subtitle
DivX operation Slow motion SUBTITLE Touch the “ ” button during playback. 1. Press (X on the remote control) during If the disc contains multi-subtitle languages, playback. you can change to a different subtitle lan- The unit will now go into the PAUSE mode. guage during playback. -
Page 51: Cd/Mp3/Wma Operation
CD/MP3/WMA operation Skip to the previous track/file Playing an audio CD and Touch briefly the button within 4 seconds MP3/WMA disc of playing time. The disc is drawn in and play starts automati- cally. Return to the beginning of the current track/file Touch briefly the button after 5 seconds of... -
Page 52: Scan/ Repeat/ Shuffle
CD/MP3/WMA operation SCAN Locating a folder/file using the list You can display the folder list/file list before This is available only for starting to play. Touch the “ ” button during playback. This is available only for The item changes as follow. 1. -
Page 53: Photo Operation
Photo operation Locating a folder/file using the list Playing photo files The Photo viewer lets you view pictures from You can display the folder list/file list before your device. This application recognizes JPG starting to play. files. 1. Touch the “ ”... -
Page 54: Radio (Rds) Operation
Radio (RDS) operation The selected preset station has been stored Listening to the radio stations in memory. 1. Press the “SRC” button to select the radio. 2. Press the “BAND” repeatedly to select a 4. Repeat steps 1 and 3 to preset other sta- band. -
Page 55: Af (Alternative Frequency)/ Ta (Traffic Announcement Identification)
Radio (RDS) operation AF (Alternative frequency) 3. Touch one of your favorite program types. 4. Touch one of your favorite PTY code When the reception quality drops, the tuner name. automatically changes to another station in 5. “PTY SEARCH” appears on the screen. the network, broadcasting a better reception 6. -
Page 56: Troubleshooting
Troubleshooting Cannot identify the current loca- Cannot see the map. tion. (GPS not receiving) Perhaps you cannot see the map even when you have executed the navigation menu. GPS cannot be used indoors and must be This happens when the data within the memo- connected to a power source with ACC in a ry is damaged. - Page 57 This is called 2. Download *.lgsf (charged). map matching. 3. Turn the ignition switch off. 4. Separate the front panel of LAN9700R and then SD card on the left. With map matching. With no map matching.
- Page 58 Troubleshooting Symptom Cause Correction Leads and connector are not Confirm once more that all Power doesn’t turn on. properly connected. connections are correct. The fuse is blown. Rectify the problem that caused The unit doesn’t operate. the fuse to blow, and then replace it.
-
Page 59: Language Codes/Area Codes
Language Codes/Area Codes Language Codes Use this list to input your desired language for the following initial settings: Disc Audio, Disc Subtitle, Disc Menu. Language Code Language Code Language Code Language Code Abkhazian 6566 Fiji 7074 Lingala 7678 Singhalese 8373 Afar 6565 Finnish... -
Page 60: Bluetooth Phone Compatibility List
Bluetooth phone compatibility list • If even a phone as described in this list meets requirements of Bluetooth Hand-free Profile 1.0 and Object Push Profile 1.1, it can operate. However, it is noted that we cannot assure for operation by function. •... - Page 61 Bluetooth phone compatibility list Phone Dialing Remarks Manufacturer Model Nokia Note4 Nokia Note4 Nokia Note4 Nokia Note4 Note4 Nokia Nokia Note4 Nokia Note4 Nokia 3650 Note4 Nokia 6103 Note8, Note4 Note4 Nokia 6131 Nokia 6230 Note4 Nokia 6230i Note4 Nokia 6280 Note7, Note4 Nokia...
-
Page 62: Bluetooth Phone Compatibility List
Bluetooth phone compatibility list Phone Dialing Manufacturer Model Remarks Sony Erricson P990i Sony Erricson T610 Sony Erricson W710i Sony Erricson K800i Sony Erricson W85Oi Sony Erricson T610 Sony Erricson Z600 Sony Erricson S700i Sony Erricson K700i Sony Erricson V800 Simens SL75 Note12 Simens... -
Page 63: Specifications
Specifications GENERAL Output Power ....................50W x 4CH (Max.) Power Source ........................DC 12V Speaker impedance ........................4 Ω Ground System ......................Negative Dimensions (W x H x D)..................180 x 53 x 198 mm Net Weight ........................2.37 kg DISPLAY LCD ........................7 inch TFT LCD Resolution ........................480 X 234 Back Light ........................LED type CD/DVD/VCD SECTION... -
Page 64: Support-Hotline
* For the latest Call Center numbers, please visit Website (www.lge.com) “The Bluetooth word mark and logos are owned by the Bluetooth SIG, Inc. and any use of such marks by LG Electronics is under license. Other trademarks and trade names are those of their respective owners.”...