Table of Contents
Advertisement
Quick Links
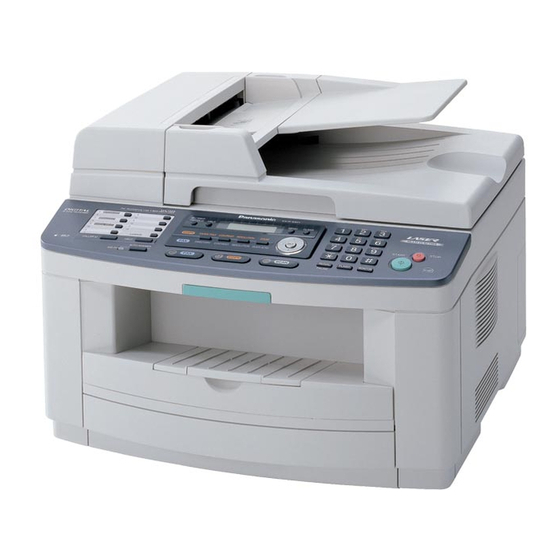
This pictured model is KX-FLB813.
Please read these operating instructions
before using the unit and save for future
reference.
This unit is compatible with Caller ID. To
use this feature, you must subscribe to
the appropriate service of your service
provider.
Operating Instructions
Laser Fax with Separator
KX-FLB813FX
Model No.
Flat-Bed Multi-Function Laser Fax
KX-FLB803FX
Model No.
Flat-Bed Multi-Function
Advertisement
Table of Contents

Related Manuals for Panasonic KX-FLB803FX


Summary of Contents for Panasonic KX-FLB803FX
-
Page 1: Operating Instructions
Laser Fax with Separator KX-FLB813FX Model No. This pictured model is KX-FLB813. Flat-Bed Multi-Function Laser Fax KX-FLB803FX Model No. Please read these operating instructions before using the unit and save for future reference. This unit is compatible with Caller ID. To... - Page 2 Location of Controls How to use the operating instructions When following operating instructions, always keep the front cover page (next page) open for easy reference to the buttons. OPEN...
-
Page 3: Location Of Controls
Location of controls Please keep this page open when following operating instructions. For a description of each button, see page 10. Buttons (Listed in alphabetical order) BROADCAST B HELP N RESOLUTION G CALLER ID L LOWER D SCAN R COLLATE E MANUAL BROAD C SET Q CONTRAST F... - Page 4 L Most figures shown in these operating instructions are based on a KX-FLB813. Declaration of Conformity: L Panasonic Communications Co., Ltd. declares that this equipment is in compliance with the essential requirements and other relevant provisions of Radio & Telecommunications Terminal Equipment (R&TTE) Directive 1999/5/EC.
-
Page 5: Important Information
Important Information C. If the unit has been exposed to rain or Important Information Safety Instructions water. Important safety D. If the unit does not work normally by following the operating instructions. instructions Adjust only controls covered by the When using this unit, basic safety precautions operating instructions. - Page 6 Important Information Laser radiation contents, and seek immediate medical treatment. L The printer of this unit utilises a laser. Use of – If any toner comes into contact with your controls or adjustments or performance of eyes, flush them thoroughly with water, procedures other than those specified herein and seek medical treatment.
- Page 7 Important Information – Bank and government bonds and securities Information on Disposal – Passports and identification cards – Copyright material or trademarks without for Users of Waste the consent of the owner Electrical & Electronic – Postage stamps and other negotiable instruments Equipment (private This list is not inclusive and no liability is...
-
Page 8: For Best Performance
This may abrasive powder. affect print quality. Moving the unit L For optimal performance, genuine Panasonic L The unit weights approximately 16 kg. It is toner cartridges and drum units are highly recommended that two people handle recommended. -
Page 9: Table Of Contents
Table of Contents 1. Introduction and on another fax machine)....40 1. Table of Contents 4.10 Junk fax prohibitor (preventing fax Installation reception from undesired callers) ..40 Accessories Included accessories......9 5. Caller ID Accessory information ......10 Finding the Controls Caller ID service ....... -
Page 10: Table Of Contents
Table of Contents 9. Programmable Features Features Summary Programming ........61 Basic features........62 Fax features........64 Copy features ........68 10.Help Error Messages 10.1 Error messages – Reports ....69 10.2 Error messages – Display ....70 Troubleshooting 10.3 When a function does not work, check here .......... -
Page 11: Introduction And Installation
1. Introduction and Installation 1 Introduction and Installation 1.1 Included accessories Item Quantity Notes Power cord ---------- Telephone line cord ---------- Handset ---------- Handset cord ---------- Handset cradle ---------- Output tray KX-FLB813 only Document tray ---------- Drum unit See page 95. Toner cartridge prints about 800 A4-sized pages with a 5% (starter toner cartridge) -
Page 12: Accessory Information
1.2 Accessory information 1.3 Description of buttons To ensure that the unit operates properly, we L Keep the front cover page open for button recommend the use of a Panasonic toner locations. cartridge and drum unit. See page 94 for Station keys specifications. -
Page 13: Overview
1. Introduction and Installation {HELP} L To print helpful information for quick 1.4 Overview reference (page 24). {FAX} 1.4.1 Front view L To switch to the fax mode (page 23, 31). KX-FLB813 {COPY} L To switch to the copy mode (page 23, 47). {SET} L To store a setting during programming. -
Page 14: Installation
1. Introduction and Installation 1.4.2 Rear view A Recording paper guides B Speaker C USB interface cover D Manual input tray E Telephone line jack F External telephone jack G Power inlet Removing the shipping tape Remove the shipping tape (1) and pad (2). * The shipping tape on the output tray is for KX- FLB803. -
Page 15: Toner Cartridge And Drum Unit
1. Introduction and Installation Place the toner cartridge (1) into the drum Installation unit (2). 1.5 Toner cartridge and drum unit The included toner cartridge is a starter toner cartridge. It will print about 800 A4-sized pages with a 5 % image area (page 94). L To replace the toner cartridge and the drum unit, see page 79. - Page 16 1. Introduction and Installation Make sure that the triangles (1) match to Install the drum and toner unit (1) by holding install the toner cartridge correctly. the tabs. Lift the top cover release lever (1) and open the top cover (2). L Make sure that the triangles (2) match to Important: install the drum and toner unit correctly.
-
Page 17: Document Tray
1. Introduction and Installation Caution: L To prevent injuries, be careful not to 1.7 Output tray put your hands under the top cover. KX-FLB813 has 2 pieces of output tray and KX- FLB803 has 1 output tray pre-installed. Note: L Do not place the unit in an area where the output tray may be easily bumped into. - Page 18 1. Introduction and Installation Pull the output tray extender (1) forward 1.7.2 For KX-FLB803 users gently until it clicks into place, then press the Pull the output tray extender (1) forward gently centre part of the extender (2) to open. until it clicks into place, then press the centre L Repeat from step 1 to install the upper part of the extender (2) to open.
- Page 19 1. Introduction and Installation ■ KX-FLB803 2. Slide the other tab (1) into the right hole (2) of the extender from below until it clicks into 1. Line up the extender (1) with the left side of place. the output tray. Make sure that the triangles (2) match to attach the extender correctly.
-
Page 20: Recording Paper
1. Introduction and Installation Before loading a stack of paper, fan the paper to prevent paper jams. 1.8 Recording paper 1.8.1 Using the paper input tray A4, letter or legal size recording paper can be used. The paper input tray unit can hold: –... - Page 21 1. Introduction and Installation Insert the paper input tray into the unit. 1.8.2 Using the manual input tray You can print not only on plain paper but also on special media (transparencies / labels / envelopes). The manual input tray is used only for printing with the computer (page 53) and can hold one page at a time.
-
Page 22: Handset Unit
1. Introduction and Installation Insert the paper, print-side down (1) until Connect the handset connecter (1) to the the unit grasps the paper and a single beep handset unit connection jack (2). is heard. L Adjust the width of the guides (2) to the size of the recording paper. - Page 23 1. Introduction and Installation 2. Remove the tab (1) from the slot (2) on the unit and disconnect the handset connector (3).
-
Page 24: Preparation
2. Preparation L If you use the unit with a computer and your 2 Preparation Connections and Setup internet provider instructs you to install a filter 2.1 Connections (5), please connect it as follows. Caution: L When you operate this product, the power outlet should be near the product and easily accessible. -
Page 25: Dialling Mode
2. Preparation 2.2 Dialling mode 2.3 Selecting the operation mode If you cannot dial (page 30, 31), change this setting according to your telephone line service. (Fax/Copy/Scan) {MENU} This unit has three operation modes. You can select the desired mode by pressing one of the following buttons. -
Page 26: Help Function
2. Preparation Help Button 2.4 Help function 2.5 Adjusting volume The unit contains helpful information which can Before adjusting volume, set the operation mode be printed for quick reference. to the fax mode (page 31) or the copy mode – “BASIC SETTINGS”: (page 47). -
Page 27: Date And Time
2. Preparation L The accuracy of the clock is approximately ±60 seconds a month. 2.6 Date and time L After setting the date and time, if the unit is in the copy mode, change it to the fax mode by You must set the date and time. -
Page 28: Your Logo
2. Preparation Keypad Characters 2.7 Your logo T U V t u v 8 The logo can be your name or the name of your W X Y Z w x y z 9 company. 0 ( ) < > ! "... - Page 29 2. Preparation 4. Press {5} 3 times. LOGO=Bi| To correct a mistake Press {<} or {>} to move the cursor to the incorrect character, and make the correction. To delete a character Press {<} or {>} to move the cursor to the character you want to delete and press {STOP}.
-
Page 30: Your Fax Number
2. Preparation 2.8 Your fax number {STOP} {MENU} {SET} {FLASH} {<}{>} Press {MENU}. SYSTEM SETUP PRESS [( )] Press {#}, then {1}{0}{3}. YOUR FAX NO. PRESS SET Press {SET}. L The cursor (|) will appear on the display. NO.=| Enter your fax number, up to 20 digits. Example: NO.=1234567| L To enter a “+”, press {*}. -
Page 31: Telephone
3. Telephone Note: 3 Telephone Automatic Dialling L A hyphen or a space entered in a telephone 3.1 Storing items for the number counts as 2 digits. one-touch dial feature and To correct a mistake navigator directory Press {<} or {>} to move the cursor to the incorrect character/number, and then make the For rapid access to frequently dialled numbers, correction. -
Page 32: Making A Phone Call Using One-Touch Dial Feature Or Navigator Directory
3. Telephone 3.1.3 Editing a stored item Select the desired station key. For stations 1–7: Press {DIRECTORY}. Press the desired station key. Press {V} or {^} repeatedly to display the For stations 8–14: desired item. Press {LOWER}, then press the desired Press {MENU}. -
Page 33: Fax
4. Fax If the {FAX} light is OFF, turn it ON by 4 Fax Sending Faxes pressing {FAX}. 4.1 Using the unit as a fax Adjust the width of the document guides (1) machine to fit the actual size of the document. Insert the document (up to 40 pages) FACE 4.1.1 Entering the fax mode UP into the feeder until a single beep is... -
Page 34: Using The Scanner Glass
4. Fax the data. If the document exceeds the To select the contrast memory capacity, transmission will be You can adjust this setting depending on the cancelled. You must send the entire darkness or lightness of the document. 5 levels document manually. -
Page 35: Document Requirements
4. Fax If necessary, change the following settings Effective scanning area according to the type of document. L Shaded area will be scanned. L To select the resolution, see page 31. L To select the contrast, see page 32. 5 mm Dial the fax number. -
Page 36: Sending A Fax Using One-Touch Dial Feature And Navigator Directory
4. Fax must be less than 10 mm. If the documents exceed the capacity of the auto document 4.4 Sending a fax using feeder, they may fall or cause a jam in the feeder. one-touch dial feature and L Do not set the following types of documents navigator directory when using the auto document feeder: (Make a copy of the document using the scanner... -
Page 37: Broadcast Transmission
4. Fax 4. Press {QUICK SCAN} to scan the document into memory. 4.5 Broadcast 5. Place the next page. transmission 6. Press {SET}. L To send more pages, repeat steps 5 and By storing one-touch dial and navigator directory items (page 29) into the broadcast memory, you 7. - Page 38 4. Fax Press {SET} after programming all of the Press {STOP} to exit. desired items. 4.5.4 Sending the same L To program another broadcast key, document to pre-programmed repeat steps 2 to 5. parties Press {STOP} to exit. L Make sure that the {FAX} light is ON. Note: L Confirm the stored items by printing a Insert the document FACE UP into the...
-
Page 39: Receiving A Fax Automatically - Auto Answer On
4. Fax To cancel broadcast transmission 4.6 Receiving a fax 1. Press {STOP} repeatedly until “SEND CANCELLED?” is displayed. automatically – Auto 2. Press {SET}. answer ON Receiving Faxes 4.6.1 Activating FAX ONLY mode Press {FAX AUTO ANSWER} repeatedly to display the following. -
Page 40: Receiving A Fax Manually - Auto Answer Off
4. Fax How to receive faxes with an extension 4.7 Receiving a fax telephone If you have another telephone connected to the manually – Auto answer [EXT] jack or the same line (extension telephone), you can use the extension telephone to receive faxes. -
Page 41: Using The Unit With An Answering Machine
4. Fax When a fax calling tone is detected The unit receives the fax automatically 4.8 Using the unit with an without ringing. When a fax calling tone is not detected answering machine A The unit will ring 3 times. You may answer the call. -
Page 42: Receive Polling
4. Fax Receiving a voice message and fax document in one call 4.10 Junk fax prohibitor The caller can leave a voice message and send a fax document during the same call. Inform the (preventing fax reception caller of the following procedure beforehand. from undesired callers) 1. - Page 43 4. Fax To display the junk fax prohibitor list 1. Press {MENU} repeatedly to display “JUNK FAX PROH.”. 2. Press {>} repeatedly to display “JUNK LIST DISP.”. 3. Press {SET}. 4. Press {V} or {^} to display the items on the list.
-
Page 44: Caller Id
5. Caller ID – “LONG DISTANCE”: The caller made a 5 Caller ID long distance call. 5.1 Caller ID service To confirm caller information by printing This unit is compatible with the Caller ID the Caller ID list service offered by your local telephone –... -
Page 45: Viewing And Calling Back Using Caller Information
5. Caller ID L When no calls have been received, the display will show “NO CALLER DATA”. 5.2 Viewing and calling To stop viewing back using caller Press {STOP} after step 2. information 5.2.1 Editing a caller’s telephone You can easily view caller information and call number before calling back back. -
Page 46: Storing Caller Information
5. Caller ID 5.2.2 Erasing all caller 4. Press {SET}. information For stations 4–7: 1. Press the desired station key. Press {MENU} repeatedly to display 2. Press {SET}. “CALLER SETUP”. For stations 8–14: Press {SET}. L “CALL LIST ERASE” will be displayed. 1. -
Page 47: Distinctive Ring Service From Your Phone Company
6. Distinctive Ring If the incoming call is for the phone number, the 6 Distinctive Ring unit will keep on ringing. 6.1 Distinctive Ring service from your phone 6.3 Using three or more company phone numbers on a This service is convenient if you wish to have a single telephone line different number for your fax machine and telephone, even when you use them on a single... -
Page 48: Programming The Ring Pattern Assigned For Fax
6. Distinctive Ring 6.4 Programming the ring pattern assigned for fax L Keep the front cover page open for button locations. Set feature #430 to “ON” (page 45). Press {MENU}. Press {#}, then {4}{3}{1}. Press {1} to {5} to select the ring pattern assigned for fax. -
Page 49: Copy
7. Copy 7 Copy 7.1 Using the unit as a 7.2 Making a copy copy machine 7.2.1 Using the auto document feeder 7.1.1 Entering the copy mode L Confirm that there are no documents on Before copying, set the operation mode to the the scanner glass. - Page 50 7. Copy 7.2.2 Using the scanner glass To stop copying L Confirm that there are no documents in Press {STOP}. the auto document feeder. To select the resolution 1. Press {RESOLUTION}. 2. Press {V} or {^} repeatedly to select the desired resolution.
-
Page 51: More Copying Features
7. Copy 7.3.2 To reduce a document 7.3 More copying features Set the original. L Keep the front cover page open for button Press {ZOOM}. locations. Press {V} repeatedly to select from “95%” to L Make sure that the {COPY} light is ON. “50%”... - Page 52 7. Copy Example: Making 2 copies of a 4-page original document Collated pages Uncollated pages Note: L The unit will store the documents into memory while collating the copies. The maximum number of original document for collating copies depends on the contents of pages, resolution and contrast.
-
Page 53: Multi-Function Station Software
Remove the USB interface cover (1). 8 Multi-Function Station software Setup 8.1 Connecting to a computer Panasonic Multi-Function Station software enables the unit to carry out the following functions: – Printing on plain paper, transparencies, labels and envelopes Connect the USB cable (1) to the USB port. - Page 54 You need to add the printer driver for each unit, Explorer and look for the CD-ROM drive.) as follows. Click [Start], then select [All Programs] or [Programs] → [Panasonic] → [KX- FLB800_FLM650 Series] → [Add Printer Driver]. Then follow the on-screen instructions. Note: L You cannot connect more than one unit to the same computer at the same time.
-
Page 55: Starting Multi-Function Station
L To display the current status of the unit. 1. Click [Start], then select [All Programs] or Readiris(OCR) (page 57) [Programs] → [Panasonic] → [KX- L To convert an image into editable text data. FLB800_FLM650 Series] → [Uninstall or Setup Modify]. - Page 56 8.4.2 Transparencies [Grayscale] in the print dialogue so that Use transparencies designed for laser printing. coloured text will be printed in grayscale. We recommend the following: Select [Panasonic KX- ® CG3300/CG5000 FLB813FX]/[Panasonic KX-FLB803FX] L Use the manual input tray to print as the active printer.
- Page 57 8. Multi-Function Station software L Do not use the following types of labels: L Printed envelope will be stacked on the – Labels that are wrinkled, damaged or upper output tray (KX-FLB813 only). separated from the backing sheet. L Remove each envelope after printing. –...
-
Page 58: Using The Unit As A Scanner
Start Multi-Function Station. Select [Viewer(Scan)]. L [Multi-Function Viewer] will appear. Click the [Scan] icon in the [Multi-Function Viewer] window. L The [Panasonic KX- FLB813FX]/[Panasonic KX- FLB803FX] (default name) dialogue box will appear. If necessary, change the scanning settings on your computer. -
Page 59: Remote Control
L When scanning a document, we recommend Select [Select Device...] from the [File] using the scanner glass rather than the auto menu, then select the [Panasonic KX- document feeder for better results. FLB813FX]/[Panasonic KX-FLB803FX] (default name) in the dialogue box. -
Page 60: Fax Sending/Receiving Using Multi-Function Station
WordPad, proceed as follows. Open the document you want to send. Select [Print...] from the [File] menu. L The [Print] dialogue box will appear. Select [PCFAX Panasonic KX- FLB813FX]/[PCFAX Panasonic KX- FLB803FX] (default name) as the active Select the desired tab. -
Page 61: Confirming The Status Of The Unit
8. Multi-Function Station software L Check the journal from Remote Control after 1. Select [PC FAX] from Multi-Function Station. sending or receiving faxes. 2. Select [Received Log] in [Communication L For details, see the help file by selecting Log]. [Usage Tips] from Multi-Function Station. 3. - Page 62 Click [Printers and Faxes]. For Windows XP Home: Click [Control Panel], [Printers and Other Hardware], then click [Printers and Faxes]. Select [Panasonic KX-FLB813FX] (default name). Select [Properties] from the [File] menu. L The printer properties window will appear. L For Windows XP and Windows 2000 users, click [Printing Preferences...] on...
-
Page 63: Programmable Features
9. Programmable Features 7. Press {MENU} to exit. 9 Programmable Features Features Summary 9.1 Programming {MENU} {SET} {<}{>}{V}{^} Press {MENU}. Press {#} and the 3-digit code (page 62 to page 68). Press the desired selection to display the desired setting. L This step may be slightly different depending on the feature. -
Page 64: Basic Features
9. Programmable Features 9.2 Basic features Feature/Code Selection Setting the date and time Enter the date and time using the dial keypad. See page 25 for details. {#}{1}{0}{1} Setting your logo Enter your logo using the dial keypad. See page 26 for details. {#}{1}{0}{2} Setting your fax number Enter your fax number using the dial keypad. - Page 65 9. Programmable Features Feature/Code Selection Setting the Caller ID list to {0} “OFF” (default): The unit will not print the Caller ID list, but will print automatically keep records of the information for the last 30 callers. {1} “ON”: The unit will print the Caller ID list automatically after every {#}{2}{1}{6} 30 new calls (page 42).
-
Page 66: Fax Features
9. Programmable Features 9.3 Fax features Feature/Code Selection Changing the TEL/FAX If you use an extension telephone in TEL/FAX mode, select the delayed ring setting desired number of times the extension telephone rings before the unit answers the call. {#}{2}{1}{2} {1} “1”... - Page 67 9. Programmable Features Feature/Code Selection Sending a fax at a specific This feature allows you to take advantage of low-cost calling hours time offered by your telephone company. This feature can be set up to 24 hours in advance of the desired time. {#}{4}{1}{2} {0} “OFF”...
- Page 68 9. Programmable Features Feature/Code Selection Setting the ring pattern for {1}: “A” fax (Distinctive Ring {2}: “B” feature) {3}: “C” {4}: “D” {#}{4}{3}{1} {5}: “B-D” (default) See page 46 for details. Receiving other size To receive a fax document that is longer than your recording paper. documents {0} “OFF”: The unit will print the original size.
- Page 69 9. Programmable Features Feature/Code Selection Setting the memory To alert you with a beeping sound when a received fax document is reception alert stored into memory due to some existing problem. The slow beeps will continue until you clear the printing problem and {#}{4}{3}{7} make sure the unit is supplied with enough paper to print the stored document.
-
Page 70: Copy Features
9. Programmable Features 9.4 Copy features Feature/Code Selection Changing the default copy To change the default resolution setting for copying. resolution {1} “TEXT/PHOTO”: For documents containing both text and photographs. {#}{4}{6}{1} {2} “TEXT” (default): For documents containing only text. {3} “PHOTO”: For documents containing photographs, shaded drawings, etc. -
Page 71: Help
10. Help 10 Help 10.1 Error messages – Reports If a problem occurs during fax transmission or reception, one of the following messages will be printed on the sending and journal reports (page 32). Message Code Cause & Solution COMMUNICATION ERROR 40-42 L A transmission or reception error occurred. -
Page 72: Error Messages - Display
10. Help 10.2 Error messages – Display If the unit detects a problem, one or more of the following messages will appear on the display. Display Cause & Solution “CALL SERVICE” L There is something wrong with the unit. Contact our service personnel. - Page 73 10. Help Display Cause & Solution “MODEM ERROR” L There is something wrong with the unit’s modem. Contact our service personnel. “NO FAX REPLY” L The other party’s fax machine is busy or has run out of recording paper. Try again. “OUT OF PAPER L Recording paper is not installed or the input tray has run out of paper.
- Page 74 10. Help Display Cause & Solution “WRONG PAPER” L The fax message was printed on paper which is shorter than A4 size paper. Use the appropriate size paper (page 94).
-
Page 75: When A Function Does Not Work, Check Here
10. Help Troubleshooting 10.3 When a function does not work, check here 10.3.1 Initial settings Problem Cause & Solution I cannot hear a dial tone. L The telephone line cord is connected to the [EXT] jack on the unit. Connect to the [LINE] jack (page 22). L If you use a splitter/coupler to connect the unit, remove the splitter/coupler and connect the unit to the wall jack directly. -
Page 76: Fax – Sending
10. Help 10.3.3 Fax – sending Problem Cause & Solution I cannot send documents. L The telephone line cord is connected to the [EXT] jack on the unit. Connect to the [LINE] jack (page 22). L The other party’s fax machine is busy or has run out of recording paper. - Page 77 10. Help Problem Cause & Solution The printing quality is L If documents can be copied properly, the unit is working normally. poor. The other party may have sent a faint document or there may be something wrong with the other party’s machine. Ask them to send a clearer copy of the document or to check their fax machine.
-
Page 78: Using An Answering Machine
10. Help 10.3.5 Copying Problem Cause & Solution The unit will not make a L You cannot make a copy during programming. Make the copy after copy. programming. L The document was not fed into the unit properly. Re-insert the document. - Page 79 10. Help 10.3.7 Multi-Function Station Problem Cause & Solution I cannot recognize the last L Put the cursor on the line between the buttons. The cursor changes part of an item in the list of shape and you can expand the area by dragging or double-clicking. the [One Touch], [Directory], [Journal] or [Caller ID] when using...
-
Page 80: If A Power Failure Occurs
10. Help Problem Cause & Solution The fax sending from the L The transmission error may be occurred in the unit. Check the computer has been sending report in the journal from Remote Control. completed, but the other party cannot receive the document. -
Page 81: Replacing The Toner Cartridge And The Drum Unit
“REPLACE DRUM” appears on the display, replace the toner cartridge and drum unit. To ensure that the unit operates properly, we recommend the use of Panasonic toner cartridge (Model No. KX-FA87E/KX- Lift the top cover release lever (1) and open FA87X/KX-FA85E/KX-FA85X) and drum unit the top cover (2). - Page 82 10. Help Remove the drum and toner unit (1) by Remove the used cartridge (1) from the holding the tabs. drum unit (2). L The toner may stick to the cartridge and the drum unit. Be careful when handling. L If you replace the toner cartridge and the See page 4 for details.
- Page 83 10. Help Turn the two green levers (1) on the toner Install the drum and toner unit (1) by holding cartridge firmly. the tabs. Make sure that the triangles (1) match to install the toner cartridge correctly. L Make sure that the triangles (2) match to install the drum and toner unit correctly.
-
Page 84: Recording Paper Jam
10. Help Jams Waste disposal method 10.5 Recording paper jam Waste material should be disposed of under conditions which meet all national and local environmental regulations. 10.5.1 When the recording paper has jammed inside of the unit The display will show the following. PAPER JAMMED OPEN TOP COVER Caution:... - Page 85 10. Help Remove the jammed paper. Case 2: When the recording paper has jammed Case 1: near the fuser unit: When the recording paper has jammed near the drum and toner unit: 1. Lift both green levers (1) until they stop. 1.
- Page 86 10. Help Case 3: Close the top cover until locked. When the recording paper has jammed near the output tray (KX-FLB813 only): 1. Pull and hold the lever (1) to release the jammed paper. Caution: L To prevent injuries, be careful not to put your hands under the top cover.
- Page 87 10. Help 10.5.2 When the recording paper 10.5.3 When the recording paper is not fed into the unit properly in the manual input tray is not fed The display will show the following. into the unit properly The display will show the following. CHECK PICK UP INPUT TRAY #1 CHECK PICK UP...
-
Page 88: Document Jams (Auto Document Feeder)
10. Help When the document has jammed near the document exit: 10.6 Document jams (Auto Press the ADF cover release button (1) and open the middle part (2) of the ADF cover. document feeder) Remove the jammed document (3) carefully. Caution: L Do not pull out the jammed document forcibly before lifting the ADF cover. -
Page 89: Cleaning The White Plate And Glasses
10. Help Clean the scanner glass (1) and the white Cleaning cover sheet (2) and its circumference (3) 10.7 Cleaning the white with a soft and dry cloth. L Clean the white cover sheet carefully to plate and glasses avoid damaging it. Clean the white plate and glasses when a black line, a white line or a dirty pattern appears on: –... - Page 90 10. Help Close the document cover (1). 3. Insert the hinges (1) into the slots (2) on the unit. Re-connect the power cord. If the document cover comes off from the unit 1. Attach the hinges (1) to the document cover 4.
- Page 91 10. Help 10.7.2 Lower glass Clean the lower glass (1) with a soft and dry cloth. Disconnect the power cord. Lift the top cover release lever (1) and open the top cover (2). Important: L Close the manual input tray (3) before opening the top cover.
-
Page 92: Cleaning The Document Feeder Rollers
10. Help Close the top cover until locked. 10.8 Cleaning the document feeder rollers Clean the rollers when the document or recording paper frequently misfeeds. Disconnect the power cord. Hold the ADF cover firmly and lift it to open the upper part (1) of the ADF cover. Caution: L To prevent injuries, be careful not to put your hands under the top cover. - Page 93 10. Help Clean the document feeder rollers (1) with a cloth moistened with isopropyl rubbing alcohol, and let all parts dry thoroughly. L Clean the rollers in the direction of the arrow to avoid the discharge brush (2) from being pulled. Close the ADF cover.
-
Page 94: General Information
11. General Information 11 General Information 11.1 Reference lists and reports You can print out the following lists and reports for your reference. – “SETUP LIST”: Provides you with the current settings of the programming features (page 62 to page 68). –... -
Page 95: Specifications
11. General Information Maximum: Approx. 900 W (When the fuser lamp turns on) 11.2 Specifications ■ Power supply: 220–240 V AC, 50/60 Hz ■ Applicable lines: ■ Memory capacity Public Switched Telephone Network (for operation and storing memory): ■ Document size: 32 MB Max. -
Page 96: Image Area
11. General Information Recording paper specifications Toner life Toner life depends on the amount of content in a Recording paper size: received, copied or printed document. The A4: 210 mm × 297 mm following is the approximate relationship Letter: 216 mm × 279 mm between image area and toner life for Legal: 216 mm ×... - Page 97 11. General Information 15 % image area Approx. 800 sheets (KX-FA87E/KX- FA87X)/1,600 sheets (KX-FA85E/KX-FA85X) of A4 size paper can be printed. Note: L The image area changes with the depth, thickness and size of the characters. L If you turn on the toner save feature, the toner cartridge will last approx.
-
Page 98: User Record
11. General Information 11.3 User record For your future reference Date of purchase Serial number (found on the rear of the unit) Dealer’s name and address Dealer’s telephone number Attach your sales receipt here. -
Page 99: Index
12. Index Storing: 44 12. Index Caller ID list (Feature #216): 42, 63, 92 12.1 Index Character table: 26 Cleaning: 87, 90 # #101 Date and time: 25 Connecting tone (Feature #416): 65 #102 Your logo: 26 Connections: 22 #103 Your fax number: 28 Contrast save (Feature #462): 63 #120 Dialling mode: 23, 62 Copy: 47... -
Page 100: Toner Cartridge
12. Index Activating: 53 Manually: 31 Installing: 51 Navigator directory: 34 One-touch dial: 34 N Navigator directory Sending report (Feature #401): 32, 64 Sending faxes: 34 Set fax default (Feature #459): 67 Storing: 29 Storing O One-touch dial Broadcast: 35 Sending faxes: 34 Navigator directory: 29 Storing: 29... - Page 101 Notes...
- Page 102 0682 Manufacturer: Panasonic Communications (Malaysia) Sdn. Bhd. PLO No.1, Kawasan Perindustrian Senai, KB No. 104, 81400 Senai, Negeri Johor Darul Ta’zim, Malaysia Global web site: http://www.panasonic.co.jp/global/ PFQX2567ZA CM0306CK0 PFQX2567ZA CM0306CK0...