Table of Contents
Advertisement
Advertisement
Table of Contents

Related Manuals for Siemens HB 131. 10 B


Summary of Contents for Siemens HB 131. 10 B
- Page 1 GB Instructions for Use HB 131.10 B...
-
Page 2: Table Of Contents
Index Important information ..... . . Before installation ......Safety information . - Page 3 Index Oven exterior ....... . Oven ........Cleaning the rails .
-
Page 4: Important Information
Important information Read this instruction manual carefully. Only then will you be able to operate your cooker safely and correctly.The manufacturer does not accept any re sponsibility if the instruction manual is not followed. Please keep the instruction and installation manual in a safe place. -
Page 5: Safety Information
Safety information This appliance is intended for domestic use only. Only use the cooker for food preparation. Hot oven Open the oven door carefully. Hot steam may escape. Never touch the internal surfaces of the oven or the heating elements. There is a risk of burning. Children must be kept at a safe distance from the appliance. - Page 6 Cooling with the oven door Only leave the oven to cool with the door closed. Do open not allow anything to become trapped in the oven door. Even if you only leave the oven door open slightly, the fronts of adjacent units may become damaged over time.
-
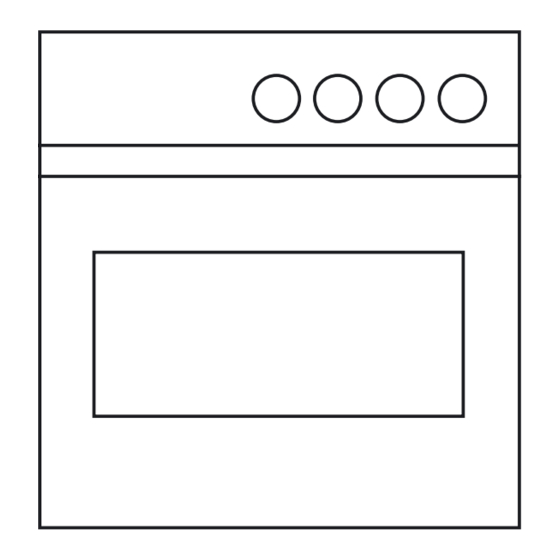
Page 7: Your New Cooker
Your new cooker Here you will learn more about your new oven. The control panel and its switches and indicators are explained here. The heating modes and the accessories included with your oven will be explained here. The control panel Details vary according to the appliance model. -
Page 8: Temperature Selector
Temperature selector Use the temperature selector to set the temperature or grill setting. Temperature 50 270 Temperature range in ºC Grill x Setting Low grill Medium grill High grill The indicator light by the temperature selector comes on while the oven is heating up. It goes out during pauses in heating. -
Page 9: Types Of Heating
Types of heating Different types of oven heating are available. You can therefore select the best method for cooking any dish. 3D hot air A fan in the rear panel distributes the heat from the ring heating element evenly inside the oven. Using 3D hot air, it is possible to bake cakes and pizza on two shelves. -
Page 10: Oven And Shelving Accessories
Defrosting A fan in the rear panel circulates the air in the oven around the frozen food. Frozen pieces of meat, poultry, bread and cakes defrost evenly. Oven and shelving accessories The shelf can be inserted at 5 different heights in the oven. -
Page 11: Cooling Fan
Handle for removing the baking tray. Cooling fan The oven is fitted with a cooling fan. It switches itself on and off as necessary. The warm air escapes above the door. Before using for the first time This section will tell you everything you need to do before using the cooker for the first time. -
Page 12: Pre Cleaning The Accessories
Switch off the function selector after 60 minutes. Pre cleaning the accessories Please wash the accessories thoroughly with soapy water and a cleaning cloth before using them. Setting the oven You have various options for setting the oven. Switching off the oven When your meal is ready, switch off the oven yourself. -
Page 13: If The Oven Is To Switch Off Automatically
Use the temperature selector to set the temperature or grill setting. Switching off Switch off the function selector when the meal is ready. Changing the setting You may change the temperature or grill setting at any time. If the oven is to switch off Perform the settings as described in items 1 and 2. -
Page 14: If The Oven Is To Switch On And Off Automatically
The cooking time has A signal sounds. The oven switches off. elapsed Press the j button twice and switch off the function selector. Changing the setting Press the j clock button. Change the cooking time using the + or - button. Cancelling the setting Press the j clock button. -
Page 15: Time
The cooking time has A signal sounds. The oven switches off. elapsed Press the j button twice and switch off the function selector. Note You can change the setting while the symbol is flashing. The setting has been adopted if the symbol lights up permanently. -
Page 16: Timer
Changing the time e.g. Press the j clock button twice and change the time from summer to winter with the + or - button. time Hiding the time You can hide the time. It will then only be visible when you are performing settings. -
Page 17: Basic Settings
Cancelling the setting Press the a timer button. Press the - button until the display is at zero. The timer and cooking time The symbols light up. The timer period counts down count down simultaneously visibly in the display. To call up the remaining cooking time ?, end time ! or time j: Press the j clock button until the symbol in question flashes. -
Page 18: Changing The Basic Settings
Changing the basic settings There must be no program set. Example: Hiding the time Press the j clock button and the + button at the same time until a 1 appears in the display. This is the basic setting for the time in the foreground. Change the basic setting using the + or - button. -
Page 19: Childproof Lock
Childproof lock The oven has a childproof lock to prevent children from switching it on accidentally. Press the p key button until the p symbol appears Locking the oven in the display. This will take approximately 4 seconds. Unlocking Press the p key button until the p goes out. Notes You can set the timer and the clock even when the oven is locked. -
Page 20: Oven
Appliances with aluminium Use a mild window cleaning detergent. Wipe the area fronts with a soft window cloth or a fluff free micro fibre cloth, using a horizontal action without applying pressure. Aggressive cleaning products, scratchy sponges and rough cleaning cloths are not suitable. Oven Never use coarse scouring pads or cleaning sponges. - Page 21 Cleaning the catalytic The rear wall and top of the oven are coated with surfaces of the oven self cleaning enamel. The surfaces clean themselves while the oven is in operation. Large splashes may only disappear after the oven has been used several times.
-
Page 22: Cleaning The Rails
Cleaning the rails The rails can be removed for cleaning. To unhook the rails: Lift the rails at the front in an upwards direction and unhook them, then pull the rails forward and remove Clean the rails using either washing up liquid and a sponge or a brush. -
Page 23: Troubleshooting
Troubleshooting Should a malfunction occur, it is often only due to a minor fault. Please read the following instructions before calling the after-sales service: Problem Possible cause Comments/remedy The oven does not work. Blown fuse. Look in the fuse box and check that the fuse is in working order. -
Page 24: After Sales Service
Replacing the glass cover The glass cover on the oven light must be replaced if it is damaged. Replacement glass covers may be obtained from the after sales service. To this end, please specify the E number and FD number of your appliance. -
Page 25: Packaging And Old Appliances
Packaging and old appliances Your new appliance was protected by suitable packaging while it was on its way to you. All materials used for this purpose are environmentally friendly and can be recycled. Please make a contribution to protecting the environment by disposing of the packaging appropriately. -
Page 26: Tables And Tips
Tables and tips This table contains a selection of dishes and the optimum settings at which to cook them. You can find out which type of heating and temperature is best for your dish, which accessories to use, and at which oven level the dish should be inserted. - Page 27 Baking on 1 level Food Dish Shelf Cooking Temp. C Time, position method minutes Baking on 2 levels Food Dish Shelf Cooking Temp. C Time, position method minutes...
-
Page 28: Baking Tips
Food Dish Shelf Cooking Temp. C Time, position method minutes Baking tips You wish to cook to your own recipe. How to check that a sponge cake is cooked properly. The cake collapses. The cake has risen in the centre but is lower at the edges. -
Page 29: Meat, Poultry, Fish
The pastry is unevenly browned. Select a slightly lower temperature to ensure that the pastry is baked more evenly. Baking paper that protrudes over the food can affect the air circulation. For this reason, always cut the baking paper to fit the baking tray. The fruit cake is too light at the Use the deeper baking tray next time. - Page 30 Advice on grilling Always close the oven door when grilling. If possible, use pieces of meat which are of the same thickness. They should be at least 2 to 3 cm thick. Such pieces will be browned evenly and stay juicy and soft in the middle.
-
Page 31: Tips For Roasting And Grilling
Grilling Food Shelf position Cooking method Grill setting Cooking time min per 1 lb. Tips for roasting and grilling The table does not contain information for the weight of the roast. How can you tell when the roast is ready? The roast is too dark and the crackling is partly burnt. -
Page 32: Defrosting
Meal Level Type of Temperature in Cooking time in heating ºC hours 800 g sliced pears 2 + 4 Approx. 8 1.5 kg prunes or plums 2 + 4 Approx. 8 10 200 g fresh herbs, washed 2 + 4 Approx. -
Page 33: Acrylamide In Food
For long cooking times, the oven can be switched off 10 minutes before the end of the cooking time and the remaining heat can be used to finish the cooking. Acrylamide in food Experts are currently discussing how dangerous acrylamide in food can be. We have compiled this information sheet for you on the basis of current research. -
Page 34: What Can You Do
What can you do? In general Baking... - Page 35 5430003322 (1W00WQ) 01-8410...