Dell Dimension 4400 Manual
Hide thumbs
Also See for Dimension 4400:
- Owner's manual (148 pages) ,
- Installation manual (42 pages) ,
- Update manual (8 pages)
Table of Contents
Advertisement
Quick Links
Dell™ Dimension™ 4400
Technical Overview
Controls and Lights
Solving Problems
System Codes and Messages
Technical Specifications
System Setup Program
Adding Parts
Documentation
Hints, Notices, and Cautions
HINT:
A HINT indicates important information that helps you make better use of your computer.
NOTICE:
A NOTICE indicates either potential damage to hardware or loss of data and tells you how to avoid the problem.
CAUTION:
A CAUTION indicates a potential for property damage, personal injury, or death.
Abbreviations and Acronyms
For a complete list of abbreviations and acronyms, see the
Information in this document is subject to change without notice.
© 2002 Dell Computer Corporation. All rights reserved.
Reproduction in any manner whatsoever without the written permission of Dell Computer Corporation is strictly forbidden.
Trademarks used in this text: Dell, the DELL logo, and Dimension are trademarks of Dell Computer Corporation; Intel and Pentium are registered trademarks of Intel Corporation;
Microsoft and Windows are registered trademarks of Microsoft Corporation; Adobe is a trademark of Adobe Systems Incorporated.
Other trademarks and trade names may be used in this document to refer to either the entities claiming the marks and names or their products. Dell Computer Corporation
disclaims any proprietary interest in trademarks and trade names other than its own.
This product incorporates copyright protection technology that is protected by method claims of certain U.S. patents and other intellectual property rights owned by Macrovision
Corporation and other rights owners. Use of this copyright protection technology must be authorized by Macrovision Corporation, and is intended for home and other limited
viewing uses only unless otherwise authorized by Macrovision Corporation. Reverse engineering or disassembly is prohibited.
May 2002 Rev. A04
Tell Me How
help file.
Advertisement
Table of Contents

Related Manuals for Dell Dimension 4400


Summary of Contents for Dell Dimension 4400
-
Page 1: Abbreviations And Acronyms
Microsoft and Windows are registered trademarks of Microsoft Corporation; Adobe is a trademark of Adobe Systems Incorporated. Other trademarks and trade names may be used in this document to refer to either the entities claiming the marks and names or their products. Dell Computer Corporation disclaims any proprietary interest in trademarks and trade names other than its own. -
Page 2: Diagnostic Codes
"Contacting Dell" in the Owner's Manual for instructions on obtaining technical assistance. Microprocessor has failed a If the problem persists, see "Contacting Dell" in the Owner's Manual for instructions on obtaining BIOS test. technical assistance. ... -
Page 3: Post Beep Codes
Other failure. See "Contacting Dell" in the Owner's Manual for instructions on obtaining technical assistance. Computer has started and No action is necessary. turned over control to the operating system. POST Beep Codes If the monitor cannot display errors or problems, during POST the computer might emit a series of beeps, or beep code, that identifies the problem. The POST beep codes are listed below. - Page 4 CMOS Time and Date Not Set Drive A or B is present but has failed the BIOS POST. Ensure that the drive is installed correctly in the computer and defined Diskette Boot Failure correctly in the system setup program. Check the interface cable at both ends.
-
Page 5: Printed Documentation
5. Click OK when the installation is complete. 6. Right-click the following link to the file: Dell Dimension 4400 System Tell Me How (.chm) (1224 KB). 7. Click Save Target As in Microsoft Internet Explorer or Save Link As in Netscape Navigator, and specify a location on your hard drive. -
Page 6: Adding Parts
Before you remove the computer cover, perform the following steps in the sequence indicated. NOTICE: Do not attempt to service the computer yourself, except as explained in this guide and elsewhere in Dell documentation. Always follow installation and service instructions closely. -
Page 7: Shutting Down The Computer
2. Ground yourself by touching an unpainted metal surface at the back of the computer before touching anything inside your computer. While you work, periodically touch an unpainted metal surface on the computer to dissipate any static electricity that might harm internal components. 3. -
Page 8: Reattaching The Hinge Arms
Reattaching the Hinge Arms Shut down the computer. 2. Disconnect the power cable from your computer. 3. Remove the front door, if it is attached. The front door snaps off of the two hinge arms. 4. Remove the front-panel insert above the front-door bay area. Pull the bottom of the insert with your fingers to remove it. -
Page 9: Opening The Computer Cover
NOTICE: Using excessive force to pull the hinge arms into place may damage the arms or the front panel. 7. Pull the arms toward you until they snap into place. If the hinge arms don't snap back into place on the first attempt, slightly reposition the arms and try again. 8. -
Page 10: Adding Cards
Adding Cards CAUTION: Before you begin any of the procedures in this section, follow the safety instructions in "Safety Instructions." CAUTION: To guard against electrical shock, always unplug your computer from the electrical outlet before opening the cover. Shut down the computer. -
Page 11: Removing Cards
8. Lower the plastic securing lever. 9. Connect any cables that should be attached to the card. See the documentation that came with the card for information about the card cable connections. Close the computer cover. 11. Connect your computer and devices to their electrical outlets, and turn them on. NOTICE: To connect a network cable, first plug the cable in to the network wall jack and then plug it in to the computer. -
Page 12: Adding Memory
You can increase your computer memory by installing memory modules on the system board. For information on the type of memory supported by your computer, see "Memory" in "Technical Specifications." HINT: Memory purchased from Dell is covered under your computer warranty. Shut down the computer. - Page 13 8. Align the notches on the bottom of the module with the crossbars in the connector. NOTICE: To avoid breaking the memory module, do not press near the middle of the module. 9. Insert the module straight down into the connector, ensuring that it fits into the vertical guides at each end of the connector. Press firmly on the ends of the module until it snaps into place.
-
Page 14: Adding A Second Hard Drive
NOTICE: Visually inspect the position of the securing clips on the memory connectors and make sure that they are secured in the vertical position in the cutouts on the ends of the memory modules. Otherwise, the securing clips may prevent the AGP card from being properly reinstalled. 6. -
Page 15: Adding Other Drives
"Safety Instructions." HINT: Drives sold by Dell come with their own operating software and documentation. After you install a drive, refer to the documentation that came with the drive for instructions on installing and using the drive software. NOTICE: To avoid possibly damaging the drive by electrostatic discharge (ESD), ground yourself by periodically touching an unpainted metal surface on... -
Page 16: Inch Devices
Your computer includes a floppy drive and a CD or DVD drive. You can add other devices, such as a Zip drive, a CD-RW drive, or a tape drive. 5.25-Inch Devices CAUTION: Before you begin any of the procedures in this section, follow the safety instructions in "Safety Instructions."... - Page 17 See the documentation that came with the drive for instructions on connecting a drive cable to the drive and system board. HINT: Your computer uses cable-select drive cables. This means that the device connected to the end connector of the drive cable is the master device and the device connected to the middle connector is the slave device.
-
Page 18: Replacing The Microprocessor
9. Attach the rails to the drive using the screws supplied with the drive. Ensure that the rail tabs are positioned at the back of the drive. 10. Gently slide the drive into the bay until you hear a click. ... - Page 19 NOTICE: Do not discard the original heat sink and securing clips unless you are installing a microprocessor upgrade kit from Dell. If you are not installing a microprocessor upgrade kit from Dell, reuse the original heat sink, blower, and securing clips when installing your new microprocessor.
-
Page 20: Installing The Microprocessor
To connect a network cable, first plug the cable in to the network wall jack and then plug it in to the computer. If you are installing a microprocessor replacement kit from Dell, return the original heat sink assembly and microprocessor package to Dell in the same package in which your replacement kit was sent. -
Page 21: Removing The Front I/O Panel
Removing the Front I/O Panel CAUTION: Before you begin any of the procedures in this section, follow the safety instructions in "Safety Instructions." Shut down the computer. 2. Turn off any attached devices and disconnect them from their electrical outlets. NOTICE: To disconnect a network cable, first unplug the cable from your computer and then unplug it from the network wall jack. -
Page 22: Replacing The System Board
Note the routing of the DC power cables underneath the tabs in the computer frame as you remove them from the system board and drives. It is important to route these cables properly when you replace them to prevent them from being pinched or crimped. 6. -
Page 23: Closing The Computer Cover
NOTICE: The system board and the metal tray are attached and are removed as one piece. 5. Remove or move any components that restrict access to the system board. 6. Disconnect all cables from the system board. Before you remove the existing system board, visually compare the replacement system board to the existing system board to make sure that you have the correct part. - Page 24 ...
-
Page 25: Solving Problems
If the power light is solid amber, the computer is receiving electrical power, but an internal power problem may exist—call Dell for technical assistance. See "Contacting Dell" in the Dell Owner's Manual for the correct number to call. -
Page 26: Video And Monitor Problems
Operating system not found— Call Dell for technical assistance. See "Contacting Dell" in the Dell Owner's Manual for the correct number to call. Insert bootable media— The operating system is trying to boot to a nonbootable floppy disk or CD. Insert a bootable floppy disk or CD. -
Page 27: Printer Problems
If you cannot print to a parallel port printer Verify the printer cable connections— Ensure that the printer cable is connected as described in "Connecting a Printer" in the Dell Owner's Manual. Ensure that the printer is turned on—... -
Page 28: Scanner Problems
Reinstall the printer driver— See "Installing the Printer Driver" in the Dell Owner's Manual. Check for interrupt request conflicts— "Resolving Software and Hardware Incompatibilities." Scanner Problems HINT: If you need technical assistance for your scanner, call the scanner's manufacturer (see the documentation that came with the scanner for the correct phone number). -
Page 29: Keyboard Problems
Reconnect the keyboard cable— Shut down the computer (see "Turning Off the Computer" in the Dell Owner's Manual), reconnect the keyboard cable as shown on the START HERE sheet for your computer, and then restart the computer. Check for interrupt request conflicts—... -
Page 30: Network Problems
Check the speakers and subwoofer— "Sound and Speaker Problems." If you cannot play a DVD movie HINT: Because of different worldwide file types, not all DVD titles work in all DVD drives. Ensure that Windows recognizes the drive— In Windows XP, click the Start button, and then click My Computer. In Windows 2000, double- click the My Computer icon on the Windows desktop. -
Page 31: General Program Problems
6. See the program documentation for installation instructions. Windows 2000 1. Click the Start button, point to Settings, and then click Control Panel. 2. Double-click the Add/Remove Programs icon. 3. Select the program that you want to remove. 4. Click Change/Remove and follow the prompts on the screen. 5. -
Page 32: E-Mail Problems
Go to the Dell | Support website for help with general usage, installation, and troubleshooting questions. E-mail Dell— Go to the Dell | Support website and then click E-Mail Dell in the Communicate list. Send an e-mail message to Dell about your problem; you can expect to receive an e-mail message from Dell within hours. -
Page 33: Using The Windows Xp Device Driver Rollback
NOTICE: The ResourceCD contains drivers for devices that are not part of your computer. Only reinstall the specific drivers for hardware included in your computer. Otherwise, your computer might not work correctly. 4. Select a topic in the Topic list. If you select Drivers in the Topic list and a particular driver is not listed, then that driver is not required by your operating system. -
Page 34: Using System Restore
4. Click the System Restore tab. 5. Make sure that Turn off System Restore is unchecked. Before proceeding with any System Restore function, Dell recommends that you thoroughly read Microsoft's information about using System Restore. To access this information: 1. Click the Start button, point to All Programs—> Accessories—> System Tools, and then click System Restore. -
Page 35: Undoing The Last System Restore
The Operating System CD provides options for reinstalling your Windows XP operating system. The options can potentially overwrite files installed by Dell and possibly affect programs installed on your hard drive. Therefore, Dell does not recommend that you reinstall your operating system unless instructed to do so by a Dell technical support representative. -
Page 36: Reinstalling Windows 2000
The Operating System CD provides options for reinstalling your Windows 2000 operating system. The options can potentially overwrite files installed by Dell and possibly affect programs installed on your hard drive. Therefore, Dell does not recommend that you reinstall your operating system unless instructed to do so by a Dell technical support representative. - Page 37 ...
-
Page 38: Technical Specifications
Back to Contents Page Technical Specifications Dell™ Dimension™ 4400 Microprocessor Audio System Information Video Expansion Bus Controls and Lights Memory Power Drives Physical Ports and Connectors Environmental Microprocessor Microprocessor type Intel® Pentium® 4 microprocessor that runs at 1.50, 1.60, 1.70, 1.80, 1.90, 2.0, 2.20, or 2.40 GHz... - Page 39 Parallel 25-hole connector (bidirectional) Video 15-hole connector Keyboard 6-pin mini-DIN connector or USB connector Mouse 6-pin mini-DIN connector or USB connector two front-panel and two back-panel USB–compliant connectors Headphone front-panel miniature connector three miniature connectors for line-in, line-out, and Audio microphone Internally accessible: Primary IDE channel...
- Page 40 At 35°C (95°F), the maximum operating altitude is 914 m (3000 ft). Back to Contents Page ...
-
Page 41: Entering The System Setup Program
To change the system configuration information after you add, change, or remove any hardware in your computer To set or change user-selectable options—for example, the user password Dell recommends that you write down the system setup program screen information for future reference. The system setup screens are organized as follows: At the top is a menu bar for accessing the main program screens. -
Page 42: Advanced Screen
Option Function BIOS Version Displays the version of the BIOS being used. Processor Type Displays the type of microprocessor installed. Processor Speed Displays the internal speed of the microprocessor. System Bus Frequency Displays the external speed of the microprocessor. Cache RAM Displays the cache random access memory. -
Page 43: Boot Configuration Submenu
Yes so the operating system handles all Plug and Play operation. Be sure that this option is set to No before running Dell Diagnostics. Otherwise, some diagnostics may incorrectly fail. The system setup program automatically checks the configuration of a Simple Boot Flag-compatible operating system at POST. Depending on its configuration, the system setup program may automatically set this option to No or Yes. ... -
Page 44: Ide Configuration Submenu
Option Function Serial Port A Configures the serial port. Set this option to Auto (default), Enabled, or Disabled. Depending on the port setting, you can set the following additional options: Base I/O Address If the port is set to Enabled, available I/O addresses are 3F8, 3E8, 2F8, and 2E8. Interrupt If the port is set to Enabled, available interrupts are IRQ3 and IRQ4. -
Page 45: Primary Ide Master Submenu
Option Function Configures the integrated primary and secondary IDE controllers and detects the types of drives attached to them. If set to Primary, Controller Secondary, or Both (default), the designated controller(s) are enabled, and the types of drives attached are displayed. If set to either Primary or Secondary, the other controller is not enabled and the IRQ it normally uses becomes available. -
Page 46: Diskette Configuration Submenu
Maximum Capacity Displays the maximum capacity of the primary IDE device. LBA Mode Control Displays whether LBA mode control is enabled or not on the primary IDE device. Multi-Sector Displays the multi-sector transfer setting of the primary IDE device. Transfers PIO Mode Displays the PIO mode setting of the primary IDE device. -
Page 47: Video Configuration Submenu
Option Function Event Log Displays the space available for the event log. Event Log Validity Displays the validity of the event log. View Event Log Press <Enter> to view the event log. Clear All Event Logs Clears all event logs when the computer restarts if set to Yes. Retains the event log information if set to No (default). Event Logging Enables or disables event logging. -
Page 48: Power Screen
Option Function Supervisor Password Indicates whether a supervisor password has been assigned. User Password Is Indicates whether a user password has been assigned. Set Supervisor Sets and confirms a supervisor password. If a supervisor password is set, a User Access Level option appears that enables you to Password set the user access level as Full (default), Limited, No Access, or View Only. -
Page 49: Boot Screen
Option Function Quiet Enabled (default) displays the Dell logo during POST. Disabled displays the normal POST messages. Boot Quick When set to Enabled, this option shortens POST by eliminating some tests. If set to Disabled (default), all POST tests occur. -
Page 50: Clearing Nvram
Option Function Exit Saving Changes Saves any changes you have made, exits the system setup program, and restarts the computer. Exit Discarding Discards any changes you have made, exits the system setup program, and restarts the computer. Changes Load Setup Defaults Discards any changes you have made and reverts all options to their defaults, but does not exit the system setup program. - Page 51 7. Access the system setup program and assign a new supervisor or setup password in the Maintenance menu. 8. Exit and save the system setup program settings. 9. After the computer boots, turn it off, and unplug it from the electrical outlet. 10.
-
Page 52: Technical Overview
Internal View System Board Connectors and Sockets Socketed Microprocessor Power Supply DC Power Connectors IDE Interface Cable Connections for Dell-Installed Drives Placement of Dell-Installed Cards Internal View CAUTION: Before you begin any of the procedures in this section, read "Safety Instructions."... -
Page 53: Power Supply
Socketed Microprocessor The 478-pin, socketed Intel® Pentium® 4 microprocessor, shown above with the heat sink attached, contains an integrated 8-KB primary (L1) cache with a secondary (L2) 256-KB Advanced Transfer Cache that resides in the processor's core and runs at the processor's internal clock speed. The socketed microprocessor inserts into the ZIF connector mounted on the system board. -
Page 54: Power Supply Dc Connector Pin Assignments
+5 VDC +/–5% 22.0 1.0/0.2 +3.3 VDC +/–5% 18.0 0.1/0.0 –12 VDC +/–10% +5 VFP +/–5% Outputs meet and do not exceed SELV requirements per electrical standards (UL 1950, IEC 950, or EN60950 Par. 2.3). Maximum continuous combined load on +5 VDC and +3.3 VDC outputs do not exceed 150 W. Peak +12 VDC output power (up to 15.0 A) does not exceed 15 seconds in duration. -
Page 55: Dc Power Connector P2
Black Gray +5 VFP Purple +12 VDC Yellow Orange +3.3 VDC –12 VDC Blue Black PS ON Green Black Black Black +5 VDC +5 VCD +5 VCD Sense connector DC Power Connector P2 Pin Number Signal Name 18-AWG Wire Black Black +12 VDC... - Page 56 IDE Interface Cable Connections for Dell-Installed Drives IDE Channel IDE Connector Location Dell-Installed Drive Primary IDE master End connector on PRI IDE Hard drive connector cable Primary IDE slave Middle connector on PRI IDE Zip drive connector cable Secondary IDE master...
-
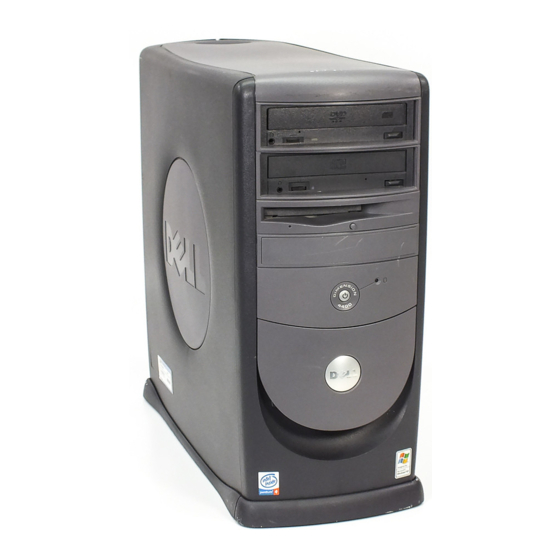
Page 57: Controls And Lights
Back to Contents Page Controls and Lights Dell™ Dimension™ 4400 Front View Back View Front View CD Activity Light The CD activity light is on when the computer reads data from the CD drive. CD Drive Eject Button Press this button to eject your CD from the CD drive. -
Page 58: Back View
Express Service may not be available in some countries. This label lists your computer's service tag and your Express Service Code (if applicable). If you call Dell technical support, use your Express Service Code to route the call directly to the correct support personnel. The Dell technical support staff will ask for your service tag. -
Page 59: Parallel Connector
Check the documentation that came with the device or contact the USB device manufacturer for more information. For quick connections, Dell recommends using the front USB connectors for USB devices such as digital cameras, gaming controllers, and scanners. Use the back-panel USB connectors for USB devices that are seldom disconnected, such as USB mouse and keyboard devices.