LG LRG3097ST User Manual
Gas range
Hide thumbs
Also See for LRG3097ST:
- User manual (50 pages) ,
- Installation manual (33 pages) ,
- Installation instructions manual (15 pages)
Table of Contents
Advertisement
Available languages
Available languages
LG Electronics Monterrey, México S.A. de C.V.
PART NUMBER: MFL33029602
DESCRIPTION: OWNER'S MANUAL
Product:
Gas Range
Brand:
LG
1. Trim Size (mm):
182 (W), 257 (H)
2. Printing Color:
Black
3. Paper Type:
- Cover:
Bond Paper 63 gr.
- Content:
Bond Paper 63 gr.
1. The part should not contain prohibited substances (Pb, Cd, Hg, Cr+6, PBB, PBDE) and should comply
with standard LG (61)-A-9101.
2.
Folding procedure must be according to the order that shows below and it should be seen front
(Printing side of P/N), 1 -> 2 -> 3 -> 4 -> 5.
The specification must be the same according to First Parts Approval (FPA).
Quality must not be modified.
FOLDING PROCEDURE ONLY FOR TECHNICAL CARDS
DATE: MARCH 1st, 2013.
Part No.
MFL33029602
MODEL DESCRIPTION:
Project:
CAMARO EXTRA & BEST
Customer:
LGEUS
PRINTING SPECIFICATION:
4. Printing Method:
5. Bindery Type:
6. Language:
English & Spanish
7. Number of Pages:
8. Number of Sheets:
NOTES:
Off Set
Saddle Stitch
100
50
Advertisement
Chapters
Table of Contents

Related Manuals for LG LRG3097ST


Summary of Contents for LG LRG3097ST
- Page 1 LG Electronics Monterrey, México S.A. de C.V. PART NUMBER: MFL33029602 DATE: MARCH 1st, 2013. DESCRIPTION: OWNER’S MANUAL Part No. MFL33029602 MODEL DESCRIPTION: Product: Project: Gas Range CAMARO EXTRA & BEST Brand: Customer: LGEUS PRINTING SPECIFICATION: 1. Trim Size (mm): 4. Printing Method:...
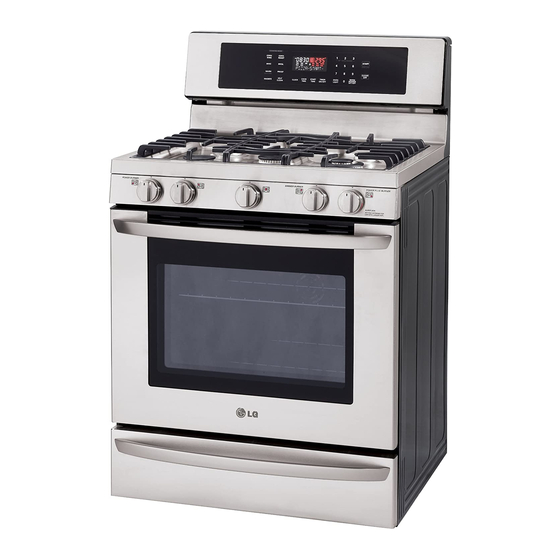
- Page 2 USER’ S GUIDE GAS RANGE Please read this manual carefully bef ore operating your range and retain it for future reference. LRG30 97ST LRG30 95ST LRG30 95SB LRG3095SW www.lg.com MFL33029602...
-
Page 3: Table Of Contents
THANK YOU! OPERATING INSTRUCTIONS Congratulations on your purchase Parts and Features............9 Using the Surface Burners ........10-11 and welcome to the LG family. Using the griddle ............12 Control Panel—LRG3097S ...........13 Control Panel—LRG3095S ...........14 Your new LG Gas Range Using the Oven ............15–18 Using the Clock and Timer........19–20... -
Page 4: Important Safety Information
I M P O RTA N T S A F E T Y I N F O R M AT I O N READ ALL INSTRUCTIONS BEFORE USE Read and follow all instructions before using your oven to prevent the risk of fire, electric shock, personal injury, or damage when using the range. -
Page 5: Safety Precautions
I M P O RTA N T S A F E T Y I N F O R M AT I O N READ ALL INSTRUCTIONS BEFORE USE ANTI-TIP DEVICE (continued) • DO NOT step or sit on the door. Install the Anti- •... - Page 6 I M P O RTA N T S A F E T Y I N F O R M AT I O N READ ALL INSTRUCTIONS BEFORE USE SAFETY PRECAUTIONS (continued) • Make sure your range is properly adjusted by a •...
-
Page 7: Surface Burners
I M P O RTA N T S A F E T Y I N F O R M AT I O N READ ALL INSTRUCTIONS BEFORE USE SURFACE BURNERS • Always heat fat slowly, and watch as it heats. WARNING: •... -
Page 8: Electric Warming Drawer
I M P O RTA N T S A F E T Y I N F O R M AT I O N READ ALL INSTRUCTIONS BEFORE USE COOK MEAT AND POULTRY THOROUGHLY Cook meat and poultry thoroughly—meat to at least To protect against foodborne illness, cook them to an INTERNAL temperature of 160°F and poultry to at these temperatures. - Page 9 I M P O RTA N T S A F E T Y I N F O R M AT I O N READ ALL INSTRUCTIONS BEFORE USE OVEN When opening the door of a hot oven, stand away from the range. The hot air and steam that escape can cause burns to hands, face and eyes.
-
Page 10: Operating Instructions
O P E R A T I N G I N S T R U C T I O N S PARTS AND FEATURES Grates Oven vent Oval burner Small burner Extra large burner Automatic oven Medium burner light switch Large burner Self clean latch Knobs (5 ea) -
Page 11: Using The Gas Surface Burners
O P E R AT I N G I N S T RU C T I O N S USING THE GAS SURFACE BURNERS Throughout this manual, features and appearance may vary from your model. • Make sure all grates on the range are properly •... - Page 12 O P E R AT I N G I N S T RU C T I O N S USING THE GAS SURFACE BURNERS HOW TO SELECT FLAME SIZE NEVER let the flames extend up the sides of the Flames larger than the cookware for safe handling of cookware.
-
Page 13: Using The Griddle
O P E R AT I N G I N S T RU C T I O N S USING THE GRIDDLE Preheat the griddle according to the guide below and adjust for the desired setting. Preheat Cook Type of Food Conditions none Warming Tortillas... -
Page 14: Control Panel-Lrg3097S
O P E R AT I N G I N S T RU C T I O N S CONTROL PANEL—LRG3097S Throughout this manual, features and appearance may vary from your model. OVEN CONTROL, CLOCK, AND TIMER FEATURES CONVECTION BAKE PAD – Touch the pad to COOK TIME PAD –... -
Page 15: Control Panel-Lrg3095S
O P E R AT I N G I N S T RU C T I O N S CONTROL PANEL—LRG3095S Throughout this manual, features and appearance may vary from your model. OVEN CONTROL, CLOCK, AND TIMER FEATURES CONVECTION BAKE PAD – Touch the pad to COOK TIME PAD –... -
Page 16: Using The Oven
O P E R AT I N G I N S T RU C T I O N S USING THE OVEN BEFORE YOU BEGIN POWER OUTAGE The oven has 7 rack positions CAUTION: for various types of cooking. To install a rack insert the DO NOT attempt to operate the electric ignition curved end of the rack into the oven during an electrical power failure. - Page 17 O P E R AT I N G I N S T RU C T I O N S USING THE OVEN To avoid possible burns, place the racks in the desired position before you turn the oven on. HOW TO SET THE OVEN FOR BAKING OR PREHEATING AND PAN PLACEMENT ROASTING Preheat the oven if the recipe calls for it.
- Page 18 O P E R AT I N G I N S T RU C T I O N S USING THE OVEN HOW TO SET THE OVEN FOR BROILING Your oven is designed for CLOSED DOOR broiling. Serve the food immediately, and place the pan outside the Place the food on the grid of the broiler...
-
Page 19: Using The Oven
O P E R AT I N G I N S T RU C T I O N S USING THE OVEN BROILING GUIDE Broiling times will be affected by the size, weight, thickness, starting temperature and your preference of doneness. This guide is based on meats at refrigerated temperatures. -
Page 20: Using The Clock And Timer
O P E R AT I N G I N S T RU C T I O N S USING THE CLOCK AND TIMER HOW TO SET THE CLOCK HOW TO SET THE TIMER The clock should be set to the correct time of day for The timer does not control oven operations. -
Page 21: Using The Timed Baking And Roasting Features
O P E R AT I N G I N S T RU C T I O N S USING THE CLOCK AND TIMER (continued) HOW TO CANCEL THE TIMER POWER OUTAGE Touch the “TIMER ON/OFF” pad. If a flashing time is in the display, you have experienced a power failure. -
Page 22: Using The Timed Baking And Roasting Features
O P E R AT I N G I N S T RU C T I O N S USING THE TIMED BAKING & ROASTING FEATURES (continued) HOW TO SET A DELAYED START AND NOTE: If you would like to check the times you have set, touch the “START TIME”... -
Page 23: Using The Convection Oven
O P E R AT I N G I N S T RU C T I O N S USING THE CONVECTION OVEN CONVECTION BAKE The convection oven fan shuts off when the oven door is opened. DO NOT leave the door open for long periods of time during convection cooking. - Page 24 O P E R AT I N G I N S T RU C T I O N S USING THE CONVECTION OVEN (continued) AUTOMATIC RECIPE CONVERSION You can use your favorite recipes in the convection Touch the “CLEAR OFF” pad when oven.
- Page 25 O P E R AT I N G I N S T RU C T I O N S USING THE CONVECTION OVEN (continued) HOW TO SET THE OVEN FOR CONVECTION BAKING OR ROASTING When the oven starts to heat, the changing Touch the “CONV.
-
Page 26: Using The Convection Oven
O P E R AT I N G I N S T RU C T I O N S USING THE CONVECTION OVEN (continued) CONVECTION ROASTNG CHART Meats Minutes/Lb. Oven Temp. Beef Rib (3 to 5 lbs.) Rare 20–24 325°F(160°C) †... -
Page 27: Using The Timed Convection Baking Or Roasting Features
O P E R AT I N G I N S T RU C T I O N S USING THE TIMED CONVECTION BAKING OR ROASTING FEATURES NOTES: • DO NOT leave foods that spoil easily – such as milk, eggs, fish, stuffings, poultry and pork –... -
Page 28: Roasting Features
O P E R AT I N G I N S T RU C T I O N S USING THE TIMED CONVECTION BAKING OR ROASTING FEATURES (continued) HOW TO SET A DELAYED START AND AUTOMATIC STOP The oven will turn on at the time of day you set, cook NOTE: If you would like to check the times you have set, touch the “START TIME”... -
Page 29: Using The Favorite Feature
O P E R AT I N G I N S T RU C T I O N S USING THE FAVORITE FEATURE The “FAVORITE” pad is used to record and recall The Favorite Setting feature may be used with COOK your favorite recipe settings. -
Page 30: Setting The Proof Feature
O P E R AT I N G I N S T RU C T I O N S SETTING THE PROOF FEATURE The Proof feature maintains a warm environment for rising yeast leavened products before baking. To avoid lowering the oven temperature and Place the covered dough in a dish in lengthening proofing time,do not open the oven door the oven on rack B or C. -
Page 31: Special Features Of Your Oven Control
O P E R AT I N G I N S T RU C T I O N S SPECIAL FEATURES OF YOUR OVEN CONTROL Your new touch pad control has additional features They remain in the control’s memory until the steps that you may choose to use. - Page 32 O P E R AT I N G I N S T RU C T I O N S SPECIAL FEATURES OF YOUR OVEN CONTROL HOW TO ADJUST THE OVEN THERMOSTAT To decrease(-) temperature adjustment You may find that your new oven cooks differently than the one it replaced.
-
Page 33: Special Features Of Your Oven Control
O P E R AT I N G I N S T RU C T I O N S SPECIAL FEATURES OF YOUR OVEN CONTROL HOW TO SELECT LANGUAGE HOW TO SET PREHEATING ALARM LIGHT ON/OFF Your oven control is set to display in English but you may change this to display in Spanish or French. -
Page 34: Using The Electric Warming Drawer (On Some Models)
O P E R AT I N G I N S T RU C T I O N S USING THE ELECTRIC WARMING DRAWER (on some models) The warming drawer will keep hot, cooked foods at serving temperature. Always start with hot food. TO USE THE WARMING DRAWER WHEN USING THE WARMING DRAWER The warming drawer will keep hot, cooked foods at... - Page 35 O P E R AT I N G I N S T RU C T I O N S USING THE ELECTRIC WARMING DRAWER (on some models) TEMPERATURE SELECTION CHART TO CRISP FOOD ITEMS If you keep several different foods hot, set the control •...
-
Page 36: Using The Self-Cleaning Oven
O P E R AT I N G I N S T RU C T I O N S USING THE SELF-CLEANING OVEN BEFORE A CLEAN CYCLE NOTES: When running a self clean cycle, it is • Soil on the front frame of the range and outside the recommended that a gasket on the door will need to be cleaned by hand. -
Page 37: Using The Self-Cleaning Oven
O P E R AT I N G I N S T RU C T I O N S USING THE SELF-CLEANING OVEN The oven door must be closed and all controls set correctly for the cycle to work properly. HOW TO DELAY THE START OF CLEANING Make sure the clock shows the correct time of day. -
Page 38: Care And Cleaning Of The Range
CA R E A N D C L E A N I N G O F T H E R A N G E CARE AND CLEANING Make sure electrical power is off and all surfaces CAUTION: are cool before cleaning any part of the range. •... -
Page 39: Burner Caps And Heads
CA R E A N D C L E A N I N G O F T H E R A N G E BURNER CAPS AND HEADS • DO NOT use bleach on product to clean. BURNER CAPS If you want to remove burned-on food, soak the burner heads in a solution of mild liquid detergent and Lift off when cool. -
Page 40: Burner Grates
CA R E A N D C L E A N I N G O F T H E R A N G E BURNER GRATES Your range has three professional-style grates. side grate center grate side grate For maximum stability, these grates should only be used in their proper position;... -
Page 41: Stainless Steel Surfaces
CA R E A N D C L E A N I N G O F T H E R A N G E STAINLESS STEEL SURFACES DO NOT use a steel wool pad; it will scratch the To inquire about purchasing stainless steel appliance surface. -
Page 42: Oven Door
CA R E A N D C L E A N I N G O F T H E R A N G E OVEN DOOR The oven door is removable, but it is heavy. You may need help removing and replacing the door. TO REPLACE THE DOOR CAUTION: Step. -
Page 43: Oven Bottom
CA R E A N D C L E A N I N G O F T H E R A N G E OVEN BOTTOM The oven bottom has a porcelain enamel finish. DO NOT use aluminum foil on the bottom of the To make cleaning easier, protect the oven bottom range. -
Page 44: Oven Racks And Drawer Racks
CA R E A N D C L E A N I N G O F T H E R A N G E OVEN RACKS AND DRAWER RACKS If your oven is equipped with nickel oven racks, To clean the oven racks, use an abrasive cleanser. remove them from the oven before beginning the self- After cleaning, rinse the racks with clean water and clean cycle. -
Page 45: Removable Warming Drawer
CA R E A N D C L E A N I N G O F T H E R A N G E REMOVABLE WARMING DRAWER NOTE: Before performing any adjustments, cleaning or service, unplug the range. Make sure the warming drawer heating element is cool. -
Page 46: Troubleshooting
T RO U B L E S H O OT I N G BEFORE CALLING FOR SERVICE Before you call for service, review this list. It may save you time and expense. This list includes common occurrences that are not the result of a defect in workmanship or materials. Problem Possible Causes Solutions... - Page 47 T RO U B L E S H O OT I N G BEFORE CALLING FOR SERVICE Problem Possible Causes Solutions Food does not broil • Make sure you touch the “BROIL HI/LO” pad. • Improper oven controls setting. properly in the oven •...
- Page 48 T RO U B L E S H O OT I N G BEFORE CALLING FOR SERVICE Problem Possible Causes Solutions Oven door will not • The oven temperature is too high. • Allow the oven to cool below locking temperature. open after a self-clean •...
- Page 49 T RO U B L E S H O OT I N G BEFORE CALLING FOR SERVICE Problem Possible Causes Solutions Convection fan not • Preheat temperature not reached. • Fan will start automatically once the preheat working (convection temperature is reached. models) •...
- Page 50 LG GAS RANGE LIMITED WARRANTY – USA LG Electronics Inc. will repair or replace your product, at LG’s option, if it proves to be defective in material or workmanship under normal use, during the warranty period set forth below, effective from the date of original consumer purchase of the product.
- Page 51 NOTAS...
- Page 52 MANUAL DEL PROPIETARIO ESTUFA DE GAS Lea detenidamente estas instrucciones antes utilizar y guárdelas como referencia para el futuro. Modelos LRG3097ST LRG3095ST LRG3095SB LRG3095SW P/No.: MFL33029602 www.lg.com...
- Page 53 LG. Panel de Control—LRG3097S ........13 Panel de Control—LRG3095S ........14 Uso del Horno ............15–18 Su nueva estufa de gas LG combina Uso del Reloj y el Temporizador ......19–20 Uso de las Funciones de Horneado y Asado características de cocción de Por Temporizador ...........20–21...
-
Page 54: Información Importante De Seguridad
I N F O R M ACIÓN IMPORTA N T E D E S E G U R I DA D LEA TODAS LAS INSTRUCCIONES ANTES DE USAR LA UNIDAD Para evitar riesgos de incendio, choque eléctrico, lesiones físicas o daños durante el uso, lea y siga todas las instrucciones antes de usar su horno. -
Page 55: Medidas De Seguridad
I N F O R M ACIÓN IMPORTA N T E D E S E G U R I DA D LEA TODAS LAS INSTRUCCIONES ANTES DE USAR LA UNIDAD DISPOSITIVO ANTIVUELCO (continuación) • NO se apoye ni se siente sobre la puerta. Instale el soporte •... - Page 56 I N F O R M ACIÓN IMPORTA N T E D E S E G U R I DA D LEA TODAS LAS INSTRUCCIONES ANTES DE USAR LA UNIDAD MEDIDAS DE SEGURIDAD (continuación) • Asegúrese de que su estufa de gas quede instalada •...
- Page 57 I N F O R M ACIÓN IMPORTA N T E D E S E G U R I DA D LEA TODAS LAS INSTRUCCIONES ANTES DE USAR LA UNIDAD COCINANDO EN LA SUPERFICIE • Si al freír combina aceites y grasas, mézclelos bien antes ADVERTENCIA: de calentarlos.
- Page 58 I N F O R M ACIÓN IMPORTA N T E D E S E G U R I DA D LEA TODAS LAS INSTRUCCIONES ANTES DE USAR LA UNIDAD COCINE MUY BIEN TODAS LAS CARNES Cocine muy bien todas las carnes, incluyendo las carnes de Por lo general, cocinar a estas temperaturas protege contra aves;...
- Page 59 I N F O R M ACIÓN IMPORTA N T E D E S E G U R I DA D LEA TODAS LAS INSTRUCCIONES ANTES DE USAR LA UNIDAD HORNO Permanezca apartado de la estufa al abrir la puerta del horno caliente. El aire caliente y el vapor de salida pueden provocar quemaduras en manos, cara y ojos.
-
Page 60: Instrucciones De Funcionamiento
INSTRUCCIONES DE FUNCIONAMIENTO PIEZAS Y FUNCIONES Rejillas Ventilación del horno Quemador oval Quemador pequeño Quemador extragrande Interruptor de luz Quemador medio automática del horno Quemador grande Seguro de autolimpieza Perillas (5 unidades) Rejilla de asados Rejilla dividida Rejilla resistente Bandeja y parrilla de asado Rejilla resistente Junta... -
Page 61: Uso De Los Quemadores De Gas
I N S T RU C C I O N E S D E F U N C I O N A M I E N TO USO DE LOS QUEMADORES DE GAS Las funciones y aspecto s re ejados en este manual podrían variar d ependiendo de su modelo. - Page 62 I N S T RU C C I O N E S D E F U N C I O N A M I E N TO USO DE LOS QUEMADORES DE GAS CÓMO SELECCIONAR EL TAMAÑO DE LA LLAMA Para usar con seguridad los utensilos de cocción, Utilizar llamas de mayor nunca deje que la llama se extienda por fuera de los...
-
Page 63: Uso De La Parrilla
I N S T RU C C I O N E S D E F U N C I O N A M I E N TO USO DE LA PARRILLA Precaliente la parrilla según la siguiente guía y ajuste la potencia que desee. -
Page 64: Panel De Control-Lrg3097S
I N S T RU C C I O N E S D E F U N C I O N A M I E N TO PANEL DE CONTROL—LRG3097S Las funciones y aspecto reflejados en este manual podrían variar dependiendo de su modelo. FUNCIONES DE CONTROL, RELOJ Y TEMPORIZADOR DEL HORNO BOTÓN DE HORNEADO POR CONVECCIÓN –... -
Page 65: Panel De Control-Lrg3095S
I N S T RU C C I O N E S D E F U N C I O N A M I E N TO PANEL DE CONTROL—LRG3095S Las funciones y aspecto reflejados en este manual podrían variar dependiendo de su modelo. FUNCIONES DE CONTROL, RELOJ Y TEMPORIZADOR DEL HORNO BOTÓN DE HORNEADO POR CONVECCIÓN –... -
Page 66: Uso Del Horno
I N S T RU C C I O N E S D E F U N C I O N A M I E N TO USO DEL HORNO ANTES DE COMENZAR CORTE DEL SUMINISTRO ELÉCTRICO EL horno cuenta con 7 posiciones PRECAUCIÓN: de rejillas que permiten realizar diversos tipos de cocción. - Page 67 I N S T RU C C I O N E S D E F U N C I O N A M I E N TO USO DEL HORNO Para evitar posibles quemaduras, introduzca las bandejas en la posición que desee antes de prender el horno. CÓMO AJUSTAR EL HORNO PARA HORNEAR O PRECALENTAMIENTO Y COLOCACIÓN DE ASAR...
- Page 68 I N S T RU C C I O N E S D E F U N C I O N A M I E N TO USO DEL HORNO CÓMO AJUSTAR EL HORNO PARA ASAR A LA PARRILLA Sirva la comida inmediatamente y deje la Su horno está...
- Page 69 I N S T RU C C I O N E S D E F U N C I O N A M I E N TO USO DEL HORNO GUÍA DE ASADO A LA PARRILLA El tamaño, peso, grosor, temperatura de inicio y sus preferencias de cocción afectarán a los tiempos del asado a la parrilla.
-
Page 70: Uso Del Reloj Y El Temporizador
I N S T RU C C I O N E S D E F U N C I O N A M I E N TO USO DEL RELOJ Y EL TEMPORIZADOR CÓMO AJUSTAR EL RELOJ CÓMO AJUSTAR EL TEMPORIZADOR El reloj debe estar a la hora para que las funciones de El temporizador no controla las funciones del horno. -
Page 71: Uso De Las Funciones De Horneado Y Asado Por Temporizador
I N S T RU C C I O N E S D E F U N C I O N A M I E N TO USO DEL RELOJ Y EL TEMPORIZADOR (continuación) CÓMO CANCELAR EL TEMPORIZADOR CORTE DEL SUMINISTRO ELÉCTRICO Pulse el botón TIMER ON/OFF. - Page 72 I N S T RU C C I O N E S D E F U N C I O N A M I E N TO USO DE LAS FUNCIONES DE HORNEADO Y ASADO POR TEMPORIZADOR (continuación) CÓMO AJUSTAR UN INICIO RETARDADO Y UNA NOTA: Si desea verificar los períodos ajustados, pulse el botón START TIME para verificar la hora de inicio o el PARADA AUTOMÁTICA...
-
Page 73: Uso Del Horno De Convección
I N S T RU C C I O N E S D E F U N C I O N A M I E N TO USO DEL HORNO DE CONVECCIÓN El ventilador del horno de convección se apaga al abrir la HORNEADO POR CONVECCIÓN puerta del horno. - Page 74 I N S T RU C C I O N E S D E F U N C I O N A M I E N TO USO DEL HORNO DE CONVECCIÓN (continuación) ADAPTACIÓN AUTOMÁTICA DE LA RECETAS Puede usar sus recetas favoritas en el horno de Pulse el botón CLEAR OFF al completarse convección.
- Page 75 I N S T RU C C I O N E S D E F U N C I O N A M I E N TO USO DEL HORNO DE CONVECCIÓN (continuación) CÓMO AJUSTAR EL HORNO PARA HORNEAR O ASAR POR CONVECCIÓN Cuando el horno empiece a calentar, se mostrará...
- Page 76 I N S T RU C C I O N E S D E F U N C I O N A M I E N TO USO DEL HORNO DE CONVECCIÓN (continuación) GUÍA DE ASADO POR CONVECCIÓN Carnes Minutos/Lb. (450 g) Temp.
-
Page 77: Uso De Las Funciones De Horneado Y Asado Por Convección Con Temporizador
I N S T RU C C I O N E S D E F U N C I O N A M I E N TO USO DE LAS FUNCIONES DE HORNEADO Y ASADO POR CONVECCIÓN CON TEMPORIZADOR NOTAS: •... - Page 78 I N S T RU C C I O N E S D E F U N C I O N A M I E N TO USO DE LAS FUNCIONES DE HORNEADO Y ASADO POR CONVECCIÓN CON TEMPORIZADOR (continuación) COMO AJUSTAR UN INICIO RETARDADO Y UNA PARADA AUTOMATICA El horno se prenderá...
-
Page 79: Uso De La Función Favoritos
I N S T RU C C I O N E S D E F U N C I O N A M I E N TO USO DE LA FUNCIÓN FAVORITOS El botón FAVORITE se usa para grabar y recuperar los La función de ajuste de favoritos podría usarse con la ajustes favoritos para sus recetas. -
Page 80: Ajuste De La Función Subir Masas
I N S T RU C C I O N E S D E F U N C I O N A M I E N TO AJUSTE DE LA FUNCIÓN SUBIR MASAS La función para subir masas de mantiene un ambiente caliente para levantar productos de levadura de trigo fermentada antes del horneado. -
Page 81: Funciones Especiales De Control De Su Horno
I N S T RU C C I O N E S D E F U N C I O N A M I E N TO FUNCIONES ESPECIALES DE CONTROL DE SU HORNO Su nuevo control táctil dispone de funciones adicionales Permanecen en la memoria de control hasta que se repitan que podrá... - Page 82 I N S T RU C C I O N E S D E F U N C I O N A M I E N TO FUNCIONES ESPECIALES DE CONTROL DE SU HORNO CÓMO AJUSTAR EL TERMOSTATO DEL HORNO Para reducir (-) el ajuste de temperatura Es posible que encuentre que su nuevo horno cocine de manera diferente al que tenia antes.
- Page 83 I N S T RU C C I O N E S D E F U N C I O N A M I E N TO FUNCIONES ESPECIALES DE CONTROL DE SU HORNO CÓMO ESCOGER EL IDIOMA CÓMO AJUSTAR LA ACTIVACIÓN/ DESACTIVACIÓN DE LA LUZ DE ALARMA DE PRECALENTAMIENTO El control de su horno está...
-
Page 84: Uso De La Gaveta De Calentamiento Eléctrica (En Algunos Modelos)
I N S T RU C C I O N E S D E F U N C I O N A M I E N TO USO DE LA GAVETA DE CALENTAMIENTO ELÉCTRICA (en algunos modelos) La gaveta de calentamiento mantendrá calientes los alimentos cocinados a la temperatura idónea para servirlos. - Page 85 I N S T RU C C I O N E S D E F U N C I O N A M I E N TO USO DE LA GAVETA DE CALENTAMIENTO ELÉCTRICA (en algunos modelos) CUADRO DE SELECCIÓN DE TEMPERATURA VOLVER A HACER CRUJIENTES ALIMENTOS YA BLANDOS Para mantener calientes distintos tipos de alimentos, ajuste...
-
Page 86: Uso De La Función De Autolimpieza Del Horno
I N S T RU C C I O N E S D E F U N C I O N A M I E N TO USO DE LA FUNCIÓN DE AUTOLIMPIEZA DEL HORNO ANTES DE REALIZAR UN CICLO DE LIMPIEZA Cuando realice un ciclo de NOTAS: autolimpieza, se... - Page 87 I N S T RU C C I O N E S D E F U N C I O N A M I E N TO USO DE LA FUNCIÓN DE AUTOLIMPIEZA DEL HORNO La puerta del horno debe cerrarse y todos los controles ajustarse correctamente para que el ciclo se realice de forma correcta.
-
Page 88: Cuidados Y Limpieza De La Estufa De Gas
C U I DA D O S Y L I M P I E Z A D E L A E S T U FA D E G A S CUIDADO Y LIMPIEZA Asegúrese de que el suministro eléctrico esté PRECAUCIÓN: desconectado y de que todas las superficies estén frías antes de proceder a la limpieza de cualquier parte de la... -
Page 89: Tapas Y Cabezas De Los Quemadores
C U I DA D O S Y L I M P I E Z A D E L A E S T U FA D E G A S TAPAS Y CABEZAS DE LOS QUEMADORES • NO use lija sobre el producto para limpiarlo. TAPAS DE LOS QUEMADORES Para eliminar los restos de comida quemados, sumerja las cabezas de los quemadores en una solución de detergente... -
Page 90: Rejillas
C U I DA D O S Y L I M P I E Z A D E L A E S T U FA D E G A S REJILLAS Su estufa de gas dispone de tres rejillas profesionales. Rejilla lateral Rejilla central Rejilla lateral Para lograr la máxima estabilidad, estas rejillas deberán... -
Page 91: Superficies De Acero Inoxidable
C U I DA D O S Y L I M P I E Z A D E L A E S T U FA D E G A S SUPERFICIES DE ACERO INOXIDABLE NO use estropajos metálicos: arañarán la superficie. Para resolver dudas relativas a la compra de limpiadores o abrillantadores para electrodomésticos de acero inoxidable Para limpiar superficies de acero inoxidable, use agua... -
Page 92: Puerta Del Horno
C U I DA D O S Y L I M P I E Z A D E L A E S T U FA D E G A S PUERTA DEL HORNO La puerta del horno es desmontable, pero pesada. Podría PARA MONTAR LA PUERTA necesitar ayuda para desmontar y montar la puerta. -
Page 93: Base Del Horno
C U I DA D O S Y L I M P I E Z A D E L A E S T U FA D E G A S BASE DEL HORNO NO use papel de aluminio en la base de la estufa del horno. La base del horno tiene un acabado de esmalte de porcelana. -
Page 94: Bandejas Del Horno Y Soportes De La Gaveta
C U I DA D O S Y L I M P I E Z A D E L A E S T U FA D E G A S BANDEJAS DEL HORNO Y SOPORTES DE LA GAVETA Si su horno está equipado con bandejas de níquel, retírelas Tras la limpieza, enjuague las bandejas con agua limpia y del horno antes de que comience el ciclo de autolimpieza. -
Page 95: Gaveta De Calentamiento Desmontable
C U I DA D O S Y L I M P I E Z A D E L A E S T U FA D E G A S GAVETA DE CALENTAMIENTO DESMONTABLE NOTA: Antes de realizar cualquier ajuste, labor de limpieza o servicio, desenchufe la estufa. -
Page 96: Solución De Problemas
SOLUCIÓN DE PRO B L E M A S ANTES DE SOLICITAR ASISTENCIA TÉCNICA Antes de llamar solicitando asistencia, repase esta lista. Esto le ahorrará tiempo y dinero. Esta lista contiene problemas comunes que no son debidas a defectos en la mano de obra o materiales. Problema Causas probables Soluciones... - Page 97 SOLUCIÓN DE PRO B L E M A S ANTES DE SOLICITAR ASISTENCIA TÉCNICA Problema Causas probables Soluciones Los alimentos no se BROIL HI/LO. • Los controles del horno no están fijados bien. • Cerciórese que presionó el botón asan al fuego directo como es se debido •...
- Page 98 SOLUCIÓN DE PRO B L E M A S ANTES DE SOLICITAR ASISTENCIA TÉCNICA Problema Causas probables Soluciones La puerta del horno no se • El horno excesivamente caliente. • Permita que el horno se enfríe por debajo de la temperatura de abrirá...
- Page 99 SOLUCIÓN DE PROBLEMAS ANTES DE SOLICITAR ASISTENCIA TÉCNICA Problema Causas probables Soluciones El ventilador de • No se ha alcanzado la temperatura de • El ventilador se pondrá en funcionamiento convección no funciona precalentamiento. automáticamente al alcanzar la temperatura de (modelos de convección) precalentamiento.
-
Page 100: Garantía
GARANTÍA LIMITADA DE ESTUFA DE GAS LG - EE.UU. LG Electronics Inc. reparará o reemplazará su producto, a criterio de LG, si llegara a tener defectos en los materiales o mano de obra bajo un uso normal, durante el período de garantía establecido a continuación, vigente desde la fecha original de compra del producto por parte del consumidor. - Page 101 LG Customer Information Center 1-800 - 243-0000 USA, Consumer User 1-888- 865-30 26 USA, Comme rcial User 1-888 -542-2 623 CANADA Register your product Online! www.lg.com Printed in Mexico...