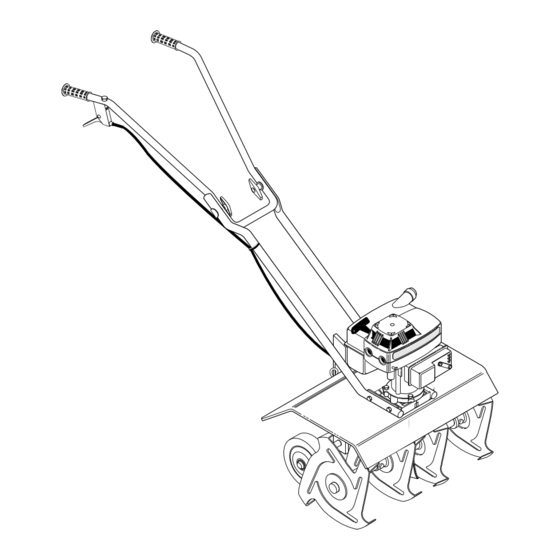
Summary of Contents for Husqvarna CT16
- Page 1 CT16 1.1996 Spare Parts Piéces Dètachées Owner's Manual 601 00 18-54 Reference No. 337411 05/03/95...
-
Page 2: Safety Rules
THESE SAFETY RULES ARE FOR YOUR PROTECTION. READ THEM CAREFULLY SAFETY STANDARDS REQUIRE OPERATOR PRESENCE CONTROLS TO MINIMIZE THE RISK OF INJURY. YOUR TILLER/ CULTIVATOR IS EQUIPPED WITH SUCH CONTROLS. DO NOT ATTEMPT TO DEFEAT THE FUNCTION OF THE OPERATOR PRESENCE CONTROL UNDER ANY CIRCUMSTANCES. -
Page 3: Table Of Contents
Record the following information about your unit so that you will be able to provide it in case of loss or theft. MODEL NUMBER: PURCHASE DATE: DEALER'S NAME AND ADDRESS: CITY: WARNING This unit is equipped with an internal combustion engine and should not be used on or near any unimproved forest- covered, brush-covered or grass-covered land unless the engine's exhaust system is equipped with a spark arrester meeting applicable local or state laws (if any). -
Page 4: Assembly
CAUTION: ALWAYS WEAR SAFETY GLASSES OR EYE SHIELDS WHILE ASSEM- BLING TILLER/CULTIVATOR. FIG. 1-OP on page 6 shows the tiller/cultivator completely assembled. Reference to the right and left hand side of the tiller/cultivator is from the operator's position behind the unit. TO INSTALL THE HANDLE ASSEMBLY The lower handles have a short bend at the bottom end and are flattened at the top to allow the upper handle to be placed... -
Page 5: Assembly
IMPORTANT: OVERTIGHTENING THE SCREWS ENOUGH TO CHANGE THE SHAPE OF THE HANDLES CAN RESULT IN DAMAGE TO THE ENGINE CASTING. Hold the curved head carriage bolt against theoutside of the lower handle while tightening the tee knobs securely. TO INSTALL THE THROTTLE CON- TROL ASSEMBLY Place a No. -
Page 6: Operation
KNOW YOUR TILLER/CULTIVATOR READ THIS OWNER’S MANUAL AND SAFETY RULES BEFORE OPERATING YOUR TILLER/CULTIVATOR. Compare the illustrations with your tiller/cultivator to familiarize yourself with the location of various controls and adjustments. Save this manual for future reference. UPPER HANDLE THROTTLE CONTROL RIGHT SIDE LOWER HANDLE... - Page 7 The operation of this tiller/cultivator can result in foreign objects being thrown into the eyes, which can result in severe eye damage. Always wear safety glasses or eye shields while operating the tiller/cultivator. We recommend standard safety glasses or Wide Vision Safety Mask for over your glasses. CAUTION: KEEP AWAY...
- Page 8 GASOLINE AND OIL MIXTURE Mix gasoline and oil as follows: Pour 1 U.S. quart of fresh, clean, unleaded automo- tive gasoline into a gallon gasoline container. Add (5 oz.) of clean, high quality two-cycle oil into the gasoline container. IMPORTANT: DO NOT USE OUTBOARD MOTOR OIL OR MULTI-VISCOSITY OILS, SUCH AS 10W-30 OR 10W-40.
- Page 9 TILLING HINTS Tilling is digging in, turning over and breaking up packed soil before planting. Loose unpacked soil helps root growth. Best tilling depth is 4 to 6 inches. Tilling will also clear the soil of unwanted vegetation. The decomposi tion of this vegetation matter enriches the soil.
-
Page 10: Maintenance
GENERAL The warranty on this tiller/cultivator does not cover items that have been subjected to operator abuse or negligence. To receive full value from the warranty, the operator must main- tain the tiller/cultivator as instructed in this manual. The follow SERVICE RECOMMENDATIONS CHART SERVICE RECORDS Fill in dates as you... - Page 11 ENGINE AIR CLEANER The air cleaner filter should be cleaned and reoiled after 3 months or 25 hours of operation. Clean more often under dusty conditions. IMPORTANT: The engine can be worn out in a very short period of time if dirt or grit is allowed to enter the engine.
-
Page 12: Service And Adjustments
TINE REPLACEMENT The tiller/cultivator is left hand or right hand as viewed from the operator's position behind the unit. All four tines on this unit are different and cannot be inter- changed. The tines must be properly installed as shown in figures 1 and 2 or the tiller/cultivator will not function properly. -
Page 13: Carburetor Adjustment
CARBURETOR ADJUSTMENT A dirty air cleaner will cause the engine to run improperly and/or smoke excessively. Be sure the air cleaner is clean before adjusting the carburetor. Never make unnecessary adjustments to the carburetor. The carburetor was set at the factory to operate efficiently under most applications. -
Page 14: Storage
CAUTION: NEVER STORE ENGINE WITH FUEL IN TANK INDOORS OR IN ENCLOSED, POORLY VENTILATED AREA, WHERE FUEL FUMES MAY REACH AN OPEN FLAME, SPARK OR PILOT LIGHT AS ON A FURNACE, WATER HEATER, CLOTHES DRYER, ETC. NOTE: The tiller/cultivator should be immediately prepared for storage at the end of the season or if the unit will not be used for 30 days or more. -
Page 15: Troubleshooting
CAUSE TROUBLE Difficult starting Stale fuel mixture Too much oil in mixture Engine runs erratically Dirt in fuel tank or out of fuel Engine will not run at Carburetor out of adjustment full speed Fouled spark plug Plugged air cleaner Engine speed does not Debris interferring with throttle linkage increase properly...


