
Related Manuals for Silvercrest DV-5200HD


Summary of Contents for Silvercrest DV-5200HD
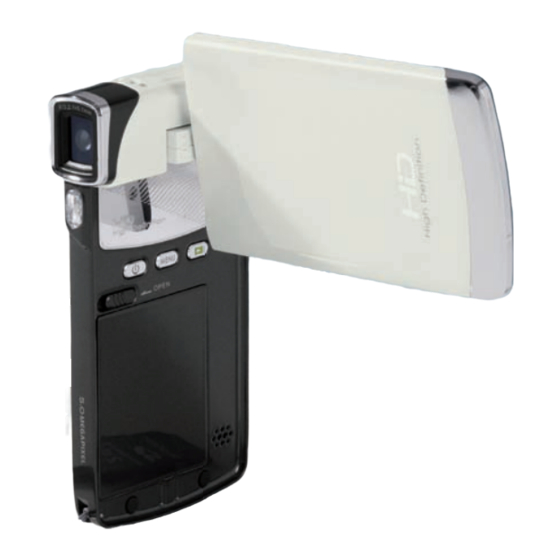
- Page 1 Digital HD Pocket Camcorder in a contemporary slim design User manual and service information DV-5200HD...
-
Page 3: Table Of Contents
DV-5200HD Table of Contents Table of Contents Important Notice Safety Instructions................5 Children................... 7 Charger and Rechargeable Battery..........7 Cables ..................... 8 Repair and Maintenance ..............8 Intended Use................... 8 Conformity..................9 Disposal of Old Devices ..............9 Introduction Package Contents................. 10 Controls and buttons .............. - Page 4 Table of Contents DV-5200HD Inserting the Battery..............17 Inserting an SD Card ..............18 Write-Protecting the Memory Card ..........19 Switching the Camcorder On and Off .......... 20 Switching the Operating Mode............. 21 Setting the Menu Language............21 Setting Date and Time ..............22 Recording Recording Videos .................
- Page 5 DV-5200HD Table of Contents The Menus The Recording Menus ..............35 Video Recording Menu..............35 Photo Capture Menu ..............38 The Playback Menus..............41 Video Playback Menu ..............41 Photo Playback Menu ..............44 Setup Menu................... 47 Date / Time .................. 48 Beep.....................
- Page 6 Table of Contents DV-5200HD Appendix Installing the Software ..............56 System Requirements ..............56 Software ..................56 Technical Specifications ............... 58 Warranty Information ..............60 4 - English...
-
Page 7: Important Notice
DV-5200HD Safety Instructions Important Notice Safety Instructions • Before you use this device for the first time, please read the following notes in this manual and heed all warnings, even if you are familiar with handling electronic devices. Always check that the product works correctly. - Page 8 Safety Instructions DV-5200HD • Unplug the power cord from the mains outlet before you remove the rechargeable battery from the charger or separate the charger from the power cord. • In the event of a defect in the charger or its accessories, unplug the power cord from the mains immediately.
-
Page 9: Children
DV-5200HD Safety Instructions and it must especially never be immersed (do not place any objects filled with liquids such as vases or drinks near the device); • no fire sources (e.g. burning candles) are placed on or near the device;... -
Page 10: Cables
Safety Instructions DV-5200HD and any areas where you should normally switch off your car engine. Respect the environment. Old rechargeable batteries do not belong in with domestic waste. They must be handed in to a collection point for old batteries. -
Page 11: Conformity
DV-5200HD Safety Instructions its default configuration, this product has not been designed for medical, lifesaving, rescue or life-maintaining purposes. Only connection cables and external devices may be used that comply with safety standards and the electromagnetic compatibility and shielding quality of this device. -
Page 12: Introduction
Introduction Package Contents Take all supplied devices and accessories out of the packaging and inspect them for any damaged or missing items. Rechargeable Li-Ion battery, Camcorder DV-5200HD PAC ELECTRONICS CO., LTD. NP40 (2 pieces) Charger Technics-GP TC03G- USB/AV cable 2U025-0421D and power cord... -
Page 13: Controls And Buttons
DV-5200HD Introduction Pouch CD with software User's manual (not shown) SD memory card (2 GB) Keep the packaging material in case you have to ship or transport the product in the future. Controls and buttons An additional illustration of the items and controls and their corresponding numbers can be found on the inner page of the fold- out cover of this User’s Manual. -
Page 14: Front Panel
Introduction DV-5200HD Front Panel 1 Lens 2 Video lamp 3 Eyelet for carrying strap Rear Panel 4 Power indicator 5 RECORD button 6 Mode selection switch 7 Confirmation button / LED lamp on/off 8 USB/AV cable receptacle 9 HDMI jack... -
Page 15: Left Panel (Display Closed)
DV-5200HD Introduction Left Panel (display closed) 11 Microphone 12 Fold-out touchscreen Left Panel (display open) 13 Menu button 14 PLAY button 15 Battery compartment cover 16 Speaker 17 Battery compartment lock 18 On/Off button Top View 19 Macro switch 20 Memory card... -
Page 16: Bottom
Introduction DV-5200HD Bottom 21 Tripod mount 14 - English... -
Page 17: Opening The Display
DV-5200HD Introduction Opening the Display Open the display and then rotate it according to your needs. You can also rotate the display so it faces the front. In this case, the picture orientation will be adjusted automatically. However, this applies to recordings in landscape format only. -
Page 18: Charging The Batteries
Introduction DV-5200HD Charging the Batteries The camcorder is powered by a rechargeable Lithium-Ion (PAC ELECTRONICS CO., LTD. NP40) battery. On delivery, the batteries are not charged. Please charge the batteries before first use of the device. Insert the rechargeable battery in the charger cradle Technics-GP TC03G-2U025-0421D so that the contacts (+) and (-) correspond to the rechargeable battery and charging tray markings. -
Page 19: Inserting The Battery
DV-5200HD Introduction The status indicator of the charging cradle will light orange whilst the battery is charging. When the charging process is completed, the status indicator will light green. You can then insert the rechargeable battery into the camcorder. Depending on the charge level, the charging cycle can take up to 2 hours. -
Page 20: Inserting An Sd Card
Introduction DV-5200HD 3. Next insert the battery into the camcorder, as shown in figure 2. To do this, insert its metal contacts first into the battery compartment and then push it downwards so that it clicks into place. When inserting the rechargeable battery, make sure that the tag is placed around the battery so that you can remove the battery easily from the compartment when required. -
Page 21: Write-Protecting The Memory Card
DV-5200HD Introduction 2. Then insert the memory card with the metal contacts facing forwards into the card slot. The label must face towards the right panel of the camcorder housing. Slide the card fully into the slot opening until the card clicks into place. -
Page 22: Switching The Camcorder On And Off
Introduction DV-5200HD Write protection disabled Write protection enabled While the write protection is enabled the indication SD will appear in the lower-right corner of the display, and when you press the recording button a double beep will be heard. Switching the Camcorder On and Off •... -
Page 23: Switching The Operating Mode
DV-5200HD Introduction Switching the Operating Mode Press the mode selector button (6) multiple times to toggle between the modes Movie, Photo and Setup. An icon for the currently selected operating mode will appear in the upper-left corner of the display: Movie recording or Photo capture. -
Page 24: Setting Date And Time
Introduction DV-5200HD Setting Date and Time 1. Open camcorder display. device powers automatically. If the display was already open but the device was off, press the On/Off button (18). 2. Press the mode selector button (6) twice. The setup menu will appear and the first option “Date/Time”... -
Page 25: Recording
DV-5200HD Recording Recording Recording Videos 1. Open the display and then rotate it according to your needs. The device powers on automatically. 2. If the current mode is not set to video recording, select it by using the mode selector (6). - Page 26 Recording DV-5200HD During recording, different icons may appear on the display informing you about the current settings. Video recording mode indicator Zoom bar Macro recording White Balance Night mode Effect Recording time counter Memory type: : an SD memory card has been inserted and all recordings are being stored on it.
-
Page 27: Video Light
DV-5200HD Recording : there is no SD memory card inserted and all recordings are being stored internal camcorder memory. Remaining memory capacity Resolution Battery level Exposure Compensation Video Light In dark environments you can enable the built-in LED lamp (2) for video or photo recording. -
Page 28: Exposure Compensation
Recording DV-5200HD Exposure Compensation During video and photo recording you can set an exposure compensation value. 1. While in video recording or photo capture mode (icons ), tap on the display icons to set an exposure compensation value. If the picture is too bright you can set a negative value for exposure compensation. -
Page 29: Capturing Pictures
DV-5200HD Recording Capturing Pictures 1. Open the display and then rotate it according to your needs. The device powers on automatically. 2. If the current mode is not set to photo capturing, select it by using the mode selector (6). - Page 30 Recording DV-5200HD Photo capture mode indicator Zoom bar Remaining number of pictures Macro recording White Balance Night mode Effect Memory type: : an SD memory card has been inserted and all pictures are being stored on it. : there is no SD memory card inserted and all pictures are being stored on the internal camcorder memory.
-
Page 31: Video Light
DV-5200HD Recording Video Light You can use the video lamp to take pictures under bad lighting conditions. It works in exactly the same way as for video recording. See page 25 - The Video Light. Macro Mode The macro function for photography works in exactly the same way as for video recording. -
Page 32: Playback
Playback DV-5200HD Playback You can play back your recorded videos and photos on the camcorder screen to check if the results are satisfactory. Depending on the selected mode you can use the Play button (14) to switch to the corresponding playback mode. - Page 33 DV-5200HD Playback In playback mode you will see further information on the display: Video playback mode indicator Total duration of the current video Number of current video / Total number of recorded videos Playback icon. Tap on this icon to start video playback.
- Page 34 Playback DV-5200HD necessary. Tap on the icon to open the playback menu. Protected file indicator During video clip playback you can increase or decrease the playback speed or pause the video. To do this, use the following buttons. • icon pauses the current playback. The button will change into a playback icon.
-
Page 35: Playing Back Photos
DV-5200HD Playback Playing Back Photos In Photo mode you can use the Play button (14) to switch to picture playback mode. The last-captured picture will appear. Press this button once again to return to capture mode. The icon in the upper- left corner of the display shows the current mode. - Page 36 Playback DV-5200HD Picture playback mode indicator Number of current picture / Total number of captured pictures Tap these icons to skip to the previous picture. Thumbnail view. Tap on this icon to get a thumbnail view of all pictures. While in...
-
Page 37: The Menus
DV-5200HD The Menus The Menus The camcorder uses different menus that offer multiple settings under each operating mode. Furthermore there is a setup menu allowing you to set the preferences for your camcorder. The Recording Menus Video Recording Menu The video recording menu allows you to set the different video recording parameters. - Page 38 The Menus DV-5200HD The icons have the following meanings: Automatic Daylight Cloudy Fluorescent Tungsten Resolution The resolution determines the size of the recording in pixels. As a general rule: The higher the resolution, the more storage space is required. The following settings are available:...
- Page 39 DV-5200HD The Menus Video resolution Preview/Playback 16:9 aspect ratio 1080P 720P WVGA 4:3 aspect ratio QVGA The WVGA video resolution records at a very high frame rate (120 fps). This is four times the normal frame rate and therefore suitable for very fast-moving scenes (like car racing, sports events etc.).
-
Page 40: Photo Capture Menu
The Menus DV-5200HD Effect You can record contents using the settings Default, Black and White, and Sepia. To do this, select the corresponding icon. Night Mode order obtain properly exposed recordings dark environments, select Night mode. This will improve the quality of any night recordings. - Page 41 DV-5200HD The Menus 6. Press the menu button (13) again or tap on the icon to hide the menu. The following sections contain a description of the different parameters available in the photo capture menu. White Balance White balance is used to determine a colour temperature suitable for the current lighting conditions.
- Page 42 The Menus DV-5200HD Your camcorder supports recording videos in modern wide-screen format. For pictures, however, the aspect ratio is downscaled to 4:3 automatically. This is due to the fact that printouts in the photo lab normally have a 4:3 aspect ratio. In this case, when pointing the device towards a scene, the screen preview contains black bars on the left and right.
-
Page 43: The Playback Menus
DV-5200HD The Menus Quality The Quality setting determines the compression ratio of the captured picture when saved onto the memory card or internal memory. The higher the compression, the more pictures can be stored. You can take pictures using the quality presets Normal (green) and High (red). - Page 44 The Menus DV-5200HD Delete one Use this option to delete a single video recording. Protected recordings cannot be deleted. See also on page 43 – Protect. 1. Perform steps 1 to 4 from “Video Playback Menu” (see page 41). 2. Select “Delete One” and press the confirmation button (7) to confirm.
- Page 45 DV-5200HD The Menus 3. Select the trash bin icon and press the confirmation button (7) to confirm the deletion. Or tap on the trash bin icon on the display and then on the OK button. If you decide not to delete your videos, in step 3 select the “Cancel”...
-
Page 46: Photo Playback Menu
The Menus DV-5200HD During playback, press the recording button (5) to pause playback. Press it again to resume playback. During this process, the playback control buttons will be shown. They allow fast forward or rewind of the video, as described on page 32. - Page 47 DV-5200HD The Menus 5. Press the navigation button (10) to select the desired function and then press the confirmation button (7) or tap on it on the display to open it. 6. Make the desired adjustments (see below) and tap OK.
- Page 48 The Menus DV-5200HD Delete all Use this option to delete all saved pictures at once. Protected pictures cannot be deleted. See also on page 46 – Protect. 1. Perform steps 1 to 4 from “Photo Playback Menu” (see page 44).
-
Page 49: Setup Menu
DV-5200HD The Menus 6. Press the Menu button (13) to return to the photo playback menu. Automatic Playback This function allows you to play all captured photos in sequence like a slideshow. 1. Perform steps 1 to 4 from “Photo Playback Menu” (see page 44). -
Page 50: Date / Time
The Menus DV-5200HD Date / Time Set the date and time (see also page 22 – Setting the Date and Time). Beep Here you can determine if a sound is output when pressing any button. This option enables or disables the power-on sound at the same time. -
Page 51: Default
DV-5200HD The Menus Warning! All saved videos and pictures will be erased and cannot be restored. This also applies to protected files. Make sure that all recordings you want to keep have been backed-up on a different medium. Default All device parameters will be reset to their factory-default values. -
Page 52: Connectors And Ports
Connectors and Ports DV-5200HD Connectors and Ports Viewing Recordings on a Television Screen Any recordings that you can view on the camcorder display can also be played back on a regular TV set. For this, your television set must have an appropriate Video In connector. -
Page 53: Connecting Via The Usb/Av Cable
DV-5200HD Connectors and Ports 4. Select the HDMI signal source corresponding to the above input connectors on your TV set. If necessary, read the User Manual of your TV set for more information on how to do this. 5. Press the On/Off button (18) to power the camcorder on. The device display remains off while the picture will be shown on the TV screen. - Page 54 Connectors and Ports DV-5200HD 4. Select the AV channel corresponding to the above input connectors on your TV set. If necessary, read the User Manual of your TV set for more information on how to do this. 5. Press the On/Off button (18) to power the camcorder on. The device display remains off while the picture will be shown on the TV screen.
-
Page 55: Transferring Recordings To The Computer
DV-5200HD Connectors and Ports Transferring Recordings to the Computer There are two possible ways to copy recordings from the camcorder to a computer: • by connecting the device to a computer via the USB/AV cable • by inserting the SD memory card into a card reader Be careful when renaming any folders and files. -
Page 56: Using The Usb Port
Connectors and Ports DV-5200HD Using the USB port ® ® ® Windows 7, Windows Vista and Windows XP operating systems will detect the camcorder automatically as a mass storage device. 1. Please make sure that your camcorder is powered off. -
Page 57: Using A Card Reader
DV-5200HD Connectors and Ports Using a Card Reader If your computer features a card reader supporting SD memory cards, you can read the memory card’s contents directly. To do this, power the camcorder off and remove the memory card (see page 18 - Inserting the SD Card). -
Page 58: Appendix
Appendix DV-5200HD Appendix Installing the Software System Requirements ® ® • Windows 7, Windows Vista™ or Windows ® ® • Intel or AMD Dual-Core processor or higher • Minimum 1 GB RAM • DirectX 9-compatible graphics adapter (DirectX recommended) •... - Page 59 DV-5200HD Appendix The files stored on your camcorder should be imported automatically into TotalMediaHDCam. After this you can edit them. more information, online help TotalMediaHDCam. English - 57...
-
Page 60: Technical Specifications
Appendix DV-5200HD Technical Specifications Capture sensor 1/3.2-inch CMOS sensor with 5.0 megapixel Lens Fixed lens F/3.2, f=5.1mm Focus area Normal: 1.5 m – infinity Macro: 20 - 21cm TFT display 3-inch TFT LCD touchscreen, 960 x 240 pixel, 16:9 LED video lamp <1.0m (<3 feet) - Page 61 DV-5200HD Appendix Exposure -2.0 EV to +2.0 EV Compensation Self-timer Off, 5, 10 seconds PC interface USB 2.0 Signal for TV NTSC/PAL / HDMI output Shutter speed Photo: 2 to 1/4000 sec Video: 1/15 to 1/2000 sec Auto power off Off, 1 min., 5 min.
-
Page 62: Warranty Information
Appendix DV-5200HD Warranty Information 60 - English... - Page 63 DV-5200HD Appendix English - 61...
- Page 64 Appendix DV-5200HD 62 - English...