Silvercrest DV-5000HD User Manual And Service Information
Digital camcorder
Hide thumbs
Also See for DV-5000HD:
- User manual (105 pages) ,
- User manual and service manual (155 pages)
Table of Contents
Advertisement
Available languages
Available languages
Quick Links
Download this manual
See also:
User Manual
Advertisement
Chapters
Table of Contents

Related Manuals for Silvercrest DV-5000HD


Summary of Contents for Silvercrest DV-5000HD
- Page 1 CÁMARA DE VÍDEO DIGITAL VIDEOCAMERA DIGITALE CÁMARA DE VÍDEO DIGITAL VIDEOCAMERA DIGITALE Manual del usuario Istruzioni per l’uso e información de servicio e informationi di servizio DIGITAL CAMCORDER User manual and service information DV-5000HD...
-
Page 2: Table Of Contents
DV-5000HD Índice Índice Instrucciones de seguridad importantes Instrucciones de seguridad ................ 5 Niños......................7 Cargador y batería recargable ..............7 Cables ......................8 Reparación y mantenimiento..............8 Uso destinado .................... 9 Conformidad..................... 10 Desecho de equipos usados ..............10 Introducción Contenido del embalaje ................ - Page 3 Índice DV-5000HD Cargar la batería..................16 Insertar la batería ................... 17 Insertar una tarjeta SD................18 Proteger la tarjeta de memoria contra escritura........19 Encender y apagar la cámara de vídeo ..........19 Seleccionar el modo operativo ............... 20 Seleccionar el idioma para los menús ............ 20 Ajustar fecha y hora................
- Page 4 DV-5000HD Índice Menús Menú principal..................35 Sonido..................... 35 Histograma....................36 Apagado auto..................36 Estándar TV .................... 36 Formatear ....................36 Predeterminados..................37 Idioma ..................... 37 Frecuencia ....................37 Fecha/Hora ..................... 37 Menú Película ..................38 Balance blancos..................38 Efecto...................... 39 Nocturno ....................
- Page 5 Índice DV-5000HD Menú de reproducción de fotografías ............42 Eliminar todo................... 43 Proteger....................43 Reproducción automática ............... 43 DPOF...................... 43 Conectores y puertos Ver grabaciones en un televisor .............. 44 Conectar mediante el cable HDMI ............45 Conectar mediante el cable USB/AV ............45 Transferir grabaciones al ordenador ............
-
Page 6: Instrucciones De Seguridad Importantes
DV-5000HD Instrucciones de seguridad importantes Instrucciones de seguridad importantes Instrucciones de seguridad Antes de usar este dispositivo por primera vez, lea detenidamente las instrucciones correspondientes en este manual y siga todas las advertencias, incluso si está acostumbrado a manejar aparatos electrónicos. - Page 7 Instrucciones de seguridad importantes DV-5000HD En caso de defecto del dispositivo o de los accesorios, desconecte inmediatamente el cable de alimentación de la toma eléctrica. También cuando exista el riesgo de tormentas, desenchufe el cable de alimentación de la toma eléctrica.
-
Page 8: Niños
DV-5000HD Instrucciones de seguridad importantes Niños Los equipos eléctricos no son para los niños. No permita que los niños utilicen equipos eléctricos sin supervisión. Los niños no suelen ser conscientes de los posibles riesgos y peligros. Peligro de asfixia con las baterías recargables y las piezas pequeñas. -
Page 9: Cables
Reparación y mantenimiento Una reparación o un mantenimiento serán necesarios cuando el cargador o la carcasa de la cámara de vídeo DV-5000HD se hayan dañado de cualquier forma, si líquidos u objetos han entrado en la unidad, si el aparato ha sido expuesto a la lluvia o humedad, si no funciona normalmente o si se ha caído. -
Page 10: Uso Destinado
DV-5000HD Instrucciones de seguridad importantes Uso destinado Este equipo es un dispositivo electrónico del grupo de la electrónica de consumo. Sólo está destinado al uso privado y no es para uso industrial o comercial. Por defecto, este producto no ha sido diseñado con fines médicos, de salvamento, rescate o soporte vital. -
Page 11: Conformidad
Instrucciones de seguridad importantes DV-5000HD Conformidad Este equipo y los accesorios incluidos han sido revisados y aprobados respecto al cumplimiento de los requisitos básicos y otras normas relevantes de la directriz de tolerancia electromagnética 2004/108/EC y de la directriz de aparatos de baja tensión 2006/95/EC. -
Page 12: Introducción
DV-5000HD Introducción Introducción Contenido del embalaje Cámara de vídeo DV-5000HD Batería PAC NP60 Cargador H-FUJ-FNP60-00 Cable de alimentación Cable USB/AV Cable HDMI Correa de transporte (no ilustrada) CD-ROM (no ilustrado) Manual del usuario (no ilustrado) Español - 11... -
Page 13: Mandos Y Botones
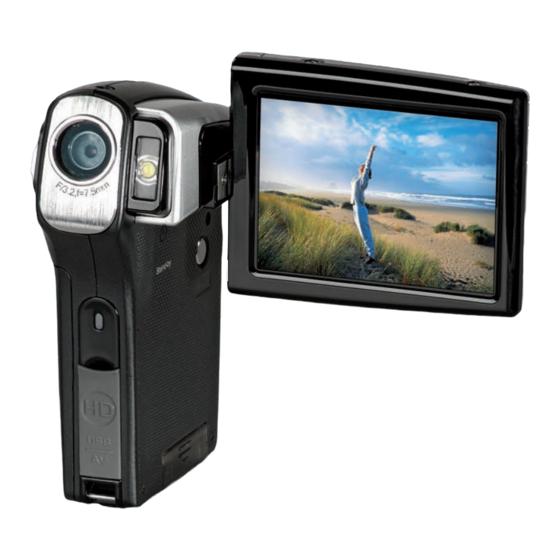
Introducción DV-5000HD Mandos y botones Panel frontal Lente Lámpara de vídeo Indicador del temporizador Salida HDMI Conector USB/AV Panel posterior Tecla de control cuatridireccional Obturador Indicador de alimentación Botón de zoom / Cambio de vista 10 Botón de reproducción 11 Botón de menú... -
Page 14: Panel Izquierdo
DV-5000HD Introducción Panel izquierdo 13 Botón de macrofotografía 14 Compartimento de la batería Panel derecho 15 Pantalla retráctil 16 Botón de encendido/apagado (debajo de la pantalla retráctil) 17 Ranura para tarjeta de memoria (debajo de la pantalla retráctil) Español - 13... -
Page 15: Vista Superior
Introducción DV-5000HD Vista superior 18 Micrófono 19 Altavoz Vista inferior 20 Asa para la correa 21 Conexión para trípode 14 - Español... -
Page 16: Abrir La Pantalla
DV-5000HD Introducción Abrir la pantalla Abra la pantalla y gírela de manera que mire hacia el panel posterior. Si fuera necesario, puede también girar la pantalla de manera que mire hacia el panel frontal. En este caso, la orientación de la imagen se ajustará... -
Page 17: Primeros Pasos
Introducción DV-5000HD Primeros pasos La cámara de vídeo se alimenta con una batería de litio-ión (PAC NP60). Esta batería no viene cargada de fábrica. Debe cargarla antes de usar la cámara por primera vez. Cargar la batería Inserte la batería en el cargador H-FUJ-FNP60-00 de manera que los bornes [+] y [-] de la batería coincidan con los del cargador (ver las... -
Page 18: Insertar La Batería
DV-5000HD Introducción El indicador de estado del cargador se ilumina de color naranja mientras la batería se esté cargando. Cuando la carga haya terminado, el indicador de estado cambia a color verde. Entonces podrá insertar la batería en la cámara de vídeo. Según el nivel de carga, el ciclo de carga puede durar hasta 2 horas. -
Page 19: Insertar Una Tarjeta Sd
Introducción DV-5000HD Insertar una tarjeta SD Con una tarjeta de memoria SD (no incluida) puede ampliar la capacidad de almacenamiento de su cámara de vídeo y así guardar más fotografías y vídeos. Si tiene insertada una tarjeta de memoria, todos los contenidos de la cámara se guardarán en ella. -
Page 20: Proteger La Tarjeta De Memoria Contra Escritura
DV-5000HD Introducción Proteger la tarjeta de memoria contra escritura La tarjeta de memoria lleva una pestaña para protegerla contra escritura. Con la protección activada (véase la figura abajo a la derecha), solamente podrá ver las imágenes y los vídeos grabados en la tarjeta y no podrá... -
Page 21: Seleccionar El Modo Operativo
Introducción DV-5000HD Seleccionar el modo operativo Pulse varias veces el botón de selección de modo [12] para alternar entre los modos Película, Foto y Configuración. Con cada pulsación de este botón, el modo operativo cambia. Modo Película Modo Foto Modo Configuración Seleccionar el idioma para los menús... -
Page 22: Ajustar Fecha Y Hora
DV-5000HD Introducción Ajustar fecha y hora Encienda la cámara de vídeo. Para ello, mantenga pulsado el botón de encendido/apagado [16] durante aproximadamente 1 segundo. Pulse dos veces el botón de selección de modo [12] para mostrar el menú Config. Pulse los botones en la tecla de control cuatridireccional [6] para seleccionar la entrada Fecha/Hora y luego pulse el botón del... -
Page 23: Grabación
Grabación DV-5000HD Grabación Grabar videoclips Abra la pantalla y gírela como deseado. Encienda la cámara de vídeo. Si el modo de grabación de vídeo no está seleccionado, selecciónelo mediante el botón de selección de modo [12]. Pulse el botón del obturador [7] para iniciar la grabación. Durante la grabación, el indicador de alimentación [8] parpadea en rojo. - Page 24 DV-5000HD Grabación Indicador de zoom Corrección de exposición Efecto Modo nocturno Balance de blancos Memoria restante disponible Tipo de memoria actual Lámpara de vídeo Resolución Estado de la batería Histograma Modo Macrofotografía Modo Película Español - 23...
-
Page 25: Capturar Fotografías
Grabación DV-5000HD Capturar fotografías Abra la pantalla y gírela como deseado. Encienda la cámara de vídeo. Si el modo de captura fotográfica no está seleccionado, selecciónelo mediante el botón de selección de modo [12]. Si fuera necesario, utilice el botón de zoom [9] para seleccionar un área de la escena más grande o más pequeña. - Page 26 DV-5000HD Grabación 0003 Número restante de fotos Corrección de exposición Efecto Modo nocturno Balance de blancos Tipo de memoria actual Lámpara de vídeo encendida Resolución Estado de la batería Histograma Modo Macrofotografía Temporizador Modo Foto Indicador de zoom Español - 25...
-
Page 27: Lámpara De Vídeo
Grabación DV-5000HD Lámpara de vídeo En entornos oscuros, puede activar la lámpara de vídeo incorporada [2] para grabar videoclips o tomar fotos. Para ello, pulse el botón en la tecla de control cuatridireccional [6]. Pulse de nuevo este botón para desactivarla. -
Page 28: Histograma
DV-5000HD Grabación Histograma El histograma es la representación gráfica de la distribución de brillo de la fotografía. Si el gráfico es más acentuado a la izquierda, la imagen es muy oscura; si el gráfico es más acentuado a la derecha, la imagen es muy clara. -
Page 29: Ajustar La Resolución
Grabación DV-5000HD Ajustar la resolución Antes de grabar videoclips o tomar fotos, puede configurar la resolución pulsando el botón en la tecla de control cuatridireccional en modo Película o Foto. En el modo Película, pulse varias veces este botón para alternar cíclicamente entre las resoluciones CIF, 480P, 720P y 1080P. -
Page 30: Reproducción
DV-5000HD Reproducción Reproducción Según el modo seleccionado, puede utilizar el botón de reproducción [10] para cambiar al modo de reproducción correspondiente. Reproducir videoclips En modo Película, puede utilizar el botón de reproducción [10] para cambiar al modo de reproducción. Pulse una vez más este botón para volver al modo Película. - Page 31 Reproducción DV-5000HD Durante la reproducción, aparece información adicional en pantalla: 100-0004 Nombre del archivo de vídeo 0001/0001 Número del videoclip actual/ Número total de videoclips Volumen de reproducción con barra indicadora (aparece solamente cuando pulsa el botón de zoom y...
- Page 32 DV-5000HD Reproducción Durante la reproducción de videoclips, puede aumentar o reducir la velocidad de reproducción o detenerla temporalmente (pausa). Para ello, pulse la tecla de control cuatridireccional [6]. Detiene temporalmente la reproducción. Para reanudar la reproducción, pulse de nuevo el botón.
-
Page 33: Reproducir Fotografías
Reproducción DV-5000HD Reproducir fotografías En modo Foto, puede utilizar el botón de reproducción [10] para cambiar al modo de reproducción de fotografías. Pulse una vez más este botón para volver al modo de captura fotográfica. El icono ubicado en la esquina superior izquierda de la pantalla muestra el modo actualmente seleccionado. - Page 34 DV-5000HD Reproducción Durante la reproducción de la foto, aparece información adicional en pantalla: DPOF 0001/0001 Número de la foto actual/ Número total de fotos Tipo de memoria actual 100-0001 Nombre de la foto Estado de la batería Protección de archivo Icono de reproducción...
-
Page 35: Borrar Videoclips Y Fotografías
Reproducción DV-5000HD Borrar videoclips y fotografías Puede borrar fácilmente fotos y videoclips específicos mientras aparecen en pantalla en modo de reproducción (véase página 29 – Reproducir videoclips y página 32 - Reproducir fotografías) pulsando el botón en la tecla de control cuatridireccional [6]. Aparecerá la advertencia de seguridad siguiente. -
Page 36: Menús
DV-5000HD Menús Menús Esta cámara de vídeo incluye varios menús que ofrecen múltiples ajustes en cada uno de los modos operativos. Un menú principal permite, además, definir sus preferencias. Menú principal Pulse el botón de selección de modo [12] tantas veces como sea necesario para mostrar el menú... -
Page 37: Histograma
Menús DV-5000HD Histograma El histograma proporciona información útil sobre el brillo de la fotografía (véase página 27), pero puede resultar molesta su visualización en pantalla. En este caso, puede desactivarlo. Apagado auto Puede configurar la cámara de vídeo de manera que se apague automáticamente después de cierto tiempo para ahorrar energía. -
Page 38: Predeterminados
DV-5000HD Menús Predeterminados Todos los parámetros de la cámara se restablecerán a sus valores predeterminados. (Ello no suprimirá ningún dato de su tarjeta de memoria.) Idioma Seleccione el idioma deseado para los menús (véase también página 20 – Seleccionar el idioma para los menús). -
Page 39: Menú Película
Menús DV-5000HD Menú Película Para abrir el menú Película, pulse el botón de menú [11] en modo Película. Este menú se compone de una sola página. Pulse los botones en la tecla de control cuatridireccional [6] para seleccionar una opción y luego pulse el botón del obturador [7]. Pulse los... -
Page 40: Efecto
DV-5000HD Menús Efecto Puede grabar contenidos con los ajustes Predeterminado, Blanco y negro y Sepia. Para hacerlo, seleccione el icono correspondiente. Nocturno Para obtener videoclips con una exposición correcta en entornos oscuros, seleccione el modo Nocturno. Ello mejorará la calidad de cualquier grabación de noche. -
Page 41: Eliminar Todo
Menús DV-5000HD Eliminar todo Se borrarán todas las grabaciones de vídeo de una sola vez. No se borrarán las fotos. Para borrar las grabaciones de vídeo, seleccione el icono para confirmar o el icono para cancelar. ¡Atención! En cuanto se haya borrado una grabación, no se podrá... -
Page 42: Menú Foto
DV-5000HD Menús Menú Foto Para abrir el menú Foto, pulse el botón de menú [11] en modo Foto. Este menú se compone de una sola página. Pulse los botones en la tecla de control cuatridireccional [6] para seleccionar una opción y luego pulse el botón del obturador [7]. Pulse los... -
Page 43: Temporizador
Menús DV-5000HD Temporizador El temporizador retrasa la captura fotográfica un tiempo predefinido después de pulsar el botón del obturador [7]. Le permite salir en la foto (en una foto de grupo, por ejemplo). Proceda como se indica a continuación: Seleccione un tiempo de espera de 5 segundos o 10 segundos. -
Page 44: Eliminar Todo
DV-5000HD Menús Eliminar todo Se borrarán todas las fotos almacenadas de una sola vez. No se borrarán las grabaciones de vídeo. Esta opción funciona de la misma manera que la opción Borrar para la reproducción de vídeo (véase página 40). -
Page 45: Conectores Y Puertos
Conectores y puertos DV-5000HD Conectores y puertos Ver grabaciones en un televisor Cualquier grabación que pueda ver en la cámara de vídeo, la puede ver también en un televisor tradicional. Para ello, el televisor debe poseer un conector de entrada de vídeo apropiado. -
Page 46: Conectar Mediante El Cable Hdmi
DV-5000HD Conectores y puertos Conectar mediante el cable HDMI Apague la cámara de vídeo. Abra la tapa de los puertos e inserte el conector menor del cable HDMI en el puerto HDMI [4] de la cámara. Conecte el conector mayor del cable HDMI en la toma HDMI de su televisor. -
Page 47: Transferir Grabaciones Al Ordenador
Conectores y puertos DV-5000HD Transferir grabaciones al ordenador Existen dos formas de copiar grabaciones de la cámara de vídeo al ordenador: conectando la cámara a un ordenador a través del cable USB/AV insertando la tarjeta de memoria (no incluida) en un lector de tarjetas Tenga especial cuidado al renombrar los archivos y las carpetas. -
Page 48: Utilizar Un Lector De Tarjetas
DV-5000HD Conectores y puertos Ahora puede copiar los archivos grabados de la cámara a una carpeta del disco duro de su ordenador. Utilizar un lector de tarjetas Si su ordenador viene equipado con un lector de tarjetas que admite tarjetas de memoria SD, podrá leer el contenido de la tarjeta directamente. -
Page 49: Apéndice
Apéndice DV-5000HD Apéndice Instalar el software Requisitos del sistema ® Windows Vista™ o Windows XP/2000 Puerto USB libre o lector de tarjetas Unidad de CD-ROM Software incluido El CD-ROM incluido contiene software para gestionar y editar sus grabaciones y fotos. Inserte el CD-ROM incluido en la unidad de CD-ROM de su ordenador y siga las instrucciones en pantalla. -
Page 50: Datos Técnicos
DV-5000HD Apéndice Datos técnicos Sensor de captura Unidad CMOS de 5 megapíxeles Lente Lente fija Distancia de enfoque: f = 7,5 mm Diafragma : F = 3.2 Pantalla LCD a color Pantalla TFT 2,5" (640 x240 píxeles) Velocidad del obturador... -
Page 51: Detalles Sobre La Garantía
Apéndice DV-5000HD Detalles sobre la garantía 50 - Español... - Page 52 DV-5000HD Indice Indice Istruzioni importanti per la sicurezza Istruzioni per la sicurezza................. 55 Bambini ....................57 Caricatore e batterie ricaricabili............... 57 Cavi......................58 Manutenzione e cura................58 Utilizzo previsto ..................59 Conformità....................60 Smaltimento dei dispositivi usati .............. 60 Introduzione Contenuto della confezione..............
- Page 53 Indice DV-5000HD Caricare la batteria ................. 66 Inserire la batteria ................... 67 Inserire la scheda SD ................68 Proteggere dalla scrittura la scheda di memoria........69 Accensione e spegnimento della videocamera........69 Cambiare la modalità operativa .............. 70 Impostare la lingua del menu..............70 Impostare data e ora................
- Page 54 DV-5000HD Indice I menu Menu principale..................85 Bip......................85 Istogramma ..................... 86 Spegn. Autom..................86 Standard TV.................... 86 Formattazione ..................86 Predef..................... 87 Lingua ..................... 87 Frequenza....................87 Data/ora ....................87 Menu Video ....................88 Bilan. bianco ................... 88 Effetto......................
- Page 55 Indice DV-5000HD Menu Riproduzione foto................92 Elim.Tutto ....................92 Proteggi ....................93 Ripr. Auto....................93 DPOF...................... 93 Connettori e porte Visualizzazione delle registrazioni su uno schermo televisivo ....94 Connessione tramite cavo HDMI ............95 Connessione tramite cavo USB/AV ............95 Trasferire le registrazioni sul computer ............
-
Page 56: Istruzioni Importanti Per La Sicurezza
DV-5000HD Istruzioni importanti per la sicurezza Istruzioni importanti per la sicurezza Istruzioni per la sicurezza Prima di utilizzare questo dispositivo la prima volta, leggere e seguire le istruzioni contenute in questo manuale anche se si ha esperienza di dispositivi elettronici. Controllare sempre il corretto funzionamento del prodotto. - Page 57 Important Safety Instructions DV-5000HD caso temporali, scollegare cavo d’alimentazione dall’alimentazione di rete. Non tentare di riscaldare, smontare o cortocircuitare le batterie ricaricabili. Non gettare le batterie ricaricabili nel fuoco. Attenzione: avviso relativo al distacco dall’alimentazione di rete Per scollegare completamente il dispositivo dall’alimentazione di rete, staccare la spina del cavo d’alimentazione dalla presa.
-
Page 58: Bambini
DV-5000HD Istruzioni importanti per la sicurezza Bambini I dispositivi elettrici devono essere tenuti fuori dalla portata dei bambini. Non consentire ai bambini di utilizzare da soli l’apparecchiatura: potrebbero non comprendere la presenza di potenziali rischi. Le batterie ricaricabili e i componenti di piccole dimensioni possono causare soffocamento. -
Page 59: Cavi
Manutenzione e cura Sarà necessario ricorrere all’assistenza quando il dispositivo risulta danneggiato; per esempio, quando il caricatore o il case del DV-5000HD hanno subito danni, quando liquidi od oggetti sono penetrati nel dispositivo, quando il prodotto è stato esposto a pioggia o umidità, quando il dispositivo non funziona correttamente o è... -
Page 60: Utilizzo Previsto
DV-5000HD Istruzioni importanti per la sicurezza Utilizzo previsto Questo è un dispositivo commerciale elettronico. Deve essere utilizzato solo a scopo privato e non per fini commerciali o industriali. Nella sua configurazione predefinita, questo prodotto non è stato progettato per fini medici, di salvataggio, salvavita o altro. -
Page 61: Conformità
Important Safety Instructions DV-5000HD Conformità Questo dispositivo e gli accessori in dotazione sono stati sottoposti a test e hanno ricevuto l’approvazione di conformità ai requisiti base e a quelli relativi alla Direttiva CEM 2004/108/EC e alla Direttiva bassa tensione 2006/95/EC. -
Page 62: Introduzione
DV-5000HD Introduzione Introduzione Contenuto della confezione Videocamera DV-5000HD Batteria ricaricabile PAC NP60 Caricatore H-FUJ-FNP60-00 Cavo di alimentazione Cavo USB/AV Cavo HDMI. Cinghietta (non illustrata) CD-ROM (non illustrato) Manuale dell’utente (non illustrato) Italiano - 61... -
Page 63: Comandi E Pulsanti
Introduzione DV-5000HD Comandi e pulsanti Pannello anteriore Obiettivo Lampada video Indicatore dell’autoscatto Presa d’uscita HDMI Connettore USB/AV Pannello posteriore Pulsante multidirezionale Otturatore Indicatore di accensione Regolazione dello zoom/cambia la visualizzazione 10 Pulsante PLAY 11 Pulsante Menu 12 Selettore della modalità... -
Page 64: Pannello Sinistro
DV-5000HD Introduzione Pannello sinistro 13 Interruttore Macro 14 Vano per le batterie Pannello destro 15 Schermo retrattile 16 Pulsante On/Off (sotto lo schermo retrattile) 17 Alloggiamento per la scheda di memoria (sotto lo schermo retrattile) Italiano - 63... -
Page 65: Visione Dall'alto
Introduzione DV-5000HD Visione dall’alto 18 Microfono 19 Altoparlante Lato inferiore 20 Occhiello per la cinghietta 21 Attacco del cavalletto 64 - Italiano... -
Page 66: Apertura Dello Schermo
DV-5000HD Introduzione Apertura dello schermo Aprire lo schermo e ruotarlo in modo che lo schermo sia posizionato davanti al pannello posteriore. Se necessario, è possibile ruotare lo schermo in maniera da posizionarlo in avanti. In questo caso, l’immagine verrà orientata automaticamente. -
Page 67: Introduzione
Introduzione DV-5000HD Introduzione La videocamera è alimentata da una batteria ricaricabile agli ioni litio (PAC NP60). Al momento della consegna le batterie in dotazione non sono cariche. Prima di utilizzare la videocamera per la prima volta, caricare la batteria. Caricare la batteria Inserire le batterie ricaricabili nel caricatore H-FUJ-FNP60-00 in modo tale che i contatti [+] e [-] su di esse coincidano con i simboli sul caricatore. -
Page 68: Inserire La Batteria
DV-5000HD Introduzione Mentre le batterie si stanno caricando, gli indicatori di stato del caricatore si illumineranno in arancione. Una volta terminato il processo di carica, l’indicatore di stato diventerà verde. A questo punto è possibile inserire la batteria nella videocamera. In base al livello di carica, il processo di ricarica potrà... -
Page 69: Inserire La Scheda Sd
Introduzione DV-5000HD Inserire la scheda SD Grazie alla scheda SD (non acclusa alla confezione) è possibile aumentare la capacità di memorizzazione della videocamera per salvare foto e video. Quando è inserita una scheda di memoria, tutti i contenuti registrati verranno salvati su essa. Se non è inserita una scheda di memoria, foto e video verranno salvati nella memoria interna della fotocamera. -
Page 70: Proteggere Dalla Scrittura La Scheda Di Memoria
DV-5000HD Introduzione Proteggere dalla scrittura la scheda di memoria La scheda di memoria è fornita di una linguetta di protezione dalla scrittura. Quando la protezione è attivata (vedere la figura seguente a destra) è possibile visualizzare solo immagini e video esistenti, ma non cancellarli o modificarli. -
Page 71: Cambiare La Modalità Operativa
Introduzione DV-5000HD Cambiare la modalità operativa Premere il selettore di modalità [12] più volte per spostarsi fra le modalità Film, Foto e Setup. A ogni pressione del selettore di modalità la modalità operativa passerà a quella successiva. Modo Film Modo foto... -
Page 72: Impostare Data E Ora
DV-5000HD Introduzione Impostare data e ora Accendere il dispositivo tenendo premuto il pulsante On/Off [16] per circa 1 sec. Premere il selettore di modalità [12] due volte per visualizzare il menu Setup. Premere sul pulsante multidirezionale [6] per selezionare Data/Ora e poi premere il pulsante dell’otturatore [7]. -
Page 73: Registrazione
Registrazione DV-5000HD Registrazione Registrazione di filmati Aprire lo schermo e ruotarlo in base alle esigenze Accendere il dispositivo. Se la modalità impostata non è Registrazione video, selezionarla utilizzando il selettore di modalità [12]. Premere il pulsante dell’otturatore (7) per avviare la registrazione. - Page 74 DV-5000HD Registrazione Indicatore zoom Correzione dell’esposizione Effetto Modo Notte Bilan. bianco Memoria disponibile Tipo di memoria in uso Lampada video Risol. Stato delle batterie Istogramma Modo macro Modo video Italiano - 73...
-
Page 75: Scattare Fotografie
Registrazione DV-5000HD Scattare fotografie Aprire lo schermo e ruotarlo in base alle esigenze Accendere il dispositivo. Se la modalità impostata non è Cattura foto, selezionarla utilizzando il selettore di modalità [12]. Se necessario, utilizzare la regolazione dello zoom [9] per selezionare un’area maggiore o minore. - Page 76 DV-5000HD Registrazione 0003 Numero di scatti possibile Correzione dell’esposizione Effetto Modo Notte Bilan. bianco Tipo di memoria in uso Luce video accesa Risol. Stato delle batterie Istogramma Modo macro Autoscatto Modo foto Indicatore zoom Italiano - 75...
-
Page 77: La Luce Video
Registrazione DV-5000HD La luce video In condizioni di luce scarsa è possibile attivare la lampada video incorporata [2] per registrare filmati o scattare foto. Per fare ciò, premere il pulsante sul pulsante multidirezionale [6]. Premere nuovamente questo pulsante per spegnere la lampada. Quando la lampada è accesa, sullo schermo compare l’icona... -
Page 78: Istogramma
DV-5000HD Registrazione Istogramma L’istogramma costituisce la rappresentazione grafica della distribuzione della luminosità di un’immagine. Se il grafico risulta accentuato a sinistra, l’immagine è molto scura; se è accentuato a destra, l’immagine è molto luminosa. Immagine scura Immagine media Immagine chiara La distribuzione della luminosità... -
Page 79: Impostare La Risoluzione
Registrazione DV-5000HD Impostare la risoluzione Prima di registrare video o scattare foto, in Modo Video o Foto, è possibile impostare risoluzione premendo pulsante pulsante multidirezionale. In Modo video, premere il pulsante più volte per spostarsi fra le risoluzioni CIF, 480P, 720P e 1080P. Maggiore è la risoluzione, maggiore sarà la quantità... -
Page 80: Riproduzione
DV-5000HD Riproduzione Riproduzione In base alla modalità selezionata è possibile utilizzare il pulsante Play [10] per spostarsi sulla relativa modalità di riproduzione. Riproduzione dei filmati In Modo video è possibile utilizzare il pulsante Play [10] per spostarsi in Modo Riproduzione. Premere nuovamente questo pulsante per tornare in Modo video. - Page 81 Riproduzione DV-5000HD Durante la riproduzione sullo schermo appariranno ulteriori informazioni: 100-0004 Nome del file video 0001/0001 Numero del video corrente/numero totale di video Volume della riproduzione con barra del livello (appare solo quando si preme il pulsante e scompare dopo 3 sec.)
- Page 82 DV-5000HD Riproduzione Durante la riproduzione di filmati è possibile aumentare o diminuire la velocità o mettere in pausa il video. Per fare ciò, premere il pulsante multidirezionale [6]. Mettere in pausa la riproduzione Premere nuovamente il pulsante per riprendere la riproduzione).
-
Page 83: Riproduzione Di Foto
Riproduzione DV-5000HD Riproduzione di foto In Modo foto è possibile utilizzare il pulsante Play [10] per spostarsi in Modo Riproduzione foto. Premere nuovamente questo pulsante per tornare in Modo Cattura. L’icona nell’angolo in alto a sinistra dello schermo mostra la modalità in corso. - Page 84 DV-5000HD Riproduzione Durante la riproduzione sullo schermo appariranno ulteriori informazioni: DPOF 0001/0001 Numero dell’immagine corrente/numero totale di immagini Tipo di memoria in uso 100-0001 Nome del file dell’immagine Stato delle batterie Protezione del file Icona di riproduzione Italiano - 83...
-
Page 85: Cancellazione Di Video E Immagini
Riproduzione DV-5000HD Cancellazione di video e immagini È possibile cancellare facilmente singoli video o immagini mentre li si visualizza in Modo riproduzione (vedere pag. 79 – riproduzione di video e pag. 82 – Riproduzione di immagini) premendo sul pulsante multidirezionale [6]. -
Page 86: I Menu
DV-5000HD I menu I menu La videocamera utilizza diversi menu che offrono impostazioni multiple per ogni modalità operativa. Inoltre, il menu principale consente di fissare le impostazioni preferite per la propria videocamera. Menu principale Premere ripetutamente il selettore di modalità [12] fino a quando non Cambiare la modalità... -
Page 87: Istogramma
I menu DV-5000HD Istogramma L’istogramma offre informazioni utili sulla luminosità dell’immagine /vedere pag. 77), ma può disturbare la visione sullo schermo. Quando è necessario, è possibile disattivare l’istogramma. Spegn. Autom. Consente lo spegnimento automatico del dispositivo dopo un certo periodo di tempo per risparmiare le batterie. Se durante il periodo di tempo selezionato non si effettua alcuna operazione, il dispositivo si spegne. -
Page 88: Predef
DV-5000HD I menu Predef. Tutte le impostazioni verranno riportate ai valori predefiniti di fabbrica. Ciò non implica la cancellazione dei dati dalla scheda di memoria. Lingua Selezionare la lingua a video desiderata (vedere anche pag. 70 – Impostare la lingua del menu). -
Page 89: Menu Video
I menu DV-5000HD Menu Video Per aprire il menu video, premere il pulsante Menu [11] mentre ci si trova in Modo Video. Il menu è formato da una pagina. Premere sul pulsante multidirezionale [6] per selezionare un’opzione e poi premere il pulsante dell’otturatore [7]. Premere pulsante multidirezionale [6] per selezionare il valore desiderato e poi premere il pulsante dell’otturatore [7] per confermare. -
Page 90: Effetto
DV-5000HD I menu Effetto I contenuti possono essere registrati utilizzando le impostazioni Predef., Bianco&Nero e Seppia. Per fare ciò, selezionare l’icona corrispondente. Modo Notte In condizioni di luce scarsa, per ottenere registrazioni con la giusta esposizione, selezionare questa modalità Ciò migliorerà la qualità delle registrazioni. -
Page 91: Elim.tutto
I menu DV-5000HD Elim.Tutto È possibile cancellare tutte le registrazioni video salvate in una volta sola. Le foto scattate non verranno cancellate. Per cancellare, selezionare o selezionare per annullare il comando. Avvertenza Una volta cancellata, una registrazione non può essere recuperata. -
Page 92: Menu Foto
DV-5000HD I menu Menu Foto Per aprire il menu Foto, premere il pulsante Menu [11] mentre ci si trova in Modo Foto. Il menu è formato da una pagina. Premere sul pulsante multidirezionale [6] per selezionare un’opzione e poi premere il pulsante dell’otturatore [7]. Premere pulsante multidirezionale [6] per selezionare il valore desiderato e poi premere il pulsante dell’otturatore [7] per confermare. -
Page 93: Menu Riproduzione Foto
I menu DV-5000HD consente all’autore della foto di rientrare nella foto stessa (es. foto di gruppo). Procedere come segue: Selezionare l’autoscatto con un periodo di tempo di 5 o 10 secondi. L’icona corrispondente apparirà sullo schermo. Inquadrare il soggetto e accertarsi che il dispositivo si trovi su una superficie stabile (meglio ancora il treppiede). -
Page 94: Proteggi
DV-5000HD I menu Proteggi Questa impostazione è uguale a quella della registrazione video (vedere pag. 90). Ripr. Auto Consente di attivare la riproduzione automatica (Slideshow) di tutte le foto scattate. Le immagini verranno riprodotte continuativamente con un intervallo di circa 5 secondi fra una foto e l’altra. Per avviare questa funzione, premere il pulsante dell’otturatore [7]. -
Page 95: Connettori E Porte
Connettori e porte DV-5000HD Connettori e porte Visualizzazione delle registrazioni su uno schermo televisivo Tutte le registrazioni visualizzabili sullo schermo della videocamera possono essere riprodotte anche su una TV. A questo scopo, la TV deve essere dotata di un connettore video in entrata adatto. -
Page 96: Connessione Tramite Cavo Hdmi
DV-5000HD Connettori e porte Connessione tramite cavo HDMI Accertarsi che la videocamera sia spenta. Aprire il coperchio della porta e inserire il connettore più piccolo del cavo HDMI nella relativa porta [4] della videocamera. Inserire il connettore più grande del cavo HDMI nella porta HDMI sul televisore. -
Page 97: Trasferire Le Registrazioni Sul Computer
Connettori e porte DV-5000HD Trasferire le registrazioni sul computer Esistono due modi possibili per copiare le registrazioni dalla videocamera al computer: collegare la videocamera al computer con un cavo USB/AV inserire la scheda di memoria (non inclusa) in un lettore di schede Prestare attenzione quando si rinominano le cartelle e i file. -
Page 98: Utilizzo Di Un Lettore Di Schede
DV-5000HD Connettori e porte Utilizzo di un lettore di schede Se il PC è dotato di un lettore di schede che supporta le schede SD, è possibile leggere direttamente il contenuto della scheda di memoria. Per fare ciò, spegnere la videocamera ed estrarre la scheda di memoria (vedere pag. -
Page 99: Appendice
Appendice DV-5000HD Appendice Installazione del software Requisiti di sistema ® Windows Vista™ o Windows XP/2000 Una porta USB o un lettore di schede liberi Unità CD-ROM Software in dotazione Il CD-ROM in dotazione contiene il software per la gestione e l’editing delle registrazioni. -
Page 100: Caratteristiche Tecniche
DV-5000HD Appendice Caratteristiche tecniche Sensore di cattura CMOS da 5 megapixel Obiettivo Obiettivo fisso Distanza per la messa a fuoco: f = 7,5 mm Apertura: F= 3,2 Schermo LCD a TFT da 2,5 pollici (640x240 pixel) colori Tempo d’otturazione 2s ~ 1/2000s... -
Page 101: Dettagli Della Garanzia
Appendice DV-5000HD Dettagli della garanzia 100 - Italiano... - Page 102 DV-5000HD Table of Contents Table of Contents Important Safety Instructions Safety Instructions.................. 105 Children....................107 Charger and Rechargeable Battery ............107 Cables ....................108 Maintenance and Care................108 Intended Use..................109 Conformity....................110 Disposal of Old Devices ................. 110 Introduction Package Contents..................
- Page 103 Table of Contents DV-5000HD Charging the Battery................116 Inserting the Battery................117 Inserting an SD Card ................118 Write-Protecting the Memory Card ............119 Switching the Camcorder On and Off ........... 119 Switching the Operating Mode.............. 120 Setting the Menu Language..............120 Setting Date and Time ................
- Page 104 DV-5000HD Table of Contents The Menus The Main Menu ..................135 Beep...................... 135 Histogram....................136 Auto PowerOff..................136 TV Standard..................136 Format....................136 Default....................137 Language ....................137 Frequency ..................... 137 Date/Time ..................... 137 Video Menu .................... 138 White balance ..................138 Effect.....................
- Page 105 Table of Contents DV-5000HD Photo Playback Menu ................142 Delete All ....................142 Protect ....................143 Autoplay:....................143 DPOF....................143 Connectors and Ports Viewing Recordings on a Television Screen.......... 144 Connecting via the HDMI Cable ............145 Connecting via the USB/AV Cable ............145 Transferring Recordings to the Computer..........
-
Page 106: Important Safety Instructions
DV-5000HD Important Safety Instructions Important Safety Instructions Safety Instructions Before you use this device for the first time, please read the following notes in this manual and heed all warnings, even if you are familiar with handling electronic devices. Always check that the product works correctly. - Page 107 Important Safety Instructions DV-5000HD Also, when there is the possibility of thunderstorms, unplug the power cord from the wall outlet. Never try to heat, disassemble or short-circuit the rechargeable battery. Do not throw the rechargeable battery in fire. Warning: Notice concerning separation from the mains In order to completely disconnect the charger from the mains, unplug the power cord from the wall outlet.
-
Page 108: Children
DV-5000HD Important Safety Instructions Children Electrical appliances do not belong in the hands of children. Do not allow children to use electrical devices when not under supervision. Children may not comprehend the presence of potential risks. Rechargeable batteries and small parts represent potential choking hazards. Keep batteries out of reach of children. -
Page 109: Cables
Maintenance and Care Servicing is required when this device has been damaged in any way, for example, when the charger or the housing of the DV-5000HD is damaged, when liquid or objects have entered the device, when the product has been exposed to rain or moisture, when the product does not work normally or if the product has been dropped. -
Page 110: Intended Use
DV-5000HD Important Safety Instructions Intended Use This is a consumer electronics device. It may only be used for private use, not industrial or commercial purposes. In its default configuration, this product has not been designed for medical, lifesaving, rescue or life- maintaining purposes. -
Page 111: Conformity
Important Safety Instructions DV-5000HD Conformity This device and its supplied accessories have been tested and approved for compliance with the basic and other relevant requirements of the EMC Directive 2004/108/EC, as well as the Low-voltage Directive 2006/95/EC. Disposal of Old Devices Devices marked with this symbol are subject to the European Directive 2002/96/EC. -
Page 112: Introduction
DV-5000HD Introduction Introduction Package Contents Camcorder DV-5000HD Rechargeable battery PAC NP60 Charger H-FUJ-FNP60-00 Power cord USB/AV cable HDMI cable Carrying strap (not shown) CD-ROM (not shown) User's manual (not shown) English - 111... -
Page 113: Controls And Buttons
Introduction DV-5000HD Controls and buttons Front Panel Lens Video lamp Self-timer indicator HDMI out jack USB/AV connector Rear Panel Four-way button Shutter Power indicator Zoom adjustment/ toggle display view 10 PLAY button 11 Menu button 12 Mode selector 112 - English... -
Page 114: Left Panel
DV-5000HD Introduction Left Panel 13 Macro switch 14 Battery compartment Right Panel 15 Retractile display 16 On/Off button (under the retractile display) 17 Memory card compartment (under the retractile display) English - 113... -
Page 115: Top View
Introduction DV-5000HD Top View 18 Microphone 19 Speaker Bottom 20 Eyelet for carrying strap 21 Tripod mount 114 - English... -
Page 116: Opening The Display
DV-5000HD Introduction Opening the Display Open the display and then rotate so that the screen faces to the back panel. If required, you can also rotate the display so it faces to the front. In this case, the picture orientation will be adjusted automatically. -
Page 117: Getting Started
Introduction DV-5000HD Getting started The camcorder is powered by a rechargeable Lithium-Ion (PAC NP60) battery. On delivery, the battery is not charged. Please charge the battery before first use of the device. Charging the Battery Insert the rechargeable battery in the charger H-FUJ-FNP60-00 so that the contacts [+] and [-] on the rechargeable battery and charger markings match. -
Page 118: Inserting The Battery
DV-5000HD Introduction The status indicator of the charging cradle will light orange whilst the battery is charging. When the charging process is completed, the status indicator will light green. You can then insert the rechargeable battery into the camcorder. Depending on the charge level, the charging cycle can take up to 2 hours. -
Page 119: Inserting An Sd Card
Introduction DV-5000HD Inserting an SD Card By using the SD memory card (not included in the package) you can increase the camcorder's storage capacity for saving your videos and photos. When a memory card is inserted, all the recorded contents will be saved onto it. -
Page 120: Write-Protecting The Memory Card
DV-5000HD Introduction Write-Protecting the Memory Card The memory card features a write-protection tab. When the write protection is enabled (see the right figure below) you will be able to view existing videos and pictures only, but not be able to delete or edit them. -
Page 121: Switching The Operating Mode
Introduction DV-5000HD Switching the Operating Mode Press the mode selector button [12] multiple times to toggle between the modes Movie, Photo and Setup. With each press of the mode selector the operating mode will change to the next mode. Movie mode... -
Page 122: Setting Date And Time
DV-5000HD Introduction Setting Date and Time Power the device on by pressing and holding the On/Off button [16] for approx. 1 second. Press the mode selector button [12] twice to display the Setup menu. Press on the four-way button [6] to select Date / Time and then press the shutter button [7]. -
Page 123: Recording
Recording DV-5000HD Recording Recording Video Clips Open the display and then rotate it according to your needs. Power the camcorder on. If the current mode is not set to video recording, select it by using the mode selector button [12]. - Page 124 DV-5000HD Recording Zoom indicator Exposure correction Effect Night Mode White balance Remaining memory available Current memory type Video lamp Resolution Battery status Histogram display Macro mode Video mode English - 123...
-
Page 125: Capturing Pictures
Recording DV-5000HD Capturing Pictures Open the display and then rotate it according to your needs. Power the camcorder on. If the current mode is not set to photo capturing, select it by using the mode selector button [12]. If necessary, use the zoom adjustment [9] to select a larger to smaller scene area. - Page 126 DV-5000HD Recording 0003 Remaining number of shots Exposure correction Effect Night Mode White balance Current memory type Video light on Resolution Battery status Histogram display Macro mode Self timer Photo mode Zoom indicator English - 125...
-
Page 127: The Video Light
Recording DV-5000HD The Video Light In dark environments you can enable the built-in video lamp [2] for video or photo recording. To do this, press the button on the four-way button [6]. Pressing this button again will turn the video lamp off. While the video lamp is enabled, the icon will appear on the display. -
Page 128: Histogram
DV-5000HD Recording Histogram The histogram is the graphical representation of the brightness distribution of an image. If the graphic is accentuated on the left, the picture is very dark; if it is accentuated on the right, the picture is very bright. -
Page 129: Setting The Resolution
Recording DV-5000HD Setting the Resolution Before capturing videos or photos you can set the resolution by pressing button located on the four-way button in video or photo mode. In video mode, press this button multiple times to toggle cyclically between CIF, 480P, 720P and 1080P resolution. -
Page 130: Playing Back
DV-5000HD Playing Back Playing Back Depending on the selected mode you can use the Play button [10] to switch to the corresponding playback mode. Playing Back Video Clips In video mode you can use the Play button [10] to switch to playback mode. - Page 131 Playing Back DV-5000HD During playback you will see further information on the display: 100-0004 File name of the video 0001/0001 Current video number/ total number of videos Playback volume with indicator bar (displays only when pressing the zoom adjustment and hides after...
- Page 132 DV-5000HD Playing Back During video clip playback you can increase or decrease the playback speed or pause the video. To do this, press the four-way button [6]. Pauses playback Pressing the button again resumes playback. Enables slow-motion playback Press this button multiple times to toggle playback speed in steps to 1/2, 1/4, 1/8 and 1/16.
-
Page 133: Playing Back Photos
Playing Back DV-5000HD Playing Back Photos In Photo mode you can use the Play button [10] to switch to the picture playback mode. Press this button once again to return to capture mode. The icon in the upper-left corner of the display shows the current mode. - Page 134 DV-5000HD Playing Back During picture playback you will see further information on the display: DPOF 0001/0001 Current picture number/ total number of pictures Current memory type 100-0001 File name of the picture Battery status File protection Playback icon English - 133...
-
Page 135: Deleting Videos And Pictures
Playing Back DV-5000HD Deleting Videos and Pictures You can easily delete individual videos or pictures while displaying them in playback mode (see page 129 – Playing Back Videos and page 132 - Playing Back Pictures) by pressing the button on the four-way button [6]. -
Page 136: The Menus
DV-5000HD The Menus The Menus The camcorder uses different menus that offer multiple settings under each operating mode. Furthermore there is a main menu allowing you to set the preferences for your camcorder. The Main Menu Press the mode selector button [12] as many times as necessary to... -
Page 137: Histogram
The Menus DV-5000HD Histogram The histogram offers helpful information about the picture's brightness (see page 127), but it may disturb the view on the screen. You can therefore turn the histogram off when needed. Auto PowerOff You can have the device power off automatically after a certain time to save battery power. -
Page 138: Default
DV-5000HD The Menus Default All device parameters will be reset to their factory-default values. This will not erase any data from your memory card. Language Select the desired display menu language (see also page 120 – Setting the Menu Language). -
Page 139: Video Menu
The Menus DV-5000HD Video Menu To open the Video menu, press the Menu button [11] while in video mode. This menu consists of one page. Press on the four-way button [6] to select an option and then press the shutter button [7]. Press on the four-way button [6] to select the desired value and then press the shutter button [7] to confirm. -
Page 140: Effect
DV-5000HD The Menus Effect You can record contents by using the settings Default, Black and White, and Sepia. To do this, select the corresponding icon. Night Mode In order to obtain properly exposed recordings in dark environments, select Night mode. This will improve the quality of any night recordings. -
Page 141: Delete All
The Menus DV-5000HD Delete All All saved video recordings can be deleted at once. Any captured pictures will not be erased. To erase, select the icon or select to cancel. Warning! After a recording has been erased, it cannot be restored. -
Page 142: Photo Menu
DV-5000HD The Menus Photo Menu To open the Photo menu, press the Menu button [11] while in photo mode. This menu consists of one page. Press on the four-way button [6] to select an option and then press the shutter button [7]. Press on the four-way button [6] to select the desired value and then press the shutter button [7] to confirm. -
Page 143: Self Timer
The Menus DV-5000HD Self timer The self-timer delays the capture for a preset time after pressing the shutter button [7]. This allows you to participate in the scene (e.g. for a group photo). Proceed as follows: Select the self-timer with a 5-second or 10-second delay. The corresponding icon will show on the display. -
Page 144: Protect
DV-5000HD The Menus Protect This setting is equivalent to the Protect setting for video playback (see page 140). Autoplay: Here you can start the automatic playback (slideshow) for all captured pictures. The pictures will be played back repeatedly with an interval of approx. -
Page 145: Connectors And Ports
Connectors and Ports DV-5000HD Connectors and Ports Viewing Recordings on a Television Screen Any recordings that you can view on the camcorder display can also be played back on a regular TV set. For this, your television set must have an appropriate Video In connector. -
Page 146: Connecting Via The Hdmi Cable
DV-5000HD Connectors and Ports Connecting via the HDMI Cable Please make sure that your camcorder is powered off. Open the port cover and insert the smaller connector of the HDMI cable into the HDMI port [4] of your camcorder. Plug the larger connector of the HDMI cable into the HDMI receptacle of your TV set. -
Page 147: Transferring Recordings To The Computer
Connectors and Ports DV-5000HD Transferring Recordings to the Computer There are two possible ways to copy recordings from the camcorder to a computer: by connecting the device to a computer via the USB/AV cable by inserting the memory card (not included) into a card reader Be careful when renaming any folders and files. -
Page 148: Using A Card Reader
DV-5000HD Connectors and Ports Using a Card Reader If your computer features a card reader supporting SD memory cards, you can read the memory card’s contents directly. To do so, power the camcorder off and remove the memory card (see page 118 - Inserting the SD Card). -
Page 149: Appendix
Appendix DV-5000HD Appendix Installing the Software System Requirements ® Windows Vista™ or Windows XP/2000 Free USB port or card reader CD-ROM drive Supplied Software The supplied CD-ROM contains software for managing and editing your recordings. Insert the supplied CD-ROM into the CD-ROM drive of your computer and follow the on-screen instructions. -
Page 150: Technical Specifications
DV-5000HD Appendix Technical Specifications Capture sensor 5 megapixels CMOS Lens Fixed lens Focus range: f = 7.5 mm Aperture: F = 3.2 Colour LCD Display 2.5-inch TFT (640x240 pixel) Shutter speed 2s ~ 1/2000s File format Video: Photo: JPEG White balance... -
Page 151: Details Of Guarantee
Appendix DV-5000HD Details of Guarantee 150 - English... -
Page 152: Declaration Of Conformity
Digital Camcorder model: SilverCrest DV-5000HD is confirmed to comply with the requirements set out in the Council Directive on the Approximation of the Laws of the Member States relating to Electromagnetic Compatibility 2004/108/EC and the Council Directive relating to Low Voltage 2006/95/EC. - Page 153 TARGA GmbH Lange Wende 41 D-59494 Soest www.silvercrest.cc...