Table of Contents
Advertisement
Quick Links
Advertisement
Table of Contents

Related Manuals for Husqvarna W21K, W21SK, W21SBK, W53SBEK, W53SEK, W21KC, W21SKC, W21SBKC


Summary of Contents for Husqvarna W21K, W21SK, W21SBK, W53SBEK, W53SEK, W21KC, W21SKC, W21SBKC
- Page 1 Operator's Manual 968999283 / W21K, 968999284 / W21SK, 968999286 / W21SBK, 968999287 / W53SBEK 968999289 / W53SEK, 968999638 / W21KC 968999639 / W21SKC, 968999640 / W21SBKC English Please read the operator’s manual carefully and make sure you understand the instructions before using the machine.
-
Page 2: Table Of Contents
OPERATOR’S MANUAL 21" PUSH MOWER Introduction ..........3 Maintenance ........30 General ..........3 Maintenance Schedule ...... 31 Driving and Transport on Public Roads 3 Before Each Use ....... 31 Towing ..........3 Ignition System ........31 Operating ..........3 Engine's Cooling Air Intake ....32 Good Service ........4 Throttle Cable and Choke Cable .. -
Page 3: Introduction
INTRODUCTION WARNING! Failure to follow cautious operating practices can result in serious injury to the operator or other persons. The owner must understand these instructions, and must allow only trained persons who understand these instructions to operate the mower. Each person operating the mower must be of sound mind and body and must not be under the influence of any mind altering substance. -
Page 4: General
INTRODUCTION Introduction Congratulations Thank you for purchasing a Husqvarna Pro Push Mower. This machine is built for high performance and rapid mowing. This manual is a valuable document. Following the instructions (use, service, maintenance, etc.) can considerably increase the lifespan of your machine and even increase its resale value. -
Page 5: Good Service
INTRODUCTION Good Service Husqvarna’s products are sold all over the world and only in specialized retail stores with complete service. This ensures that you as a customer receive only the best support and service. Before the product is delivered, the machine has, for example, been inspected and adjusted by your retailer, see the certificate in the Service Journal in this operator’s manual. -
Page 6: Symbols And Decals
SYMBOLS AND DECALS Symbols and Decals These symbols are found on the machine and in the operator’s manual. Study them carefully so that you know what they mean. WARNING! Xxxxxxx xxxx xxxxxxxx xxx x Xxxxx xxxxxx xx. xx xxxxxxxx xxxxx xxx xx. Used in this publication to notify the reader of a risk of personal injury, particularly if the reader should neglect to follow instructions given in the manual. - Page 7 SYMBOLS AND DECALS Shut off engine and Read Whole Severing Do not open or Keep a safe remove spark plug Operator´s body of fingers remove safety distance from wire before Manual. exposure and toes. shields while engine the machine. performing any to thrown is running.
-
Page 8: Safety Instructions
SAFETY INSTRUCTIONS Safety Instructions These instructions are for your safety. Read them carefully. This cutting machine is capable of amputating hands and feet and throwing objects. Failure to observe the following safety instructions could result in serious injury or death. WARNING! This symbol means that important safety instructions need to be emphasized. - Page 9 SAFETY INSTRUCTIONS • Do not put hands or feet near or under WARNING! rotating parts. Keep clear of the Engine exhaust and certain discharge opening at all times vehicle components contain • Do not pull mower backwards unless or emit chemicals considered absolutely necessary.
-
Page 10: Operating On Slopes
SAFETY INSTRUCTIONS • Always wear gloves when handling the blades. • Never wear loose clothing that can get caught in moving parts. • Use ear protectors to avoid damage to hearing. • Stop the blade when crossing gravel drives, walks, or roads. •... -
Page 11: Children
SAFETY INSTRUCTIONS • Do not drive the mower on terrain that slopes more than 10°. • Do not mow near verges, ditches, or banks. The operator could lose footing or balance. • Do not mow wet grass. Reduced footing could cause slipping •... - Page 12 SAFETY INSTRUCTIONS • Keep the nozzle in contact with the rim of the fuel tank or container opening at all times until fueling is complete. Do not use a nozzle lock-open device. • Never fill containers inside a vehicle or on a truck or trailer bed with a plastic liner.
-
Page 13: Transport
SAFETY INSTRUCTIONS • Never make adjustments with the engine running. • Ensure that nuts and bolts, especially the fastening bolts for the blade attachments, are properly tightened, torqued and that the equipment is in good condition. • Do not modify safety equipment. Check regularly to be sure it works properly. -
Page 14: Customer Responsibilities
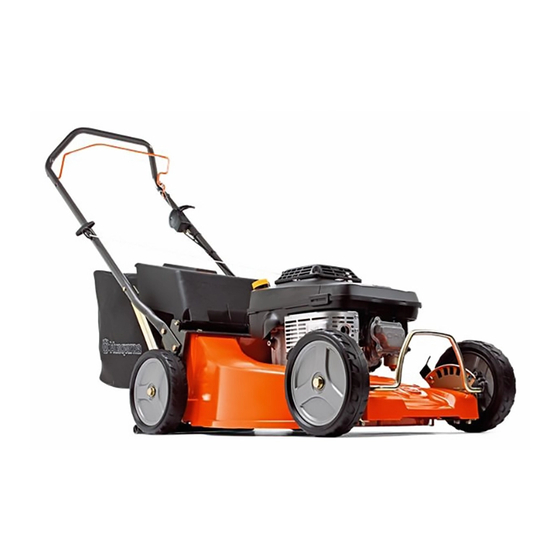
(if any). If a spark arrester is used, it should be maintained in effective working order by the operator. A spark arrester for the muffler is available through your authorized Husqvarna dealer. English-... - Page 15 CONTROLS Controls This operator’s manual describes the Husqvarna Pro Push Mower. The mower is fitted with a Kawasaki engine. 8019-040 Pro Push Mower Control Locations 1, 5, 6 8019-052 Locations of the controls Page Page Engine speed BBC control Fuel shut off valve...
-
Page 16: Controls
CONTROLS Engine Speed CAUTION: The engine speed was set at the factory for Federal regulations require an optimum performance. Speed is not engine control to be installed adjustable on this lawn mower in order to Operator Presence Control (OPC) minimize the risk of blade contact injury. -
Page 17: Choke Control (All Models)
CONTROLS WARNING! Gasoline is highly flammable. Observe caution and fill the tank outdoors (see the safety rules). IMPORTANT INFORMATION Experience indicates that alcohol blended fuels (called gasohol, ethanol or methanol) can attract moisture which WARNING! leads to separation and formation of Fill to bottom of filler neck. -
Page 18: Blade Brake Control (Bbc)
CONTROLS Blade Brake Control (BBC) Models: W21SBK, W53SBEK, W21SBKC The Blade Brake Control (BBC) engages the blade drive. The Operator Presence Control (OPC) must be engaged and the engine running to engage the BBC. Illustration shows ground speed bail engaged to operate in transport mode. -
Page 19: Cutting Height
CONTROLS Cutting height The cutting deck height is obtained by raising the wheels for low cut and lowering wheels for high cut, adjust cutting height to suit your requirements. Medium position is best for most lawns. To change your cutting height, squeeze adjuster lever toward wheel. - Page 20 CONTROLS Shut Off Engine Models: W21SBK, W53SBEK, W21SBKC To stop engine, release OPC bail to stop blades. Pull back on throttle control to stop engine Stop Engine 8019-047 1. OPC bail 2. Throttle control Models: W21SK, W53SEK, W21SKC Pull throttle control back to slow speed. Release OPC bail to stop engine.
-
Page 21: To Convert Mower
CONTROLS Mulching Kits are available separately, containing blade and mulch plug. To Convert Mower Your lawn mower was shipped as a rear discharge mower. To convert to bagging or side discharge: REAR BAGGING • Lift rear door of the lawn mower and place the grass catcher frame hooks onto the door pivot pins. - Page 22 CONTROLS English-...
-
Page 23: Before Starting Engine
OPERATION Before Starting Engine CAUTION: ADD OIL DO NOT overfill engine with oil, Your lawn mower is shipped without oil in the or it will smoke on startup. engine. For type and grade of oil to use see “ENGINE” in the Maintenance section of this manual or the engine manual. - Page 24 OPERATION TO START ENGINE NOTE: Due to protective coatings on the engine, a small amount of smoke may be present during the initial use of the product and should be considered normal. To start a cold engine, push the throttle control lever to the choke position.
-
Page 25: Transmission Selector
OPERATION Transmission Selector BBC Self propelled Models Only Models: W21SBK, W53SBEK, W21SBKC Mowing Prepare the area before mowing. Look for obstacles, remove foreign objects and clear the work area of pets and bystanders. Check the equipment for fuel, oil, loose fasteners etc. - Page 26 OPERATION Set throttle control to high speed. Engage Operator Presence Control (OPC). 8019-020 Set Throttle to High Speed Engage Blade Brake Control (BBC). 8019-021 Engage OPC then BBC Engage Ground Speed Bail to begin mowing. TIP: To extend clutch life do not engage BBC 8019-022 and start blade while in tall grass.
- Page 27 OPERATION When finished mowing, release OPC bail to stop blade rotation. Release Ground Speed Bail to stop wheel rotation. 8019-023 Release OPC bail 1. OPC bail 2. Ground speed bail Pull throttle control all the way rearward to stop engine. 8019-024 1.
-
Page 28: Self Propelled Models Only
OPERATION Self Propelled Models Only Models: W21SK, W53SEK, W21SKC Mowing Prepare the area before mowing. Look for obstacles, remove foreign objects and clear the work area of pets and bystanders. Check the equipment for fuel, oil, loose fasteners etc. Make sure the equipment is in top shape. Correct any defects before using the mower. - Page 29 OPERATION Set throttle control to high speed. 8019-028 Set throttle to high speed Engage Ground Speed Bail to begin mowing. 8019-029 Engage Ground Speed Bail Release Ground Speed Control to stop. When finished mowing release OPC bail to stop blade rotation and stop engine. 8019-023 English-...
-
Page 30: Push Models Only
OPERATION Push Models Only Model: W21K, W21KC Prepare the area before mowing. Look for obstacles, remove foreign objects and clear the work area of pets and bystanders. Check the equipment for fuel, oil, loose fasteners etc. Make sure the equipment is in top shape. Correct any defects before using the mower. -
Page 31: Mowing Tips
OPERATION Mowing Tips Under certain conditions, such as very tall grass, it may be necessary to raise the height WARNING! of cut to reduce pushing effort and to keep DO NOT use de-thatcher blade from overloading the engine and leaving attachments on your mower. -
Page 32: Mulching Tips
OPERATION Mulching Mowing Tips IMPORTANT INFORMATION • The special mulching blade will recut the grass clippings many times and reduce For best performance, keep mower them in size so that as they fall onto the housing free of built-up grass and trash. lawn they will disperse into the grass and See "Cleaning"... -
Page 33: Maintenance
MAINTENANCE Maintenance Maintenance Schedule The following is a list of maintenance procedures that must be performed on the machine. For those points not described in this manual, visit an authorized service workshop. An annual service carried out by an authorized service workshop is recommended to maintain your machine in the best possible condition and to ensure safe operation. -
Page 34: Before Each Use
MAINTENANCE General Recommendations The warranty on this lawn mower does not cover items that have been subjected to operator abuse or negligence. To receive full value from the warranty, operator must maintain mower as instructed in this manual. Some adjustments will need to be made periodically to properly maintain your unit. -
Page 35: Engine's Cooling Air Intake
MAINTENANCE using a spark plug wrench so that the washer is compressed. A used spark plug should be turned 1/8 of a turn from the seated position. A new spark plug should be turned 1/4 a turn from the seated position. Replace the ignition cable. -
Page 36: Throttle Cable And Choke Cable
MAINTENANCE Checking and Adjusting the Throttle Cable and Choke Cable Check that the engine responds to throttle increases and that a good engine speed is attained at full throttle. If doubts arise, contact the service workshop. If adjustments are necessary, they can be made as follows: Position the throttle/choke control lever to full throttle (not the “Choke”) position. -
Page 37: Replacing Air Filter
MAINTENANCE Replacing Air Filter If the engine seems weak or runs unevenly, the air filter may be clogged. If run with a dirty air filter, the spark plugs can become fouled, disturbing operation. For this reason, it is important to replace the air filter regularly (see the heading Maintenance Schedule for the proper service interval). -
Page 38: Replacing The Fuel Filter
MAINTENANCE Replacing the Fuel Filter Replace the line-mounted fuel filter every 100 hours (once per season) or more regularly if it is clogged. Replace the filter as follows: Move the hose clamps away from the filter. Use flat-nosed pliers. Pull the filter loose from the hose ends. Push the new filter into the hose ends. -
Page 39: Checking The V-Belts
MAINTENANCE Checking the V-belts Check every 100 hours of operation. Check for severe cracking and large nicks. NOTE: The belt will show some small cracks in normal operation. The belts are not adjustable. Replace belts if they begin to slip from wear. Checking the Blade In order to attain the best mowing effect, it is important that the blade is well sharpened... -
Page 40: Blade Replacement
Install and tighten blade bolt securely. Torque blade bolt to 45-55 ft/lbs (60-75 Nm). IMPORTANT INFORMATION Special blade bolt is heat treated. Replace with Husqvarna bolt if required. Do not use lower grade hardware than specified. Gear Case • To keep our drive system working... -
Page 41: Grass Catcher
MAINTENANCE Grass Catcher • The grass catcher may be hosed with water, but must be dry when used. WARNING! • Check your grass catcher often for damage or deterioration. Through normal Disconnect spark plug wire from use it will wear. If catcher needs spark plug and place wire where replacing, replace only with approved it cannot come in contact with... -
Page 42: Adjusting The Lawn Mower
MAINTENANCE Adjusting the Lawn Mower WARNING! Before performing any service or adjustment: 1. Release control bar and stop engine. 2. Make sure the blade and all moving parts have completely stopped. 3. Disconnect spark plug wire from spark plug and place where it cannot come in contact with plug Adjusting Cutting Height See “TO ADJUST CUTTING HEIGHT”... -
Page 43: Engine Adjustment
MAINTENANCE Engine Adjustment Engine Speed Your engine speed has been factory set. Do not attempt to increase engine speed or it may result in personal injury. If you believe that the engine is running too fast or too slow, take your lawn mower to an authorized service center for repair and adjustment. - Page 44 MAINTENANCE English-...
-
Page 45: Lubrication
LUBRICATION Lubrication Keep unit well lubricated (See “LUBRICATION CHART”). IMPORTANT: DO NOT OIL OR GREASE PLASTIC WHEEL BEARINGS. VISCOUS LUBRICANTS WILL ATTRACT DUST AND DIRT THAT WILL SHORTEN THE LIFE OF THE SELF-LUBRICATING BEARINGS. IF YOU FEEL THEY MUST BE LUBRICATED, USE ONLY A DRY, POWDERED GRAPHITE TYPE LUBRICANT SPARINGLY. - Page 46 LUBRICATION Change the oil after every 25 hours of operation or at least once a year if the lawn mower is not used for 25 hours in one year. WARNING! Engine oil can be very hot if it is Check the crankcase oil level before starting drained directly after stopping the engine and after each five (5) hours of the engine.
- Page 47 LUBRICATION 6. Changing the Oil Filter Drain the engine oil in accordance with the work description under the heading Engine Oil/Change Engine Oil. Remove the oil filter. If necessary, use a filter remover. Wipe new, clean engine oil onto the seal for the new filter.
-
Page 48: Trouble Shooting Guide
TROUBLE SHOOTING GUIDE Trouble Shooting Guide Problem Cause The engine will not start. • Dirty air filter. • Out of fuel. • Stale fuel. • Water in fuel. • Spark plug wire is disconnected. • Bad spark plug. • Loose blade or broken blade adapter. •... - Page 49 TROUBLE SHOOTING GUIDE Grass catcher not filling (if so equipped) • Cutting height too low. • Lift on blade worn off. • Catcher not venting air. Hard to push • Grass is too high or wheel height is too low. •...
- Page 50 112280 R2 03/06/07...