Canon G2000 Instruction Manual
8mm video camcorder
Hide thumbs
Also See for G2000:
- Online manual (611 pages) ,
- Instruction manual (70 pages) ,
- Getting started (2 pages)
Table of Contents
Advertisement
Canon INC.
Canon Europa N.V.
P.O. Box 2262, 1180 EG Amstelveen, the Netherlands
Canon UK Ltd
Camera Division, Ribcon Way Luton Bedfordshire LU4 9UR, United Kingdom
Telephone 0870 241 2161
Canon Australia Pty. Ltd
1 Thomas Holt Drive, North Ryde, N.S.W. 2113, Australia
Telephone 805-2000, Fax 887-4484
Canon New Zealand Ltd
Fred Thomas Drive, Takapuna, P.O. Box 33-336, Auckland, New Zealand
Telephone 486-1570, Fax 486-6420
Canon Singapore Pte. Ltd
79 Anson Road #09-01/06, Singapore 079906
Telephone (65)-532-4400, Fax (65)-221-2939
Canon Hongkong Company Ltd
9/F, The Hong Kong Club Building, 3A Chater Road, Central, Hong Kong
Canon Latin America, Inc.
Sales & Enquiries: 6505 Blue Lagoon Drive Suite 325 Miami FL 33126 USA
PUB.DIE-156
© CANON INC. 2001
DY8-9020-092-000
PRINTED IN KOREA
IMPRIME EN COREE
8mm VIDEO CAMCORDER
Instruction Manual
PAL
This manual explains how to use the G2000/G15Hi and
G20Hi camcorders. In certain areas, all of these three
models may not be available.
E
Advertisement
Chapters
Table of Contents

Related Manuals for Canon G2000


Summary of Contents for Canon G2000
-
Page 1: Instruction Manual
Canon Latin America, Inc. Sales & Enquiries: 6505 Blue Lagoon Drive Suite 325 Miami FL 33126 USA This manual explains how to use the G2000/G15Hi and G20Hi camcorders. In certain areas, all of these three models may not be available. -
Page 2: Important Usage Instructions
Important Usage Instructions CAUTION: TO REDUCE THE RISK OF ELECTRIC SHOCK, DO NOT REMOVE COVER (OR BACK). NO USER SERVICEABLE PARTS INSIDE. REFER SERVICING TO QUALIFIED SERVICE PERSONNEL. WARNING: TO REDUCE THE RISK OF FIRE OR ELECTRIC SHOCK, DO NOT EXPOSE THIS PRODUCT TO RAIN OR MOISTURE. -
Page 3: Table Of Contents
Thank you for Choosing a Canon ........ -
Page 4: Thank You For Choosing A Canon
Thank you for Choosing a Canon First, we’d like to thank you for buying Check that this package contains the this Canon camcorder. Its advanced following accessories: technology makes it very easy to use — CA-550K Compact WL-85 Wireless you will soon be making high-quality... -
Page 5: Introducing The Camcorder
Easier than manual operation and more flexible than Lithium ion power supply automatic functions, Canon’s FlexiZone Control is a A small but powerful battery pack that can be completely new way to use a charged at any time. -
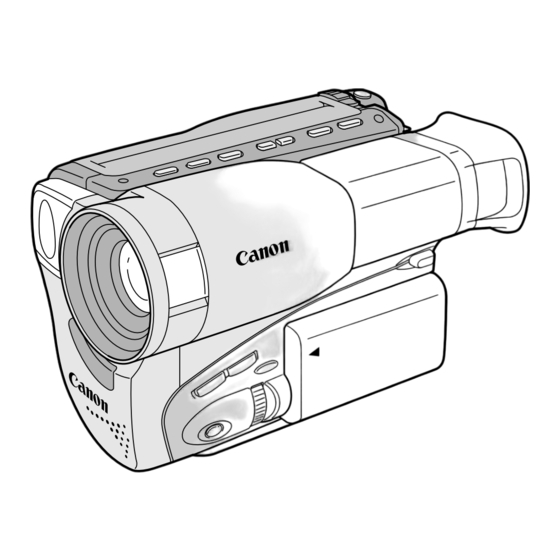
Page 6: Finding Your Way Around The G2000/G15Hi/G20Hi
Finding Your Way Around the G2000/G15Hi/G20Hi EJECT button (p. 11) C. (counter) RESET button (p. 18) (fast forward) button (p. 17) REC SEARCH + button (p. 35) (rewind) button (p. 17) REC SEARCH – and (record review) button (p. 35) (play) button (p. - Page 7 Viewfinder (p. 50, 60) Viewfinder focusing switch (p. 50) Backup battery Tripod socket holder (p. 54) (p. 21) PHOTO button (G20Hi) (p. 43) Strap attachment bar (p. 51) CHARGE indicator (p. 9) S-video output DC IN terminal (p. 8) terminal (G15Hi/G20Hi) (p.
-
Page 8: Powering Your Camcorder
3. Connect the power adapter to a mains outlet. 4. Remove the power adapter after use. • Always turn the camera off before connecting/removing the power source. • For the power adapter, use only Canon CA-550K (or CA-550). Do not use other equipment. CA-550K Compact power adapter... - Page 9 Charging and attaching the battery pack POWER Your battery pack was partially charged before it left the factory. It should have enough power for you to check that your camera is working properly. However, you must charge the battery pack fully if you want it to power the camera for more than a few minutes.
- Page 10 BP-915 (optional) 4 hrs. BP-930 (optional) 6 hrs. BP-945 (optional) 8 hrs. 30 min. Continuous recording time (G20Hi: video light off) * G2000 G15Hi/G20Hi* BP-911K (supplied) 2 hrs. 30 min. 2 hrs. 10 min. BP-915 (optional) 2 hrs. 35 min.
-
Page 11: Loading A Cassette
Loading a Cassette EJECT Use video cassettes marked with an f (or g for G15Hi/G20Hi). Loading and unloading 1. Make sure that you have attached or connected a power source. 2. Press the 5 EJECT button and wait for the cassette compartment to open. - Page 12 Handling cassettes • To protect the tape heads, transfer cassettes directly from the tape case to the camcorder – do not open the tape protect cover or touch the tape itself. • Do not use cassettes where the tape has been damaged or rejoined – they may damage the camcorder.
-
Page 13: Basic Recording
Basic Recording POWER Safe cassette operation When you turn the power off or remove the power source, be sure to set the camcorder first to record pause, stop or still pause mode. Turning the power off or removing the power source while the tape is moving (during recording, play, rewind for example), will make the counter display appear wrong or may cause tape damage. - Page 14 • To check that the camera is recording correctly, be sure to make a test recording first. • Before making important recordings, clean the video heads using Canon CC-8 Video Head Cleaning Cassette or a commercially available dry-type head cleaning cassette.
-
Page 15: Zooming
Zooming Zoom in Zoom out The camera’s 22× zoom lens allows you to choose the best picture angle for each scene: • Turn the zoom control towards W to zoom out to wide-angle. • Turn it towards T to zoom in to telephoto. You can also control the speed of zooming: •... -
Page 16: Viewfinder Displays
Viewfinder displays Zoom in Zoom out Stationary Optical zoom Digital zoom 700× Notes: • The viewfinder display stays lit for approximately 4 seconds following an adjustment to the picture angle. • Overuse of the zoom may make recordings seem too busy. It is generally better to use it sparingly, or in order to reframe between shots. -
Page 17: Playing Back A Cassette
• To wind the tape backwards, stop playback and press the ` (rewind) button. • If the playback picture is rough, clean the video heads using a Canon CC-8 Video Head Cleaning Cassette or a commercially available dry-type head cleaning cassette. - Page 18 High-speed search To play back the recording at about 15 times normal speed, press and hold the 1 button during normal fast forward. For reverse playback at about 15 times normal speed, press and hold the ` button during normal rewind. Tape return Use the wireless controller’s TAPE RETURN button to quickly return to a...
-
Page 19: Connecting For Playback On A Tv Screen
Connecting for Playback on a TV Screen You can connect the camera to a TV or VCR in order to play back your recordings. You will need to attach a power source to the camera (see p. 8). See your TV or VCR instruction manual for further details. If your TV (or VCR) has a SCART terminal (without S-video) C-250 AV Cable PC-A5... - Page 20 If your TV (or VCR) has audio/video input terminals VIDEO IN C-250 AV Cable AUDIO IN • Connect the camera by using the C-250 AV Cable to connect the AV terminal. Connect the white plug to the white AUDIO terminal. Connect the yellow plug to the yellow VIDEO terminal.
-
Page 21: Tips For Making Better Videos
Tips for Making Better Videos Holding the camera For maximum stability, place your right hand through the grip belt and keep your right elbow pressed against your body. Rest your left hand lightly on the side of the camera. With practice, you will be able to operate the controls by touch, without taking your eye off the action. -
Page 22: Picture Angle
Picture angle Instead of zooming while recording, Long shot try to choose your picture angle before you begin. A good way to tell a story with video is to begin with a long shot that establishes the situation, and then Medium shot move in with medium shots and close- ups to show the details. -
Page 23: Selecting From The Menus
Selecting from the Menus The menus let you choose settings for a wide range of functions. There are two separate menus, for recording (camera menu) and playback (play menu). Camera menu While the camera is in record pause mode, press the MENU button. Screen 1 q Custom key information......p. - Page 24 1,4,5 1. Press the MENU button to open the menu at screen 1. 2. Use the SELECT dial to move the cursor up or down the screen. • In camera mode, when the cursor reaches the bottom of the screen 1, screen 2 of the menu appears, and when the cursor reaches the top of the screen 2, screen 1 appears.
-
Page 25: Setting Custom Keys
The 2 keys on the left side of the camera body can easily be set to operate a number of functions. When you buy the camcorder, they should be set as follows: CUSTOM KEY 1 CUSTOM KEY 2 G2000 D.E.SELECT D.E.ON/OFF G15Hi/G20Hi D.ZOOM... - Page 26 Displaying the Custom Key function in the viewfinder Choose to display the combination of functions set for the CUSTOM KEYS in the viewfinder. 1. Turn the program selector to camera mode (a, w , b, c, e or f). 2. Open the camera menu and select CUSTOM KEY INFO. 3.
-
Page 27: Image Stabilizer (G15Hi/G20Hi)
Image Stabilizer (G15Hi/G20Hi) With most camcorders, even the slightest hand movements will be noticeable during telephoto recording. However, the image stabilizer allows you to obtain steady recordings even at high magnification. Before you start recording, turn the image stabilizer on or off from the IMAGE STABIL option at the camera menu. •... -
Page 28: Using The Wireless Controller
Using the Wireless Controller The wireless controller can operate the camera from a distance of up to 5 meters (16 feet). Point it at the camera’s remote sensor while you press the buttons. 5 m (16 feet) There are 2 functions which can only be operated using the wireless controller: •... - Page 29 Turning off the remote sensor SENSOR••••••••••OFF (see p. 23) The remote sensor may be turned off to prevent interference from other Canon wireless controllers being used nearby. 1. Open either the camera or play menu and move the cursor to SENSOR.
-
Page 30: Setting The Date And Time
Setting the Date and Time 1:23 PM 1.JUN.2001 DATE DISPLAY•••CONT. (see p. 23) Choose whether to add the date and time to your recordings by selecting DATE DISPLAY at the camera menu, and choosing one of the 3 options: AUTO–10S: Adds the date and time to your recordings for the first 10 seconds of each scene you record. -
Page 31: Date Select••Date&Time
Setting the date and time Set the date and time display when you first start using your camera. As long as you have inserted the backup battery (p. 54), the camera’s internal clock will continue to work even when the main power source is removed. 1. -
Page 32: Adding Titles
Adding Titles WEDDING You can choose from a selection of preset titles to add to your recording. After you have selected a preset title, do not remove the battery pack before actual recording. Your preset title will return to HAPPY BIRTHDAY when you remove (change) the battery pack (except when you are using the power adapter) or remove/connect the power adapter. - Page 33 Selecting a present title 1. Open the camera menu to screen 2 and choose the TITLE SELECT option. 2. Turn the SELECT dial to move through the list of preset titles until the title you wish to use is displayed. •...
-
Page 34: Fade
Fade Fade in Fade out Fade in To make the scene gradually appear from a blank screen: 1. Make sure the camera is in record pause mode. 2. Press and hold the FADE button until the scene disappears completely from the viewfinder. 3. -
Page 35: Searching And Reviewing While Recording
Searching and Reviewing While Recording Record search When the camera is in record pause mode, you can use record search to play the tape forwards or backwards to find the point where you want to start or restart recording. This is useful when you want to add a new scene to a previously recorded cassette. -
Page 36: Using The Various Recording Programs
Using the Various Recording Programs The camera provides you with a choice of 6 recording programs. They use different combinations of camera settings in order to adjust the exposure and other functions to match the recording situation. POWER Rotate the program selector to choose the appropriate program before you start recording. - Page 37 Specialized AE programs Sports SPORTS This program is useful for recording high-speed sports scenes in brightly lit conditions. Normal playback will be slightly jerky, but you will get clear images which can be analyzed frame by frame during slow or still playback on a VCR. Portrait PORTRAIT Use this program outdoors to make the subject stand...
-
Page 38: Focusing
Focusing POWER The camera can focus automatically. All you have to do is point it, and whatever is in the centre of the viewfinder will usually be in sharp focus. It also has 2 functions which give you more control over focusing. FlexiZone AF FlexiZone AF makes autofocus much more powerful. -
Page 39: Manual Focus
Manual focus Sometimes you will get better results by turning off autofocus and using manual focus instead. (For a list of difficult to focus subjects refer to p. 64) 1. Frame the picture with the zoom control. • If you use the zoom after manual focusing, the picture may go out of focus. 2. -
Page 40: Adjusting The Exposure Manually
Adjusting the Exposure Manually The camera adjusts the exposure automatically, making sure that your pictures are neither too dark nor too light. There is a choice of 6 recording programs to deal with different recording conditions (see p. 36–37). This section explains how to use 3 more exposure functions. These will give you added control over your recordings. - Page 41 FlexiZone AE EXP.LOCK The camera usually adjusts the exposure so that it is suitable for the whole scene, and especially for the area in the centre of the viewfinder. FlexiZone AE allows you to choose any part of the scene, so that even if your subject is towards the edge of the screen, or if it is very bright or very dark, it will still be properly exposed.
- Page 42 Exposure lock When you are recording in situations where the lighting or light reflected by the subject may change suddenly, you can lock the exposure at the current level. 1. Turn the program selector to a Auto Recording program. 2. Press the centre of the FlexiZone controller in straight. •...
-
Page 43: Taking Still Pictures (Photo Mode) (G20Hi)
Taking Still Pictures (Photo Mode) (G20Hi) You can record still pictures like a photograph. You can use still pictures as an effective first scene, and so on. The camera records the picture and sound to tape for approximately 7 seconds. You can take a still picture at any time during regular recording, or you can put the camcorder into record pause mode first, then take a still picture. -
Page 44: Using Digital Effects
Using Digital Effects You can add a variety of digital effects to your recording, during recording and playback (negative-positive conversion, mirror, mosaic, 16:9, cinema, strobe and ghost effects can be used only during recording). The soundtrack is not affected. • The digital effects marked with asterisks can be used only during camera recording. - Page 45 Mirror* The image will be as if you have placed a mirror in the middle of the screen. • G15Hi/G20Hi : If you select Mirror after the image stabilizer has already been turned on, the image stabilizer automatically turns off and i flashes and then disappears after 4 seconds.
- Page 46 Strobe* (G15Hi/G20Hi) This effect converts on-screen action to a series of still images, giving an effect similar to slow-motion. If you select Strobe after the image stabilizer has already been turned on, the image stabilizer automatically turns off and i flashes and then disappears after 4 seconds.
-
Page 47: Using Digital Effects
Using Digital Effects 1. Turn the program selector to camera or play mode. 2. Make sure that the CUSTOM KEYS are assigned to D.E.SELECT and D.E.ON/OFF (see p. 25). 3. Press CUSTOM KEY 1 (the D.E.SELECT button) to choose the effect you want. -
Page 48: Using The Built-In Video Light (G20Hi)
• Do not knock the light, especially during use. • Do not use the wide-converter lens or the tele-converter lens with the video light. • When the bulb has reached the end of its life, contact your nearest Canon Service Centre. -
Page 49: Simple Editing To A Vcr
Simple Editing to a VCR Preparations 1. Connect the camera to the VCR. • See “Connections for Playback on a TV Screen” on p. 19–20. 2. Prepare the TV and VCR. • Turn on the TV and set it to the video channel, or set the TV/VIDEO selector to VIDEO. -
Page 50: Preparing The Camera
Preparing the Camera You should already have attached a power source to the camera and loaded a cassette. When you have completed the following steps, you will be ready to start recording. Fasten the grip belt • Release the Velcro fastening and hold the camera with your right hand while you adjust the belt with your left. -
Page 51: Attach The Shoulder Strap
Attach the shoulder strap • For extra security and portability, attach the shoulder strap before using the camera. • Pass the ends through the attachment bars and adjust the length as shown. • Be sure to test the strap to check that it is properly attached before using it to carry the camera. -
Page 52: Notes On Using The Batteries
For example, when you attach 2 BP-945 battery packs, the G15Hi/G20Hi can record up to 13 hours and the G2000 up to 15.5 hours continuously. • These times vary — the safest policy is always to have 2 or 3 times as many battery packs as you think you will need. - Page 53 How much power is left? The indicator in the display shows you 100% approximately how much charge the battery ↓ pack has left (when a battery pack is directly ↓ attached to the camera): ↓ Notes: ↓ • The mark starts blinking in the display when the power is completely exhausted.
-
Page 54: Installing The Backup Battery
Installing the backup battery Open the battery cover, and insert the CR2025 lithium battery with the + side facing out. CR2025 Close the battery cover into place. • This backup battery allows the camera to remember the data and time and other settings when the main power source is removed. -
Page 55: Video System
DC Coupler Adapter BP-900 Series Battery Pack CA-910 Compact Power Adapter WD-46 Wide-converter CA-550/CA-550K* Compact Power Adapter TL-46 Tele-converter G2000/G15Hi/ G20Hi FS-46 Filter Set BP-900 Series Battery Pack FS-46U Filter Set CH-910 Dual Battery Charger/Holder C-250 AV Cable PC-A5 SCART... -
Page 56: Optional Accessories
— and you can still use both zoom and autofocus. • As the G20Hi/G15Hi/G2000 is already designed to record wide angle, vignetting occurs at the extreme wide angle position. - Page 57 FS-46 Filter Set Three special effects filters to add a creative touch to your recordings: multiple-image, R-cross and zoom-spot. • Turn autofocus off when using special effects filters. • Vignetting occurs when using the multiple-image filter at the extreme wide angle position. FS-46U Filter Set Ultraviolet, neutral density and circular polarising filters help you take control of difficult lighting...
- Page 58 WS-20 Wrist Strap Provides an extra measure of protection for active shooting. This mark identifies genuine Canon video accessories. When you use Canon video equipment, we recommend Canon-brand accessories or products bearing this same mark.
-
Page 59: Cautions And Maintenance
Cautions and Maintenance Cautions Avoid high temperatures and high humidity. • Do not leave the camera inside a car in hot weather, for example. • Be careful of heat radiating from video lighting equipment. • Do not take the camera into a humid room. Avoid sudden changes in temperature. - Page 60 Video heads • Clean the video heads only when necessary, preferably using Canon’s CC-8 Video Head Cleaning Cassette. • Do not use a wet-type cleaning cassette as this can cause damage.
- Page 61 Condensation Condensation may form on the camera when it is moved from a cold place to a warm place. Using the camera while condensation is present can damage both the tape and the camera. Condensation may become a problem: When you take the camera from a cold When a cold room is heated rapidly place to a warm room When the camera is left in a humid...
-
Page 62: Using The Camera Abroad
• You can use the compact power adapter to operate your camera and charge battery packs in any country where the electricity supply is between 100 and 240 V AC, 50/60 Hz. Contact your Canon dealer for information about plug adapters for overseas use. -
Page 63: Troubleshooting
Troubleshooting Refer to this checklist first if you have any problems with your camera. Possible explanations are given below each problem on the list — turn to the page numbers in parentheses for more information. Make sure that the camera is properly connected if you are using it with a TV or VCR. - Page 64 ? The camera won’t focus. • The camera is on manual focus (p. 39). • The viewfinder lens needs adjusting (p. 50). • The lens is dirty (p. 60). • Some subjects are not suitable for autofocus. Note: • Some subjects are not suitable for autofocus. In these situations, you will often get better results using manual focus (see p.
- Page 65 ? The video light won’t turn on. • The program selector is in PLAY mode. (G20Hi) • The STANDBY cover is closed. • The bulb has reached the end of its life. ? The e (Play) button doesn’t work. • The program selector is not set to PLAY (p.
-
Page 66: Viewfinder Displays
Viewfinder Displays Use the wireless controller’s ON SCREEN button to choose whether or not the viewfinder displays appear on the TV screen. They are not recorded to the tape if you start recording with the camera. indicates a flashing display. Date and time display The safety mechanism (p. -
Page 67: Custom Key Set
Optical zoom (p. 15) FlexiZone AE/ E X P . L OCK Exposure lock (p. 41) Digital zoom is turned on (p. 15). Condensation warning (p. 61) Digital zoom (p. 15) Custom key settings Image stabilizer (p. 25) D . Z OOM (G20Hi/G15Hi) I MAGE S T AB I L (G20Hi/G15Hi) -
Page 68: Specifications
Specifications G2000/G15Hi/G20Hi Power supply (rated): 7.2 V DC Electronic viewfinder: Power consumption: G2000/G15Hi: 0.24 inch monochrome G2000: 3.3 W LCD, 76,000 pixel G15Hi/G20Hi: 3.9 W G20Hi: 0.44 inch colour LCD, 113,000 Television System: CCIR standard pixel (625 lines, 50 fields) -
Page 69: Index
Index Å ˝ Abroad, Using the Camera, 62 Ghost, 46 Accessories, 4, 56–57 Grip Belt, 50 Adapter, Mains, 8–9 Ó AE programs, 36 Head Cleaning, 60 Art, 44 High-Speed Search, 18 Audio/Video Terminal, 20, 49 ˆ Auto Recording, 36 Image Stabilizer, 27 ı... - Page 70 Í Sand & Snow, 37 Sensor, Remote, 28 Sepia, 44 Shoulder Strap, 51 16:9, 45 Specifications, 68 Sports, 37 Spotlight, 37 Storage, 60 Strobe, 46 ˇ Tape Counter, 18, 67 Tape Return, 18 Telephoto, 15 Temperature, 52, 59 Time Display, 30–31 Titles, 32–33 Tripod, 21 Troubleshooting, 63–64...