Table of Contents
Advertisement
Advertisement
Table of Contents

Related Manuals for NEC Terrain


Summary of Contents for NEC Terrain
- Page 1 NEC Terrain User Guide...
-
Page 2: Table Of Contents
Table of Contents 1. Get Started Set Up YoUr phone ..................7 Charge the BatterY ..................10 power phone on and off ................11 ConfigUre YoUr phone .................11 waterproof & dUStproof information ..........12 2. Learn About Your Phone featUreS of YoUr phone ................14 phone laYoUt .................... - Page 3 4. AT&T Enhanced Push-To-Talk taCtile keY ....................... 34 enhanCed ptt appliCation ................. 34 ContaCtS ......................35 groUpS ....................... 36 make CallS ...................... 37 reCeive CallS ....................38 Set availaBilitY ....................38 Send & reCeive alertS ................38 SUperviSorY override ................39 enhanCed ptt SettingS ................
- Page 4 7. Messaging tYpeS of meSSageS ..................48 Create text meSSageS ................48 meSSage optionS ................... 49 view new meSSageS ..................49 delete meSSageS ................... 50 meSSaging SettingS ..................50 USe email ......................51 USe gmail ......................52 8. Internet Browser USe YoUr BrowSer ..................
- Page 5 10. Settings wi-fi ........................67 BlUetooth ....................... 67 more SettingS ....................68 SoUnd ........................71 diSplaY ....................... 72 Storage ......................72 BatterY ......................73 eCo mode ......................73 appS ........................73 aCCoUntS & SYnC .................... 74 loCation ServiCeS ..................74 SeCUritY ......................
- Page 6 12. Legal Notices intelleCtUal propertY ................96 open SoUrCe Software ................96 diSClaimer of warrantieS & exClUSion of liaBilitY ....... 96 logo & trademark identifiCation ............97...
-
Page 7: Get Started
1. Get Started This section explains how to start using your phone by first configuring your hardware, activating your service, setting up your voice mail and understanding the waterproof features of your phone. Set Up YoUr phone Prior to use it is necessary to install both the battery and SIM card into their corresponding internal compartments. The microSD™... -
Page 8: Install The Sim Card
install the Sim Card When you subscribe to cellular carrier service, you are provided a SIM card loaded with your subscription details, such as your PIN, available optional services, and many other features. 1. Carefully slide the SIM card into the SIM card slot (shown below) until the card locks into place. •... -
Page 9: Install The Battery
install the Battery 1. To install / replace the battery, insert the bottom of the battery first, ensuring the gold contacts are connected and then press the top side down securely. 2. To remove the battery, lift the top side up as shown below. microUSB port Cover 1. -
Page 10: Charge The Battery
Use the wall Charger Your device is powered by a rechargeable Li-ion battery. The USB cable required to charge the battery, is included with your device. Use only NEC approved batteries and chargers. 1. Open the microUSB port cover. 2. Connect the microUSB end of the supplied cable with the USB symbol facing up. -
Page 11: Power Phone On And Off
disconnect the microUSB cable from the pC 1. Open the Notifications panel, tap Turn off USB storage. 2. Tap Turn off USB storage. Then you can disconnect the microUSB cable from the PC. Note: Connect the USB plug of the microUSB cable for PC connection directly to the USB port of the PC. If the cable is connected via a USB hub or USB extension cable, a malfunction may occur. -
Page 12: Create A Google Account
4. The Use Google location screen will appear. Google’s location services use data from your phone to determine your approximate locations. The phone will default to allow Google’s location services to collect anonymous location data and to use your location for Google search results and services. If you do not wish to participate in these services then tap on the check mark to opt out. - Page 13 dry Your phone If the microphone or speakers are exposed to water it is important to ensure they dry properly to maintain sound quality. If exposed to water, follow the following steps. 1. Wipe the surface with a dry soft cloth. 2.
-
Page 14: Learn About Your Phone
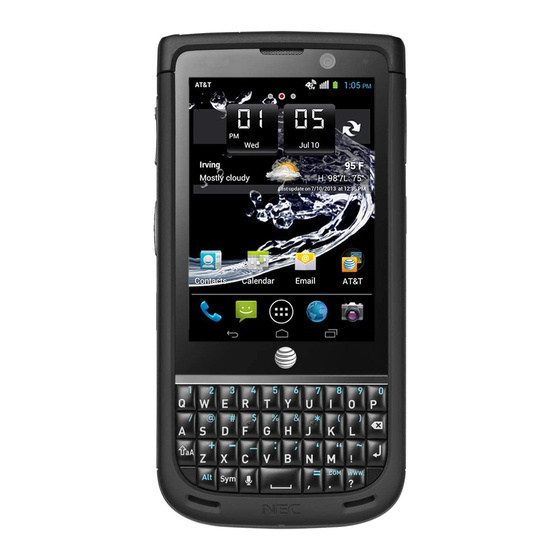
2. Learn About Your Phone featUreS of YoUr phone This section outlines key features of your phone and describes how to use the touch screen. It will explain the icons that appear when using the phone as well as how to navigate your phone and use a memory card. phone laYoUt front &... -
Page 15: Basic Operation
15. Volume Key: Adjusts the ringer volume while in standby mode or adjust the voice volume during a call. 19. MicroUSB Port 15. Volume Key 16. Enhanced Push-to-Talk Key: Instantly access Enhanced PTT to make or respond to an Enhanced PTT alert. 16. -
Page 16: Touch Screen
touch Screen This device features a touch screen that makes navigation quick and easy. Lightly touch items to select or launch them. For example: • Tap an application icon to launch or open the application. • Tap a menu item to select it. •... -
Page 17: Phone Navigation
navigate the apps menu Your phone comes with three Application Menus available. As you add applications, your menus will increase. To access your menus follow these steps: 1. At the Home screen, tap All Apps . The first Application Menu will be displayed. 2. - Page 18 navigate the home Screens The main Home screen is the starting point for your phone. This phone initially has 3 Home screens, additional screens can be added, up to 7. You can create shortcuts to your favorite applications, folders and widgets on any of the Home screens to have easy and instant access to the information and applications you use most.
-
Page 19: Display Layout
diSplaY laYoUt Your phone will provide you with a wealth of information regarding the device itself, notifications, status and options, as well as provide access to applications via the application icons. Notification Bar Your phone is equipped with a Notification Bar at the top of your touch screen. The Notification Bar provides you with your phone’s status and options as well application updates. - Page 20 Microphone is muted Data download / receive Airplane mode Application installation is completed Vibration mode Update of installed application available Silent mode Software update notification, updating Eco mode Synchronizing data GPS is positioning applications icons The All Applcations menu provides quick access to the items you use most frequently. The following is a list of the applications that come standard on your phone with a brief description of the application.
- Page 21 Latitude Google Latitude allows you to see the location of all your friends on a map. Local An application that uses Google Maps and your location to locate surrounding Restaurants, Bars and Attractions. Maps Google Maps allows you to see your location and obtain directions for driving or walking.
-
Page 22: Customize Your Home Screens
google Search Bar ™ The Google Search Bar provides you with an on-screen Internet search engine powered by Google. You can either type or speak the item that you wish to search for. • The Google Search bar is located on the left Home screen (swipe right to reach the screen). •... -
Page 23: Primary Shortcuts
remove a Shortcut 1. Locate the desired icon on any of the Home screens. 2. Touch and hold the icon, until the icon begins to ‘float’. 3. You will see the X Remove appear at the top of the screen in red. 4. -
Page 24: Memory Card
folders You can organize your Home screens by combining similar applications together to create folders for a variety of uses. Create a folder 1. Tap and hold the desired icon, once you feel the phone vibrate, drag it to the icon that you wish to combine it with. - Page 25 Unmounting a microSd Card You can safely remove the microSD card from your phone at any time once your phone is turned off. If you remove it while your phone is powered on, you should first unmount the microSD card. Otherwise, the microSD card may become corrupted and damage the data stored on the card.
-
Page 26: Call Functions
3. Call Functions This section describes how to make or answer a call as well as other features and functionality associated with phone calls. find YoUr phone nUmBer ► Settings ► About phone ► Status. Scroll down to the 1. From the Home screen, tap My phone number field, where your number will be displayed. -
Page 27: Emergency Calls
emergenCY CallS If you do not have a SIM card installed the first time you turn on the phone, the SIM Card Not Found icon will appear in the notification bar. Without your SIM card, you can only make an emergency call with the phone; normal cell phone service is not available. -
Page 28: Call Log
Call log The phone stores the numbers of the calls you’ve dialed, received, or missed in the Call Log. The Call Log displays the details of each call. 1. From the Home screen, tap LOGS tab. 2. Tap the A list of recent calls is displayed. If the number or caller is listed in your Contacts, the associated name is displayed. All calls made, received, and missed are listed. -
Page 29: Options During A Call
delete a Call from the Call log LOGS. 1. From the Home screen, tap ► 2. Touch and hold the call you want to delete. You can select multiple calls. If you accidently select a call you do not wish to delete, simply tap the call again and it will be unmarked. - Page 30 Switch Between Calls (Swap) When you have an active call and a call on hold, you may switch between the two calls, changing the one on hold to active and placing the other on hold. Swap. 1. Tap The current call, in green, is placed on hold and the previous call on hold, in black, is then reactivated so that you can continue conversing with that person.
-
Page 31: Call Settings
Call SettingS There are multiple feature settings that you can adjust to your preferences that can customize the way you handle phone calls. To access these settings from the Home screen: ► ► Settings 1. Tap fixed dialing numbers (fdn) Fixed dialing numbers allows you to restrict outgoing calls to a limited set of phone numbers that are contained on your SIM card. -
Page 32: Hearing Aids
audible touch tone This option allows you to turn the dialpad tone on or off while dialing phone number. ► ► Settings ► Audible touch tone to remove the default • From the Home screen, tap checkmark and disable the sound. voicemail You can manage your voicemail defaults by accessing the settings. -
Page 33: Dtmf Tones
dtmf tones This option allows you to set the length of the DTMF (Dual Tone Multi-Frequency) tones. ► ► Settings ► DTMF Tones, then select Normal • From the Home screen, tap or Long. Call forwarding ► ► Settings ► Call forwarding. 1. -
Page 34: At&T Enhanced Push-To-Talk
4. AT&T Enhanced Push-To-Talk This section describes how to use Enhanced Push-to-Talk (PTT) as well as other features and functionality associated with this service. Enhanced PTT is an additional service that must be subscribed to from AT&T. Additional charges may apply. Contact AT&T to add this service to your account. taCtile keY Your phone has a dedicated tactile Enhanced PTT key on the left side. -
Page 35: Contacts
enhanced ptt options From the phone’s Home screen, select Enhanced Push-to-Talk . You will see the following options: 1. Home 8. Favorites 2. Contacts 7. Groups 3. Call 6. Add 5. Manual Dial 4. Alert 1. Home: Displays your call and conversation history, as well as your availability status. 2. -
Page 36: Groups
add Contacts from the Contacts Screen 1. Tap the Menu at the bottom right corner of the screen. 2. Select Add Contact. 3. Select Native Phonebook or Manual Input. 4. For Native Phonebook, select the contact and then tap Save. 5. -
Page 37: Make Calls
edit groups The following steps apply to manually entered groups only. 1. Tap Groups 2. Press and hold the desired group, and a menu will be displayed, select Edit Group. 3. You can rename, add members, assign an avatar and assign a color to your group. make CallS enhanced ptt Call to an individual 1. -
Page 38: Receive Calls
reCeive CallS 1. When you receive an Enhanced PTT call, you will hear a ‘chirp’ followed by the initiator’s voice. 2. To respond, press and hold the tactile Enhanced PTT key on the left side of the phone and begin speaking. -
Page 39: Supervisory Override
Set favorites The application allows you to designate certain contacts and groups as favorites, which are listed under the Favorites tab. 1. To set a contact or group as a favorite: from the Home screen, go to the bottom action bar and select and then select Add to Favorites. -
Page 40: Enter Text
5. Enter Text This section describes how to use the QWERTY keyboard and predictive text in order to reduce the amount of key strokes associated with entering text. inpUt methodS There are two text input methods available: • Physical QWERTY Keyboard: Use the physical QWERTY keypad to type. •... -
Page 41: Formatting Basics
formatting BaSiCS Using the Cursor • When you tap on the message field the cursor will appear. • You can move the cursor around by touching and dragging the blue cursor to the desired location. • To highlight a word, touch and hold the text to create two half cursors. •... -
Page 42: Contacts
6. Contacts This section allows you to manage your daily contacts by storing their names, numbers and other information in your Contacts application. at&t addreSS Book The AT&T Contacts is a free backup service that allows your contacts to be automatically synchronized between your phone and online Contacts. -
Page 43: Add Pauses To Contact Numbers
add paUSeS to ContaCt nUmBerS When you call automated systems, you are often required to enter a password or account number. Instead of manually entering the numbers each time, you can store the numbers in the contact along with special characters that represent pauses and waits. -
Page 44: Contacts Options
Separate a Contact 1. From the Home screen, tap 2. Select the contact that has been merged. 3. Tap the ► Separate. 4. The contact entries will now display as separate contacts. Note: Typically this is the same contact with a different name or account information. assign default information Many contacts have several phone numbers and emails. -
Page 45: Groups
options in a Contact’s Screen 1. From the Home screen, tap 2. Select a contact, then tap . 3. The following options are displayed: • Edit: Edit the contact’s information. • Share: Send the contact’s information via Bluetooth, Email, Gmail or Messaging. •... -
Page 46: Contacts Favorites
Create a new group 1. From the Group tab. 2. Tap the Add Group at the bottom center of the screen. 3. If you have multiple address book accounts, you will select which account you would like to store the group in. -
Page 47: Manage Contacts
manage ContaCtS You can copy, delete and view the memory status for the Phone and SIM contacts on your phone. Copy Contacts to the Sim Card When storing Contacts to the SIM card, only the name, phone number, and email address can be stored. ►... -
Page 48: Messaging
7. Messaging This section describes how to compose, send and receive different types of messages. tYpeS of meSSageS • Text Messages • Multimedia (Picture, Video, and Audio) Messages • Email and Gmail Messages • Google+ and Messenger Short Message Service (SMS) lets you send and receive text messages to and from other mobile phones or email addresses. -
Page 49: Message Options
meSSage optionS options Before Composing a message Search allows you to search through all of your messages for a certain word or string of words. Tap Search and enter the word(s) in the Search messaging field and select the word when it appears in the drop down box. -
Page 50: Delete Messages
message threads Sent and received messages are grouped into message threads. Threaded messages allow you to see all the messages exchanged (similar to a chat program) and displays a contact on the screen. Message threads are listed in the order in which they were received, with the latest message displayed at the top. to open a threaded message follow these steps: 1. -
Page 51: Use Email
multimedia message (mmS) Settings • Auto-retrieve: Enables the message system to retrieve messages automatically. • Creation mode: Select the type of creation mode: Free, Restricted or Warning. - Restricted: Limits the creation or submission of messages with only the content belonging to the Core MM Content Domain. -
Page 52: Use Gmail
Create additional email accounts To create additional email accounts after setting up your first account, follow these steps: 1. From the Home screen, tap 2. Press ► Settings. 3. Tap Add Account. 4. Enter the information required to set up another account. Switch Between email accounts 1. - Page 53 3. Press to select one of the following additional options. • Mark important/not important: Selects the importance of a message. • Mute: Mutes any sound in a message if applicable. • Report spam: Identifies the message as spam. Tap the UNDO option if you change your mind.
-
Page 54: Internet Browser
8. Internet Browser The browser is your access to the internet. This chapter explains how to navigate the browser and use the basic features. USe YoUr BrowSer access the internet From the Home screen, tap Browser . The AT&T/YAHOO! mobile homepage will display. navigate with the Browser 1. -
Page 55: Browser Options
Search the internet with voice To perform an internet search using the voice search, follow these steps: 1. From any website, tap the web address field (the entire URL should be highlighted). 2. Tap on the Microphone 3. Clearly speak the keyword(s) that you wish to search for. 4. -
Page 56: Open And Close Windows
open and CloSe windowS You can have numerous browsing windows open at one time. To manage your windows: 1. From your browser, press Windows • Thumbnails of all open windows will be shown in a vertical list. 2. Tap New to open a new window. -
Page 57: Browser History
add Bookmarks 1. From any webpage, tap ► Save to bookmarks. 2. Enter the Label, Address, Account and Folder. 3. Tap OK. 4. Saved to bookmarks will appear at the bottom of the page. edit Bookmarks 1. From the Bookmarks page, tap and hold the bookmark you want to edit. 2. -
Page 58: Empty Cookies
emptY CookieS A cookie is a small file which is placed on your phone by a website during navigation. In addition to containing some site-specific information, it can also contain some personal information (such as a username and password) which can pose a security risk if not properly managed. - Page 59 advanced • Set search engine: Allows you to set your default search engine to Google, Yahoo!, or Bing. • Open in background: New pages are launched in a separate window and displayed behind the current one. Remove the checkmark to disable this function. •...
-
Page 60: Multimedia
9. Multimedia This section explains how to use the multimedia features of your phone, including Camera, Camcorder, Gallery, Music Player, Video Player and Play Movies. Camera This section explains how to use the digital camera on your phone. Your 5.0 megapixel camera produces photos in JPEG format. -
Page 61: View Your Pictures
Photo size: Adjust or change the resolution of your photos: • 5M (2560 x 1920) • Full HD (1920 x 1080) • 2M (1600 x 1200) • HD (1280 x 720) • VGA (640 x 480) Flash: Turns the flash On or Off. Settings: Tag Settings: Provide ways to label your photos with location, date and audio descriptions. -
Page 62: Camcorder
CamCorder In addition to taking photos, the camera also doubles as a camcorder that also allows you to record and view videos. Shoot video Tip: When shooting video in direct sunlight or in bright conditions, it is recommended that you shoot your subject with the light source behind you. -
Page 63: Gallery
Settings: Tag settings: Allows you to label your video with a location. You can also select preloaded labels by pressing the New Label • Save to internal memory: Tap to remove the checkmark if you would prefer your photos be saved to your SD card. White balance settings: Sets lighting balance for the following environments: Auto, Daylight, Cloudy, Fluorescent or Incandescent. -
Page 64: Music Player
Options • Delete: Deletes the picture. • Slideshow: Plays a slideshow of all of your pictures. • Edit: Provides editing features such as lighting options, photo effects, color options, doodling, cropping, red-eye correction and many other features. • Exif info: Exchangeable image file (Exif) data is information and camera settings for each photo. -
Page 65: Playlists
music player options To access additional options while in the Music Player, press . • Library: Takes you to the music library listed by songs. • Party shuffle: Creates a shuffle play list from all songs stored in the player. •... -
Page 66: Google Play Music
google plaY mUSiC ► Play Music From the Home screen, tap Note: If you have not created a Google account, you will need to in order to access this application. play music 1. All music on your device and external SD card is displayed including Music folders that may contain multiple songs. -
Page 67: Settings
10. Settings This section explains the settings that are available to customize your device. accessing Settings ► Settings • From the Home screen, tap – or – • From the Home screen, pull the Notification Bar down. Tap in blue towards the top right corner. -
Page 68: More Settings
Bluetooth Settings When Bluetooth is on, additional settings are available. 1. From the Bluetooth screen, tap . • Rename phone: Tap to create a name for your device. This is only available when Bluetooth is turned On. • Visibility timeout: Change the discovery time outs or how long the device stays Discoverable to other Bluetooth devices. - Page 69 The VPN settings menu allows you to set up and manage Virtual Private Networks (VPNs). add Basic vpn Before using VPN, you must first set up a screen unlock PIN or password. 1. From the Settings screen tap More… ► VPN ► Basic VPN ► Add VPN network. 2.
-
Page 70: Mobile Networks
Configure Wi-Fi Hotspot 1. From Tethering and portable hotspots. 2. Tap Configure Wi-Fi hotspot. 3. Edit the Network SSID, Security setting, Password, Show password and Hide my device. 4. Tap Save. NFC (Near Field Communication) allows data exchange when you touch your device with another compatible device. -
Page 71: Sound
SoUnd From this menu you can control the sounds on the phone. ► Sound. • From the Home screen, tap ► volume 1. Select Volumes. 2. Touch and drag the slider to adjust the sound volume for Music, Ringtones and Alarms. 3. -
Page 72: Display
diSplaY In this menu, you can change various settings for the phone’s display. ► Display. • From the Home screen, tap ► The following options display: • Brightness: Configures the LCD Brightness levels. Drag the slider to adjust the brightness and tap OK. -
Page 73: Battery
BatterY See how much battery power is used for device activities. ► Battery. • From the Home screen, tap ► The battery level displays in percentage. The amount of time the battery was used also displays. Battery usage displays in percentages per application. •... -
Page 74: Accounts & Sync
running View and control services running on your device. 1. Tap the Running tab to view all the applications that are currently running on the device. 2. Select an application to view information and options. The following options display: • Stop: Stops the application from running on the device. This is usually done prior to uninstalling the application. -
Page 75: Security
SeCUritY The Security settings allow you to determine the security level for your phone. ► Security. • From the Home screen, tap ► Screen lock Choose settings for unlocking your screen. 1. Tap Screen lock for these options: • None: No lock protection will be applied to your phone, the screen will never lock. •... -
Page 76: Set Up Sim Card Lock
Set up Sim Card lock Prevent another user from using your SIM card by protecting the information using a PIN code. When enabled, your phone will ask for a PIN number each time you use the phone. Using this option you can also change your SIM PIN number. -
Page 77: Trusted Credentials
trusted Credentials If a Certification Authority (CA) certificate becomes compromised or for some other reason you do not trust it, you can disable or remove it. • From the Security screen ► Trusted Credentials. The trusted credentials screen has two tabs: •... -
Page 78: Personal Dictionary
personal dictionary You can industry terms or slang that you use often to your own dictionary so that it will show up while composing messages. 1. From the Language & input screen, tap Personal dictionary. 2. Tap Add at the bottom of the screen and follow the instructions. google voice typing Settings 1. -
Page 79: Voice Search
voice Search This menu allows you to set preferences when using the Voice Search feature. ► Language & input ► Voice Search. 1. From the Home screen, tap ► 2. The following options are available: • Language: Select the preferred language for your voice input. •... -
Page 80: Date & Time
factory data reset From this menu you can reset your phone to the factory default settings. 1. From the Backup & Reset screen, tap Factory data reset. 2. Tap Reset phone. Warning! Performing a Factory data reset will erase all data from your phone. It will not erase current system software, bundled applications, and data stored on your external microSD card. -
Page 81: Developer Options
developer optionS ► Developer options. • From the Home screen, tap ► USB debugging When enabled, allows debugging when the device is attached to a PC by a USB cable. • From the Developer options screen, tap USB debugging to create a checkmark and enable this setting. -
Page 82: At&T Software Update
apps ► Developer options. 1. From the Home screen, tap ► 2. Tap the check box next to each option to enable: • Don’t keep activities: Destroy every activity as soon as the user leaves the application. • Background processes limit: Set the number of processes that can run in the background. •... -
Page 83: Product Safety & Warranty
11. Product Safety & Warranty IMPORTANT SAFETY INSTRUCTIONS - SAVE THESE INSTRUCTIONS DANGER - TO REDUCE THE RISK OF FIRE OR ELECTRIC SHOCK, CAREFULLY FOLLOW THESE INSTRUCTIONS For connection to a supply not in the U.S.A., use an attachment plug adapter of the proper configuration for the power outlet. -
Page 84: Electronic Devices
electronic devices Your wireless handheld portable telephone is a low power radio transmitter and receiver. When it is ON, it receives and also sends out radio frequency (RF) signals. Most modern electronic equipment is shielded from RF energy. However, certain electronic equipment may not be shielded against the RF signals from your wireless phone. -
Page 85: Safety Information
• Please dispose off your battery properly or take it to your local wireless carrier for recycling. • The battery doesn’t need to be empty before recharging. • Use only NEC-approved Chagres specific to your model since they are designed to maximize battery life. -
Page 86: Warning! Important Safety Information
• Do not use the phone if the antenna is damaged. If a damaged antenna contacts skin, it may cause a slight burn. Please contact an NEC Authorized Service Center to replace the damaged antenna. • Do not paint your phone. -
Page 87: Fda Consumer Update
The louder the volume, the less time is required before your hearing could be affected. Hearing experts suggest that to protect your hearing: • Limit the amount of time you use your phone and/or headset at high volume. • Avoid turning up the volume to block out noisy surroundings. •... - Page 88 • The FDA belongs to an interagency working group of the federal agencies that have responsibility for different aspects of RF safety to ensure coordinated efforts at the federal level. The following agencies belong to this working group: • National Institute for Occupational Safety and Health Environmental Protection Agency •...
-
Page 89: Wireless Phone
This is because the interval between the time of exposure to a cancer-causing agent and the time tumors develop — if they do — may be many, many years. The interpretation of epidemiological studies is hampered by difficulties in measuring actual RF exposure during day-to-day use of wireless phones. Many factors affect this measurement, such as the angle at which the phone is held, or which model of phone is used. - Page 90 9. What steps can I take to reduce my exposure to Radio Frequency energy from my wireless phone? If there is a risk from these products — and at this point we do not know that there is — it is probably very small.
- Page 91 important driver Safety tips Your wireless phone gives you the powerful ability to communicate by voice almost anywhere, anytime. An important responsibility accompanies the benefits of wireless phones, one that every user must uphold. When operating a car, driving is your first responsibility. When using your wireless phone behind the wheel of a car, practice good common sense and remember the following tips: 1.
-
Page 92: Consumer Information On Sar (Specific Absorption Rate)
ConSUmer information on Sar (SpeCifiC aBSorption rate) This Model Phone Meets the Government’s Requirements for Exposure to Radio Waves. Your wireless phone is a radio transmitter and receiver. It is designed and manufactured not to exceed the emission limits for exposure to radiofrequency (RF) energy set by the Federal Communications Commission (FCC) of the U.S. -
Page 93: Regulations For Wireless Devices
When you’re talking over the cell phone, it’s recommended you’d turn the BT (Bluetooth®) mode off for HAC. According to HAC policy (NEC Terrain), we state this handset has not been rated for hearing aid compatibility with respect to the Wi-Fi capability. -
Page 94: Month Limited Warranty
Products will reasonably conform to the applicable published specifications in effect at the time of shipment from NEC Corporation of America to the Dealer, and that the Products will be free from defects in materials or workmanship that result in product failure under normal use during the warranty period described in Paragraph 4. - Page 95 NEC Corporation of America Distribution Center. NEC Corporation of America assumes no risk for damage or loss in transit. If, in NEC Corporation of America’s sole opinion, the Product failure is not covered under this warranty, or proof of purchase does not meet the terms of this warranty, you will be notified and your authorization will be requested for any further repair activity.
-
Page 96: Intellectual Property
All Intellectual Property owned by or which is otherwise the property of NEC CASIO Mobile Communications, Ltd. or its respective suppliers relating to the NEC Phone, including but not limited to, accessories, parts or software relating thereto (the “Phone System”) is proprietary to NEC CASIO Mobile Communications, Ltd. and protected under federal laws, state laws and international treaty provisions. -
Page 97: Logo & Trademark Identification
Microsoft® Exchange ActiveSync® is a trademark or registered trademark of Microsoft Corporation in the United States and/or other countries. NEC TERRAIN and NEC are registered trademarks of NEC Corporation. The TERRAIN logo is a registered trademark of NEC CASIO Mobile Communications.