Table of Contents
Advertisement
Quick Links
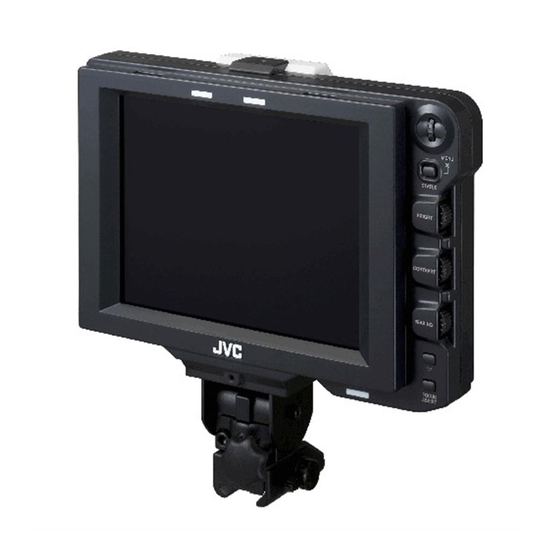
VIEWFINDER
VF-HP840U
Thank you for purchasing this JVC product.
Before beginning to operate this unit, please read
the instructions carefully to ensure the best
possible performance.
For Customer Use:
Enter below the Serial No. which is located on the
body.
Retain this information for future reference.
Model No.
Serial No.
INSTRUCTIONS
LST0662-001B
Advertisement
Table of Contents

Related Manuals for JVC ViewFinder VF-HP840U


Summary of Contents for JVC ViewFinder VF-HP840U
- Page 1 VIEWFINDER VF-HP840U Thank you for purchasing this JVC product. Before beginning to operate this unit, please read the instructions carefully to ensure the best possible performance. For Customer Use: Enter below the Serial No. which is located on the body.
-
Page 2: Getting Started
Getting Started FOR USA These are general IMPORTANT SAFEGUARDS and certain items may not apply to all appliances. Read all of these instructions. Save these instructions for later use. All warnings on the product and in the operating instructions should be adhered to. Unplug this appliance system from the wall outlet before cleaning. -
Page 3: Safety Precautions
Operation of this equipment in a residential area is likely to cause harmful interference in which case the user will be required to correct the interference at his own expense. CAUTION: CHANGES OR MODIFICATIONS NOT APPROVED BY JVC COULD VOID USER fS AUTHORITY TO OPERATE THE EQUIPMENT. NOTE: The rating plate (serial number plate) is on this unit. -
Page 4: Safety Precautions
This apparatus is in conformance with the valid European directives and standards regarding electromagnetic compatibility and electrical safety. European representative of Victor Company of Japan, Limited is: JVC Technology Centre Europe GmbH Company name changed in: JVC Technical Services Europe GmbH... -
Page 5: Table Of Contents
Table of Contents Getting Started Safety Precautions ......3 Table of Contents ......5 Features . -
Page 6: Precautions During Use
Getting Started Precautions During Use Location of Storage and Use Do not place this product at the following locations. Doing so may cause the product to malfunction or break down. ● Hot or cold places beyond the allowable operating temperature range of 0°C to +40°C. ●... -
Page 7: Names And Functions Of Parts
● The above feature may not function depending on the version of the camera’s software. For details, please consult JVC’s authorized dealers. [1 : 1] Button Press this button to display the input video signals 1: 1 without resizing. - Page 8 [CAMERA NAME] will be AOFFB. ● The above feature may not function depending on the version of the camera’s software. For details, please consult JVC’s authorized dealers. [VF CABLE] Input Terminal Connect this terminal to the KA-HD250U VF output terminal (20-pin) with the provided VF cable.
-
Page 9: Setup
Release button ● Use KA-HD250U with identification letter from (A) onwards on the name plate for connecting to this unit. If there is no identification letter, consult JVC dealer. VF Cable Insert the provided VF cable completely into the [VF CABLE] terminal. -
Page 10: Mounting Hood Cover (Provided)
Setup Installation (continued) Mounting hood cover (provided) Align the hood cover with the groove on top of the viewfinder screen and insert from the top. Secure with the screw found under the center of the viewfinder screen. Screw Adjusting position To adjust the angle of the viewfinder, loosen the Pan/ Tilt Lock Handle and secure it at an appropriate angle for visible viewing. -
Page 11: Menu
Menu Menu Setting Method Press the [MENU] button for 1 second or more during normal screen display. The [MAIN MENU] screen appears. M A I N M E NU MA R K ER S E T T I NG . . S HOO T I NG A S S I S T . -
Page 12: Menu Screen Content
Menu Menu screen content The Menu screen consists of the following structure as shown below. M A I N M E NU MA R K ER S E T T I NG . . S HOO T I NG A S S I S T . . V I D EO F ORMA T . -
Page 13: Marker Setting Menu Screen
Video display, 1:1 display and when status display is OFF. ● The above feature may not function depending on the version of the camera's software. For details, please consult JVC's authorized dealers. This item sets the display percentage for markers inside the aspect area. -
Page 14: Shooting Assist Menu Screen
Menu Menu screen content (continued) SHOOTING ASSIST Menu Screen Settings in bold are factory default settings. Item Setting Value FOCUS ASSIST GREEN BLUE LEVEL MIDDLE HIGH ZEBRA OVER 1PATTERN 2PATTERNS TOP1 5 % ~ 80 % ~ 100 % OVER BOTTOM1 0 % ~ 70 % ~ 100 % This item sets the lower limit of the brightness of Zebra 1. -
Page 15: Video Format Menu Screen
Note : ● The above feature may not function depending on the version of the camera’s software. For details, please consult JVC’s authorized dealers. This item sets the frame rate of the input signals. 60: Select this when the frame rate of the input signals is 60 Hz. -
Page 16: Others
Setting Value VF SIGNAL COMPONENT TALLY SYSTEM STUDIO Other than STUDIO *1 The above feature may not function depending on the version of the camera’s software. For details, please consult JVC’s authorized dealers. Terminal Specifications VF Terminal 20-pin Connector Pin No. -
Page 17: Setting Selection Dip Switch
Setting Selection DIP Switch You can switch the setting (factory setting) for certain functions. All DIP switches are set to "OFF" in the factory settings. Method of opening Remove the two screws fastening the cover on the bottom of this product and open the cover. Caution :... -
Page 18: Specifications
Others Specifications General Connected Target Equipment : KA-HD250U Power Supply : 12 V DC (11 V DC to Power Consumption : Approx. 13 W and below Ambient Temperature : 0 °C to 40 °C Allowable Operating Humidity : 30 % RH to 80 % RH Mass : 1.6 kg (excluding hood) Dimension... - Page 19 Dimensional Outline Drawing (Unit: mm) The specifications and appearance of this product and other related products may be modified for improvement without prior notice. With Hood MENU STATUS BRIGHT CONTRAST PEAKING FOCUS ASSIST Without Hood...
- Page 20 贩卖商名 杰伟世 (中国)投资有限公司 住址 北京市朝阳区光华路 12A 号北京科伦大厦 316 室 出版日 2008 年 2 月 1 日 日本 JVC 公司 © 2008 Victor Company of Japan, Limited LST0662-001B...