Advertisement
Quick Links
Do not move the toaster whilst it is
G
in operation.
G
Never touch hot surfaces especially
the metal top area.
G
Never use an unauthorised
Use the carriage lever to lift the
attachment or accessory.
toast to Peek & View™ at any
Never use a damaged toaster. Get it
G
time without cancelling the toasting
checked or repaired: see 'Service &
cycle.
Customer Care'.
This appliance is not intended to be
G
operated by means of an external
1 slot setting, only heats what you
timer or separate remote-control
need, saving 50% energy.
system.
G
This appliance is not intended for
before using your Kenwood
use by persons (including children)
appliance
with reduced physical, sensory or
G
Read these instructions carefully
mental capabilities, or lack of
and retain for future reference.
experience and knowledge, unless
Remove all packaging and any
G
they have been given supervision or
labels.
instruction concerning use of the
safety
appliance by a person responsible
for their safety.
Burnt food can catch fire, so:
G
G
Children should be supervised to
never leave your toaster on
ensure that they do not play with
G G
unattended;
the appliance.
keep your toaster away from
Only use the appliance for its
G G
G
anything (eg curtains) that could
intended domestic use. Kenwood
catch fire;
will not accept any liability if the
set the browning control lower for
appliance is subject to improper
G G
thin or dry bread;
use, or failure to comply with these
never warm food with a topping or
instructions.
G G
filling (eg pizza): if it drips into the
before plugging in
toaster, it could catch fire.
Make sure your electricity supply is
G
Clean the crumb tray regularly:
G G
the same as the one shown on the
crumbs can smoke or burn.
underside of your toaster.
G
To avoid electric shocks, never:
G
This appliance conforms to EC
let the toaster, cord or plug get wet;
G G
directive 2004/108/EC on
or
Electromagnetic Compatibility and
put your hand or anything metal,
G G
EC regulation no. 1935/2004 of
eg a knife or foil, into the toaster.
27/10/2004 on materials intended
Always unplug the toaster when not
G
for contact with food.
in use, before cleaning or
Important – UK only
attempting to clear jammed bread.
G
Never cover your toaster with a
The wires in the cord are coloured
G
plate or anything else - it could
as follows:
overheat and catch fire.
Green and Yellow = Earth,
Never let the cord hang down
G
Blue = Neutral,
where a child could grab it.
Brown = Live.
We recommend that you do not
G
use your toaster directly under wall
cupboards.
The appliance must be protected
to use your toaster
G
by a 13A approved (BS1362) fuse.
1 Plug the toaster into the power
G
WARNING: THIS APPLIANCE
supply.
MUST BE EARTHED.
2 Move the browning control to the
Note:
desired setting. Use a low setting
For non-rewireable plugs the fuse
G
for light toasting and for thin or dry
cover MUST be refitted when
bread.
replacing the fuse. If the fuse cover
3 Insert the bread, muffins, bagels
is lost then the plug must not be
etc.
used until a replacement can be
4 Lower the lever
obtained. The correct fuse cover is
'cancel' button will illuminate. (The
identified by colour and a
lever will not stay down unless the
replacement may be obtained from
toaster is plugged in).
your Kenwood Authorised Repairer
G
To toast frozen bread, move the
(see Service).
browning control to the defrost
If a non-rewireable plug is cut off it
G
position
must be DESTROYED
To toast a single slice of bread,
G
IMMEDIATELY. An electric shock
place the bread into the
hazard may arise if an unwanted
lower the carriage lever and press
non-rewireable plug is inadvertently
the
inserted into a 13A socket outlet.
button will illuminate.
before using for the first time
G
Use the carriage lever to lift the
1 Wrap excess cord around the cord
toast to Peek & View™ at any
storage device on the underside of
time without cancelling the toasting
the toaster
.
cycle.
G
Operate the toaster once on a
To stop toasting during the cycle,
G
medium setting without bread. (The
press the 'cancel' button, the toast
lever will not stay down unless the
will pop up and the 'cancel' button
toaster is plugged in).
light will go off.
As with all new heating elements,
G
5 Your toast will pop up
your toaster may emit a slight
automatically, to raise it higher, lift
burning smell when it is first
the lever.
switched on. This is normal and not
a cause for concern.
hints on using your
toaster
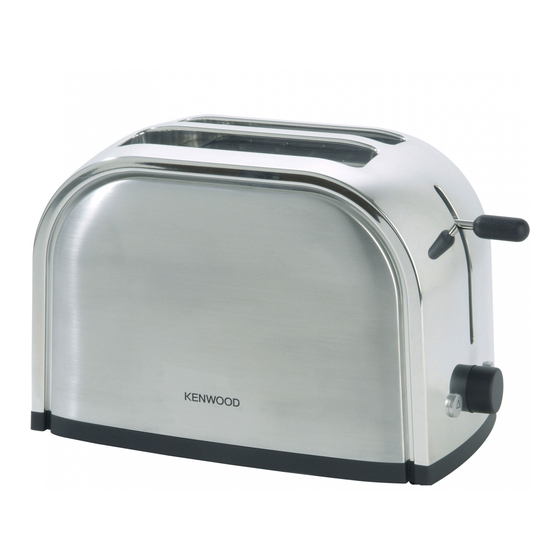
key
Select a lower setting for light
G
Peek & View™ carriage lever
browning or for dry bread.
(with 'Hi-Rise™' for extra lift)
Dry/stale bread toasts more quickly
G
cancel button with indicator light
than fresh bread and thinly sliced
browning control
bread toasts more quickly than
button with indicator
thickly sliced bread. Therefore the
light
browning control should be set at a
crumb tray
lower setting than usual.
For best results ensure that the
G
cord wrap
bread slices are of an even
thickness, freshness and size.
until it locks. The
.
,
button. The
Advertisement

Related Manuals for Kenwood TTM100 Series


Summary of Contents for Kenwood TTM100 Series
- Page 1 This appliance is not intended for your Kenwood Authorised Repairer before using your Kenwood To toast frozen bread, move the use by persons (including children) (see Service).
-
Page 2: Care And Cleaning
Made in China. TTM100 series Head Office Address: show when you bought it. Kenwood Limited, New Lane, Havant, Hampshire PO9 2NH, UK www.kenwoodworld.com This guarantee does not affect your statutory rights. Designed and engineered by Kenwood in the UK...