Table of Contents
Advertisement
Advertisement
Table of Contents

Related Manuals for Kenwood KDC-MP533V


Summary of Contents for Kenwood KDC-MP533V
-
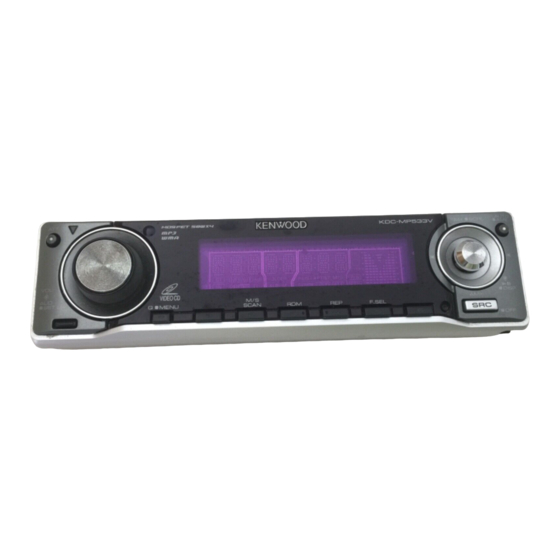
Page 1: Instruction Manual
CD-RECEIVER KDC-MP533V INSTRUCTION MANUAL © B64-3476-00/00 (MW) -
Page 2: Table Of Contents
Contents Safety precautions Notes About CDs About MP3 and WMA General features Power Selecting the Source Volume Attenuator System Q Audio Control Audio Setup Speaker Setting Switching Display Theft Deterrent Faceplate TEL Mute Tuner features Tuning Tuning Mode Station Preset Memory Auto Memory Entry Preset Tuning Frequency Step Setting... -
Page 3: Safety Precautions
CDs to play. In such a situation, remove the disc and wait for the condensation to evaporate. If the unit still does not operate normally after a while, consult your Kenwood dealer. English... -
Page 4: Notes
• If you experience problems during installation, consult your Kenwood dealer. • When you purchase optional accessories, check with your Kenwood dealer to make sure that they work with your model and in your area. • If the unit fails to operate properly, press the Reset button. -
Page 5: About Cds
About CDs Handling CDs • Do not touch the recording surface of the CD. • CD-R and CD-RW are easier to damage than a normal music CD. Use a CD-R or a CD-RW after reading the caution items on the package etc. •... -
Page 6: About Mp3 And Wma
About MP3 and WMA The playable MP3/WMA file (hereafter called Audio file) and the media format has the following limitation. The Audio file, which is not conforming to the specification, may not play normally, or the file and folder names may not display correctly. Playable Audio file •... -
Page 7: General Features
General features Release button Power Turning ON the Power Press the [SRC] button. Turning OFF the Power Press the [SRC] button for at least 1 second. Selecting the Source Press the [SRC] button. Source required Tuner CD/VCD Auxiliary input* Standby (Illumination only mode) •... -
Page 8: System Q
General features System Q Selecting the best sound setting preset for different types of music. Select the source to set Press the [SRC] button. Select the Sound type Press the [Q] button. When you press the button once, the current sound setting is displayed. -
Page 9: Speaker Setting
Speaker Setting Fine-tuning so that the System Q value is optimal when setting the speaker type. Enter Standby Press the [SRC] button. Select the "STANDBY" display. Enter Speaker Setting mode Press the [VOL] knob. Select the Speaker type Turn the [VOL] knob. Each time you turn the knob, the setting alternates between the settings shown in the table below. -
Page 10: Theft Deterrent Faceplate
General features Theft Deterrent Faceplate The faceplate of the unit can be detached and taken with you, helping to deter theft. Removing the Faceplate Press the Release button. Drop open the faceplate. Drawing the faceplate to left side, pull it and detach from the unit. -
Page 11: Tuner Features
Tuner features Band display ST indicator Tuning Selecting the station. Select tuner source Press the [SRC] button. Select the "TUNER" display. Select the band Push the Control knob towards [FM] or [AM]. Each time you push the knob toward [FM], it switches between the FM1, FM2, and FM3 bands. -
Page 12: Station Preset Memory
Tuner features Station Preset Memory Putting a station in the memory. Select the band Push the Control knob towards [FM] or [AM]. Select the frequency to put in the memory Push the Control knob towards [4] or [¢]. Put the frequency in the memory Press the desired [1] —... -
Page 13: Cd/Audio File/Vcd Control Features
CD/Audio file/VCD control features Release button IN indicator Playing CD, Audio file & VCD When there is no disc inserted Drop open the faceplate Press the Release button. Insert a disc. Push the faceplate on the left side, and return it to its former position. -
Page 14: Fast Forwarding And Reversing
CD/Audio file/VCD control features Fast Forwarding and Reversing Fast Forwarding Hold down the Control knob toward [¢]. Release to resume the playback. Reversing Hold down the Control knob toward [4]. Release to resume the playback. • The sound is not output while the Audio file and video track of Video CD is being searched. -
Page 15: Folder Select
• When you push the Control knob toward [¢], the next random song starts. Function of Audio file Folder Select Quickly selecting the folder you want to hear. Enter Folder Select mode Press the [F.SEL] button. "FOLD SEL" is displayed. During Select mode the folder information is displayed as shown below. -
Page 16: Menu System
Menu system MENU Menu System Setting beep sound during operation, etc. functions. The Menu system basic operation method is explained here. The reference for the Menu items and their setting content is after this operation explanation. Enter Menu mode Press the [MENU] button for at least 1 second. "MENU"... -
Page 17: Touch Sensor Tone
In Standby mode Touch Sensor Tone Setting the operation check sound (beep sound) ON/OFF. Display Setting "BEEP ON" Beep is heard. "BEEP OFF" Beep canceled. In Standby mode Manual Clock Adjustment Select Clock Adjustment mode Push the Control knob towards [FM] or [AM]. Select the "CLK ADJ"... -
Page 18: Auxiliary Input Display Setting
Menu system Auxiliary Input Display Setting Selecting the display when changing to Auxiliary input source. Select Auxiliary input source Press the [SRC] button. Select the "AUX" display. Enter Menu mode Press the [MENU] button for at least 1 second. "MENU" is displayed. Select Auxiliary input display setting mode Push the Control knob towards [FM] or [AM]. -
Page 19: Basic Operations Of Remote Control
Basic Operations of remote control FM/AM/ Not Used [0] — [9] Loading and Replacing the battery Use two "AA"/ "R6"-size batteries. Slide the cover while pressing downwards to remove it as illustrated. Insert the batteries with the + and – poles aligned properly, following the illustration inside the case. -
Page 20: In Tuner Source
Basic Operations of remote control Audio Control [AUD] button Selects the Audio item to be adjusted. [VOL] buttons Adjusts the Audio item. • Refer to <Audio Control> (page 8) for the operation method, such as the procedures for Audio control and others operations. -
Page 21: Accessories/ Installation Procedure
Accessories/ Installation Procedure Accessories Installation Procedure 1. To prevent a short circuit, remove the key from the ignition and disconnect the - battery. 2. Make the proper input and output wire connections for each unit..1 3. Connect the speaker wires of the wiring harness. 4. -
Page 22: Connecting Wires To Terminals
Connecting Wires to Terminals To the monitor unit Connection cable (Accessory8) To parking brake detection switch harness of car. Parking sensor wire (Light green) For the sake of safety, be sure to connect the parking sensor. If no connections are made, do not let the wire come out from the tab. When using the optional power amplifier, connect to its power control terminal. -
Page 23: Installation
Installation non-Japanese cars Metal mounting strap (commercially available) Firewall or metal support Bend the tabs of the mounting sleeve with a screwdriver or similar utensil and attach it in place. Self-tapping screw (commercially available) Screw (M4X8) (commercially available) • Make sure that the unit is installed securely in place. If the unit is unstable, it may malfunction (for example, the sound may skip). - Page 24 Installation Screwing the Faceplate on the Unit If you want to fasten the faceplate to the main unit so that it does not fall off. Refer to the section <Removing the hard rubber frame> (page 25) and then remove the hard rubber frame.
-
Page 25: Removing The Unit
Removing the Unit Removing the hard rubber frame Engage the catch pins on the removal tool and remove the two locks on the upper level. Upper the frame and pull it forward as shown in the figure. Accessory2 Removal tool When the upper level is removed, remove the lower two locations. -
Page 26: Troubleshooting Guide
Troubleshooting Guide What might seem to be a malfunction in your unit may just be the result of slight misoperation or miswiring. Before calling service, first check the following table for possible problems. General The power does not turn ON. ✔... - Page 27 Disc source The specified disc does not play, but another one plays instead. ✔ The specified CD is quite dirty. ☞ Clean the CD. ✔ The disc is severely scratched. ☞ Try another disc instead. Can’t remove disc. ✔ The cause is that more than 10 minutes has elapsed since the vehicle ACC switch was turned OFF.
-
Page 28: Specifications
Specifications Specifications subject to change without notice. FM tuner section Frequency range (50 kHz space) : 87.5 MHz – 108.0 MHz Frequency range (200 kHz space) : 87.9 MHz – 107.9 MHz Usable sensitivity (S/N = 30dB) : 9.3dBf (0.8 μV /75 Ω) Quieting Sensitivity (S/N = 50dB) : 15.2dBf (1.6 μV /75 Ω) Frequency response (±3.0 dB)