Table of Contents
Advertisement
Advertisement
Table of Contents

Related Manuals for Zanussi ZCV668MW


Summary of Contents for Zanussi ZCV668MW
- Page 1 User Manual Cooker ZCV668MW...
-
Page 2: Table Of Contents
Cleaning and user maintenance shall not be made by children • without supervision. General Safety Only a qualified person must install this appliance and replace • the cable. Do not operate the appliance by means of an external timer or • separate remote-control system. www.zanussi.com... -
Page 3: Safety Instructions
This prevents hot • Do not pull the appliance by the handle. cookware to fall from the appliance when the • The kitchen cabinet and the recess must door or the window is opened. have suitable dimensions. www.zanussi.com... -
Page 4: Electrical Connection
• Do not change the specification of this • Do not let cookware boil dry. appliance. • Be careful not to let objects or cookware fall • Make sure that the ventilation openings are on the appliance. The surface can be not blocked. damaged. www.zanussi.com... -
Page 5: Care And Cleaning
• Remove the door catch to prevent children the appliance. The door is heavy! and pets to get closed in the appliance. • Clean regularly the appliance to prevent the deterioration of the surface material. • Remaining fat or food in the appliance can cause fire. www.zanussi.com... -
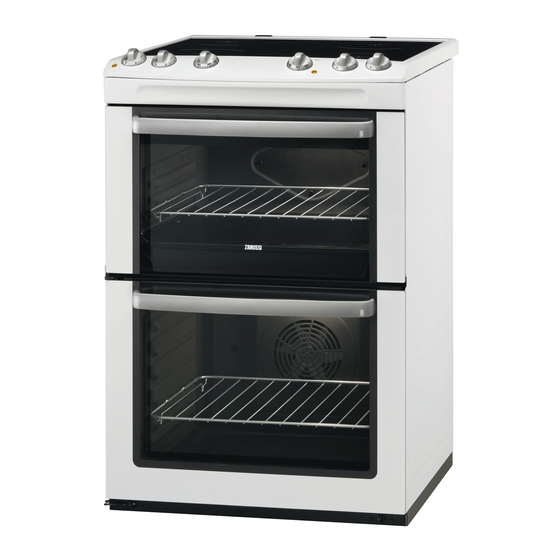
Page 6: Product Description
145 mm Control panel Knobs for the hob Knob for the top oven functions Knob for the main oven functions Temperature lamp / symbol / indicator for the main oven Temperature lamp / symbol / indicator for the top oven www.zanussi.com... -
Page 7: Before First Use
Deactivate the cooking zone approximately 5 - 10 minutes before the cooking process is completed. Hob - Hints and tips Cookware WARNING! Refer to Safety chapters. The bottom of the cookware must be as thick and flat as possible. www.zanussi.com... -
Page 8: Hob - Care And Cleaning
If you deactivate the WARNING! appliance, the cooling fan can continue to Refer to Safety chapters. operate until the appliance cools down. Cooling fan When the appliance operates, the cooling fan activates automatically to keep the surfaces of www.zanussi.com... - Page 9 WARNING! 1. Put the trivet into the deep pan so that the Be careful when you remove the supports of the wire shelf point up. accessories from a hot appliance. There is a risk of burns. www.zanussi.com...
-
Page 10: Oven - Hints And Tips
The shelf position is incorrect. Put the cake on a lower shelf. browned sufficiently. The cake sinks and becomes The oven temperature is too high. The next time you bake, set a soggy, lumpy or streaky. slightly lower oven temperature. www.zanussi.com... - Page 11 90 - 100 150 - 180 Cakes: Flapjack 160 - 170 25 -30 Cakes: Shortbread 130 - 150 45 - 60 Cakes: Apple Pie 170 - 180 50 - 60 Casseroles: Beef / Lamb 160 -170 150 - 180 www.zanussi.com...
- Page 12 Food Temperature (°C) Time (min) Shelf posi- tion Biscuits 180 - 190 10 - 20 1 – 3 Bread 190 - 210 30 - 35 www.zanussi.com...
- Page 13 10 minutes before the end of have crackling can be roasted in the roasting the roasting time, and use the residual heat. tin without the lid. • We recommend that you cook meat and fish weighing 1 kg and above in the appliance. www.zanussi.com...
- Page 14 Dual Grill - Top Oven Food Time (min) Shelf position Bacon Rashers 5 - 6 Beefburgers 10 - 20 Chicken Joints 20 - 40 Chops - Lamb 15 - 25 2 - 3 Chops - Pork 20 - 25 2 - 3 www.zanussi.com...
-
Page 15: Oven - Care And Cleaning
2. Hold the door trim on the top edge of the edged objects or a dishwasher. It can cause door at the two sides and push inwards to damage to the nonstick coating. release the clip seal. www.zanussi.com... - Page 16 3. Replace the oven lamp with a suitable 300 The number of glasses can also be °C heat-resistant oven lamp. different. Use the same oven lamp type. 4. Install the glass cover. 1. Push the door trim at one side to remove it. www.zanussi.com...
-
Page 17: Troubleshooting
Authorised the rating plate from the appliance cavity. Service Centre. We recommend that you write the data here: Model (MOD.) ......... Product number (PNC) ......... Serial number (S.N.) ......... Installation WARNING! Refer to Safety chapters. www.zanussi.com... -
Page 18: Technical Data
77 mm below the top surface of the appliance and 50 mm from the left or right side of the appliance into the circular hole on the bracket. Screw it into the wall. Levelling of the appliance 50 mm 77 mm www.zanussi.com... -
Page 19: Electrical Installation
Help protect the environment and human health and to recycle waste of electrical and electronic appliances. Do not dispose appliances marked with the symbol with the household waste. Return the product to your local recycling facility or contact your municipal office. www.zanussi.com... - Page 20 www.zanussi.com/shop...