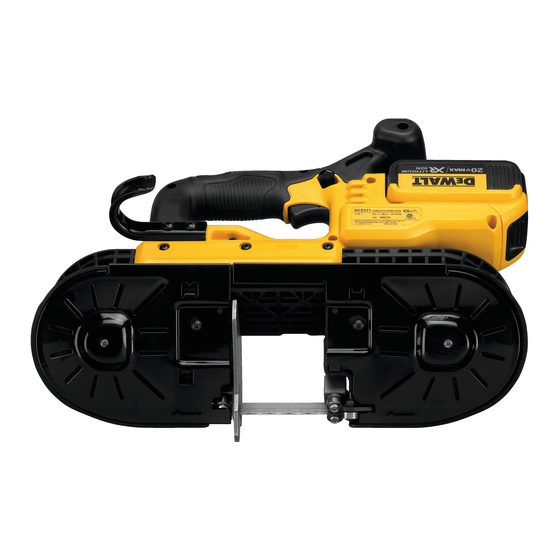
DeWalt DCS371 Instruction Manual
Heavy-duty 20v max cordless band saw
Hide thumbs
Also See for DCS371:
- Instruction manual (65 pages) ,
- Manual (61 pages) ,
- Original instructions manual (19 pages)
Table of Contents
Advertisement
1-800-4-D
INSTRUCTION MANUAL
GUIDE D'UTILISATION
MANUAL DE INSTRUCCIONES
DCS371
Heavy-Duty 20V Max* Cordless Band Saw
Scie à ruban industrielle sans fil de 20 V max*
Sierra de banda para trabajo pesado, inalámbrica, de 20 V Máx*
If you have questions or comments, contact us.
Pour toute question ou tout commentaire, nous contacter.
Si tiene dudas o comentarios, contáctenos.
WALT • www.dewalt.com
E
INSTRUCTIVO DE OPERACIÓN, CENTROS DE SERVICIO Y PÓLIZA DE
GARANTÍA. ADVERTENCIA: LÉASE ESTE INSTRUCTIVO ANTES DE
USAR EL PRODUCTO.
Advertisement
Table of Contents

Related Manuals for DeWalt DCS371


Summary of Contents for DeWalt DCS371
- Page 1 If you have questions or comments, contact us. Pour toute question ou tout commentaire, nous contacter. Si tiene dudas o comentarios, contáctenos. 1-800-4-D WALT • www.dewalt.com INSTRUCTION MANUAL INSTRUCTIVO DE OPERACIÓN, CENTROS DE SERVICIO Y PÓLIZA DE GUIDE D’UTILISATION GARANTÍA. ADVERTENCIA: LÉASE ESTE INSTRUCTIVO ANTES DE USAR EL PRODUCTO.
-
Page 2: Save All Warnings And Instructions For Future Reference
1) WORK AREA SAFETY Defi nitions: Safety Guidelines a) Keep work area clean and well lit. Cluttered or dark areas The defi nitions below describe the level of severity for each invite accidents. signal word. Please read the manual and pay attention to these b) Do not operate power tools in explosive atmospheres, symbols. - Page 3 tool while you are tired or under the infl uence of drugs, c) Disconnect the plug from the power source and/or the alcohol or medication. A moment of inattention while battery pack from the power tool before making any operating power tools may result in serious personal injury. adjustments, changing accessories, or storing power b) Use personal protective equipment.
- Page 4 from one terminal to another. Shorting the battery terminals • Always keep handles dry, clean, and free of oil and grease. together may cause burns or a fi re. Hold the tool fi rmly when in use. d) Under abusive conditions, liquid may be ejected from •...
-
Page 5: Important Safety Instructions For All Battery Packs
Wear protective clothing and wash exposed areas with soap sfpm ..... surface feet ..... safety alert and water. Allowing dust to get into your mouth, eyes, or lay on the per minute symbol skin may promote absorption of harmful chemicals. SPM ..... -
Page 6: Important Safety Instructions For All Battery Chargers
• Contents of opened battery cells may cause respiratory WARNING: Fire hazard. Never attempt to open the battery pack irritation. Provide fresh air. If symptoms persist, seek medical for any reason. If the battery pack case is cracked or damaged, do attention. - Page 7 • An extension cord must have adequate wire size (AWG or WARNING: Shock hazard. Do not allow any liquid to get inside the American Wire Gauge) for safety. The smaller the gauge number charger. Electric shock may result. of the wire, the greater the capacity of the cable, that is, 16 gauge CAUTION: Burn hazard.
-
Page 8: Charge Indicators
Indicator Light Operation • Do not operate the charger if it has received a sharp blow, been dropped or otherwise damaged in any way. Take it to an authorized service center. PACK CHARGING • Do not disassemble the charger; take it to an authorized service center when service or repair is required. -
Page 9: Important Charging Notes
LEAVING THE BATTERY PACK IN THE CHARGER 4. If the battery pack does not charge properly: a. Check operation of receptacle by plugging in a lamp or other The charger and battery pack can be left connected with the charge indicator showing Pack Charged. -
Page 10: Trigger Switch
NOTE: Battery packs should not be stored completely depleted of the motor OFF. Releasing the trigger switch also automatically charge. The battery pack will need to be recharged before use. actuates lock-off button. WARNING: This tool has no provision to lock the switch in the ON SAVE THESE INSTRUCTIONS position, and should never be locked ON by any other means. -
Page 11: Blade Tracking
The following table is intended as a general guide only. FIG. 2 Determine the type of material and dimension of the workpiece and select the most appropriate band saw blade. NOTICE: Never use the band saw to cut resin materials which are subject to melting. -
Page 12: Assembly And Adjustments
3. Use a 3 mm hex wrench (E) to turn one of the FIG. 3 tracking screws (O) 1/4 turn clockwise. Turn the other tracking screw 1/4 turn clockwise. NOTE: Turning the tracking screw clockwise moves the blade toward the guide roller, turning the tracking screw counterclockwise moves the blade away from the guide roller. -
Page 13: Removing And Installing Blades
FIG. 5 BLADE DIRECTION For more information regarding fuel gauge battery packs, please call 1-800-4-D WALT (1-800-433-9258) or visit our website www.dewalt. com. Removing and Installing Blades POSITION OF TEETH ON LEFT SIDE OF MACHINE WARNING: To reduce the risk of serious personal injury, turn tool off and remove the battery pack before making any TO INSTALL BLADE (FIG. -
Page 14: Installing Brush/Brush Cap/Blade Guards
NOTE: It is available at extra cost from your local dealer or authorized service center. This assembly (brush, brush cap and blade guards) is not compatible with the Type 1 DCS371 band saw. -
Page 15: Operation
OPERATION blade, ensure there is no sudden impact at the beginning of the cutting operation. WARNING: To reduce the risk of serious personal injury, 4. As shown in Figure 9, straight cutting can be accomplished by turn tool off and remove the battery pack before making any keeping the band saw blade aligned with the side surface of the adjustments or removing/installing attachments or accessories. -
Page 16: Maintenance
FIG. 10 7. Whenever possible, hold the saw fi rmly in both hands. If the optional RECOMMENDED CUTTING POSITIONS blade guards (Fig. 8) are installed, the saw can be operated with one hand. Keep your free hand clear of the blade area and do not allow the saw to fall against the clamped or supported material or your body when the cut is complete. - Page 17 Industrial Tool Co., 701 East Joppa Road, Towson, MD 21286, call or provinces. 1-800-4-D WALT (1-800-433-9258) or visit our website: www.dewalt. com. In addition to the warranty, D WALT tools are covered by our:...
- Page 18 2 YEARS FREE SERVICE ON D WALT BATTERY PACKS DC9071, DC9091, DC9096, DC9280, DC9360, DC9180, DCB120, DCB127, DCB201, DCB203 and DCB207. 3 YEARS FREE SERVICE ON D WALT BATTERY PACKS DCB200, DCB204, DCB205 WALT BATTERY PACKS Product warranty voided if the battery pack is tampered with in any way.
- Page 19 * El máximo voltaje inicial de la batería (medido sin carga de trabajo) es 20 voltios. El voltaje nominal es de 18. WALT Industrial Tool Co., 701 Joppa Road, Towson, MD 21286 (AUG14) Part No. N410310 DCS371 Copyright © 2013, 2014 D WALT The following are trademarks for one or more D WALT power tools: the yellow and black color scheme, the “D”...