Table of Contents
Advertisement
Available languages
Available languages
Quick Links
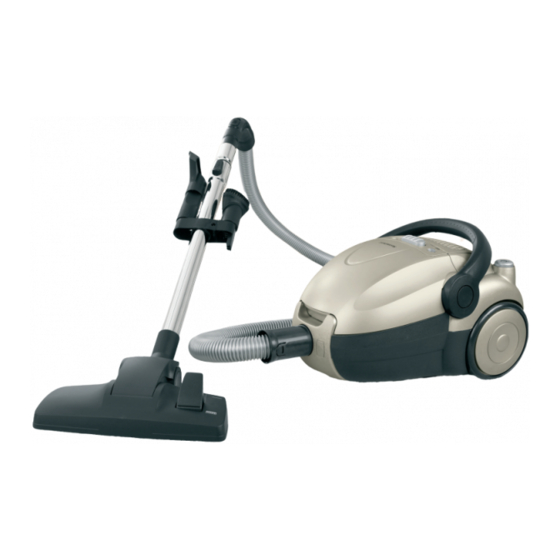
Aspirador de bajo consumo/ Aspirapolvere a risparmio energetico SBS 1400 A1
ASPIRADOR DE BAJO CONSUMO
Instrucciones de utilización y de seguridad
ASPIRAPOLVERE A RISPARMIO
ENERGETICO
Indicazioni per l'uso e per la sicurezza
ENERGY-SAVING VACUUM CLEANER
Operation and Safety Notes
ENERGIESPAR-BODENSTAUBSAUGER
Bedienungs- und Sicherheitshinweise
Advertisement
Table of Contents

Related Manuals for Silvercrest SBS 1400 A1


Summary of Contents for Silvercrest SBS 1400 A1
- Page 1 Aspirador de bajo consumo/ Aspirapolvere a risparmio energetico SBS 1400 A1 ASPIRADOR DE BAJO CONSUMO Instrucciones de utilización y de seguridad ASPIRAPOLVERE A RISPARMIO ENERGETICO Indicazioni per l’uso e per la sicurezza ENERGY-SAVING VACUUM CLEANER Operation and Safety Notes ENERGIESPAR-BODENSTAUBSAUGER...
- Page 2 Instrucciones de utilización ........................4 - 9 Istruzioni per l'uso ............................10 - 15 Operating Manual ............................16 - 21 Bedienungsanleitung ..........................22 - 27...
-
Page 4: Indicaciones De Seguridad
1.1 sobre el manual de instruccio- medo. La humedad en el interior del apa- ¡Le agradecemos la compra del SBS 1400 A1 rato puede provocar un cortocircuito. y le deseamos que disfrute del aparato! Lea este manual de instrucciones por completo - Polvo de tóners (para impresoras láser,... - Page 5 Desembalar y montar el aparato Desembalar y montar el 4. Ajuste la longitud del tubo telescópico. Pa- Para montar las toberas proceda de la si- ra ello presione el inmovilizador del tubo te- guiente manera: aparato lescópico (fig. 4/1) hacia abajo. Tire del tu- 2.1 Desembalaje AVISO: bo telescópico hasta que se encuentre en...
- Page 6 Manejo Manejo 5. Ajuste el conmutador "alfombra/suelo duro" 3.4 Transportar y almacenar el apa- (fig. 11/1) según el revestimiento del suelo: rato 3.1 Aspirar el polvo Para el transporte Ud. puede llevar la as- piradora rodante ya sea del asa de transporte AVISO: (fig.
- Page 7 Mantenimiento Mantenimiento 4. Libere la bolsa filtrante de polvo tirando ha- 4.2 Cambio de filtros cia atrás el clip de sujeción (fig. 18/1). La aspiradora rodante posee los siguientes fil- 4.1 Cambiar la bolsa filtrante de tros: 5. A continuación extraiga la bolsa filtrante de polvo polvo hacia arriba (fig.
- Page 8 Mantenimiento 4.3 Cambiar el filtro de evacuación 4.4 Cambiar el filtro de protección 4. Limpie el soporte del filtro. higiénica del motor 5. Coloque el soporte del filtro junto con el fil- tro de protección del motor desde arriba en 1.
- Page 9 Solución de problemas Solución de problemas Antes de contactar a su concesionario oficial Royal, al socio de servicio Royal o a su mercado especializado, verifique con la siguiente tabla si puede solucionar el problema por sí mismo. AVISO: ¡Peligro de lesiones! ¡Jamás utilice un aparato defectuoso! Antes de ponerse a localizar el problema, desconecte el aparato y desenchufe la clavija de la caja de enchufe, Capítulo 3.3, "Desconectar y enrollar el cable eléctrico".
-
Page 10: Dati Tecnici
Vi ringraziamo per la fiducia accordataci acqui- 1.1 sulle istruzioni per l'uso genti per la pulizia a umido di tappeti e stando l'SBS 1400 A1 e vi auguriamo di trarre Prima di lavorare con l'apparecchio leggere in- moquette. L'umidità presente all'interno la massima soddisfazione dall'apparecchio! teramente le presenti istruzioni per l'uso. - Page 11 Disimballo e montaggio Disimballo e montaggio 4. Regolare la lunghezza del tubo telescopico Per montare le bocchette procedere co- premendo verso il basso l'apposito disposi- me segue: 2.1 Disimballo tivo di arresto (Fig. 4/1). Quindi estrarre il 1. Sballare l’apparecchio e tutti gli accessori. AVVERTIMENTO: tubo alla lunghezza desiderata.
- Page 12 Comando Comando 5. Regolare il selettore "tappeti e moquette/ 3.4 Trasporto e conservazione pavimenti duri" (Fig. 11) in base al tipo di ri- Per il trasporto l'aspirapolvere può essere 3.1 Aspirazione della polvere vestimento: afferrato per il manico (Fig. 13/1) o per il mani- co da trasporto (Fig.
- Page 13 Manutenzione Manutenzione 4. Liberare il sacchetto filtro della polvere fa- 4.2 Sostituzione dei filtri cendo arretrare la clip di tenuta (Fig. 18/1). L'aspirapolvere è dotato dei seguenti filtri: 4.1 Cambio del sacchetto del filtro 5. Quindi estrarre il sacchetto filtro della pol- della polvere vere tirandolo verso l'alto (Fig.
- Page 14 Manutenzione 4.3 Sostituzione del filtro igienico 4.4 Sostituzione del filtro di prote- 4. Pulire il portafiltro. dell'aria uscente zione del motore 5. Mettere il portafiltro unitamente al filtro di protezione del motore nel relativo alloggia- 1. Spegnere l'apparecchio capitolo 3.3, 1.
-
Page 15: Risoluzione Dei Problemi
Risoluzione dei problemi Risoluzione dei problemi Prima di contattare il rivenditore contrattuale Royal competente, il partner dell'assistenza Royal o il punto vendita specializzato verificare, in base alla se- guente tabella, se è possibile risolvere autonomamente il problema. AVVERTIMENTO: Pericolo di lesioni! Non usare mai l'apparecchio se è difettoso! Prima di procedere con la diagnostica, spegnere l'apparecchio e staccare la spina della presa elettrica, capitolo 3.3, „Spegnimento e avvolgimento del cavo elettrico“. -
Page 16: Technical Data
Thank you! Safety notices It is especially forbidden: To vacuum-clean: We thank you for buying the SBS 1400 A1 and 1.1 Re: Operating Manual wish you many happy hours with your appli- - Persons, animals, plants, especially hair, Read this operating manual carefully before... -
Page 17: Unpacking And Assembling
Unpacking and assembling Unpacking and assembling 4. Adjust the length of the telescopic tube. This is how to attach the nozzles: Press down the release latch on the tube 2.1 Unpacking WARNING: (Fig. 4/1) to do this. Then extend the tele- 1. - Page 18 Operation Operation 5. Set the nozzle switch to "carpet" or "hard 3.4 Transport and storage floor" (Fig. 11) according to the floor to be To transport the cylinder vacuum cleaner 3.1 Vacuum cleaning cleaned: you can carry it by the carrying-handle (Fig.
- Page 19 Maintenance Maintenance 4. Release the dust filter bag by pulling back 4.2 Changing filters the holding-clip (Fig. 18/1). Your cylinder vacuum cleaner is equipped with 4.1 Changing the dust filter bag the following filters: 5. Then pull the bag up and out (Fig. 18/2). Change the dust filter bag at the latest when the electronic dust filter bag change indi- cator (Fig.
- Page 20 Maintenance 4.3 Changing the hygienic exhaust 4.4 Changing the motor protection 4. Clean the filter holder. filter filter 5. Insert the filter holder complete with filter in- 1. Switch off the appliance chapter 3.3, 1. Switch off the vacuum cleaner and remove to its bracket from above (Fig.
-
Page 21: Troubleshooting
Troubleshooting Troubleshooting First check according to the following table if you can solve the problem on your own before contacting your authorised Royal dealer, Royal service partner or appliance market. WARNING: Danger of injury! Never use a defective appliance! Always switch off the appliance and disconnect it from the mains before starting troubleshooting chapter 3.3, „Switching off and retracting power cord“. -
Page 22: Vielen Dank
Wir danken Ihnen für den Kauf unseres Boden- Lesen Sie diese Bedienungsanleitung vollstän- gungsmitteln. Feuchtigkeit im Inneren staubsaugers SBS 1400 A1 und wünschen Ih- dig durch, bevor Sie mit dem Gerät arbeiten. kann zum Kurzschluss führen. nen viel Freude mit dem Gerät! Bewahren Sie die Anleitung gut auf. -
Page 23: Auspacken Und Montieren
Auspacken und Montieren Auspacken und Montieren 4. Stellen Sie die Länge des Teleskoprohrs Zum Aufsetzen der Düsen gehen Sie wie ein. Drücken Sie dazu die Teleskoprohr-Ar- folgt vor: 2.1 Auspacken retierung (Abb. 4/1) nach unten. Ziehen Sie 1. Packen Sie das Gerät und alle Zubehörteile WARNUNG: dann das Teleskoprohr auf die gewünschte aus. - Page 24 Bedienung Bedienung 5. Stellen Sie je nach Bodenbelag den Um- 3.4 Transportieren und Aufbewah- schalter „Teppich/Hartboden“ (Abb. 11) 3.1 Staubsaugen ein: Zum Transport können Sie den Bodens- WARNUNG: taubsauger entweder am Tragegriff (Abb. 13/ 1) oder am Transportgriff tragen (Abb. 13/2). Verletzungsgefahr! Ein beschädigtes Gerät darf nicht verwendet werden.
- Page 25 Wartung Wartung 4. Geben Sie den Staubfilterbeutel durch Zu- 4.2 Filterwechsel rückziehen des Halteclips frei (Abb. 18/1). Ihr Bodenstaubsauger besitzt die folgenden 4.1 Staubfilterbeutel wechseln Filter: 5. Ziehen Sie dann den Staubfilterbeutel nach Wechseln Sie den Staubfilterbeutel spä- oben heraus (Abb. 18/2). testens dann, wenn die elektronische Staubfil- terbeutelwechsel-Anzeige (Abb.
- Page 26 Wartung 4.3 Hygiene-Ausblasfilter wech- 4.4 Motorschutzfilter wechseln 4. Reinigen Sie den Filterhalter. seln 1. Schalten Sie das Gerät aus und entneh- 5. Setzen Sie den Filterhalter samt Motor- men Sie den Staubfilterbeutel, wie unter schutzfilter von oben in seine Aufnahme 1.
- Page 27 Problembehebung Problembehebung Bevor Sie Ihren zuständigen Royal-Vertragshändler, Royal-Servicepartner oder Ihren Fachmarkt kontaktieren, überprüfen Sie anhand der folgenden Ta- belle, ob Sie das Problem selbst beseitigen können. WARNUNG: Verletzungsgefahr! Verwenden Sie niemals ein defektes Gerät! Bevor Sie auf Problemsuche gehen, schalten Sie das Gerät aus und ziehen Sie den Stecker aus der Steckdose, Kapitel 3.3, „Ausschalten und Stromkabel aufrollen“.
- Page 29 NUR GÜLTIG MIT RECHNUNGSKOPIE! Teléfono con prefijo • Telefono con prefisso • Phone number (with area code) • Telefon mit Vorwahl SBS 1400 A1 Correo electrónico • e-mail • email • E-Mail Fecha de compra • Data d'acquisto • Date of purchase • Kaufdatum Fecha, firma del comprador •...
- Page 30 IAN 57229 ROYAL APPLIANCE INTERNATIONAL GMBH Jagenbergstr. 19 D-41468 Neuss Estado de las informaciones · Versione delle informazioni Last Information Update · Stand der Informationen: 09 / 2010 · Ident.-No.: SBS 1400 A1 092010 - ES/IT...