
Related Manuals for AEG LAVAMAT LS 70840


Summary of Contents for AEG LAVAMAT LS 70840
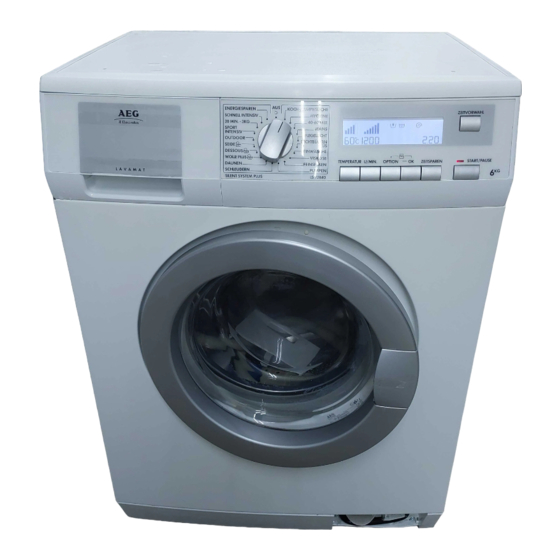
- Page 1 LAVAMAT LS 70840 - LS 72840 User manual Washing Machine Downloaded From WashingMachine-Manual.com Manuals...
-
Page 2: Table Of Contents
Contents Thank you for choosing one of our high-quality products. To ensure optimal and regular performance of your appliance please read this instruction manual carefully. It will enable you to navigate all processes perfectly and most efficiently. To refer to this manual any time you need to, we recommend you to keep it in a safe place. -
Page 3: Operating Instructions
Safety information ENVIRONMENT CONCERNS Ecological hints Packaging materials Subject to change without notice OPERATING INSTRUCTIONS SAFETY INFORMATION Read carefully & keep for future reference. • The safety of Your appliance complies with the industry standards and with legal re- quirements on the safety of appliances. However, as manufacturers, we feel it is our duty to provide the following safety notes. -
Page 4: Installation
Safety information Installation • This appliance is heavy. Care should be taken when moving it. • When unpacking the appliance, check that it is not damaged. If in doubt, do not use it and contact the Service Centre. • All packing and transit bolts must be removed before use. Serious damage can occur to the product and to property if this is not adhered to. -
Page 5: Product Description
Product description • Make sure that children or pets do not climb into the drum. To prevent children or pets becoming trapped inside the drum the ma- chine incorporates a special feature. To acti- vate this device, rotate the button (without pressing it) inside the door clockwise until the groove is horizontal. -
Page 6: Detergent Dispenser Drawer
Control panel Detergent dispenser drawer Compartment for prewash phase or stain re- mover. The prewash detergent is added at the beginning of the wash programme. The stain remover is added during the STAIN-Ac- tion phase in the main wash. Compartment for powder or liquid detergent used for main wash. -
Page 7: Symbols
Display DELAY START button (ZEITVORWAHL) Display Symbols: Handwash; Child Lock. DISPLAY 9.5 9.6 9.7 9.8 9.1 - Temperature indicator and COLD symbol 9.2 - Spin Speed indicator, RINSE HOLD , NIGHT CYCLE - symbols 9.3 - Programme progress display: PREWASH , MAIN WASH , RINSE , SPIN... -
Page 8: First Use
First use – The DELAY START symbol will appear on the display. – The delay time value decreases by one unit every hour and then, when remains 1 hour, the time decreases every minute. • Incorrect option selection – If an option which is not compatible with the set wash programme is selected, the message Err is displayed for about 2 seconds and the yellow light of button 7 starts blinking. -
Page 9: Daily Use
Daily use DAILY USE Load the laundry Open the door by carefully pulling the door handle outwards. Place the laundry in the drum, one item at a time, shaking them out as much as possible. Close firmly the door. You must hear a click during closing. -
Page 10: Turn The Programme Dial (1) To Set The Required Programme
Daily use Turn the programme dial (1) to set the required programme You can choose the right programme for any type of laundry following the descriptions on the washing programme tables (see «Washing Programmes» ). Turn the programme dial to the required programme. The programme dial determines the type of washing cycle (e.g. -
Page 11: Programme Option Buttons
Daily use To empty out the water, please read chapter «At the end of the programme». Programme option buttons Depending on the programme, different functions can be combined. WARNING! Not all the options are compatible among themselves. The symbols of the incompatible op- tions disappear. -
Page 12: Extra Rinse Option (Additional Rinse)
Daily use EXTRA RINSE option (additional rinse) This appliance is designed for saving water. However, for people with a very delicate skin (allergic to detergents) it may be necessary to rinse the laundry using an extra quantity of water (extra rinse). The relevant symbol will appear on the display and this option is active for selected washing programme. -
Page 13: Interrupting A Programme
Daily use Selecting the delayed start. • Select the programme and the required options. • Select the delay start. • Press button 7: the appliance starts its hourly countdown. The programme will start after the selected delay has expired. Cancelling the delayed start •... -
Page 14: Washing Programmes
Washing programmes To empty the water out: • turn the programme selector dial to • set the DRAINING or SPINNING programme • if needed, press the relevant button to reduce the spin speed • press the button 7 • when the programme has finished the display shows a blinking . - Page 15 Washing programmes Programme - Maximum and Minimum Temperature - Detergent Cycle Description - Maximum Fabrics Load - Type of Options Compartment Laundry JEANS SPIN REDUCTION 60° - Cold RINSE HOLD Main wash - Rinses - Long spin NIGHT CYCLE Maximum spin speed PREWASH Max.
- Page 16 Washing programmes Programme - Maximum and Minimum Temperature - Detergent Cycle Description - Maximum Fabrics Load - Type of Options Compartment Laundry DELICATE RINSES SPIN REDUCTION Rinses - Short spin RINSE HOLD Maximum spin speed NIGHT CYCLE Max. load 6 kg EXTRA RINSE With this programme it is possible to rinse and spin delicate garments which have been washed by hand.
- Page 17 Washing programmes Programme - Maximum and Minimum Temperature - Detergent Cycle Description - Maximum Fabrics Load - Type of Options Compartment Laundry SILK (HANDWASH) SPIN REDUCTION 30° - Cold RINSE HOLD Main wash - Rinses - Short spin NIGHT CYCLE Maximum spin speed Max.
-
Page 18: Helpful Hints And Tips
Helpful hints and tips Programme - Maximum and Minimum Temperature - Detergent Cycle Description - Maximum Fabrics Load - Type of Options Compartment Laundry COTTON ECONOMY SPIN REDUCTION 60° RINSE HOLD Main wash - Rinses - Long spin NIGHT CYCLE Maximum spin speed PREWASH Max. -
Page 19: Detergents And Additives
Helpful hints and tips Rust: oxalic acid dissolved in hot water or a rust removing product used cold. Be careful with rust stains which are not recent since the cellulose structure will already have been damaged and the fabric tends to hole. Mould stains: treat with bleach, rinse well (whites and fast coloureds only). -
Page 20: Degrees Of Water Hardness
Care and cleaning Degrees of water hardness Water hardness is classified in so-called “degrees” of hardness. Information on hardness of the water in your area can be obtained from the relevant water supply company, or from your local authority. If the water hardness degree is medium or high we suggest you to add a water softener following always the manufacturer’s instructions. -
Page 21: Drain Pump
Care and cleaning Remove the drawer by pressing the catch downwards and by pulling it out. Flush it out under a tap, to remove any traces of accumulated powder. To aid cleaning, the top part of the addi- tive compartment should be removed. Clean all parts with water. - Page 22 Care and cleaning Open the pump door. Place a container close to the pump to collect any spillage. Release the emergency emptying hose, place it in the container and remove its cap cover. When no more water comes out, un- screw the pump and remove it.
-
Page 23: Cleaning The Water Inlet Filters
Care and cleaning Put the cap back on the emergency emptying hose and place the latter back in its seat. Screw the pump fully in. 10. Close the pump door. WARNING! When the appliance is in use and depending on the programme selected there can be hot water in the pump. -
Page 24: Emergency Emptying Out
Care and cleaning Screw the hose back to the machine and make sure the connection is tight. Turn on the water tap. Emergency emptying out If the water is not discharged, proceed as follows to empty out the machine: pull out the plug from the power socket; close the water tap;... -
Page 25: What To Do If
What to do if… WHAT TO DO IF… Certain problems are due to lack of simple maintenance or oversights, which can be solved easily without calling out an engineer. Before contacting your local Service Centre, please carry out the checks listed below. During machine operation it is possible that the yellow pilot light of button 7 blinks, one of the following alarm codes appears on the display and at the same time some acoustic sig- nals sound every 20 seconds to indicate that the machine is not working:... - Page 26 What to do if… Problem Possible cause/Solution The drain hose is squashed or kinked. • Check the drain hose connection. The drain filter is clogged. • Clean the drain filter. An option or a programme that ends with the The machine does not empty and/or does not water still in the tub or a that eliminates all the spin: spinning phases has been selected.
- Page 27 What to do if… Problem Possible cause/Solution The transit bolts and packing have not been re- moved. • Check the correct installation of the appli- ance. The support feet have not been adjusted The machine vibrates or is noisy: • Check the correct levelling of the appliance. The laundry is not evenly distributed in the drum.
-
Page 28: Technical Data
Technical data If you are unable to identify or solve the problem, contact our service centre. Before telephoning, make a note of the model, serial number and pur- chase date of your machine: the Service Centre will require this information. TECHNICAL DATA Dimensions Width... -
Page 29: Installation Instructions
Installation and they are the most efficient programmes in terms of combined energy and water con- sumption for washing that type of cotton laundry. They agree with EN60456. The actual water temperature may differ from the declared cycle temperature. INSTALLATION INSTRUCTIONS INSTALLATION Unpacking All transit bolts and packing must be removed before using the appliance. - Page 30 Installation Remove the power supply cable and the draining and inlet hose from the hose holders on the rear of the appliance. Unscrew the three bolts with the key supplied with the appliance. Slide out the relevant plastic spacers. Downloaded From WashingMachine-Manual.com Manuals...
-
Page 31: Positioning And Levelling
Installation Fill the smaller upper hole and the two large ones with the corresponding plas- tic plug caps supplied in the bag con- taining the instruction booklet. Positioning and levelling Install the machine on a flat hard floor. Make sure that air circulation around the machine is not impeded by carpets, rugs etc. - Page 32 Installation Open the porthole and extract the inlet hose. Connect the hose with the angled con- nection to the machine. Do not place the inlet hose downwards. Angle the hose to the left or right de- pending on the position of your water tap.
-
Page 33: Water-Stop Device
Installation Water-stop device The inlet hose is provided with a water stop de- vice, which protects against damage caused by water leaks in the hose which could develop due to natural ageing of the hose. This fault is shown by a red sector in the window «A». Should this oc- cur, turn the water tap off and refer to your Serv- ice Centre to replace the hose. -
Page 34: Electrical Connection
Electrical connection The drain hose may be extended to a maximum of 4 metres. An additional drain hose and joining piece is available from your local Service Centre. ELECTRICAL CONNECTION Information on the electrical connection is given on the rating plate on the inner edge of the appliance door. -
Page 35: Packaging Materials
Packaging materials The materials marked with the symbol are recyclable. >PE<=polyethylene >PS<=polystyrene >PP<=polypropylene This means that they can be recycled by disposing of them properly in appropriate collec- tion containers. Ecological hints To save water, energy and to help protect the environment, we recommend that you follow these tips: •... - Page 36 Downloaded From WashingMachine-Manual.com Manuals...