Sign In
Upload
Manuals
Brands
Toshiba Manuals
All in One Printer
e-STUDIO407CS Serie
Toshiba e-STUDIO407CS Serie Manuals
Manuals and User Guides for Toshiba e-STUDIO407CS Serie. We have
7
Toshiba e-STUDIO407CS Serie manuals available for free PDF download: User Manual, Software Installation Manual, High Security Mode Management Manual
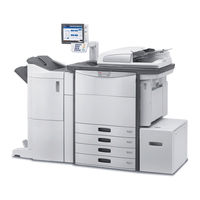
Toshiba e-STUDIO407CS Serie User Manual (368 pages)
Brand:
Toshiba
| Category:
All in One Printer
| Size: 82.43 MB
Table of Contents
Table of Contents
2
1 Printing Operations
7
Setting up Print Options
8
How to Set up
8
Print Options
11
Printing with Best Functions for Your Needs
37
Printing Various Print Job Types
37
Printing Private Print Jobs
38
Printing Proof Print Jobs
39
Creating an Overlay File
40
Layout and Finishing Options in [Basic] Tab Menu
43
Layout and Finishing Options in [Finishing] Tab Menu
45
Making a Booklet
46
Printing on both Sides of a Sheet
46
Printing Several Pages on One Sheet
47
Finishing Options in [Paper Handling] Tab Menu
49
Finishing Options in [Effect] Tab Menu
50
Using Various Types of Paper
52
Switching Equipment to Print Jobs
53
Splitting a Print Job Across Two Pieces of Equipment (Tandem Printing)
55
PRINTING from Macintosh
56
Printing from Application
56
Page Setup Dialog
56
Custom Page Sizes
57
Page Attributes
57
Print Dialog
58
Color Matching
60
Cover Page
60
Paper Handling
60
Color Settings
61
Paper Feed
61
Print Mode
64
Printer Features
64
Supply Levels
68
PRINTING from Unix/Linux
69
Printing from Application
69
Considerations and Limitations
69
General Options
69
Generic "Lp" and "Lptap" Options
69
Printing Using Lp Command
69
Output bin
70
Print Language
70
Paper Size
71
Paper Source
71
Booklet Modes
72
Department Code
72
Distinguish Thin Lines
72
Printing Modes
72
Toner Save
72
Center Margin
73
Outer Margin
73
Page Layout
73
Color Mode
74
Font Pitch
74
Page Length
74
Black Overprint
75
Image Quality Type
75
Pure Black and Pure Gray
75
Pcl5E Specific Options
76
Banner Page
77
Text Length
77
Managing Print Jobs from the Control Panel
79
Monitoring the Print Job Status
79
Normal Print / Scheduled Print Jobs
79
Managing Print Jobs from the Control Panel
80
Proof Print Jobs
81
Private Print Jobs
82
Managing Print Jobs from the Control Panel
83
Hold Print Jobs
84
Managing Print Jobs from the Control Panel
85
Managing Print Jobs from the Control Panel
86
Invalid Jobs
87
Printing Files from USB Media (USB Direct Printing)
88
Viewing the Print Job Log
92
Checking Supplies
92
Checking Remaining Toner Levels
92
Viewing the Drawer Status
92
Other Printing Methods
93
FTP Printing
93
Email Printing
94
Appendix
95
Internal Fonts List
95
Internal PCL Fonts List
95
Internal PS Fonts List
96
2 Copying Operations
97
Editing Functions
98
Displaying EDIT Menu
98
Image Shift
98
Creating Top/Bottom Margin or Left/Right Margin
98
Creating Bookbinding Margin
99
Edge Erase
100
2In1 / 4In1
101
Magazine Sort Mode
102
Image Editing
103
Trimming / Masking
103
Mirror Image / Negative/Positive Reversal
104
XY Zoom
105
Cover Sheet
106
Sheet Insertion
107
Time Stamp
108
Page Number
109
Job Build
110
Image Direction
112
Book - Tablet
112
Adf -> Sadf
113
Full Image
114
Omit Blank Page
114
Outside Erase
115
Image Adjustment
117
Displaying IMAGE Menu
117
Using Image Adjustment Functions
117
Color Balance (YMCK Adjustment)
117
RGB Adjustment
118
Background Adjustment
119
One-Touch Adjustment
119
Sharpness
120
Twin Color Copying
120
Twin Color Selectable
120
Hue
123
Mono Color Copying
123
Saturation
124
Confirming Job Status
125
Confirming Copy Job Status
125
Confirming Jobs in Progress or Ones in Waiting
125
Deleting Jobs
125
Pausing Jobs
126
Confirming Copy Job History
127
Confirming Amount of Toner Remaining
128
Confirming Drawers
128
Other Information
129
Continuous Copying Speed
129
Copying Function Combination Matrix
131
Combination Matrix 1/2
131
Combination Matrix 2/2
132
Image Adjustment Function Combination Matrix
133
Combination Matrix 1/2
133
Combination Matrix 2/2
134
3 FAX Operations
135
Advanced Functions
136
Transmitting 2-Sided Originals
136
Priority Transmission
136
Polling Communication
137
Polling Reception
137
Polling Transmission
137
Mailbox Transmission
138
Registering/Printing/Deleting an Original
138
Sending/Retrieving an Original
140
Creating/Modifying/Deleting a Mailbox
142
Deleting a Mailbox
143
Chain Dial Communication
144
Delayed Transmission Reservation
144
Recovery Transmission
145
Onramp Gateway
146
Offramp Gateway
147
Save as File
148
Printing SECURE RECEIVE Fax Jobs
149
Printing Lists and Reports
150
Printing Lists & Reports Manually
150
Journal (Transmission Journal/Reception Journal)
150
Reservation List
150
Mailbox/Relay Box Report
151
Printing Lists & Reports Automatically
151
Lists/Reports Samples
152
Transmission Journal
152
Reception Journal
153
Reservation List
153
Mailbox/Relay Box Report
154
Memory Transmission Report
155
Multi Transmission Report
156
Transmission Report
156
Multi Polling Report
157
Relay TX Orig. Terminal Report
157
Relay TX End Terminal Report
158
Relay TX Relay Station Report
158
Mailbox Reception Report
159
Relay Station Report
159
Setting Items
160
User Settings
160
Fax Settings
160
Administrator Settings
162
Registering the Terminal ID
162
Setting the Initial Setup
165
Setting RX Printing
165
Setting Recovery Transmission
166
Secure Receive
166
Setting Secure Receive
167
Sending a N/W Fax
169
Basic Procedure
169
Specifying Recipients
171
Entering Recipients from the Keyboard
171
Selecting Recipients from the Address Book
172
Selecting Recipients from the Address Book (Search Option)
173
Removing Recipients
175
SETTING N/W-Fax DRIVER
176
How to Setup
176
Setting Initial Values of the N/W-Fax Driver Options
176
Setting Print Options for each Print Job
176
Setting up the N/W-Fax Driver Options
176
Setting up the [Layout] Tab
176
Setting up the [Send] Tab
177
Setting up the Cover Sheet
178
Setting up the SNMP
179
Setting up the [Device Settings] Tab
180
Setting up LDAP Servers
181
Sending with Extended Fax Functionality
181
Saving a Fax as a File
181
Delayed Transmission
182
Sending with a Cover Sheet
182
Initialize Fax
185
Setting the Country/Region of FAX
185
Initializing FAX Settings Individually
186
Appendix
187
Cover Sheet Samples
187
Standard Cover Page
187
Business Cover Page
188
Professional Cover Page
189
4 Scanning Operations
190
Useful Functions
191
Changing Scan Settings
191
Specifying Color Mode
191
Specifying Resolution
191
Changing Orientation
192
Scanning 2-Sided Originals
192
Selecting Original Mode
192
Changing Compression Ratio
193
Removing Blank Pages
193
Specifying Original Size
193
Adjusting Contrast
194
Adjusting Exposure
194
Erasing Black Frames Around Images
194
Adjusting Background Density
195
Adjusting Color Balance
195
Adjusting Sharpness
195
Previewing Scans
195
Specifying E-Mail Addresses
196
Scanning with Dual Functions (Dual Agents)
203
Encrypting PDF Files
205
Other Scanning Methods
207
Scanning Images Using the Remote Scan Driver
207
Scanning Images Using the WIA Driver
207
Internet Fax
208
Precautions for Internet Fax Transmissions
208
Viewing Touch Panel for Fax Menu
208
Sending Internet Faxes
209
Saving Sent Data as a File (Internet Fax and File)
211
Setting Advanced Functions
213
Receiving Internet Faxes
215
Available File Formats
215
Viewing the Internet Fax Job Status and Log
215
Viewing the Internet Fax Job Status
216
Viewing the Send Log for Internet Fax Jobs
216
Saving Contact Information to the Address Book
217
Viewing the Receive Log for Internet Fax Jobs
217
5 Registering Functions
218
Templates
219
Displaying Template Menu
219
Using "Useful Templates
220
Registering Templates
221
Registering Templates into the Public Template Group
221
Creating a New Private Group
222
Registering Templates into a Private Group
223
Recalling Templates
224
Changing Data
225
Changing Private Group Data
225
Changing Template Data
226
Deleting Groups or Templates
227
Deleting Private Groups
227
Deleting Templates
227
Using Templates
229
Registering Scan Templates
229
Using Scan Templates
232
6 Setting Items/Printing
239
Setting Items (User)
240
Accessing the User Menu
240
General
241
Changing the Display Language
241
Setting the Reversed Display
241
Adjusting the Display Setting
241
Setting the Calibration
241
Copy
242
Fax
243
Scan
244
E-Filing
246
List
247
Drawer
248
Address
248
Managing Contacts in Address Book
249
Managing Groups in Address Book
254
Check E-Mail
260
Change User Password
260
Setting Items (Admin)
261
Accessing the Admin Menu
261
General
262
Setting the Device Information
263
Setting the Notification
263
Changing the Administrator Password and Resetting the Service Password
264
Setting the Clock
265
Setting the Energy Saver Modes
266
Setting the Calibration Display Level
268
Setting the Calibration
268
Changing the Roughness of Print
268
Setting the Status Message
269
Setting the Auto Clear Function
269
Managing the Option Licenses
269
Adding or Removing Display Languages
270
Updating Your System
272
Creating or Installing Clone Files
273
Setting the Panel Calibration
276
Exporting Logs
276
Setting Job Skip
277
Changing the Keyboard Layout
277
Setting Print Adjustment
278
Setting the Pop-Up Messages
278
Network
279
Setting the TCP/IP Protocol (Ipv4)
279
Setting the TCP/IP Protocol (Ipv6)
280
Setting the IPX/SPX Protocol
284
Setting the Netware Settings
284
Setting the SMB Protocol
285
Setting the Appletalk Protocol
286
Setting the HTTP Network Service
287
Setting the Ethernet Speed
287
Setting the LDAP Services and the Filtering Functions
287
Setting Ipsec (IP Security)
288
Checking the Network
288
Copy
289
Fax
291
Setting the Discard and Reduction Print Option for RX Print
291
File
291
E-Mail
292
Internet Fax
293
Security
293
Managing Certificates
293
Setting Secure PDF
296
Performing the Integrity Check
297
List/Report
297
Setting the Report
297
Printing Lists
299
Printer/E-FILING
300
Wireless Setting
301
Setting up the Infrastructure Mode
301
Setting up the Ad Hoc Mode
310
Disabling Wireless Network
313
Change User Password
314
802.1X Settings
315
Setting IEEE 802.1X Authentication
315
Error Messages
317
Factory Default
318
Managing Counters (Counter Menu)
320
Total Counter
320
Print out Total Counter
321
Department Counter
321
Department Management
323
Logging on as Administrator
323
Printing the Department Code List
324
Enabling Department Codes
324
Registering a New Department Code
325
Editing Department Codes
326
Deleting Department Codes
327
Resetting the Counters for each Department
328
Setting Output Limitations for All Departments
328
Setting the no Limit Black Function
329
Setting the Registered Quota
329
Resetting All Department Counters
329
Deleting All Department Codes
330
Appendix
331
Setting Letters
331
On-Screen Keyboard
331
On-Screen Numeric Keypad
331
List Print Format
332
Total Counter List
332
Department Code List
333
Address Book Information
334
Group Number Information
335
FUNCTION LIST (User)
336
NIC Configuration Page
337
FUNCTION LIST (Administrator)
339
PS3 Font List
356
PCL Font List
357
Specifications
358
Scanning Specifications
359
FAX Unit Specifications
360
7 Index
361
Advertisement
Toshiba e-STUDIO407CS Serie Software Installation Manual (238 pages)
MULTIFUNCTIONAL DIGITAL SYSTEMS
Brand:
Toshiba
| Category:
Speakers
| Size: 16.71 MB
Table of Contents
Installation Guide
1
Preface
3
End User Software License Agreement
5
Table of Contents
7
Chapter 1 OVERVIEW
12
About the Install Disc
12
For Windows
12
For Macintosh
14
For Unix/Linux
14
Contents of Installer
16
Precautions for Using Firewall Software
17
Downloading Software from Topaccess
18
Downloading Installer for Windows
18
Downloading Macintosh PPD Files
20
Downloading Unix/Linux Filters
22
Setting up Netware Print Server
23
Setting up the Netware Print Server in NDS Mode
23
Setting up the Netware Print Server in NDPS Mode
24
Setting up the Novell Iprint
27
Chapter 2 RECOMMENDED INSTALLATION
29
Procedure for Recommended Installation
30
Precautions for Changing the SNMP Settings
35
When SNMP V1 and V2 Are Configured for Your TOSHIBA MFP
35
When SNMP V3 Is Configured for Your TOSHIBA MFP
36
Chapter 3 INSTALLING PRINTER DRIVERS for WINDOWS
40
Before Installation
40
Type of Printer Drivers
40
System Requirements
40
About Installation Procedure
41
Installing the Printer Drivers
43
Installing the Printer Drivers by Using Software Installer
43
Installing the Printer Drivers by Using the Individual Installers
64
Installing the Printer Drivers from Topaccess
82
Installing the Printer Drivers from the Equipment's Shared Folder
84
Other Installations
86
Raw TCP/LPR Printing ("Add Printer" Installation from File)
86
USB Printing
91
IPP Printing
101
Novell Iprint
113
Web Service Print
114
Copying the PPD File for Windows
122
Uninstalling Printer Drivers
123
Windows 7 / Windows 8 / Windows Server 2012
123
Windows Vista / Windows Server 2008
125
Windows Server 2003
128
Chapter 4 INSTALLING PRINTER DRIVERS for MACINTOSH
130
About the Installation
130
About Client Software for Macintosh
130
Planning for Installation
130
Installing the Printer on Mac os X 10.4.X to Mac os X 10.10.X
131
Installing the Macintosh PPD File
131
Installing Plug-Ins(Mac os X 10.4.X-10.6.X)
135
Configuring the Printer on Mac os X 10.7.X to 10.10.X
138
Configuring the Printer on Mac os X 10.5.X to 10.6.X
149
Configuring the Printer on Mac os X 10.4.X
159
Uninstalling the Macintosh PPD File
168
Chapter 5 INSTALLING PRINTER DRIVERS for Unix/Linux
170
Setting up the Unix/Linux Filters
170
About Unix/Linux Filters
170
System Requirements
171
Precautions for Using User Authentication
171
Configuring Unix/Linux Printing Using Unix/Linux Filters
171
Setting up the CUPS
180
About CUPS
180
Configuring Unix/Linux Printing Using CUPS
180
Chapter 6 INSTALLING SCAN DRIVER and UTILITIES
204
Before Installation
204
Type of Scan Driver and Utilities
204
System Requirements
204
Installing Scan Driver and Utilities
205
Installing the Scan Driver and Utilities Using the Installer
205
Installing WIA Driver to Windows Computer
208
Uninstalling Scan Driver and Utilities
212
Chapter 7 INSTALLING NETWORK FAX UTILITIES
214
Before Installation
214
Type of Network Fax Utilities
214
System Requirements
214
Installing Network Fax Utilities
215
Installing Web Service Print
217
Uninstalling the Network Fax Software
218
Uninstalling N/W-Fax Driver
218
Uninstalling Addressbook Viewer
218
Chapter 8 INSTALLING E-Filing BACKUP/RESTORE UTILITIES
220
Before Installation
220
System Requirements
220
Installing E-Filing Backup/Restore Utilities
221
Uninstalling E-Filing Backup/Restore Utilities
224
Chapter 9 INSTALLATION MAINTENANCE
226
Uninstalling Client Software
226
Windows Vista / Windows 7 / Windows 8 / Windows Server 2008/ Windows Server 2012
226
Windows Server 2003
230
Repairing Client Software
232
Index
235
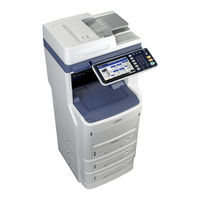
Toshiba e-STUDIO407CS Serie User Manual (94 pages)
MULTIFUNCTIONAL DIGITAL COLOR SYSTEMS
Brand:
Toshiba
| Category:
All in One Printer
| Size: 26.7 MB
Table of Contents
About the Manuals
2
About this Manual
4
Notation Used in this Manual
4
Terms in this Document
4
Illustrations in this Document
4
Table of Contents
5
Convenient Functions
7
Power Consumption
9
1 Printing
11
Installing Drivers on Your Computer
12
Operating Environment
13
Windows Operating Environment
13
Macintosh Operating Environment
13
Preparations to Print from Windows
14
Setup Via a Network (Windows)
14
Setup Via USB (Windows)
15
Preparations to Print from Mac os X
16
Setup Via a Network (Mac os X)
16
Printing from Windows
18
Before Using the Printer Driver
18
Configuring the Options
18
Setting the Department Code
19
Copying the PPD File for Windows
21
Printing from Application
21
Considerations and Limitations
21
How to Print
21
PRINTING from Macintosh
23
Printing from Application on Mac os X
23
Considerations and Limitations
23
How to Print from Mac os X
23
2 Copying
24
How to Make Copies
25
Before Making Copies
25
Storage of Color Copies
25
Forgery Prevention Function
25
Placing Originals
25
Acceptable Originals
25
Placing Originals on the Original Glass
25
Book-Type Originals
26
Using the RADF (Reversing Automatic Document Feeder)
26
Continuous Feed Mode
27
Single Feed Mode
27
Making Copies
28
Basic Copying Procedure
28
Scanning the Next Original During Copying
30
Interrupting Copying and Making Other Copies
30
Proof Copy
30
Selecting Exit Tray
31
Bypass Copying
32
Bypass Copying on Standard Size Paper
33
Control Panel
34
Copying on an Envelope
36
Bypass Copying on Non-Standard Size Paper
37
Using the Offline Stapler
39
Basic Copy Modes
40
Before Using Copying Functions
40
Default Settings
40
Confirming the Set Functions
40
Clearing the Set Functions
40
Restrictions on Function Combinations
41
Paper Selection
41
Automatic Paper Selection (APS)
41
Selecting Desired Paper Manually
41
Copying Mixed-Size Originals in One Operation
42
Switching Color Modes
43
Setting Original Modes
43
Density Adjustment
44
Enlargement and Reduction Copying
44
Automatic Magnification Selection (AMS)
44
Specifying both the Original Size and the Copy Paper Size Separately
45
Specifying Reproduction Ratio Manually
46
Copying Photo Originals in the Optimal Reproduction Ratio for Copy Paper Size (PHOTO ZOOM)
47
Selecting Finishing Mode
48
Finishing Modes and Optional Finishing Devices
48
Sort/Group Mode
49
Staple Sort Mode
50
Magazine Sort
51
Duplex Copying
51
Making a 1-Sided Copy
52
Making a 2-Sided Copy
53
Performing Copy & File
53
Setting Share Folder
55
3 Fax
56
Sending/Receiving a Fax
57
Sending a Fax
57
Basic Procedures
57
Handling an Original
58
Setting the Transmission Conditions
61
Specifying the Recipient
63
Address Book
64
Searching by ID Number
65
Other Transmissions
66
Receiving a Fax
68
Reception Mode
68
Originals and Paper
69
Checking and Canceling the Communications
70
Checking Communications
70
Checking Reserved Transmissions
70
Checking Communication Status (Log)
70
Canceling the Transmission
71
Canceling the Memory Transmission
71
Canceling Direct Transmissions
72
Canceling Reserved Transmissions
72
4 Scanning
74
Basic Operation
75
Viewing Touch Panel for Scan Menu
75
Default Settings
75
Scan to E-Filing
76
Scan to File
76
Scan to E-Mail
80
Scan to USB
83
Web Service (WS) Scan
85
Using Saved Scan Data
86
Using Scan Data Saved as E-Filing Documents
86
Using Scan Data Saved as Files
86
Viewing the Scan Job Status and Log
87
Viewing the Scan Job Status
87
Viewing the Scan Job Log
87
5 Utilities that Can be Used with this Machine
88
List of Utilities
89
Common Utilities for Windows/Macintosh
89
6 Index
90
Advertisement
Toshiba e-STUDIO407CS Serie User Manual (78 pages)
MULTIFUNCTIONAL DIGITAL COLOR SYSTEMS
Brand:
Toshiba
| Category:
All in One Printer
| Size: 13.78 MB
Table of Contents
Troubleshooting Guide
1
Table of Contents
2
1 Troubleshooting
4
When a Paper Jam Occurs
5
During Paper Jams
5
When a Paper Jam Occurs in Drawer 1, Bypass Tray
5
When Paper Jam Occurs Inside the Machine
6
When an Error Remains after Removing Jammed Paper
8
Paper Jam on both Sides of the Printer Unit
9
When Paper Jam Occurs in Drawer 2/3/4 (Option)
10
When Paper Jam Occurs in Inner Finisher (Option)
11
When a Document Is Jammed
12
When a Staple Jammed
14
When Staple Jam Occurs in Inner Finisher (Option)
14
When Staple Jam Occurs in Offline Stapler (Option)
15
Troubleshooting for the Hardware
16
When this Screen Is Displayed
16
Messages Displayed on the Touch Panel
17
Error Codes
19
Troubleshooting for Printing
20
Print Job Problems
20
Clearing Print Job Errors
20
Cannot Remember the Document Password for a Private Print Job
21
Printing a Document Including Many Graphics Takes Time
21
Printer Driver Problems
21
Cannot Print (Port Setting Problems)
21
Cannot Print (SNMP Community Name Problems)
21
Cannot Change Settings on the [Device Settings] Tab
22
Command Line Options Not Processed
22
Retrieval of Printer Configuration Failed
22
Network Connection Problems
22
Cannot Print with the Equipment (Network Connection Problems)
22
Cannot Print with SMB Print
23
Client Problems
23
Checking the Client Status
23
Hardware Problems
24
Envelope Creased
24
Print Jobs Not Output
24
Troubleshooting for Copying
25
Copying Problems
25
TROUBLESHOOTING for FAX
27
Troubleshooting
27
Error Codes
27
Error Messages
27
Transmission/Reception Trouble
28
FAX Unit Specifications
29
Troubleshooting for Scanning
30
Scanning Problems
30
Cannot E-Mail My Scans
30
Cannot Find the Data Saved in the Shared Folder
30
Cannot Perform Scanning from a PC with Office 2013
30
TROUBLESHOOTING for E-Filing
31
E-Filing Web Utility Problems
31
E-Filing Web Utility Terminates the Session
31
Numerous Sub Windows Repeatedly Appear
31
Displaying the Items in the Contents Frame Takes a Long Time
31
Error Messages
31
Troubleshooting for Network Connections
33
Locating the Equipment in the Network
33
Cannot Locate the Equipment in the Network
33
Cannot Locate the Equipment with Local Discovery
34
Equipment Does Not Respond to Ping Command
35
LDAP Search and Authentication Problems
35
Network Shutdown Occurs or Touch Panel Disabled after LDAP Search
35
LDAP Authentication Takes a Long Time
35
Printing Problems (Network Related)
36
SMB Print in a Windows Operating System Environment
36
Raw TCP or LPR Print in a Windows Operating System Environment
36
IPP Print in a Windows Operating System Environment
37
Novell Print in a Netware Environment
37
Macintosh Environment
38
Unix/Linux Environment
38
Network Fax (N/W-Fax) Driver Problems
38
N/W-Fax Driver Installation Error Messages
38
Location Does Not Contain Information about Your Hardware
39
Problem with the Current Printer Setup
39
This Port Is Currently in Use
39
N/W-Fax Driver General Errors
40
Wireless LAN Problems
40
Client Software Authentication Problems
41
Cannot Log in Using Client Software
41
CHECKING the EQUIPMENT STATUS with Topaccess
42
Hardware Status Icons on Topaccess [Device] Tab
42
Error Messages
43
Error Codes
44
Error Codes on Print Jobs
44
Error Codes on Transmission and Reception
45
Error Codes on Scan Jobs
48
2 Maintenance
53
Replacing Consumables / Maintenance Units
54
Replacing the Toner Cartridge
54
Replacing the Image Drum Cartridge
57
Replacing the Image Drum Cartridge
58
Drum Cartridge
59
Replacing the Fuser Unit
60
Replacing the Belt Unit
62
Replacing the Inner Finisher Cartridge
64
Replacing the Offline Stapler Cartridge
66
Maintenance
67
Cleaning the Surface of the Machine
67
Cleaning the Platen (Glass Surface)
67
Clean the Document Transporting Roller and Document Holding Roller
68
Clean the Feed Roller
69
When Cleaning the Bypass Tray
69
When Cleaning the Drawer
69
Clean the LED Heads
70
Moving or Transporting the Machine
72
Moving the Machine
72
For the Equipment with Additional Drawer Units Installed
72
3 Appendix
73
Battery Disposal
74
4 Index
75
Toshiba e-STUDIO407CS Serie User Manual (84 pages)
MULTIFUNCTIONAL DIGITAL COLOR SYSTEMS
Brand:
Toshiba
| Category:
All in One Printer
| Size: 12.31 MB
Table of Contents
Setup Guide
1
About the Product Warranty
2
Emergency First Aid
3
Manufacturer
3
For Your Safety
4
When Installing or Moving
5
When Using the Machine
6
During Maintenance or Inspection
8
When Handling Supplies
9
About the Manuals
10
About this Manual
12
Notation Used in this Manual
12
Terms in this Document
12
Symbols in this Document
12
Illustrations in this Document
12
Table of Contents
13
1 Checking the Product
15
Name and Function of each Part
16
Machine
16
Operator Panel
18
Adjusting the Angle of the Control Panel
19
About the Operator Panel
20
Description of the Touch Panel Display
20
Message Displayed
20
Touch Buttons
21
Adjusting the Contrast of the Touch Panel
21
Simultaneous Functions (Multi-Operational)
21
Setting Letters
22
Checking the Product
23
2 Installing the Machine
24
Installation Conditions
25
Installation Conditions
26
Installation Space
26
Unpacking and Installing the Machine
27
The Machine
28
About the Option
31
Installing Additional Paper Feed Units
32
Drawer Unit
34
Setting up the Printer for Windows
36
Configuring the Options
36
Setting the Department Code
37
Copying the PPD File for Windows
39
Setting up the Printer for Mac os X
39
Configuring the Printer on Mac os X
39
Connecting the Cables
43
Connecting the Network Cables
43
Connecting the USB Cable
43
Connecting to the Telephone Line
44
Checking the Copy Operation
47
3 Turning Power ON/OFF
48
Precautions about the Power Supply
49
Turning Power on
50
Turning Power off
51
Reducing Power Consumption When the Machine Is Not in Use (Power Save Mode)
52
4 About Paper
53
About Paper
54
The Width and Length of the Paper
54
Supported Paper
55
Acceptable Paper
56
Paper Size
56
Paper Recommendations
57
Selecting the Paper Source and Output Method for each Paper Type
58
Output Method
59
Printable Areas of the Paper
60
About Symbols
60
Storing Paper
61
How to Load the Paper
62
Loading the Paper in the Drawer Cassette
62
Setting the Paper Size Dial
63
Loading the Paper in the Large Capacity Feeder
63
Using the Bypass Tray
64
Paper Width
65
Registering a Custom Size (Undefined Size)
67
About Auto Tray Switching (Auto Tray Switch Function)
68
Paper Output
69
Using the Face down Tray
69
Using the Face up Tray
69
5 About Document Copies
70
About Document Copies
71
Document Conditions
71
Readable Areas of the Document
72
About Symbols
72
The Width and Length of the Document
73
Loadable Document Sizes
73
Loading Documents
75
Loading the Documents
75
Loading Documents of Various Sizes (MIX Documents)
76
6 Using each Function
77
Configuration of the Printer, Fax, and Scanner Functions
78
Index
80
Toshiba e-STUDIO407CS Serie User Manual (84 pages)
MULTIFUNCTIONAL DIGITAL COLOR SYSTEMS
Brand:
Toshiba
| Category:
All in One Printer
| Size: 12.24 MB
Table of Contents
Table of Contents
13
Setup Guide
1
About the Product Warranty
2
Emergency First Aid
3
For Your Safety
4
When Installing or Moving
5
When Using the Machine
6
During Maintenance or Inspection
8
When Handling Supplies
9
About the Manuals
10
About this Manual
12
Table of Contents
13
Checking the Product
15
Name and Function of each Part
16
Operator Panel
18
Adjusting the Angle of the Control Panel
19
About the Operator Panel
20
Message Displayed
20
Touch Buttons
21
Adjusting the Contrast of the Touch Panel
21
Setting Letters
22
1 Checking the Product
23
2 Installing the
24
2 Installing the Machine
24
Installation Conditions
25
Installation Space
26
Unpacking and Installing the Machine
27
The Machine
29
About the Option
32
Installing Additional Drawer Units
33
Drawer Unit
35
Setting up the Printer for Windows
36
Configuring the Options
36
Setting the Department Code
38
Copying the PPD File for Windows
39
Configuring the Printer on Mac os X
39
Connecting the Cables
44
Connecting to the Telephone Line
45
Checking the Copy Operation
48
3 Turning
49
3 Turning Power ON/OFF
49
Precautions about the Power Supply
50
Turning Power on
51
Turning Power off
52
Reducing Power Consumption When the Machine Is Not in Use (Power Save Mode)
53
4 About Paper
54
About Paper
55
Supported Paper
56
Paper Recommendations
57
Selecting the Paper Source and Output Method for each Paper Type
58
Printable Areas of the Paper
60
Storing Paper
61
How to Load the Paper
62
Using the Bypass Tray
64
Configuring the Drawer Cassette
67
Paper Output
70
About Document Copies
71
About Document Copies
72
Readable Areas of the Document
73
The Width and Length of the Document
74
Loading Documents
76
Using each Function
78
Configuration of the Printer Fax, and Scanner Functions
79
Index
81
Toshiba e-STUDIO407CS Serie High Security Mode Management Manual (24 pages)
MULTIFUNCTIONAL DIGITAL COLOR SYSTEMS / MULTIFUNCTIONAL DIGITAL SYSTEMS
Brand:
Toshiba
| Category:
All in One Printer
| Size: 0.54 MB
Table of Contents
Preface
3
How to Read this Manual
3
Table of Contents
5
Chapter 1 THE HIGH SECURITY MODE
7
Precautions on Using the High Security Mode
8
Confirmation of the Mode
9
Operational Conditions
10
Chapter 2 Unique Functions
13
Temporary Password
14
Conditions When a Temporary Password Is Used
14
Operation by a User When a Temporary Password Is Used
14
Hold (Fax)
15
Chapter 3 THE INITIAL VALUES
17
Precautions on the Initial Values
18
Logging in
18
Initial Value List
18
Advertisement
Related Products
Toshiba e-Studio403s
Toshiba e-STUDIO400AC
Toshiba e-STUDIO4500c
Toshiba e-STUDIO4540c Series
Toshiba e-STUDIO456 Series
Toshiba e-STUDIO477SL
Toshiba e-studio451c
Toshiba E-studio450
Toshiba E-STUDIO4508A
Toshiba e-STUDIO456S
Toshiba Categories
Laptop
Air Conditioner
TV
LCD TV
All in One Printer
More Toshiba Manuals
Login
Sign In
OR
Sign in with Facebook
Sign in with Google
Upload manual
Upload from disk
Upload from URL