Silvercrest SNS 45 A3 Operating Instructions Manual
Nail studio set
Hide thumbs
Also See for SNS 45 A3:
- Operating instructions manual (214 pages) ,
- Operating instructions manual (94 pages) ,
- Operating instructions manual (195 pages)

Related Manuals for Silvercrest SNS 45 A3


Summary of Contents for Silvercrest SNS 45 A3
- Page 1 NAIL STUDIO SET SNS 45 A3 NAIL STUDIO SET ΣΕΤ ΣΤΟΥΝΤΙΟ ΠΕΡΙΠΟΙΗΣΗΣ ΝΥΧΙΩΝ Operating instructions Οδηүίες χρήσης NAGELSTUDIO-SET Bedienungsanleitung IAN 100059...
- Page 2 Before reading, unfold the page containing the illustrations and familiarise yourself with all functions of the device. Πριν ξεκινήσετε την ανάγνωση, ανοίξτε τις δυο σελίδες με τις εικόνες και εξοικειωθείτε με όλες τις λειτουργίες της συσκευής. Klappen Sie vor dem Lesen die Seite mit den Abbildungen aus und machen Sie sich anschließend mit allen Funktionen des Gerätes vertraut.
-
Page 4: Table Of Contents
Importer ..... 31 Matching a nail set ... . . 20 SNS 45 A3... -
Page 5: Introduction
Risks from unintended use! Risks can be engendered by the appliance if it is used for unintended purposes and/or other types of use. ► Use the appliance exclusively for intended purposes. ► Observe the procedures described in these operating instructions. SNS 45 A3... -
Page 6: Warning Notices
If the situation is not avoided it can lead to property damage. ► The directives in this warning are there to avoid property damage. NOTICE ► A notice signifi es additional information that assists in the handling of the appliance. SNS 45 A3... -
Page 7: Safety Instructions
NEVER look directly into the ultraviolet light from the UV lamps. ► If the UV lamps are not in use, switch them off . ► Non-users, and especially children, may not be present during the ► operation of the appliance. SNS 45 A3... - Page 8 In addition, warranty claims become void. Defective components may only be replaced with original replace- ► ment parts. Only by using these replacement parts can it be guaranteed that they comply with the safety requirements. SNS 45 A3...
- Page 9 The improper handling of chemical substances can lead to serious health damage! If swallowed, IMMEDIATELY seek medical attention! ► In cases of allergic reactions, consult a doctor immediately! ► In the event of contact with the eyes or mucous membranes, contact ► a doctor immediately! SNS 45 A3...
- Page 10 Always pull the plug itself out of the mains power socket, do not ► pull it with the power cable. In the case of a malfunction occurring or a thunderstorm, discon- ► nect the plug from the mains power socket. SNS 45 A3...
- Page 11 People who absolutely cannot tan at all, or who cannot tan with- ► out getting sunburned, when they are exposed to the sun, People who are easily sunburned when they are exposed to the sun, ► during pregnancy. ► SNS 45 A3...
- Page 12 Some medications or cosmetics increase the sensitivity to UV radiation. The unprotected eye can suff er superfi cial infl ammation and, in some ■ cases, excessive exposure may cause damage to the retina. Frequently repeated exposures can lead to cataracts. SNS 45 A3...
- Page 13 Remove cosmetics and sun care products before using the appliance. ■ If you do not, it could lead to skin irritation. NOTICE If in any doubt, consult your doctor about the possible applica- ► tions before using the appliance. SNS 45 A3...
-
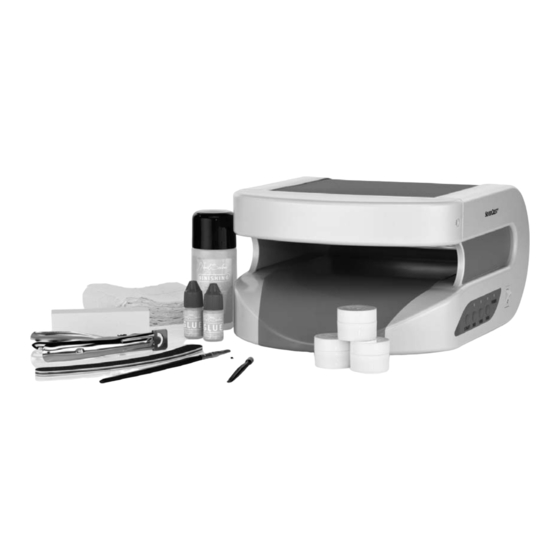
Page 14: Appliance And Accessories
(artifi cial fi ngernails) o Finishing solution (for fi nal treatment and for cleaning brushes) p Nail glue (to glue the “GLUE” nail tips on) a UV gel (for topping up nails) s French gel (for modelling “French nails”) SNS 45 A3... -
Page 15: Setting Up And Connecting To The Power Supply
Check the contents to ensure everything has been provided, and for signs of visible damage. ► If the contents are incomplete, or have been damaged due to defective packaging or transportation, contact the Service Hotline (see chapter Service). SNS 45 A3... -
Page 16: Unpacking
Do not place the appliance in a damp environment and not in an area at risk from spraywater. ■ Do not place the appliance adjacent to a radiator or a raiation heater. ■ The mains power socket must be easily accessible, so that the plug can be easily removed in an emergency. SNS 45 A3... -
Page 17: Electrical Connection
Ensure that the power cable is not over-taut or kinked. Do not let the power cable hang over edges (trip wire eff ect). Insert the plug into the mains power socket. SNS 45 A3... -
Page 18: Handling And Operation
► The UV lamps switch off automatically after the lapse of the preset time. Press the time preselect button 9, 7 or 5 and the Start button 0 once again as described above for any further treatments. SNS 45 A3... -
Page 19: Utilisation
Select a nail tip i whose curvature corresponds as closely as possible to the natural curve of your nail. Select a nail tip i which closes exactly at the edge of your natural nail and whereby the sides are parallel to your natural nail. SNS 45 A3... -
Page 20: Attaching Artifi Cial Nails
Now treat the nail surface with the sanding block r until the fi ngernail is no longer shiny. Remove the dust from fi ling with a paper cloth or cellulose pad z. Rub the nails with the fi nishing solution o so that the last remnants of dust and grease are removed. SNS 45 A3... - Page 21 Now tilt the nail tip i with gentle pressure onto the natural nail, so that po- tential air bubbles are squeezed out . NOTICE Wipe away excess nail glue p with a cellulose pad z, a cotton bud or ► a paper towel. SNS 45 A3...
- Page 22 File very carefully, because the nail tips i are held only with a nail glue p. ► ► If you are not used to long nails, cut them back a little in order to avoid knocks and the falling off of the nail tips i. SNS 45 A3...
-
Page 23: Matching A Nail Set
Model the fi rst layer of the UV Gel a very carefully, as this determines the ► future shape of the nail. Model the best possible natural nail shape. Maintain a distance of about 1 mm from the cuticle during the application. SNS 45 A3... -
Page 24: Hardening Of The Uv-Gel
Treat the thumbnail separately because, when you hold your hand in the UV unit, the UV light only shines on the side of it. Repeat the application of the UV gel a and the hardening in the UV appli- ance 1 as described above once more. SNS 45 A3... - Page 25 Even after the last hardening of the Gel layer, the nails may feel a feel sticky (“sweat-layer” or polymerization layer). Moisten a cellulose pad z with fi nishing solution o and then wipe this over the nail. SNS 45 A3...
-
Page 26: Topping Up
Use the sanding block r until the nail is no longer shiny. When done, reapply UV gel a and harden it again. NOTICE ► In this regard, see the previous chapters Application of the UV-Gel and Hardening of the UV-Gel SNS 45 A3... -
Page 27: French Nails
Then fi le the nail tips i off with the sandpaper fi le u. ► After this, apply a little nail oil or use a rich hand cream for hands and nails in order to care for your natural nails. SNS 45 A3... -
Page 28: Care
To avoid irreparable damage, ensure that no moisture can penetrate inside the UV appliance 1 when you are cleaning it. Cleaning the appliance Clean the surfaces of the UV appliance 1 only with a soft and dry cloth. SNS 45 A3... -
Page 29: Cleaning Accessories
The UV lamps may ONLY be replaced with lamps of the same type. The speci- fi cations for the precise lamp type are given in the chapter "Technical Data". Unscrew the two screws on the sides of the appliance with a cross-head screwdriver. SNS 45 A3... -
Page 30: Troubleshooting
► Repairs to electronic appliances may only be carried out by specialists who have been trained by the manufacturer. Considerable risk to the consumer and damage to the appliance can occur as a result of incompetent repairs. SNS 45 A3... -
Page 31: Malfunction Causes And Remedies
UV gel a and then harden it. A UV lamp does UV lamp defect. Replace the defective UV lamp. not glow. NOTICE ► If you cannot solve the problem with the aforementioned solutions, please contact Customer Services. SNS 45 A3... -
Page 32: Storage/Disposal
... – the European directive on electromagnetic compat- ibility 2004/108/EC, – the Low Voltage Directive 2006/95/EC, – and the RoHS Directive 2011/65/EU. The full original Declaration of Conformity is available from the importer. SNS 45 A3... -
Page 33: Technical Data
Technical data Model SNS 45 A3 Operating voltage 220 - 240 V ~ / 50 Hz Power consumption 45 W Operating temperature +5 - +45 °C Humidity (no condensation) 5 - 90 Dimensions (W x H x D): 23,1 x 29,6 x 14,3 Weight approx. -
Page 34: Service
(0,08 EUR/Min., (peak)) (0,06 EUR/Min., (off peak)) E-Mail: kompernass@lidl.ie IAN 100059 Service Cyprus Tel.: 8009 4409 E-Mail: kompernass@lidl.com.cy IAN 100059 Hotline availability: Monday to Friday 08:00 - 20:00 (CET) Importer KOMPERNASS HANDELS GMBH BURGSTRASSE 21 44867 BOCHUM GERMANY www.kompernass.com SNS 45 A3... - Page 35 SNS 45 A3...
- Page 36 Τοποθέτηση της μύτης νυχιού ..49 Εισαγωγέας ....63 Προσαρμογή της βάσης νυχιού ..52 SNS 45 A3...
-
Page 37: Εισαγωγή
Μπορεί να προκύψουν κίνδυνοι από τη συσκευή σε μη σύμφωνη με τους κανονισμούς χρήση και/ή σε άλλου είδους χρήση. ► Χρησιμοποιείτε αποκλειστικά τη συσκευή με τρόπο σύμφωνο με τους κανονισμούς. ► Τηρείτε τις περιγραφόμενες διαδικασίες σε αυτές τις οδηγίες χειρισμού. SNS 45 A3... -
Page 38: Υποδείξεις Προειδοποίησης
Στην περίπτωση που δεν μπορεί να αποφευχθεί αυτή η κατάσταση, μπορεί να συμβεί εμπράγματη ζημιά. ► Οι οδηγίες σε αυτή την υπόδειξη προειδοποίησης πρέπει να τηρούνται, ώστε να αποφεύγονται εμπράγματες ζημιές. ΥΠΟΔΕΙΞΗ ► Μία υπόδειξη χαρακτηρίζει επιπλέον πληροφορίες που διευκολύνουν το χειρισμό της συσκευής. SNS 45 A3... -
Page 39: Υποδείξεις Ασφαλείας
Ποτέ μην κοιτάτε απευθείας στο φως υπεριωδών των λυχνιών. ► Απενεργοποιείτε τις λυχνίες υπεριωδών σε περίπτωση μη χρήσης τους. ► Όσοι δεν χρησιμοποιούν τη συσκευή και κυρίως τα παιδιά δεν ► επιτρέπεται κατά τη λειτουργία της να είναι παρόντες. SNS 45 A3... - Page 40 ληλων επισκευών μπορεί να προκληθούν κίνδυνοι για το χρήστη. Επίσης ακυρώνεται η απαίτηση της εγγύησης. Τα ελαττωματικά μέρη κατασκευής επιτρέπεται να αντικαθίστανται ► μόνο από γνήσια ανταλλακτικά. Μόνο με αυτά τα ανταλλακτικά εξασφαλίζεται η εκπλήρωση των απαιτήσεων ασφάλειας. SNS 45 A3...
- Page 41 Η ακατάλληλη μεταχείριση χημικών ουσιών μπορεί να οδηγήσει σε σοβαρές βλάβες στην υγεία! Σε περίπτωση κατάποσης αναζητήστε αμέσως έναν γιατρό! ► Σε περίπτωση αλλεργικών αντιδράσεων αναζητήστε αμέσως έναν ► γιατρό! Σε περίπτωση επαφής με τα μάτια ή τη βλεννογόνο αναζητήστε ► αμέσως έναν γιατρό! SNS 45 A3...
- Page 42 Αποφεύγετε την απευθείας ηλιακή ακτινοβολία. ► Τραβάτε πάντα το καλώδιο δικτύου από την πρίζα κρατώντας ► από το βύσμα σύνδεσης, όχι από το ίδιο το καλώδιο. Σε εμφανιζόμενες βλάβες και σε περίπτωση κακοκαιρίας τραβάτε ► το βύσμα από την πρίζα. SNS 45 A3...
- Page 43 λουθούν κάποια ιατρική και φαρμακευτική αγωγή, Άτομα, τα οποία δεν μπορούν να μαυρίσουν ή όταν μαυρίζουν ► αποκτούν ηλιακό έγκαυμα όταν εκτίθενται στον ήλιο, Άτομα, τα οποία παθαίνουν εύκολα εγκαύματα, όταν εκτίθενται ► στον ήλιο, Κατά την εγκυμοσύνη. ► SNS 45 A3...
- Page 44 Η ακτινοβολία υπεριωδών μπορεί να οδηγήσει σε τραυματισμούς στα ■ μάτια και στο δέρμα, όπως για παράδειγμα σε πρόωρη γήρανση του δέρματος ή ακόμα και σε καρκίνο του δέρματος. Διαβάζετε τις οδηγίες χρήσης προσεκτικά. Ορισμένα φάρμακα ή καλλυντικά αυξάνουν την ευαισθησία έναντι της ακτινοβολίας υπεριωδών. SNS 45 A3...
- Page 45 ήλιο πριν από τη θέση σε λειτουργία της συσκευής. Αλλιώς μπορεί να εμφανιστούν ερεθισμοί στο δέρμα. ΥΠΟΔΕΙΞΗ Σε περίπτωση αμφιβολίας ζητήστε πληροφορίες πριν από τη ► χρήση της συσκευής από το γιατρό σας σχετικά με τις δυνατότητες χρήσης. SNS 45 A3...
-
Page 46: Συσκευή Και Αξεσουάρ
(για την τελική επεξεργασία και για τον καθαρι- σμό των πινέλων) p Κόλλα νυχιών (για την κόλληση των μυτών νυχιών «GLUE») a Τζελ UV (για το γέμισμα των νυχιών) s Τζελ για γαλλικό μανικιούρ (για τη διαμόρφωση του γαλλικού μανικιούρ) SNS 45 A3... -
Page 47: Τοποθέτηση Και Σύνδεση
Οδηγίες χρήσης ΥΠΟΔΕΙΞΗ ► Ελέγχετε το σύνολο παράδοσης ως προς την πληρότητα και εμφανείς φθορές. ► Σε μία ελλιπή παράδοση ή σε φθορές από ελλιπή συσκευασία ή από τη μεταφορά απευθυνθείτε στη γραμμή του σέρβις (βλέπε Κεφάλαιο Σέρβις). SNS 45 A3... -
Page 48: Αποσυσκευασία
Μην τοποθετείτε τη συσκευή σε ένα βρεγμένο περιβάλλον και όχι σε μέρη όπου εκτοξεύεται νερό. ■ Μην τοποθετείτε τη συσκευή απευθείας δίπλα σε καλοριφέρ ή σε θερμαντικό σώμα. ■ Η πρίζα πρέπει να είναι καλά προσβάσιμη έτσι ώστε το βύσμα να μπορεί να τραβηχτεί σε περίπτωση ανάγκης. SNS 45 A3... -
Page 49: Ηλεκτρική Σύνδεση
τοποθετείται επάνω σε καυτές επιφάνειες και/ή σε αιχμηρές ακμές. Προσέχετε ώστε το καλώδιο δικτύου να μην είναι τεντωμένο ή λυγισμένο. Μην αφήνετε το καλώδιο δικτύου να κρέμεται πάνω από γωνίες (κίνδυνος να σκοντάψετε). Εισάγετε το βύσμα στην πρίζα. SNS 45 A3... -
Page 50: Χειρισμός Και Λειτουργία
κτρο προεπιλογής χρόνου 9, 7 ή 5. ΥΠΟΔΕΙΞΗ ► Οι λυχνίες υπεριωδών απενεργοποιούνται αυτόματα μετά τη λήξη του προρυθμισμένου χρόνου. Πιέστε εκ νέου το πλήκτρο προεπιλογής χρόνου 9, 7 ή 5 και το πλήκτρο έναρξης 0 για κάθε περαιτέρω χρήση, όπως περιγράφεται ανωτέρω. SNS 45 A3... -
Page 51: Χρήση
Επιλέξτε μια μύτη νυχιού i, της οποίας το κύρτωμα θα αντιστοιχεί όσο περισσότερο γίνεται στο κύρτωμα του φυσικού σας νυχιού. Επιλέξτε μια μύτη νυχιού i, η οποία θα κλείνει ακριβώς στα άκρα του φυσικού νυχιού, ενώ οι πλευρές θα είναι παράλληλες προς το φυσικό σας νύχι. SNS 45 A3... -
Page 52: Τοποθέτηση Της Μύτης Νυχιού
έως ότου το νύχι δεν θα γυαλίζει πλέον. Απομακρύνετε τη σκόνη από το λιμάρισμα με ένα χαρτί κουζίνας ή μία ταινία κυτταρίνης z. Τρίψτε τα νύχια με το διάλυμα φινιρίσματος o, ώστε να απομακρυνθούν τα τελευταία υπολείμματα σκόνης και λίπους. SNS 45 A3... - Page 53 Τώρα ακουμπάτε τη μύτη νυχιού i με ελαφριά πίεση επάνω στο φυσικό νύχι, έτσι ώστε να πιέζονται προς τα έξω ενδεχόμενες φυσαλίδες αέρα. ΥΠΟΔΕΙΞΗ Σκουπίζετε την περιττή κόλλα νυχιών p με μία ταινία κυτταρίνης z, μία ► μπατονέτα ή χαρτί κουζίνας. SNS 45 A3...
- Page 54 Λιμάρετε πολύ προσεκτικά, διότι οι μύτες νυχιών i είναι στερεωμένες μόνο ► με κόλλα νυχιών p. ► Εάν δεν έχετε συνηθίσει τα μακριά νύχια, κόψτε τα προηγουμένως λίγο, ώστε να αποφύγετε χτύπημα και πέσιμο των μυτών νυχιών i. SNS 45 A3...
-
Page 55: Προσαρμογή Της Βάσης Νυχιού
Διαμορφώστε την πρώτη στρώση του τζελ UV a ιδιαίτερα προσεκτικά, ► διότι αυτή καθορίζει το μετέπειτα σχήμα του νυχιού. Διαμορφώστε ένα το δυνατόν φυσικό σχήμα νυχιού. Κατά την εφαρμογή διατηρείτε περ. 1 χιλ. απόσταση προς τα πετσάκια. SNS 45 A3... -
Page 56: Σκλήρυνση Του Τζελ Uv
Κάντε την εφαρμογή στο νύχι του αντίχειρα ξεχωριστά, διότι το φως υπερι- ωδών καλύπτει αυτό το νύχι μόνο πλευρικά, όταν τοποθετείται το χέρι στη συσκευή. Επαναλάβετε άλλη μια φορά την εφαρμογή του τζελ UV a και τη σκλήρυνση στη συσκευή υπεριωδών 1 όπως περιγράφηκε. SNS 45 A3... - Page 57 εφαρμοστεί a). Ακόμα και μετά τη σκλήρυνση της τελευταίας στρώσης τζελ, μπορεί να αισθάνεστε τα νύχια κάπως κολλώδη («Στρώση διασποράς» ή Στρώση πολυμερισμού). Υγραίνετε μία ταινία κυτταρίνης z με διάλυμα φινιρίσματος o και σκουπίζετε με αυτή τα νύχια. SNS 45 A3...
-
Page 58: Πλήρωση
Χρησιμοποιείτε το μπλοκ τροχίσματος r, έως ότου το νύχι δεν γυαλίζει πλέον. Στη συνέχεια εφαρμόστε πάλι τζελ UV a και σκληρύνετε το εκ νέου. ΥΠΟΔΕΙΞΗ ► Δείτε σχετικά το προηγούμενο Κεφάλαιο Εφαρμογή του τζελ UV, Σκλήρυνση του τζελ UV SNS 45 A3... -
Page 59: Γαλλικό Μανικιούρ
Στη συνέχεια λιμάρετε τις μύτες νυχιών i με τη χαρτόλιμα νυχιών u. ΣΥΜΒΟΥΛΗ ► Στη συνέχεια και για την περιποίηση των φυσικών νυχιών απλώστε λίγο ειδικό λάδι ή χρησιμοποιήστε μία πλούσια κρέμα χεριών για την περιποίηση των χεριών και των νυχιών. SNS 45 A3... -
Page 60: Φροντίδα
► Εξασφαλίζετε ότι κατά τον καθαρισμό δεν θα διεισδύει υγρασία στη συσκευή υπεριωδών 1, ώστε να αποφεύγετε μια ανεπανόρθωτη ζημιά της συσκευής. Καθαρισμός συσκευής Καθαρίζετε την επιφάνεια της συσκευής υπεριωδών 1 μόνο με ένα μαλακό, στεγνό πανί. SNS 45 A3... -
Page 61: Καθαρισμός Των Αξεσουάρ
λαμπτήρων υπεριωδών! ΥΠΟΔΕΙΞΗ ► Οι λαμπτήρες υπεριωδών επιτρέπεται να αντικαθίστανται μόνο μέσω λυ- χνιών του ίδιου τύπου.Μπορείτε να βρείτε τον ακριβή τύπο λαμπτήρα στο Κεφάλαιο «Τεχνικές πληροφορίες». Ξεβιδώστε τις δύο βίδες στα πλάγια της συσκευής με ένα σταυροκατσάβιδο. SNS 45 A3... -
Page 62: Διόρθωση Σφαλμάτων
Επισκευές στις ηλεκτρικές συσκευές επιτρέπεται να πραγματοποιούνται μόνο από εξειδικευμένα άτομα τα οποία έχουν εκπαιδευτεί από τον κατασκευαστή. Μέσω επισκευών μη σύμφωνων με τους κανονισμούς μπορεί να προκύψουν σημαντικοί κίνδυνοι για τον χρήστη και φθορές στη συσκευή. SNS 45 A3... -
Page 63: Αιτίες Σφαλμάτων Και Διόρθωση
ση τζελ UV a και σκληρύνετε την. με ανομοιόμορφο τρόπο. Ένας λαμπτήρας Ελαττωματικός λαμπτήρας Αντικαταστήστε τον ελαττωματικό υπεριωδών δεν υπεριωδών. λαμπτήρα υπεριωδών. ανάβει. ΥΠΟΔΕΙΞΗ ► Εάν με τα ανωτέρω αναφερόμενα βήματα δεν μπορείτε να λύσετε το πρό- βλημα, απευθυνθείτε στο τμήμα του σέρβις. SNS 45 A3... -
Page 64: Αποθήκευση/Απόρριψη
βασικές απαιτήσεις και με τις άλλες σχετικές προδιαγραφές... – της ευρωπαϊκής Οδηγίας περί Ηλεκτρομαγνητικής Συμβατότητας 2004/108/EC, – της Οδηγίας περί Χαμηλής Τάσης 2006/95/EC, – της Οδηγίας RoHS 2011/65/ΕU. Η πλήρης και γνήσια Δήλωση Συμμόρφωσης διατίθεται από τον εισαγωγέα. SNS 45 A3... -
Page 65: Τεχνικές Πληροφορίες
Τεχνικές πληροφορίες Μοντέλο SNS 45 A3 Τάση λειτουργίας 220 - 240 V ~ / 50 Hz Κατανάλωση ενέργειας 45 W Θερμοκρασία λειτουργίας +5 - +45 °C Υγρασία (καμία συμπύκνωση) 5 - 90 Διαστάσεις (Υ x Π x B) 23,1 x 29,6 x 14,3 εκ. -
Page 66: Σέρβις
Tel.: 801 5000 019 (0,03 EUR/Min.) E-Mail: kompernass@lidl.gr IAN 100059 Σέρβις Κύπρος Tel.: 8009 4409 E-Mail: kompernass@lidl.com.cy IAN 100059 Τηλεφωνικό κέντρο (Hotline): Δευτέρα έως Παρασκευή, 8:00 – 20:00 (CET) Εισαγωγέας KOMPERNASS HANDELS GMBH BURGSTRASSE 21 44867 BOCHUM GERMANY www.kompernass.com SNS 45 A3... - Page 67 SNS 45 A3...
- Page 68 Service ..... . 95 Nagelansatz anpassen ..84 Importeur ....95 SNS 45 A3...
-
Page 69: Einführung
Benutzung gilt als nicht bestimmungsgemäß. WARNUNG Gefahr durch nicht bestimmungsgemäße Verwendung! Von dem Gerät können bei nicht bestimmungsgemäßer Verwendung und/ oder andersartiger Nutzung Gefahren ausgehen. ► Das Gerät ausschließlich bestimmungsgemäß verwenden. ► Die in dieser Bedienungsanleitung beschriebenen Vorgehensweisen einhalten. SNS 45 A3... -
Page 70: Warnhinweise
Sachschaden. Falls die Situation nicht vermieden wird, kann dies zu Sachschäden führen. ► Die Anweisungen in diesem Warnhinweis befolgen, um Sachschäden zu vermeiden. HINWEIS ► Ein Hinweis kennzeichnet zusätzliche Informationen, die den Umgang mit dem Gerät erleichtern. SNS 45 A3... -
Page 71: Sicherheitshinweise
Direkter Blick in das UV-Licht der UV-Lampen im Gerät kann zu Au- genverletzungen und Minderung der Sehfähigkeit führen! Niemals direkt in das ultraviolette Licht der UV-Lampen blicken. ► UV-Lampen bei Nichtgebrauch ausschalten. ► Nicht-Anwender und insbesondere Kinder dürfen bei dem Betrieb ► des Geräts nicht anwesend sein. SNS 45 A3... - Page 72 Kundenservice durchführen. Durch unsachge- mäße Reparaturen können Gefahren für den Benutzer entstehen. Zudem erlischt der Garantieanspruch. Defekte Bauteile dürfen nur gegen Original-Ersatzteile ausge- ► tauscht werden. Nur bei diesen Teilen ist gewährleistet, dass sie die Sicherheitsanforderungen erfüllen. SNS 45 A3...
- Page 73 Der unsachgemäße Umgang mit chemischen Substanzen kann zu schweren Gesundheitsschäden führen! Bei Verschlucken sofort einen Arzt aufsuchen! ► Bei allergischen Reaktionen sofort einen Arzt aufsuchen! ► Bei Kontakt mit den Augen oder Schleimhäuten sofort einen Arzt ► aufsuchen! SNS 45 A3...
- Page 74 Das Gerät nicht in der Nähe von off enen Flammen (z.B. Kerzen) ► betreiben. Vermeiden Sie direkte Sonneneinstrahlung. ► Das Netzkabel immer am Anschlussstecker aus der Steckdose ► ziehen, nicht am Kabel selbst. Ziehen Sie bei auftretenden Störungen und bei Gewitter den ► Netzstecker aus der Steckdose. SNS 45 A3...
- Page 75 Personen, die überhaupt nicht bräunen können oder nicht bräu- ► nen können, ohne einen Sonnenbrand zu bekommen, wenn sie der Sonne ausgesetzt sind, Personen, die leicht einen Sonnenbrand bekommen, wenn sie der ► Sonne ausgesetzt sind, schwangeren Personen. ► SNS 45 A3...
- Page 76 Bestrahlung. UV-Strahlung in jungem Alter erhöht das spätere Haut- krebsrisiko. UV-Strahlung kann zu Verletzungen an Augen und Haut führen, wie ■ zum Beispiel vorzeitige Hautalterung oder sogar Hautkrebs. Lesen Sie die Bedienungsanleitung sorgfältig. Einige Medikamente oder Kosme- tika erhöhen die Sensibilität gegenüber UV-Strahlung. SNS 45 A3...
- Page 77 Jahr nicht. Entfernen Sie Kosmetik und Sonnenschutzprodukte vor der Inbretrieb- ■ nahme des Gerätes. Ansonsten kann es zu Hautirritationen führen. HINWEIS Erkundigen Sie sich im Zweifelsfall vor Benutzung des Gerätes bei ► Ihrem Arzt über die Anwendungsmöglichkeit. SNS 45 A3...
-
Page 78: Gerät Und Zubehör
Sandblatt-Feile (zum Feilen der Nägel) i Nagel-Tips (künstliche Fingernägel) o Finishing-Lösung (zur Endbehandlung und für die Pinselreinigung) p Nagelkleber (zum Aufkleben der Nagel-Tips „GLUE“) a UV-Gel (zum Auff üllen der Nägel) s French-Gel (zum Modellieren von „French-Nails“) SNS 45 A3... -
Page 79: Aufstellen Und Anschließen
Aufbewahrungstasche Bedienungsanleitung HINWEIS ► Prüfen Sie die Lieferung auf Vollständigkeit und auf sichtbare Schäden. ► Bei einer unvollständigen Lieferung oder bei Schäden infolge mangelhafter Verpackung oder durch Transport wenden Sie sich an die Service-Hotline (siehe Kapitel Service). SNS 45 A3... -
Page 80: Auspacken
Stellen Sie das Gerät nicht in einer nassen Umgebung und nicht im Spritzwas- ser-Bereich auf. ■ Stellen Sie das Gerät nicht direkt neben einem Heizkörper oder einem Heiz- strahler auf. ■ Die Steckdose muss gut zugänglich sein, so dass der Netzstecker notfalls leicht abgezogen werden kann. SNS 45 A3... -
Page 81: Elektrischer Anschluss
über heiße Flächen und/oder scharfe Kanten verlegt wird. Achten Sie darauf, dass das Netzkabel nicht straff gespannt oder geknickt wird. Lassen Sie das Netzkabel nicht über Ecken hängen (Stolperdrahteff ekt). Stecken Sie den Netzstecker in die Steckdose. SNS 45 A3... -
Page 82: Bedienung Und Betrieb
Zeitvorwahl-Taste 9, 7 oder 5. HINWEIS ► Die UV-Lampen schalten sich nach Ablauf der voreingestellten Zeit automa- tisch wieder aus. Drücken Sie die Zeitvorwahl-Taste 9, 7 oder 5 und die Start-Taste 0 für jede weitere Behandlung wie oben beschrieben erneut. SNS 45 A3... -
Page 83: Anwendung
Wählen Sie einen Nagel-Tip i, dessen Krümmung so genau wie möglich der Krümmung Ihres Naturnagels entspricht. Wählen Sie einen Nagel-Tip i, der exakt am Rand Ihres Naturnagels ab- schließt, wobei die Seiten parallel zu Ihrem Naturnagel sind. SNS 45 A3... -
Page 84: Aufsetzen Der Nagel-Tips
Behandeln Sie nun die Nageloberfl äche mit dem Schleifblock r, bis der Fingernagel nicht mehr glänzt. Entfernen Sie den Schleifstaub mit einem Papiertuch oder einer Zellette z. Reiben Sie die Nägel mit der Finishing-Lösung o ab, damit letzte Staub- und Fettreste entfernt werden. SNS 45 A3... - Page 85 Kante des Nagel-Tips i an der Kante des Naturnagels liegt. Kippen Sie den Nagel-Tip i nun mit leichtem Druck auf den Naturnagel, so dass eventuelle Lufteinschlüsse herausgedrückt werden. HINWEIS Wischen Sie überschüssigen Nagelkleber p mit einer Zellette z, einem ► Wattestäbchen oder einem Papiertuch weg. SNS 45 A3...
- Page 86 Feilen Sie sehr vorsichtig, da die Nagel-Tips i nur mit Nagelkleber p ► fi xiert sind. ► Falls Sie lange Nägel nicht gewohnt sind, schneiden Sie sie vorher etwas zu, um ein Anstoßen und Abfallen der Nagel-Tips i zu vermeiden. SNS 45 A3...
-
Page 87: Nagelansatz Anpassen
Streifenbildung verursacht. Modellieren Sie die erste Schicht des UV-Gels a besonders sorgfältig, ► da diese die spätere Form des Nagels bestimmt. Modellieren Sie eine mög- lichst natürliche Nagelform. Halten Sie beim Auftragen ca. 1 mm Abstand zur Nagelhaut. SNS 45 A3... -
Page 88: Aushärten Des Uv-Gels
Behandeln Sie den Daumennagel separat, da das UV-Licht diesen, wenn man die Hand in das UV-Gerät hält, nur seitlich triff t. Wiederholen Sie das Auftragen des UV-Gels a und das Aushärten im UV- Gerät 1 wie beschrieben noch einmal. SNS 45 A3... - Page 89 90 Sekunden (je nach Menge des aufgetragenen UV-Gels a). Auch nach dem Aushärten der letzten Gel-Schicht können sich die Nägel etwas klebrig anfühlen („Schwitzschicht“ bzw. Polymerisationsschicht). Befeuchten Sie eine Zellette z mit Finishing-Lösung o und wischen Sie damit über den Nagel. SNS 45 A3...
-
Page 90: Auff Üllen
Verwenden Sie den Schleifblock r, bis der Nagel nicht mehr glänzt. Tragen Sie danach wieder UV-Gel a auf und härten Sie dieses erneut. HINWEIS ► Siehe hierzu die vorigen Kapitel Auftragen des UV-Gels, Aushärten des UV-Gels SNS 45 A3... -
Page 91: French-Nails
Schneiden Sie zuerst die Nägel mit dem Nagelschneider q ganz zurück. Feilen Sie dann die Nagel-Tips i mit der Sandblatt-Feile u ab. TIPP ► Tragen Sie anschließend zur Pfl ege Ihrer Naturnägel etwas Nagelöl auf oder benutzen Sie eine reichhaltige Handcreme, die Hände und Nägel pfl egt. SNS 45 A3... -
Page 92: Pfl Ege
Stellen Sie sicher, dass bei der Reinigung keine Feuchtigkeit in das UV- Gerät 1 eindringt, um eine irreparable Beschädigung des Gerätes zu vermeiden. Gerät reinigen Reinigen Sie die Oberfl ächen des UV-Gerätes 1 nur mit einem weichen, trockenen Tuch. SNS 45 A3... -
Page 93: Zubehör Reinigen
UV-Lampen beginnen! HINWEIS ► Die UV-Lampen dürfen nur durch den gleichen Lampentyp ersetzt werden. Entnehmen Sie den genauen Lampentyp bitte dem Kapitel „Technische Daten“. Schrauben Sie die beiden Schrauben an den Seiten des Gerätes mit einem Kreuzschlitzschraubendreher heraus. SNS 45 A3... -
Page 94: Fehlerbehebung
Beachten Sie die folgenden Sicherheitshinweise um Gefahren und Sachschä- den zu vermeiden: ► Reparaturen an Elektrogeräten dürfen nur von Fachleuten durchgeführt werden, die vom Hersteller geschult sind. Durch unsachgemäße Reparatu- ren können erhebliche Gefahren für den Benutzer und Schäden am Gerät entstehen. SNS 45 A3... -
Page 95: Fehlerursachen Und -Behebung
Schicht UV-Gel a auf und härten Sie aufgetragen. diese aus. Eine UV-Lampe Tauschen Sie die defekte UV-Lampe UV-Lampe defekt. leuchtet nicht. aus. HINWEIS ► Wenn Sie mit den vorstehend genannten Schritten das Problem nicht lösen können, wenden Sie sich bitte an den Service. SNS 45 A3... -
Page 96: Lagerung/Entsorgung
Dieses Gerät entspricht hinsichtlich Übereinstimmung mit den grundlegenden Anforderungen und den anderen relevanten Vorschriften... – der europäischen Richtlinie für elektromagnetische Verträglichkeit 2004/108/EC, – der Niederspannungsrichtlinie 2006/95/EC, – der RoHS-Richtlinie 2011/65/EU. Die vollständige Original-Konformitätserklärung ist beim Impor- teur erhältlich. SNS 45 A3... -
Page 97: Technische Daten
Technische Daten Modell SNS 45 A3 Betriebsspannung 220 - 240 V ~ / 50 Hz Leistungsaufnahme 45 W Betriebstemperatur +5 - +45 °C Feuchtigkeit (keine Kondensation) 5 - 90 Abmessungen (H x B x T) 23,1 x 29,6 x 14,3 Gewicht ca. -
Page 98: Service
Service Schweiz Tel.: 0842 665566 (0,08 CHF/Min., Mobilfunk max. 0,40 CHF/Min.) E-Mail: kompernass@lidl.ch IAN 100059 Erreichbarkeit Hotline: Montag bis Freitag von 8:00 Uhr – 20:00 Uhr (MEZ) Importeur KOMPERNASS HANDELS GMBH BURGSTRASSE 21 44867 BOCHUM GERMANY www.kompernass.com SNS 45 A3... - Page 99 KOMPERNASS HANDELS GMBH BURGSTRASSE 21 44867 BOCHUM DEUTSCHLAND / GERMANY www.kompernass.com Last Information Update · Έκδοση των πληροφοριών Stand der Informationen: 06 / 2014 · Ident.-No.: SNS45A3-052014-2 IAN 100059...