Nokia 252 Owner's Manual
Nokia cell phone owner's manual
Hide thumbs
Also See for 252:
- Owner's manual (76 pages) ,
- Owner's manual (103 pages) ,
- Manual del usuario (113 pages)
Table of Contents
Advertisement
Quick Links
Advertisement
Table of Contents

Related Manuals for Nokia 252


Summary of Contents for Nokia 252
- Page 1 O W N E R ’ S M A N U A L N O K I A 2 5 2 R E P L A C E W I T H C O V E R...
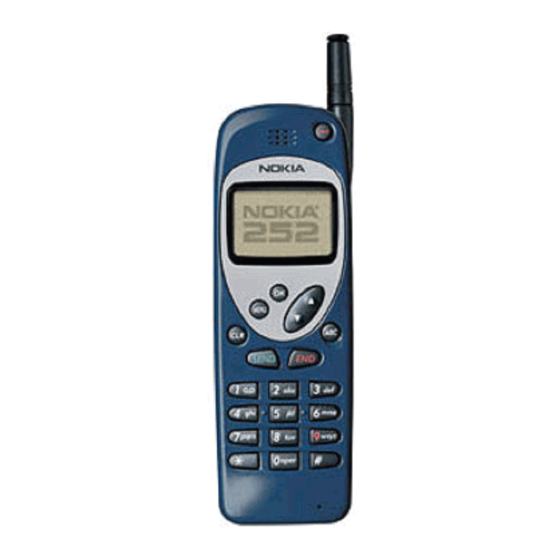
- Page 2 Retractable antenna. Extend fully during calls. Confirms and selects choices on display. Enters the menu. Deletes characters or clears display. Backs up one menu level or returns to pre- vious menu. Dials a phone number and answers a call. 0-9, , #: Used to enter numbers and characters.
-
Page 3: Table Of Contents
Contents 1. For Your Safety ....1 2. Display Indicators ....3 3. - Page 4 6. The Menu ....28 “MENU then OK” Method ....28 Shortcut Method .
-
Page 5: For Your Safety
1. For Your Safety Read these simple guidelines before using your phone. Failure to comply with these guidelines may be dangerous or illegal. For more detailed safety information, See “Im- portant Safety Information” on page 68. Road Safety Comes First Don’t use a hand-held phone while driving;... - Page 6 Qualified Service Only qualified service personnel may install or repair cellular phone equipment. Use only ap- proved accessories and batteries. FCC/Industry Canada Notice A cellular phone may cause TV or radio interference (e.g. when using a phone in close proximity to electronic re- ceiving equipment).
-
Page 7: Display Indicators
2. Display Indicators Shows which type of system the phone will use when it is roaming (see “Carrier Selection (Menu 5 2 1)” on page 49.) Blank if Home-only system is selected, or the phone is using a “preferred” network. The phone is using the Home system. - Page 8 Signal Strength Indication A cellular phone sends and receives radio signals. As with all radio equipment, the quality of radio reception depends on the strength of the radio signal in the area where you are operating your phone. The strength of the cellular signal is shown by the vertical bar on the left-hand side of the dis- play.
-
Page 9: Battery Information
3. Battery Information Your phone is powered by a rechargeable battery. Use only batteries approved by the phone manufacturer and recharge your battery only with the chargers approved by the manufacturer. See “Important Battery Information” on page 10. A new battery must be charged for a mini- mum of 12 hours before being used for the first time. -
Page 10: Charging The Battery
Charging the Battery Plug the charger into a wall outlet and connect the charger to the bottom of your phone. When charging starts, the battery segments scroll and the phone beeps once. You can use the phone during charg- ing, but charging will be reduced for the duration of the call. - Page 11 Standard Battery BKH-6 Extended NiCd 1100 mAh BKL-6 Extended Vibra NiCd 1100 mAh BMH-2 Light NiMH 550 mAh BMH-7 Extended NiMH 1400 mAh 6.5 hours BML-7 Extended Vibra NiMH 1400 mAh * Check with your service provider for availability. Talk and Standby Times Battery operation times depend greatly on how you use the batteries, as well as on the coverage of the network and network parameters set by the cellular service...
-
Page 12: Discharging The Battery
Battery BKH-6 Extended NiCd 1100 mAh BKL-6 Extended Vibra NiCd 1100 mAh BMH-2 Light NiMH 550 mAh BMH-7 Extended NiMH 1400 mAh BML-7 Extended Vibra NiMH 1400 mAh * Check with your service provider for availability. Discharging the Battery A battery lasts longer and performs better if you fully dis- charge it from time to time. - Page 13 The repetition rate of the battery-low warnings depends on the remaining battery capacity and the battery condition. The warnings are more frequent when you’re in a call. Note: If you’ve selected the Vibra Only or Silent Ringing Option, you won’t hear any warning tones. See “Ringing Options (Menu 3 1)”...
-
Page 14: Important Battery Information
The phone may remind you to discharge the battery, by presenting a series of battery-advice messages. Press W or 2. to page through the information, or press &/5 to clear the messages. Important Battery Information • Use only batteries and chargers approved by the phone manufacturer. - Page 15 • Temperature extremes affect the ability of your battery to charge: it may require cooling or warming first. • When the battery is not in use, store it uncharged in a cool, dark and dry place. • The battery is a sealed unit with no serviceable parts. Do not attempt to open the case.
-
Page 16: The Basics
4. The Basics Switching On or Off Press and hold the 3:5 key for one second. • NORMAL POSITION: Hold the phone as you would any other tele- phone with the antenna pointed up and over your shoulder. TIPS ON EFFICIENT OPERATION: Extend your antenna fully when in calls. -
Page 17: Selecting A Network
Selecting a Network Your phone operates on specific networks and sometimes it must choose which system to use. This can happen, for example, if you are roaming (i.e. you leave the area where you have signed up for service). If you want your phone to work only in certain types of net- works (for example, to take advantage of certain billing agreements between systems), you can specify this using “Carrier Selection (Menu 5 2 1)”. -
Page 18: Ending A Call
CALL NOT ALLOWED that is restricted (see “Allowed Calls (Menu 5 2 2)” on page 51), or if the phone is locked. If you receive a call when you’re trying to make a call, the incoming call comes through and the outgoing call is cancelled. -
Page 19: Adjusting The Earpiece Volume
If you have set Ringing Options to and display lights flash, the phone makes a short beep (see “Ringing Options” on page 37). You can answer a call any time, even while using Key- guard, memory or menu functions. If you don’t answer a call, the message ‘n’... -
Page 20: Last Number Redial
Last Number Redial Clear the display, then press 6(1' 6(1'. • Last 15 Dialed Calls Clear the display, press 6(1', then • repeatedly until you see the number you want. Then press 6(1' to dial it. See “Dialed Calls (Menu 2 1)” on page 33 for more information. -
Page 21: Emergency 9 Dialing
Emergency 9 Dialing The 9 Key is reserved for an Emergency Number that is programmed into your phone by your dealer. • Press and hold 9 for 2 seconds. Emergency 9 Dialing must be set On for this to work! See “Emergency 9 Dialing (Menu 3 7)”... -
Page 22: Calling Card Calls
The phone cannot be switched off when Keyguard is active. However, if the phone is ringing and Keyguard is active, you can press 3:5 to switch off the phone while it is ringing. Note: When Keyguard is activated, calls may be possible to the emergency number programmed into your phone (e.g., 911 or another official emergency number). -
Page 23: Pin Calls
then displays ‘OK’ 3) When you hear a tone or voice prompt, press 2. or 6(1'. The phone may ask you again to TONE, THEN PRESS ‘OK’ 4) If you get another tone or voice prompt, press 6(1' again. The call is then made, and the phone displays CALL and the name of the card (if you have entered one). - Page 24 2) The phone asks for your four-digit PIN Code, which is provided by your network operator. Enter your PIN code and press 2.. The phone briefly displays Making PIN Calls 1) Make the call as usual (refer to “Making a Call” on page 13).
-
Page 25: Voice Messages
Voice Messages If you subscribe to voicemail, callers will be able to leave you voice mail messages which you can recall from your voice mailbox. For more details, refer to “Network Services” on page 59. -
Page 26: The Phone Book
5. The Phone Book The Phone Book can store up to 75 phone numbers and corresponding names. It also has a “notepad” where you can store one additional number and name. The maximum number of phone book entries depends on how much information you store in each location. - Page 27 press Moves the cursor to the next space immediately. Adds a space between letters. Entering Punctuation Marks The ‘0’ key can be used to insert punctuation marks (and 0). Press 0 until you get to the punctuation mark you want: - ? ! .
-
Page 28: Saving Numbers And Names
Saving Numbers and Names Quick Save 1) Enter the area code and phone number. 2) (Optional) Press $%&, then enter the name. 3) Press 2.. When SAVE IN LOCATION? is dis- played, press 2.. The phone stores the number in the first empty memory location. - Page 29 location (‘+’ character). This allows the automatic sending of Touch Tones. For more information on using these special characters see “Automatically Sending Touch Tones” on page 56. • To enter a Pause (p), press Note that a ‘p’ appears on the display, but this is different from just keying in the letter ‘p’.
-
Page 30: Finding Numbers And Names
Making a call using the two joined locations: 1) Recall the first location and press 6(1'. This dials the phone number, but the dialing stops at the ‘+’ character. 2) When the call is established, press 0(18#6(1'. The phone will automatically send the Touch Tone string in the second location (which is displayed). -
Page 31: Using The Notepad Memory
Using the Notepad Memory Saving a number and name in the Notepad Enter the number and name, then press 2.. At • IN LOCATION? Viewing information in the Notepad • With the display clear of numbers or names, press # then name stored with the number, press $%&. -
Page 32: The Menu
6. The Menu The phone’s menus and submenus give you access to many features and ways to customize your phone. You can use the menus and submenus either with the ‘Menu then OK Method’ or the ‘Shortcut Method’. A menu list is on page 30 and instructions for using the menus follow. -
Page 33: Shortcut Method
Shortcut Method The menus and submenus are numbered, so you can ac- cess them by their number: 1) Press 0(18 to enter the menu. 2) Press the number of the menu you want (1-6) within 4 seconds. (Also, If there are submenus, press the sub- menu number within 4 seconds.) The current setting (if applicable) is displayed. -
Page 34: List Of Menu Functions
List of Menu Functions 1 Phone Book Find Name Save Name & Number Edit Name or Number Erase from Phone Book Phone Book Status 2 Call Log Dialed Calls Received Calls Missed Calls Erase all Recent Calls Call Timers 3 Phone Settings Ringing Options Ringing Volume Ringing Tone... -
Page 35: Phone Book (Menu 1)
Phone Book (Menu 1) To access Menu 1, press 0(18 then 2.. Find Name (Menu 1 1) 1) Press 0(18 then 2.. 2) You’ll see FIND NAME. 2. again. The phone prompts you to enter a name. 3) Enter the first few letters of the name, then press to scroll through stored names. - Page 36 3) Edit the name: use the &/5 key to delete characters, characters as required. 4) Edit the number: press $%&. Use the &/5 key to delete digits, use enter new digits as required. Press 2.. 5) At SAVE IN LOCATION? 2..
-
Page 37: Call Log (Menu 2)
Phone Book Status (Menu 1 5) 1) Press 0(18 then 2. then scroll to PHONE BOOK STATUS Press 2.. 2) The phone displays the percent- age of memory available. Call Log (Menu 2) To access Menu 2, press 0(18 then ;... - Page 38 See “Last Number Redial” on page 16 for shortcuts. Received Calls (Menu 2 2) The phone automatically stores the callers’ numbers of the last 15 calls you received and answered (if network sup- ports this feature, and the callers’ numbers were received from the network –...
- Page 39 Missed Calls (Menu 2 3) The phone automatically stores the callers’ numbers and names of the last 15 calls you missed (if network supports this feature, and the callers’ numbers were received from the network – refer to your service provider for more de- tails).
- Page 40 1) Press 0(18 2) Press to scroll to RECENT CALLS 3) The phone asks Press 2. to erase, or SURE? press &/5 to exit without erasing. Call Timers (Menu 2 5) 1) Press 0(18 2) Press to scroll to 3) Press to scroll through the options.
-
Page 41: Phone Settings (Menu 3)
Phone Settings (Menu 3) To access Menu 3, press 0(18, then PHONE SETTINGS Ringing Options (Menu 3 1) You can choose how you want the phone to indicate that there is an incoming call. 1) Press 0(18 then . Press 2.. TINGS 2) You’ll see RINGING OPTIONS... - Page 42 Ringing Volume (Menu 3 2) With this menu you choose the ringing volume. As you scroll through each of the 5 volume levels, the phone rings so you can hear each level. 1) Press 0(18 then . Press 2.. TINGS 2) Press to scroll to VOLUME...
- Page 43 1) Press 0(18 then . Press 2.. TINGS 2) Press to scroll to TONES and the current setting. Press 2. if you want to change 3) Press to move the pointer. Press 2. to choose the one you want, or select Off. Note: You can still send Touch Tones even when the key- pad tones are switched off.
- Page 44 Lights Off The lights are off permanently, except if Silent ringing is selected. Then they flash to indicate an incoming call. 1-Touch Dialing (Menu 3 6) This menu gives you the option of dialing memory loca- tions 1-8 by pressing and holding a single number key for 2 seconds (location 1 is recommended to be used for the Voice Mailbox Number).
- Page 45 Emergency 9 Dialing (Menu 3 7) You may dial the emergency number programmed in your phone by your dealer, by pressing and holding the 9 key, only if Menu 3 7 is set to On. 1) Press 0(18 then . Press 2.. TINGS 2) Press to scroll to...
- Page 46 Note: In order to have two different telephone numbers, you must subscribe to them through your cellular operator(s). 1) Press 0(18 then . Press 2.. TINGS 2) Press to scroll to NUMBER and the current phone number. Press 2. if you want to change it.
-
Page 47: Security Settings (Menu 4)
1) Press 0(18 then . Press 2.. TINGS 2) Press to scroll to MATIC ANSWER setting. Press 2. if you want to change it. 3) Press to move the pointer. Press 2. to choose On or Off. Automatic Redial (Menu 3 11) Sometimes the cellular network is busy and your call can’t go through. - Page 48 To access Menu 4, press 0(18, then SECURITY SETTINGS The phone asks for your security code. Enter your 5-digit security code and press 2.. Change Lock Code (Menu 4 1) The lock code is required when you want to lock your phone. See “Lock Phone (Menu 6)” on page 52. Note: The phone’s default lock code is 1234.
- Page 49 3) Press to scroll to SECURITY CODE change it. Enter a new 5-digit security code. Press 2.. 4) When the phone asks you to ver- ify your new security code, enter it again and press 5) The phone briefly displays CHANGED Restore Factory Settings (Menu 4 3) This function resets the phone’s menus to their factory...
-
Page 50: Call Settings (Menu 5)
Call Settings (Menu 5) This menu lets you store calling card information in your phone, and set up calling restrictions. To access Menu 5, press 0(18, then until you see . Press 2.. CALL SETTINGS Calling Card (Menu 5 1) With this menu you store calling card information for up to 2 cards in your phone. - Page 51 To Enter or Change Calling Card Information 1) Press 0(18 then Press 2.. 2) You’ll see CALLING CARD the currently selected card. Press 2. to change it. 3) Use to move the pointer to None Card A press 2.. When the phone asks for your security code, enter it and press 2..
- Page 52 5) The phone prompts you to SELECT DIALING . Press 2.. SEQUENCE Press to scroll through the 4 dialing sequence options, and press 2. to choose one: Access No. + Phone No. + Card No. Use for cards that require you to enter a 1-800 access number first, then require you to enter a phone number after you hear a tone, then a card number after you hear another tone.
- Page 53 Access No: enter the information then press 2.. The phone briefly displays uses the card for which you just entered information. Calling Options (Menu 5 2) This menu lets you set your phone so that it can only make the types of calls you specify, or only in certain types of networks.
- Page 54 1) Press 0(18 then Press 2.. Press W until you see . Press 2.. TIONS 2) Press to scroll to SELECTION ting. Press 2. if you want to change it. 3) The phone asks for your security code. Enter it and press 2.. 4) Press to move the pointer to the option you want (described...
- Page 55 Home Only - The phone only looks for service on the Home system. It won’t choose any other network, so if you’re out of your Home system, you won’t have service NO SERVICE The table below shows how the phone’s display changes according to which network the phone uses.
-
Page 56: Lock Phone (Menu 6)
4) Press to move the pointer to the option you want (described below). Press 2. to select it. Allow all - There are no restric- tions on outgoing calls. Nat’l only - You can only make calls within your own country;... -
Page 57: In-Call Menu
2) The phone asks you to lock code 3) Enter the lock code and press 2.. The phone displays LOCKED LOCKED remains on the display to remind you that the phone is locked. To unlock the phone, press 0(18 and the phone will prompt you for the lock code. -
Page 58: Reminder Message
While the phone is alerting you of an incoming call (and there are no other calls active or held), the In-Call menu is not available until you answer the call. Similarly, when you press 6(1' to initiate a call, until the call is connected, there is no In-Call Menu. -
Page 59: Data And Touch Tones
7. Data and Touch Tones Data Mode Data Mode can be used when your phone is connected, via a suitable data card and modem, to a laptop or personal computer. You may then use your computer to make and receive calls, and to send and receive data messages such as emails. -
Page 60: Sending Touch Tones
To de-select Data Mode Disconnect the data cable ( displays). To operate your modem and data card Refer to the documentation supplied with these items. Sending Touch Tones Your phone is a ‘Touch Tone’ phone. Touch Tones are the sounds your phone makes when you press the keys. Touch Tones can be used for many automated phone ser- vices such as checking your bank balance and using voice mailbox options. - Page 61 See “Special Characters in Stored Numbers” on page 24 for details on storing pause and wait characters. The following is an example of a number you could store in your phone: This number contains a phone number (18005551212), a wait character, an access number (‘1234’), a wait charac- ter, and a password (‘3434’) - 18005551212w1234w3434.
-
Page 62: Using The Flash Function
Pressing 0(18#6(1' sends a displayed number as a Touch Tone. To end the call, press#(1' after the phone sends the Touch Tones and has returned to the normal call mode. Using the Flash Function Your cellular system may offer a flash function service. This system service lets you accept or make a second call when you already have a call in progress (e.g. -
Page 63: Network Services
8. Network Services Availability of Network Services To be able to use any of the network services, you will need to subscribe to the particular service. The service may not be available in all cellular service provider net- works. Please contact your local cellular service provider for further information. -
Page 64: Call Waiting
The number will be stored in the Received Calls list or the Missed Calls list, depending on whether you answer the call or not. Call Waiting Call Waiting allows you to be informed of a incoming call while you already have a call in progress. When you have a call in progress and a third party calls you, the phone can display the caller’s phone number or... -
Page 65: Voicemail Message Waiting
Note: If the last seven digits of an incoming caller’s number match the last seven digits of a number stored in the Phone Book, the phone displays the stored number/name even if the area code or other dialing prefix is different. If you don’t answer the incoming call, after approximately 20 seconds the call alert indications will stop and the caller’s number (if available) will be added to the Missed... - Page 66 Give the 4 key a long press to quick-dial your voice- • mail access number (if it is stored in phone book location 1; see Note below). • Enter your voicemail access number, then press 6(1'. The service may offer voice guidance. You may need to press keys on the phone keypad to access features.
-
Page 67: Accessories
9. Accessories An extensive range of accessories is available for your phone. You can select the accessories that best suit your specific communication needs. For availability, please check with your local dealer. A few practical rules for accessory operation: • Keep the accessories out of small children's reach. - Page 68 Batteries Several batteries are available for your phone: • BKH-6 Extended NiCd 1100 mAh • BKL-6 Extended Vibra NiCd 1100 mAh • BMH-2 Light NiMH 550 mAh) • BMH-7* Extended NiMH 1400 mAh (looks same as BKH-6) • BML-7* Extended Vibra NiMH 1400 mAh (looks same as BKL-6) * Check with your service provider for availability.
- Page 69 Calls can be made during charging, but charging will stop for the duration of the call and the battery bar scrolling stops. Note: If the battery is completely empty, you cannot use the phone until it has enough charge to operate. The Travel Charger is available for different voltage levels and can also be used with the CGH-10 Compact Desktop Charging Stand.
- Page 70 LCH-9 Rapid Cigarette Lighter Charger The multivoltage Rapid Ciga- rette Lighter Charger ensures that your phone is always ready for use wherever you travel. The small charger's functional design fits well with most car lighters and interiors. Charging Times are the same as for the Rapid Travel Charger ACP-9U (see “Charging Times”...
- Page 71 charging. Check the charging status of the phone battery on the phone display. When the phone is charging, no lights are displayed on the stand. When charging is complete, the stand’s indicator light blinks. Compatible with all battery options, the Compact Desktop Charging Stand can be used with the Standard Travel Charger ACP-7U or the Rapid Travel...
-
Page 72: Reference Information
10. Reference Information Important Safety Information Traffic Safety Do not use a hand-held phone while driving a vehicle. If using a hand-held phone, park the vehicle before conversing. Always secure the phone in its holder; do not place the phone on the passenger seat or where it can break loose in a collision or sud- den stop. - Page 73 • Should always keep the phone more than 6 inches (20 cm) from their pacemaker when the phone is switched on; • Should not carry the phone in a breast pocket; • Should use the ear opposite the pacemaker to minimize the potential for interference.
- Page 74 Potentially Explosive Atmospheres Switch off your phone when in any area with a potentially explosive atmosphere and obey all signs and instructions. Sparks in such areas could cause an explosion or fire resulting in bodily injury or even death. Users are advised to switch off the phone while at a refueling point (service station).
-
Page 75: Emergency Calls
Emergency Calls IMPORTANT! This phone, like any cellular phone, operates by using radio sig- nals, cellular and landline networks, as well as user- programmed functions which cannot guarantee connection in all conditions. Therefore, you should never rely solely upon any cellular phone for essential communications (e.g. - Page 76 In August, 1996, the Federal Communications Commission (FCC) adopted RF exposure guidelines with safety levels for handheld wireless phones. Those guidelines are consistent with safety stan- dards previously set by both U.S. and international standards bodies: ANSI C95.1 (1992)*, NCRP Report 86 (1986)*, ICNIRP (1996)*. Those standards were based on comprehensive and periodic eval- uations of the relevant scientific literature.
-
Page 77: Care And Maintenance
Care and Maintenance Your phone is a product of superior design and craftsman- ship and should be treated with care. The suggestions below will help you to fulfill any warranty obligations and al- low you to enjoy this product for many years. When using your phone, battery, charger, OR any accessory: •... -
Page 78: Troubleshooting
11. Troubleshooting Note: With a new, completely discharged battery, the phone may take up to 45 minutes to show that charging is in progress. If the power does not come on or stay • Make sure the battery is properly installed and charged. -
Page 79: Technical Information
Tel: 1-888-NOKIA2U (1-888-665-4228) Part No. 9351765 NOKIA and the NOKIA logo are registered trademarks of Nokia Corporation. The information contained in this User Guide was written for Nokia phone NHA-3NA. The right to make changes and improvements to any of the products described in this guide without prior notice is reserved. - Page 80 (5) months from the date of wholesale shipment from NOKIA, whichever is sooner. During the warranty period, NOKIA will, at its option, repair or replace the defective product free of charge. However, if NOKIA determines that the warranty conditions cannot be applied, the purchaser will be billed for the repair and shipping.
-
Page 81: Warranty
4) This warranty does not cover defects or damages caused by a product which is not approved by NOKIA to be connected to the cellular telephone. NOKIA will not be liable for incidental or consequential damages resulting from the use of such not-approved device;... - Page 82 NOKIA PRODUCTS LIMITED 575 Westney Road South Ajax, Ontario L1S 4N7 For products being returned to NOKIA or its authorized ser- vice centres, the retail dealer shall prepay shipping charges, taxes, duties, insurance. NOKIA assumes no risk for damage in shipping.
- Page 83 NOTES...