Table of Contents
Advertisement
Quick Links
Advertisement
Table of Contents

Related Manuals for Bosch HCE8584.1A


Summary of Contents for Bosch HCE8584.1A
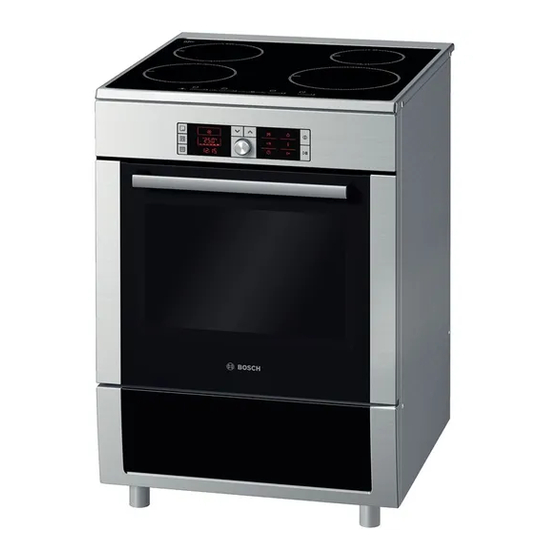
- Page 1 Free standing cooker HCE8584.1A [en] Instruction manual...
-
Page 3: Table Of Contents
Starting the memory ................ 19 Sabbath mode................19 Additional information on products, accessories, replacement Starting Sabbath mode..............19 parts and services can be found at www.bosch-home.com and in the online shop www.bosch-eshop.com Childproof lock .................19 Basic settings ................20 Changing the basic settings ............20... -
Page 4: Important Safety Information
: Important safety information Read these instructions carefully. Only then element and catch fire. Do not place will you be able to operate your appliance greaseproof paper loosely over safely and correctly. Retain the instruction accessories during preheating. Always manual for future use or for subsequent weight down the greaseproof paper with a owners. - Page 5 During operation, the surfaces of the bottom of the water-filled pot. Only use ■ appliance become hot. Do not touch the heat-resistant cookware. surfaces when they are hot. Keep children Saucepans may suddenly jump due to Risk of injury! ■ away from the appliance.
-
Page 6: Causes Of Damage
Cracks or fractures in the glass ceramic Risk of burns! ■ may cause electric shocks. Switch off the The cooking compartment will become ■ circuit breaker in the fuse box. Contact the very hot during the Self-cleaning cycle. after-sales service. Never open the appliance door or move the locking latch by hand. -
Page 7: Damage To The Plinth Drawer
appliance door. Always insert the accessories into the Damage to the plinth drawer cooking compartment as far as they will go. Caution! Carrying the appliance: do not carry or hold the appliance by ■ Do not place hot objects in the plinth drawer. It could be the door handle. -
Page 8: The Hob
The hob Control panel Symbol Button function The hotplates are set using sensors. These are located under Switches the oven light on and off the symbols. To make the setting, touch the corresponding symbol. Press briefly = calls up the temperature °... -
Page 9: Cooking Compartment
Cooking compartment Cooling fan The cooling fan switches on and off as required. The hot air The oven light is located in the cooking compartment. A cooling escapes above the door. Caution: do not cover the ventilation fan protects the oven from overheating. slots. -
Page 10: Optional Accessories
Optional accessories for ordering these online varies from country to country. Please see the sales brochures for more details. You can purchase optional accessories from the after-sales Not all optional accessories are suitable for every appliance. service or specialist retailers. You will find a comprehensive When purchasing, please always quote the exact designation range of products for your oven in our brochures and on the (E-no.) of your appliance. -
Page 11: Before Using The Appliance For The First Time
Before using the appliance for the first time This section tells you everything you need to do before using Note: You can read how to change the time in the Time-setting the appliance for the first time. options section. Set the clock ■... -
Page 12: Setting The Hob
Setting the hob This section familiarises you with how to make settings on your Touch the symbol again within 10 seconds. hob. The table shows heat settings and cooking times for The default value appears: various meals. , heat setting Š... -
Page 13: Powerboost
Ongoing cooking Ongoing cooking setting time in minutes Boiling, steaming, braising Rice (with double the quantity of water) 15-30 Rice pudding 25-35 Unpeeled boiled potatoes 25-30 Boiled potatoes 15-25 Pasta, noodles 6-7* 6-10 Stew, soups 15-60 Vegetables 10-20 Frozen vegetables 7-20 Cooking in pressure cooker Braising... -
Page 14: Timer
Timer Displaying the cooking time for several hotplates: Touch the symbol repeatedly until lights up brightly over You can use the timer in two different ways: the required heat setting display. The remaining cooking time for this hotplate is displayed. for automatic hotplate switch-off. -
Page 15: Switching The Oven On And Off
Display Function Options Power management function = 1000 W minimum setting ™ˆ ‚ Limits the total power of the hob. There are 18 levels. = 1500-9000 W ‚ Š Moving down a level decreases the power of the hob by = 9500 W maximum setting* ‹... -
Page 16: Setting The Type Of Heating And Temperature
Press the button. Type of heating and tem- Application Appliance operation begins. The symbol lights up in the perature range display. Hot air grilling For roasting meat, poultry and whole fish. The grill element and 30-300 °C the fan switch on and off alter- nately. -
Page 17: Time-Setting Options
If a cooking time has been set, this runs independently of Setting rapid heating ■ rapid heating and counts down immediately when operation Press the button to activate rapid heating. The symbol is started. appears next to the temperature you have set. The temperature indicator bars start filling in. -
Page 18: Setting A Later End Time
Confirm by pressing the button. Cancelling the cooking time Press the button to open the menu. Using the button, The oven is in [ ] standby. The end time is shown in the clock switch to the [ ] cooking time and use the rotary selector to display. -
Page 19: Memory
Memory You can save the settings for a dish in the memory and call it Saving another setting up again at any time. Enter and save the new setting. The old settings are The memory is useful for if you frequently prepare a specific overwritten. -
Page 20: Basic Settings
Basic settings Your appliance has various basic settings, which you can Note: In the table, you will find all the basic settings and the adjust to suit your needs at any time. associated options for changing them. Only the basic settings that correspond to the features of your specific appliance are displayed. -
Page 21: Automatic Switch-Off
You can now change other basic settings, as described in Cancelling points 2 to 4. Press the button. The changes are not applied. Press and hold the button until the current time appears. ° This takes about four seconds. All changes are saved. Automatic switch-off Your oven has an automatic switch-off function. -
Page 22: Setting The Cleaning Level
Setting the cleaning level Cancelling the setting Switch off the oven with . Do not open the oven door until Press the button. symbol disappears. Cleaning level 3 is suggested. You can start the self-cleaning immediately by pressing the button. Adjusting the cleaning level If you wish to change the cleaning level: Once cleaning starts, the cleaning level can no longer be... -
Page 23: Detaching And Refitting The Rails
Detaching and attaching the oven door Area Cleaning agents For cleaning purposes and to remove the door panels, you can Cooking compart- Hot soapy water or a vinegar solution: detach the oven door. ment Clean with a dish cloth. The oven door hinges each have a locking lever. When the If there are heavy deposits of dirt, use a locking levers are closed (figure A), the oven door is secured in stainless steel scouring pad or oven... -
Page 24: Removing The Door Cover
Fold back both locking levers (figure C). Close the oven Lift the top panel up and pull it out and remove the two small door. seals (fig. B). Unscrew the retaining clips on the right and left. Lift the panel Risk of injury! and remove the clips from the panel (fig. -
Page 25: Troubleshooting
Stick the retaining clips onto the right and left-hand side of Insert the two small seals on the left and right of the panel the panel, aligning them so that the retaining carriers are over again (fig. F). the screw holes, and then screw into place (fig. C). Hook the seal in to the bottom of the panel again (fig. -
Page 26: Hob
Unscrew the bulb and replace it with one of the same type (Fig. B). Problem Possible cause Remedy/information The appli- The circuit Look in the fuse box and ance does breaker is defec- check that the circuit breaker not work. tive. -
Page 27: After-Sales Service
After-sales service Our after-sales service is there for you if your appliance needs Please note that there will be a fee for a visit by a service to be repaired. We will always find the right solution in order to technician in the event of a malfunction, even during the avoid unnecessary visits from a service technician. -
Page 28: Saving Energy With Your Oven
Accessories Level Temperature Cooking time Dishes using Hot air eco ‘ ’ in °C in minutes Bread rolls, rye flour Baking tray 200-220 20-30 Bakes Potato gratin Ovenproof dish 160-180 60-80 Lasagne Ovenproof dish 180-200 40-50 Frozen products Pizza, thin base Universal pan 190-210 15-25... -
Page 29: Preparing The Dish
Season the meat. Season frozen meat in the same way as fresh Suitable cookware meat. We recommend heat-resistant cookware (up to 300 °C) made from glass or glass ceramic. Roasting dishes made from Many dishes require the addition of liquid. Pour enough liquid stainless steel are not ideal. - Page 30 Programmes Programme num- Weight range in kg Add liquid Weight setting Leg, fresh, boned, well done 0.5-2.5 A little Weight of meat Leg, fresh, boned, medium 0.5-2.5 Weight of meat Leg, fresh, on the bone, well done 0.5-2.5 A little Weight of meat Leg, frozen, boned, well-done P16*...
-
Page 31: Selecting And Setting A Programme
Set the total weight of the meat loaf. Meat loaf Use fresh minced meat. The recipe can be improved by adding diced vegetables or cheese. Programmes Programme num- Weight range in kg Add liquid Weight setting Meat loaf Made from fresh beef 0.3-3.0 Total weight Made from fresh lamb... -
Page 32: Tips For The Automatic Programmes
The programme has ended Pausing operation A signal sounds. The oven stops heating. You can cancel the Press the button briefly. The oven is paused. Press the signal earlier by pressing the button. button again to continue operation. Changing the programme duration Cancelling the programme The duration of the programme cannot be changed. - Page 33 Baking tins Tables It is best to use dark-coloured metal baking tins. The tables show the ideal type of heating for the various cakes and pastries. The temperature and baking time depend on the Baking times are increased when light-coloured baking tins amount and composition of the mixture.
- Page 34 Cakes on trays Accessories Level Type of Temperature Cooking time heating in °C in minutes Tarte flambée (preheat) universal pan 280-300 10-12 Börek Universal pan 180-200 40-50 Small baked items Accessories Level Type of Temperature Cooking time heating in °C in minutes Biscuits baking tray...
-
Page 35: Baking Tips
Baking tips You wish to bake according to your own Use similar items in the baking tables as a guide. recipe. How to establish whether sponge cake Approximately 10 minutes before the end of the baking time specified in the recipe, stick is baked through. - Page 36 After cooking, wrap sirloin in aluminium foil and leave it to rest Meat for 10 minutes in the oven. Turn pieces of meat halfway through the cooking time. For roast pork with a rind, score the rind in a crossways pattern, When the roast is ready, turn off the oven and allow it to rest for then lay the roast in the dish with the rind at the bottom.
- Page 37 Meat Weight Accessories and Level Type of Temperature Cooking time ovenware heating in °C, grill set- in minutes ting Sausages wire rack + univer- sal pan Turn roasts, such as rolled turkey joint or turkey breast, halfway Poultry through the cooking time. Turn poultry portions after of the The weights indicated in the table refer to oven-ready poultry time.
-
Page 38: Tips For Roasting And Grilling
Tips for roasting and grilling The table does not contain information Select the next lowest weight from the instructions and extend the time. for the weight of the joint. How to tell when the roast is ready. Use a meat thermometer (available from specialist shops) or carry out a “spoon test”. Press down on the roast with a spoon. -
Page 39: Tips For Slow Cooking
Dish Weight Level Type of Temperature Searing time Slow cooking heating in °C in minutes time in hours Lamb Lamb saddle fillet, whole approx. 200 g 1½-2 * For crispy skin, briefly fry the duck breast in a frying pan after slow cooking. Tips for slow cooking Slow-cooked meat is not as hot as con- So that the roasted meat does not cool so quickly, warm the plates and serve the gravy... -
Page 40: Special Dishes
Dish Accessories Level Type of Temperature Cooking time heating in °C in minutes Chips universal pan 190-210 20-30 universal pan + baking 180-200 30-40 tray Croquettes universal pan 190-210 20-25 Rösti, stuffed potato pockets universal pan 200-220 15-25 Baked items, frozen Bread rolls, baguette universal pan 180-200... -
Page 41: Drying
Drying Line the universal pan and the wire rack with greaseproof or parchment paper. With 3D hot air, you can dry foods brilliantly. Turn very juicy fruit or vegetables several times. Use unblemished fruit and vegetables only and wash them Remove fruit and vegetables from the paper as soon as they thoroughly. -
Page 42: Acrylamide In Foodstuffs
Acrylamide in foodstuffs Acrylamide is mainly produced in grain and potato products toast, bread rolls, bread or fine baked goods (biscuits, prepared at high temperatures, such as potato crisps, chips, gingerbread, cookies). Tips for keeping acrylamide to a minimum when preparing food Keep cooking times to a minimum. -
Page 43: Grilling
Dish Accessories and tins Level Type of Temperature Cooking time heating in °C in minutes Hot water sponge cake Springform cake tin on the 160-180 30-40 ‘ ’ wire rack German apple pie Wire rack+ 2 springform 180-200 70-90 cake tins, dia. 20 cm 2 wire racks + 2 spring- 170-190 70-90... - Page 44 Robert Bosch Hausgeräte GmbH Carl-Wery-Straße 34 81739 München Germany www.bosch-home.com *9000796717* 920724 9000796717...