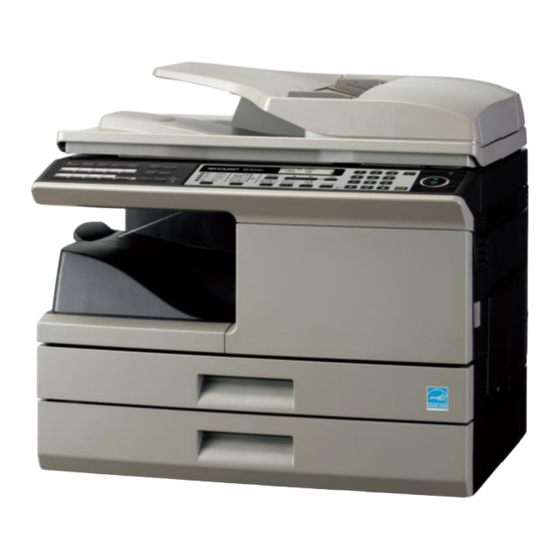
Sharp MX-B201D Technical Handy Manual
Hide thumbs
Also See for MX-B201D:
- Operation manual (117 pages) ,
- Brochure & specs (4 pages) ,
- Start manual (2 pages)

Related Manuals for Sharp MX-B201D


Summary of Contents for Sharp MX-B201D
-
Page 1: Table Of Contents
MX-B201D Technical Handy Guide JULY 2015 CONTENT Product Specification MX-NB11 & MX-FX12 Upgrade Product Options Firmware & Print Driver Revision Initial Setup Test Simulation Updated Maintenance & Consumables Trouble Codes Interface Functionality User Program Operating System Support Repair Hints Updated... -
Page 2: Product Specification
PRODUCT SPECIFICATION SHARP MX-B201D General Specification Original paper size: Max. A4 Printed paper size: Max. A4 – Min. A6 Standard paper capacity: 300 sheets (250 sheets with 50 sheet bypass) Maximum paper capacity: 550 sheets (2 x 250 sheets + 50 sheet bypass) - Page 3 Duplex: Not supported via network connection – USB only (Twain) Destination: Desktop (Sharpdesk), FTP, E-Mail, USB Memory Device, Bundled Utility Software: Sharp Status monitor, Sharpdesk 3.3 (with NST - 3 licenses) Facsimile Requirement: Opt: MX-FX12 & MX-NB11 Communication / Speed: Super G3 / Max.
-
Page 4: Product Options
PRODUCT OPTIONS SHARP MX-RP13 Document Feeder (RSPF MX-PK10 Postscript 3 Expansion MX-USX1/5, MX-US10/50/A0 Sharpdesk v3.3 License Kit(s) MX-NB11 MX-B201D Network Expansion Kit. MX-FX12 MX-CS10 Fax Expansion Kit. 1 x 250 sheet Cassette Machine Options Model Description Comment MX-RP13 Document Feeder (RSPF) - Page 5 INITIAL SETUP SHARP DEVELOPER INSTALLATION Sim 25-01 Developer Cycle/Stir (Once) Toner Cartridge must be installed before execution. PRODUCT ACTIVATION & FIRMWARE UPGRADE Activation of Optional Product(s). Sim 22-14 Check Firmware version(s):- Upgrade to latest version. INITIAL SETUP Sim 21-01 Maintenance Cycle Setting:- Set to 4 = 25K.
- Page 6 INITIAL SETUP SHARP COPY IMAGE QUALITY (Cont’d) Sim 53-08 SPF Scanning Position Adjust [MX-RP13]:- AE Lamp = Automatic Adjust. Text Lamp = Manual Adjust. Sim 53-06 SPF Lead Edge Adjust [MX-RP13]: PERIPHERAL / OPTION CONFIGURATION FAX OPTION – MX-FX12 Sim 66-01...
-
Page 7: Maintenance & Consumables
MAINTENANCE & CONSUMABLES SHARP The MX-B201D consumable system is SRU – Service Replaceable Units. The toner unit is supplied as a cartridge that the customer can change, and the technician changes the Drum and Developer. CONSUMABLES MXB201D Product Code Description Approx. - Page 8 MAINTENANCE & CONSUMABLES SHARP Maintenance Schedule: : Clean Replace Section Parts 100K 125K Developer Developing DV blade DV side seal (F/R) ...
-
Page 9: Interface Functionality
Scan to System I/F Network SPLC PCL6 Scan Scan Memory MX-B201D Standard Machine USB 2.0 MX-B201D with optional MX-NB11 & MX-FX12 USB 2.0 10/100Base Note: For PS3 Support, the MX-PK10 is required. - Page 10 OPERATING SYSTEM SUPPORT SHARP WINDOWS OS WINDOWS SERVER OS APPLE OSX MX-B201D 8, 8.1 7, Vista 2008(R2) 2012 2012R2 10.4 to 10.10.x 10.9.x 32/64 32/64 32/64 32/64 PRINTER DRIVER: SPLC [GDI] WHQL WHQL ...
-
Page 11: Product Key Registration
Postscript function within the device when the MX-NB11 is installed. For MX-B201D, the MX-PK10 Postscript Option is registered against the Machine Serial Number. Procedure: 1. Make a note of the Machine Serial Number upon which the MX-PK10 is to be installed. - Page 12 5. Register the MX-PK10 by completing the following Web form:- Caution: For MX-B201D, the MX-PK10 is registered against the Machine Serial Number, which must be entered in the Serial Number of Engine Field – (Do not enter the MX-NB10 Serial Number).
- Page 13 PRODUCT KEY REGISTRATION SHARP 8. From the drop down menu, select Postscript and enter the MX-PK10 Product Key within the Product Key field. Click Submit:- 9. Power cycle the copier. 10. To confirm the MX-PK10 is activated, re-enter the IP address of the MX-NB11 into the Web Browser and click Device Configuration.
-
Page 14: Usb Driver Installation (Firmware)
SHARP General: In preparation for downloading the new firmware from a PC to MX-B201D series, it is necessary to install a software driver on the PC to allow the transfer of the firmware via USB. Once the driver has been installed, it will then be possible to connect to the MX-B201D using the Integrated Maintenance (Download) program. - Page 15 USB DRIVER INSTALLATION [FIRMWARE] SHARP 3. Select Troubleshoot from the Choose an option screen, then Advanced Options:- 4. From the Advanced Options menu, select Startup Settings, then Restart from the Windows Startup Settings menu:- 5. Select 7) Disable driver signature enforcement by pressing the number 7 key on your keyboard.
- Page 16 The following procedure describes the USB driver installation on Windows 8.1 (x64). Administrative privileges will be required:- 1. Power on the MX-B201D and put the copier into Download Mode by executing Simulation 49-01. 2. Connect an “A to B” type USB cable between the PC and USB port (as shown below):- 1.
- Page 17 USB DRIVER INSTALLATION [FIRMWARE] SHARP 5. Right click DOWNLOAD and select Update Driver Software:- 6. Select Browse my computer for driver software and navigate to the folder/location that contains the correct USB driver for the Operating System being used:- Windows XP 32bit OS: 2kXp folder Windows Vista/7/8/8.1 32bit OS:...
- Page 18 USB DRIVER INSTALLATION [FIRMWARE] SHARP 7. Click Next. If Windows cannot verify the driver publisher, the following message will appear. Select Install this driver software anyway:-...
- Page 19 USB DRIVER INSTALLATION [FIRMWARE] SHARP 8. The DOWNLOAD driver will now be installed:- 9. When the DOWNLOAD driver has been installed successfully, click Close:- 10. Once the DOWNLOAD driver has been successfully installed, it will be identified as Integration Maintenance Program Version 4.01 Generic USB Driver under Universal Serial Bus controllers within Device Manager (as shown):- USB Driver Installation is Complete –...
-
Page 20: Firmware Upgrade
Procedure: 1. Presuming the DOWNLOAD USB driver (for the Maintenance Tool) is already installed on the PC, power on the MX-B201D and put the copier into Download Mode by executing Simulation 49-01. 2. Connect an “A to B” type USB cable between the PC and USB port as indicated below:- 3. - Page 21 FIRMWARE UPGRADE SHARP 4. Expand the Simulation Command List and double click DWL Data Area Download from within the Special (MCU) menu:- 5. Browse to the location of the updated firmware (*.dwl). Click Open to commence the firmware download:- 6. Firmware download will now commence:-...
- Page 22 Do NOT power off the copier or remove the USB cable before Download Complete is indicated on the copier panel. 9. Power on the machine. To check the firmware has updated successfully, execute Simulation 22-14. MX-B201D Firmware Upgrade is Complete.
-
Page 23: Mx-Nb11 & Mx-Fx12 Upgrade
As the same filename is used for both MX-NB11 & MX-FX12 upgrades, only 1 (*.spf) file can be copied/located on the USB root directory, prior to performing a firmware upgrade. 3. Power ON the MX-B201D. 4. Execute Simulation 49-02 (Network Expansion Firmware Download mode) - Page 24 MX-NB11 & MX-FX12 FIRMWARE UPGRADE SHARP 5. The ANB DOWNLOAD MODE (and version) should now be displayed:- ANB DOWNLOAD MODE ANB PROG: 02.00.00 6. Insert the USB memory device containing the MX-NB11 or MX-FX12 firmware into the USB Device Port on the MX-NB11:- 7.
- Page 25 DOWNLOAD MODE DOWNLOAD COMPLETE! 9. Power OFF the MX-B201D and remove the USB memory device from the machine, before powering back ON. Note: When powering ON for the first time after a firmware upgrade, the MX-NB11 may take up to 20 seconds to initialise, before network connectivity is available.
-
Page 26: Firmware & Print Driver Revision
(For Standard M/C only) Button Manager Z ** 3.01.009.005.018 (When MX-NB11 is installed) Note: ** Not supported on Windows Sever 2003 / 2008(R2) / 2012(R2) For the latest Firmware and Print Driver version(s), please refer to the SHARP Support Website. -
Page 27: Test Simulation
TEST SIMULATION SHARP The following pages contain information regarding test simulations. For a detailed description for each test simulation, please refer to the MX-B201D Service Manual. Entry Code: Scanner Self Test Toner Motor Operation & Test Scanner operations test Toner motor operation check... - Page 28 TEST SIMULATION SHARP Data Counter & Clear Copy & Image Density Adjustment Copy counter clear FAX mode density adjustment (fine) Printer counter clear FAX mode density adjustment (super fine) Fax counter clear Image contrast adjustment (300 dpi) Scanner counter clear...
- Page 29 TEST SIMULATION SHARP Self Test Print Self print test Fax Control Settings & Adjustments FAX soft switch setting FAX soft switch initialising FAX pwb memory check Signal send mode (max value) Signal send mode (soft SW set value) Image memory content clear...
-
Page 30: Trouble Codes
TROUBLE CODES SHARP Machine configuration error Heat roller low temperature (Discrepancy with ANB/FAX data) Scanner feed trouble. Network PWB communication trouble Network PWB command time out error Network PWB communication interface Scanner return trouble. error. Network PWB communication interface error (Parity). -
Page 31: User Program
USER PROGRAM SHARP User Program Entry 1. Press the [MENU] key and then press the [ENTER] key. For Printer mode, press the [MENU] key only. 2. Press the [<] key [v] or [>] key [^] to select the item that you wish to configure in the USER PROGRAM, then press the [ENTER] key. - Page 32 USER PROGRAM SHARP Audible Signals The machine sounds three different types of beep signals: a key entry beep that sounds when a valid key is pressed, an invalid key beep that sounds when an invalid key is pressed, and a base setting beep that sounds when a setting is the same as the base setting (base settings are explained below).
- Page 33 USER PROGRAM SHARP COPY MODE (Cont’d) Program Program Name Setting Codes Description Number Use this setting to select the layout pattern when LAYOUT IN 1: Pattern 1 two original pages are copied onto a single sheet of 2IN1 2: Pattern 2 paper.
- Page 34 USER PROGRAM SHARP COPY MODE (Cont’d) Program Program Name Setting Codes Description Number SOUND AT 1: ON Use this to sound a beep when a base setting is DEFAULT 2: OFF selected. This mode reduces toner usage by about 10% when...
- Page 35 USER PROGRAM SHARP PRINT MODE Program Program Name Setting Codes Description Number When this function is enabled, printing in printer mode will automatically continue using a different FORCED 1: ON size of paper if the specified size of paper runs out...
- Page 36 USER PROGRAM SHARP FAX MODE Program Program Name Setting Codes Description Number 1: 8.5 x 11 DOC. GLASS Set the size of an original faxed from the document 2: 8.4 x 14 SIZE glass. 3: A4 1: 8.5 x 11 FIXED DOC.
- Page 37 USER PROGRAM SHARP FAX MODE (Cont’d) Program Program Name Setting Codes Description Number SECURITY 1: ON Enable the polling security function. SELECT 2: OFF FAX REMOTE Set the 1-digit number used to activate remote fax 0-9 (5) NUMBER reception. REMOTE 1: ON Enable the remote reception function.
-
Page 38: Repair Hints
Program. After downloading the latest version of Button Manager or MFP Driver (Printer & Scanner) from the Sharp Support Website, it is recommended to execute Setup using Run as Administrator (right click on setup.exe). Note: During installation, ensure all anti virus software is disabled. - Page 39 MXNB11 USB Device Port and execute SIM 49-02 to perform a firmware update. 5. Once the firmware upgrade is complete, power OFF the MX-B201D and remove the USB memory device For additional security, OSX 10.8 Mountain Lion implemented “Gatekeeper”, which can be set to restrict the installation of applications/drivers from Unable to install OSX10.8 Drivers -...
-
Page 40: Technical Bulletin Index
Description Model COP2249 Maintenance tool software version update [April 2015] MX-NB11 COP2087 Sharp Remote Device Manager [SRDM] v1.5 COP2044 Registry growth when using an auto created printer under a Citrix or MX-NB11 terminal services environment. COP1971 New service part to eliminate the static charge on the USB port COP1950 Sharp Remote Device Manager [SRDM] v1.3... -
Page 41: Document Reference
Information contained within this guide is subject to change without prior notice. This Handy Guide is not a substitute for the official Sharp Service manuals. It is for use by Sharp qualified service technicians with the intention of improving the efficiency of Sharp MFP Devices. -
Page 42: Notes
NOTES SHARP...