Table of Contents
Advertisement
Quick Links
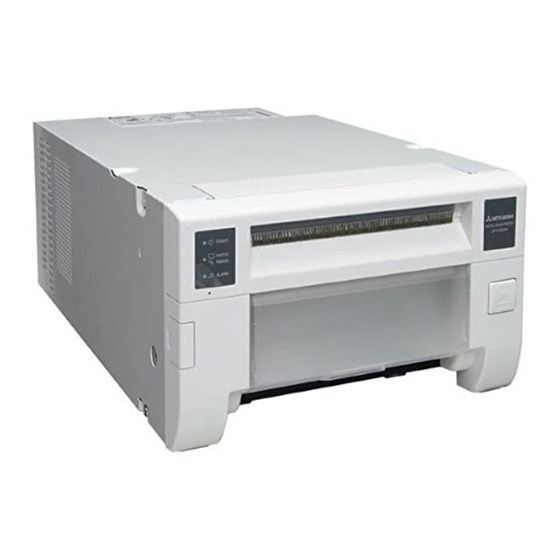
DIGITAL COLOR PRINTER
MODEL
CP-C60DW-WE
OPERATION MANUAL
THIS OPERATION MANUAL IS IMPORTANT
TO YOU.
PLEASE READ IT BEFORE USING YOUR
DIGITAL COLOR PRINTER.
Hereby, Mitsubishi Electric Corporation, declares that this digital color printer is in
compliance with the essential requirements and other relevant provisions of Directive
1999/5/EC.
Advertisement
Table of Contents

Related Manuals for Mitsubishi Electric CP-C60DW-WE


Summary of Contents for Mitsubishi Electric CP-C60DW-WE
- Page 1 THIS OPERATION MANUAL IS IMPORTANT TO YOU. PLEASE READ IT BEFORE USING YOUR DIGITAL COLOR PRINTER. Hereby, Mitsubishi Electric Corporation, declares that this digital color printer is in compliance with the essential requirements and other relevant provisions of Directive 1999/5/EC.
- Page 2 INFORMATION This Class A digital apparatus complies with Canadian ICES-003. WARNING : TO PREVENT FIRE OR SHOCK HAZARD, DO NOT EXPOSE THIS APPLIANCE TO RAIN OR MOISTURE. WARNING: Use the included AC power cord so as not to interfere with radio and television reception. If you use other cables, it may cause interference with radio and television reception.
- Page 3 WARNING: to the directive 2006/66/EC Article 20 Information for end-users and Annex II. Your MITSUBISHI ELECTRIC product is designed and manufactured with high quality materials and components which can be recycled and/or reused. This symbol means that electrical and electronic equipment, batteries and accumulators, at their end-of-life, should be disposed of separately from your household waste.
-
Page 4: Table Of Contents
CONTENTS CONTENTS Contents ....................1 Safety precautions ..................2-4 ....................5 Features and functions ................6-7 Front panel ....................6 Side and rear panel .................7 Before operation ..................8-14 Printer setup procedure ................8 Print paper installation ................9-10 ................11-12 ............13 Connection with USB data signal equipment ..........14 Error messages and countermeasures ..........15-18 Indications on the front panel and countermeasures ...... -
Page 5: Safety Precautions
SAFETY PRECAUTIONS In the interest of safety, please observe the following precautions: POWER REQUIREMENT This Digital Color Printer is designed to operate on 120 V AC 50/60 Hz in the U.S.A. and Canada, and 220 V - 240 V AC 50/60 Hz in Europe. - Page 6 SAFETY PRECAUTIONS REMOVE THE PAPER STRIP BIN WHEN OPENING OR CLOSING THE DOOR When you open or close the door with the paper strip bin installed, the bin may be removed and fall. This may cause injury or damage. Also, the chips generated by margin cut may jam at the paper exit slot. DO NOT LEAVE THE PRINTING UNIT OPEN When the printer is moved with the printing unit open, it may cause injury or damage.
-
Page 7: Safety Precautions
SAFETY PRECAUTIONS OTHER CAUTIONS Do not touch the print paper. Empty the paper strip bin frequently to prevent jamming the strips at the print outlet. Do not use the printer in a place where a strong wind blows. Otherwise, the print paper may not be fed properly, resulting in the paper jam. - Page 8 UNPACKING UNPACKING Open the printer box from the top and remove Protective the top cushion containing the accessories out cardboard Accessories of the box. out of the cushion. Carefully pull the printer up and out of the box. NOTE Unwrap the packing. Remove the protective materials for transportation such as protective sheet.
-
Page 9: Features And Functions
FEATURES AND FUNCTIONS FRONT PANEL POWER INDICATOR ( ) PAPER STRIP BIN When the power is turned on, the indicator illuminates. Holds the paper strips generated by margin cut. Empty the bin frequently to prevent jamming the strips at the illuminates orange depending on the printer status. -
Page 10: Side And Rear Panel
FEATURES AND FUNCTIONS SIDE AND REAR PANEL (LEFT SIDE) (REAR SIDE) POWER SWITCH USB TERMINAL Use to switch the power ON and OFF. Use to connect the USB cable. See page 14. POWER SOCKET (AC LINE) HANDLE FOR TRANSPORTING Use to connect the provided power cord. Insert the When carrying the printer, hold this handle and the front upper part of the printer. -
Page 11: Before Operation
BEFORE OPERATION PRINTER SETUP PROCEDURE Before printing, follow the printer setup listed below. Install the print paper to this printer. (See pages 9 to 10.) Install the ink ribbon to this printer. (See pages 11 to 12.) Connect the printer to a personal computer. (See page 14.) -
Page 12: Print Paper Installation
BEFORE OPERATION PRINT PAPER INSTALLATION The applicable roll paper to this unit is as follows. Paper width: 152 mm, inner diameter of core of roll paper: about 59 mm (default setting) Paper width: 152 mm, inner diameter of core of roll paper: about 51 mm having the core with the inner diameter of about 59 mm. - Page 13 BEFORE OPERATION POWER switch Press the POWER switch on the side panel to turn on the power. OPEN button After the POWER indicator’s color has changed from orange to green, press the OPEN button to release the printing unit out. Remove the paper strip bin and then pull the knob to open the Knob door.
-
Page 14: Ink Ribbon Installation
BEFORE OPERATION INK RIBBON INSTALLATION NOTE Load the ink ribbon in the ink cassette as shown below. Ditch Handle Shaft Guides Place the ink cassette containing the ink ribbon in the position as shown in the illustration. cassette with the right and left guides inside the printing unit and slide it in a slanting direction. - Page 15 BEFORE OPERATION Push the printing unit to close. Close the printing unit by pushing the right and left sides of the unit from the front with both hands. When a new paper is loaded and the printing unit is closed with the power turned on, the paper will be automatically fed and cut.
- Page 16 BEFORE OPERATION HANDLING OF PAPER / INK RIBBON SET BEFORE PRINTING on the surface, which causes paper jams or degraded print quality. Leave the print paper in the room to stabilize its temperature before use. number of prints may not be made. In addition, if you replace the print paper before it is used up, the indicated number of prints may not be made.
-
Page 17: Connection With Usb Data Signal Equipment
BEFORE OPERATION CONNECTION WITH USB DATA SIGNAL EQUIPMENT CONNECTING TO PERSONAL COMPUTER (EXAMPLE) Turn on the power of a personal computer. Connect the printer and a personal computer with a USB cable. To USB port To USB port Personal computer Digital color printer NOTE NOTE... -
Page 18: Error Messages And Countermeasures
ERROR MESSAGES AND COUNTERMEASURES INDICATIONS ON THE FRONT PANEL AND COUNTERMEASURES If, for some reason, printing is not possible or an error occurs during printing, the indicators on the front panel will : Steady on : Off ALARM PAPER RIBBON POWER Causes and Countermeasures Page... -
Page 19: Overcoming Paper Jams
ERROR MESSAGES AND COUNTERMEASURES OVERCOMING PAPER JAMS Press the OPEN button to open the printing unit. Remove the ink cassette. Open the door. Pull out the defective part of the print paper to the direction of an arrow. Cut off the defective part of the print paper with scissors. NOTE Refer to “CLEANING”... -
Page 20: Repairing A Torn Ink Ribbon
ERROR MESSAGES AND COUNTERMEASURES REPAIRING A TORN INK RIBBON Place a piece of transparent adhesive cellophane tape on the center of the ink ribbon. Cellophane tape Direction to turn the shaft Wind the shaft of the ink ribbon in the direction of the arrow so that the cellophane tape is not seen. -
Page 21: Before Calling For Service
ERROR MESSAGES AND COUNTERMEASURES BEFORE CALLING FOR SERVICE Symptom The power is not turned on. Is the power cord plug disconnected from the outlet? about two minutes. Then turn on the power again. The printing unit doesn’t open. Are you turning off the power during printing procedure? The image is not printed. -
Page 22: Cleaning
CLEANING Cleaning as indicated below will help maintain stable printer operation and extend the printer’s life. Wearing gloves at cleaning is recommended to prevent injury. Make sure to turn off the power before cleaning. FILTER CLEANING Filter (inside) Ventilation inlet THERMAL HEAD CLEANING Press the OPEN button to open the printing unit. - Page 23 CLEANING PLATEN ROLLER CLEANING Platen roller Preparations Alcohol (ethyl alcohol, etc.) Soft and clean cloth Wipe the whole roller by turning it. PAPER FLANGE CLEANING Clean the parts that contact the print paper sides as shown right. Wipe the parts carefully with cloth dampened with a small amount of alcohol. Cleaning part...
- Page 24 SPECIFICATIONS SPECIFICATIONS Class Digital Color Printer Model CP-C60DW-WE Printing method Sublimation Dye Thermal Transfer line print 3-color faces progressive printing (yellow, magenta, and cyan) and surface lamination Print’s resolution 300 x 300 dpi (dpi : dots per inch) Dot resolution 10x15 (4x6”)
- Page 25 Gothaer Strasse 8, 40880 Ratingen ; Postfach 1548, 40835 Ratingen ; Germany Phone +49 (2102) 486-9250 FAX +49 (2102) 486-7320 Please contact the nearest Mitsubishi sales branch to get DOC (Declaration of Conformity) of the EC Directive 1999/5/EC. Manufactured by Mitsubishi Electric (Malaysia) Sdn. Bhd. WE919C182A9...