Table of Contents
Advertisement
Advertisement
Table of Contents

Related Manuals for Silvercrest 285662


Summary of Contents for Silvercrest 285662
- Page 1 RADIO ALARM CLOCK RADIO ALARM CLOCK Operation and Safety Notes IAN 285662...
- Page 2 GB / IE / NI Operation and Safety Notes Page...
- Page 3 13 12 11...
-
Page 4: Table Of Contents
Introduction ......................Page Intended use ......................Page Warnings used ......................Page Scope of delivery ....................Page Parts Description ..................... Page Technical Data ......................Page General safety instructions ............... Page Safety instructions for batteries / rechargeable batteries ........Page Inserting batteries ................... -
Page 5: Introduction
Radio alarm clock Introduction We congratulate you on the purchase of your new product. You have chosen a high quality product. The instructions for use are part of the product. They contain important informa- tion concerning safety, use and disposal. Before using the product, please familiarise yourself with all of the safety information and instruc- tions for use. -
Page 6: Warnings Used
Warnings used These instructions for use contain the following warnings: DANGER A warning with this symbol and the word „DANGER“ indicates a life threatening situation. Failure to observe this warning may result in serious or fatal injuries. Follow the instructions in this warning to prevent serious injuries or a danger to life! DANGER! HIGH VOLTAGE! A warning with this symbol and the word “DANGER! -
Page 7: Scope Of Delivery
Failure to observe this warning may result in injuries or property damage. This action sign indicates to wear suitable protective gloves! Follow the instructions to avoid hands striking or being struck by objects or being in contact with thermal or chemical materials! NOTE A note provides additional information to improve product use. -
Page 8: Technical Data
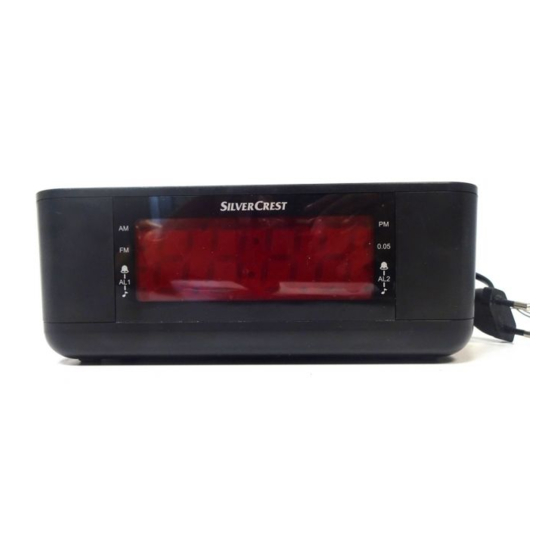
SLEEP button (set automatic switch off) TIME / SET button (set time) SNOOZE / LIGHT / DIM button (interrupt alarm / set nightlight on or off / set display light) / FM / AM button (switch radio on or off / choose frequency range) DOWN / AL1 button (set alarm time 1 / settings down) UP / AL2 button (set alarm time 2 / settings up) Speaker... -
Page 9: General Safety Instructions
Weight: approx. 472 g Protection class: II / Operating conditions: + 5 °C to + 40 °C, 5 % to 70 % rel. humidity Storage temperature: 0 °C to + 45 °C General safety instructions This chapter provides important safety information for handing the prod- uct. - Page 10 If you notice anything unusual during use (e.g. unusual noise, strange odour or smoke), switch the product off immediately, unplug the power plug from socket and remove the batteries. Do not use the product anymore until it has been checked by a qualified person. Sudden temperature changes may cause condensation inside the product.
-
Page 11: Safety Instructions For Batteries / Rechargeable Batteries
Always place the product on a stable and even surface. It could be damaged if it fell over. Do not cover the ventilation openings. Otherwise, there will be danger of a fire. Do not place any containers filled with liquids (i.e. vases or drinks) onto the product or next to the product. - Page 12 Never throw batteries / rechargeable batteries into fire or water. Do not exert mechanical loads to batteries / rechargeable batteries. Risk of leakage of batteries / rechargeable batteries Avoid extreme environmental conditions and temperatures, which could affect batteries / rechargeable batteries, e.g. radiators / direct sunlight.
-
Page 13: Inserting Batteries
Inserting batteries Note: To avoid losing the time and alarm clock settings as a result of a potential power failure, insert two batteries 1.5 V, AA. The batteries ensure that the internal clock also functions during a power failure. As soon as the power is switched on again, the correct time is shown on the display automatically. -
Page 14: Initial Use
VHF cable aerial Unwind the cable aerial completely for the VHF reception. Initial use Setting the time Note: Make sure to set the time quickly as entering the settings is interrupted after approx. 5 seconds if a button has not been pressed. All settings made so far will be automatically saved. -
Page 15: Switching The Radio On And Off
Switching the radio on and off Note: You can set the frequency range VHF (FM) from 87.5 to 108.0 MHz and MW (AM) from 522 to 1620 kHz. However, it may be that diverging national regulations in different countries exist regarding the permissible broadcasting frequency ranges. The reception may be a punishable offense in some countries. -
Page 16: Searching For Radio Stations
Searching for radio stations Note: The product can automatically search for the nearest radio station. Press the UP / AL2 button for approx. 2 seconds. The product searches for the radio station with the next highest frequency. Press the DOWN / AL1 button for approx. -
Page 17: Saving A Radio Station Manually
Note: The frequency is set in 0.05-MHz spacing when VHF is being received i. e. if you have tuned to 99.25 MHz. 99.2 and a dot (0.05) appear on the display Note: The speaker is switched off during the search for radio stations, the frequency of the radio station is shown on the display Saving a radio station manually Note: The product has 20 radio station presets in total. -
Page 18: Select Saved Radio Stations
Press the M+ / AMS button for approx. 2 seconds. The product begins the radio station search and fills the presets up to with the radio stations it has found. The preset flashes briefly on the display as each radio station is saved. The search stops when all preset spaces have been filled or when the radio station has been found. -
Page 19: Activate The Alarm Function
To apply a setting, wait until the time and the dot beside the alarm type stop flashing. Note: If you would prefer the „radio“ to be your alarm, the last programmed radio station and volume will be broadcast. Note: Nightlight will be switched on automatically while the alarm (alarm tone/radio) is ringing. -
Page 20: Snooze Function
Snooze function To switch off the alarm temporarily, press the SNOOZE / LIGHT / DIM button while the alarm is ringing. The alarm will be reacti- vated after approx. 6 mins. When alarm is temporarily turned off, the dot appears on the display next to the alarm (1 or 2) is blinking. -
Page 21: Adjust The Display Light
Adjust the display light To make the face of the display brighter, press the SNOOZE / LIGHT / DIM button for approx. 2 seconds To dim the face of the display , press the SNOOZE / LIGHT / DIM button for approx. -
Page 22: Troubleshooting
them in a dark and cool place. For the storage conditions, please refer to the “Technical data”. Troubleshooting = Fault = Possible cause = Action = The product will not turn on. = The mains plug has not been inserted into the socket. = Insert the mains plug into the mains socket. -
Page 23: Disposal
= To retain the settings, insert batteries into the battery compartment Proceed as described in the chapter „inserting batteries“. = Re-programme the time or alarm time. Disposal The following symbols can be found on the packaging and the rating label. The packaging is made entirely of recyclable materials, which you may dispose of at local recycling facilities. -
Page 24: Warranty
Faulty or used batteries / rechargeable batteries must be recycled in accordance with Directive 2006/66/EC and its amendments. Please return the batteries / rechargeable batteries and / or the product to the available collection points. Think about the environment and your per- sonal health. - Page 25 your proof of purchase. This warranty becomes void if the product has been damaged, or used or maintained improperly. The warranty applies to defects in material or manufacture. This war- ranty does not cover product parts subject to normal wear, thus possibly considered consumables (e.g.
- Page 26 OWIM GmbH & Co. KG Stiftsbergstraße 1 DE-74167 Neckarsulm GERMANY Model-No.: HG00708A-BS / HG00708B-BS Version: 05 / 2017 Last Information Update: 05 / 2017 Ident.-No.: HG00708A-BS / B-BS052017-IE/NI IAN 285662...