Table of Contents
Advertisement
Quick Links
Advertisement
Table of Contents
Troubleshooting

Related Manuals for Epson Trume TR-MB7


Summary of Contents for Epson Trume TR-MB7
-
Page 2: Table Of Contents
MB73 (TR-MB7) User’s Guide Contents Contents Before Use Introduction............5 About this Manual. - Page 3 MB73 (TR-MB7) User’s Guide Contents Compass Measurements (COM) Notes and Mechanism on Compass Measurements......86 Checking the Direction.
- Page 4 MB73 (TR-MB7) User’s Guide Before Use Before Use “Introduction” on page 5 “About this Manual” on page 8 “Safety Instructions” on page 9 “Features of the Product” on page 16 “Information on the Watch's Mechanics” on page 18 “Setting up” on page 21...
-
Page 5: Before Use
MB73 (TR-MB7) User’s Guide Before Use Introduction Thank you very much for purchasing the “TRUME". Make sure you read the manual supplied to use this product correctly. This product is not intended for taking measurements that requires professional precision. Measurement function readings are intended for general reference only. - Page 6 MB73 (TR-MB7) User’s Guide Before Use For example, if you have been traveling abroad. The watch has a built-in GPS satellite signal reception system called "SATELLITELINK" that receives a GPS signal by one action and automatically enters the current time zone when you leave the airport at your destination. After dropping off your luggage at the hotel, you can go out and explore the city.
- Page 7 MB73 (TR-MB7) User’s Guide Before Use The watch comes with a feature known as a variometer that can represent a glider or an airplane. The hand movements and the dial that indicate the rate you are climbing or descending will have you yearning for the clear, blue sky. We hope you will make use of this product in a wide variety of scenarios.
-
Page 8: About This Manual
This handy manual is supplied with this product. User's Guide (this manual) Explains general operations for this product. This is an electronic manual available from the Epson Website. You can view the manual in HTML or PDF format. Symbols, marks, and notes used in this manual Important: Make sure you always observe the content of these instructions. -
Page 9: Safety Instructions
MB73 (TR-MB7) User’s Guide Before Use Safety Instructions Make sure you read the manual supplied with this product to use it safely. Failure to handle the product as described in this manual may cause a malfunction or accident to occur. Meaning of symbols used in this manual This manual contains warnings indicated by the following symbols that denote dangerous operations/handling and are designed to prevent harm to the users and third parties or damage to property. - Page 10 MB73 (TR-MB7) User’s Guide Before Use Safety instructions Warning Do not use if it is damaged. Failure to do so may result in injury, malfunction, or fire. In the following situations, stop using it immediately, and contact TRUME customer support. ❏...
- Page 11 MB73 (TR-MB7) User’s Guide Before Use Caution Do not replace or adjust the metal band yourself. This could cause an injury to occur. Replacing the metal band supplied takes expertise and skill, so be sure to contact your local dealer or TRUME customer support. “Contact Information”...
- Page 12 MB73 (TR-MB7) User’s Guide Before Use Notes on waterproofing The watch is water resistant to 10 ATM (WATER RESISTANT 10BAR). You can use the watch for water sports (swimming, fishing, yachting, and so on) and skin diving. Warning Do not hold the device directly under high pressure water from a faucet. Water pressure from a faucet is high and could effect the quality of the waterproofing.
- Page 13 MB73 (TR-MB7) User’s Guide Before Use Notes on measurements Warning This product is not intended for taking measurements that requires professional precision. When using the measurement feature, make decisions and take actions at your own risk. The content of the measurement results and Waypoint feature may differ from the actual value or status.
- Page 14 (RF) CNR-102 de l’IC. Cet équipement émet une énergie RF très faible qui est considérée comme conforme sans évaluation du débit d’absorption spécifique (DAS). Korea R-REM-EIH-TR-MB7-5 Contact TRUME customer support for the date of manufacture. SEIKO EPSON CORPORATION Europe RE Directives...
- Page 15 MB73 (TR-MB7) User’s Guide Before Use Wireless: EN 303 413 EMC: EN 301 489-1/19 Safety: EN 60950-1 International standards compliance Japan and Other Countries CISPR 16 IEC 61000-6-1, IEC 61000-6-3...
-
Page 16: Features Of The Product
MB73 (TR-MB7) User’s Guide Before Use Features of the Product Adjusting the time by receiving signals from GPS satellites (SATELLITELINK) Your watch can automatically adjust to the correct time by receiving signals from GPS satellites. However, you need to set Daylight Saving Time (DST) manually. “Adjusting the time by receiving signals from GPS satellites”... - Page 17 MB73 (TR-MB7) User’s Guide Before Use Compass feature with magnetic sensor You can check which direction is north using the magnetic sensor built into the watch. “About compass” on page 86 Waypoint feature by receiving GPS satellite signals and using magnetic sensor By receiving signals from GPS satellites and acquiring positional information, you can check the direction from your current location and the linear distance to a pre-registered point (base point).
-
Page 18: Information On The Watch's Mechanics
MB73 (TR-MB7) User’s Guide Before Use Information on the Watch's Mechanics Adjusting the time by receiving signals from GPS satellites GPS satellites are equipped with high-precision atomic clocks with a margin of error of one second every 100,000 years. Signals sent from the GPS satellite to earth contain "time information" based on the atomic clock. With the touch of a button, this product receives signals from the GPS satellite and adjusts the time according to the following information. - Page 19 MB73 (TR-MB7) User’s Guide Before Use Note: About GPS satellites The satellites are controlled by the United States Department of Defense and orbit at an altitude of 20,000 km. Originally, these satellites were designed for military purposes, but now some of the information they send is for consumer use and is used in a variety of devices such as car navigation systems and smart phones.
- Page 20 MB73 (TR-MB7) User’s Guide Before Use Leap seconds Coordinated universal time is adjusted based on universal time (UT) and international atomic time (TAI). The time (seconds) used for this adjustment is called leap seconds.
-
Page 21: Setting Up
MB73 (TR-MB7) User’s Guide Before Use Setting up Before using this product, make sure you take the following steps. 1. Check the content of the package In the unlikely event that anything is missing or damaged, contact the dealer where you purchased this product. ❏... - Page 22 MB73 (TR-MB7) User’s Guide Before Use 3. Release In-flight mode The watch is shipped in In-flight mode ( ) in accordance with aviation law. If the watch is set to In-flight mode when you purchase it, make sure you release the mode before use. “Setting In-flight Mode”...
- Page 23 MB73 (TR-MB7) User’s Guide Before Use 4. Register as a user (procedure for extending the warranty period) We recommend performing user registration to extend the warranty period from one to two years. ❏ Registering from the Website Access the following URL and enter the necessary information. <trume.jp/hosho/>...
-
Page 24: Basic Operations
MB73 (TR-MB7) User’s Guide Basic Operations Basic Operations “Part Names and Functions” on page 25 “Operating the Screw Lock Crown” on page 32 “Attaching the Band” on page 34 “Locations Suitable for Receiving Signals from GPS Satellites” on page 35 “Setting In-flight Mode”... -
Page 25: Part Names And Functions
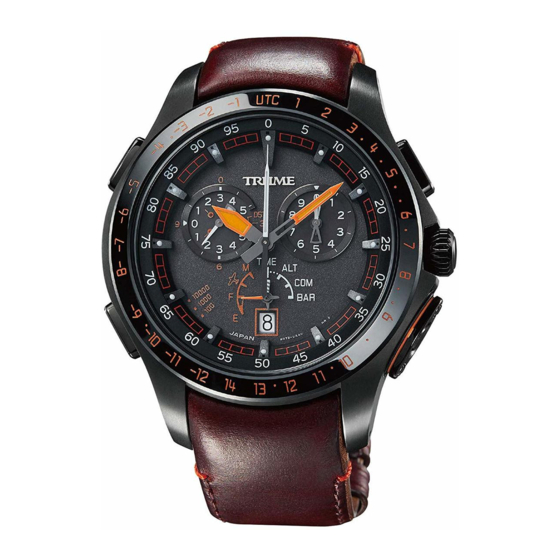
MB73 (TR-MB7) User’s Guide Basic Operations Part Names and Functions This section explains how to read the hand indications. *The dial display may vary depending on the model. Hour hand Small second hand “Small second hand display” on page 26 Minute hand Indicator hand (long hand)/mode hand (short hand) “Indicator hand/mode hand display”... - Page 26 MB73 (TR-MB7) User’s Guide Basic Operations Small second hand display Small second hand Numbers (outside: 0/3/6/9) Number of GPS satellites acquired Display range of barometric tendency Display results/symbols + (52 seconds position): Success / measured value is 0 or more - (38 seconds position): Failure Setting Daylight Saving Time (DST) DST (13 seconds position): On...
- Page 27 MB73 (TR-MB7) User’s Guide Basic Operations Indicator hand/mode hand display 3 4 5 Mode hand (short hand) Indicator hand (long hand) Battery remaining level “Checking the Battery Level” on page 37 In-flight mode “Setting In-flight Mode” on page 36 Operating Indicates that the watch is performing an operation such as measuring or receiving.
- Page 28 MB73 (TR-MB7) User’s Guide Basic Operations Measurement hand display Measurement hand (short hand) Measurement hand (long hand) Measurement value for the altitude and barometric pressure Short hand: Indicates thousandth position Long hand: Indicates hundredths position Measured linear distance for the Waypoint feature The position indicated by the short hand and the long hand changes according to the Distance Range setting.
- Page 29 MB73 (TR-MB7) User’s Guide Basic Operations Center hand display Center hand Bezel Time zone display Dial ring Inside: Stopwatch scale Outside: Display ones to tens position for altitude and barometric pressure Distance Range for the Waypoint feature...
- Page 30 MB73 (TR-MB7) User’s Guide Basic Operations Buttons/screw lock crown This section explains the main features and basic operations. The following shows the button layout: Button A: Changes the feature Button B: Receives GPS satellite signal/various features Button C: Starts/stops measuring Screw lock crown: Confirm, set/select It is useful to memorize this layout.
- Page 31 MB73 (TR-MB7) User’s Guide Basic Operations Button C: <Starts/stops measuring> Feature Mode Button Operations Starting/stopping the stopwatch TIME Press Start measuring Press and release ALT/COM/BAR Starting the Waypoint feature Press for at least three seconds Screw lock crown < Confirm, set/select > Feature Mode Crown Operations...
-
Page 32: Operating The Screw Lock Crown
MB73 (TR-MB7) User’s Guide Basic Operations Operating the Screw Lock Crown The screw lock crown is a crown that is secured to the watch by a screw. Follow the steps below to release/set the lock. Important: Make sure you lock the crown when you have finished the procedure. If you use the watch while the crown is unlocked, it may cause the waterproofing to fail or a malfunction to occur. - Page 33 MB73 (TR-MB7) User’s Guide Basic Operations When the crown is unlocked, you can pull it out and turn it. Pull out You can extend the crown in two stages. The operation differs depending on the position the crown is in. Turn Turn the crown quickly to wind the hands forward/backward quickly.
-
Page 34: Attaching The Band
MB73 (TR-MB7) User’s Guide Basic Operations Attaching the Band Press the band's push button to open the clasp and remove it. Note: The shape of the band may vary depending on the model. -
Page 35: Locations Suitable For Receiving Signals From Gps Satellites
MB73 (TR-MB7) User’s Guide Basic Operations Locations Suitable for Receiving Signals from GPS Satellites When receiving signals from GPS satellites, move to a location where signals can be easily received and then perform operations. Locations that is easy to receive signals The best location for receiving GPS signals is outside with no obstructions overhead, and no buildings or trees that obstruct your vision. -
Page 36: Setting In-Flight Mode
MB73 (TR-MB7) User’s Guide Basic Operations Setting In-flight Mode While on an airplane or in a hospital, this product may interfere with electronic equipment. “Notes on signals” on page 12 Follow the rules and regulations provided by airline companies, hospitals, and so on, and set this product to In-flight mode. -
Page 37: Checking The Battery Level
MB73 (TR-MB7) User’s Guide Basic Operations Checking the Battery Level You can check the battery level for the watch from the position of the indicator hand. Important: You cannot check the battery level in the following situations. ❏ The indicator hand points to (In-flight mode) ❏... - Page 38 MB73 (TR-MB7) User’s Guide Basic Operations Battery level 1 (approx. 5% or less) Measuring/receiving features are unavailable. You need to charge the watch. “About Charging” on page 41 You cannot operate the buttons if the small second hand is moving as follows.
- Page 39 MB73 (TR-MB7) User’s Guide Basic Operations Power Save feature When the watch is in a low power status for a continuous time, the watch enters "Power Save" status, and the small second hand stops at the 45 second position. Charge the battery sufficiently, and then adjust the time. “About Charging”...
-
Page 40: About The Sleep Feature
MB73 (TR-MB7) User’s Guide Basic Operations About the Sleep Feature The Sleep feature prevents battery power from being consumed unnecessarily. If the watch is not exposed to light for 72 hours or more continuously, the watch enters "Sleep" status, and the small second hand stops at the 15 seconds position. -
Page 41: About Charging
MB73 (TR-MB7) User’s Guide Basic Operations About Charging The optical charging feature (LIGHT CHARGE) is built-in to the dial of the watch. By frequently exposing the watch to sunlight or fluorescent light, you can continue using the watch for a long time. Charging the watch You can charge the watch by exposing it to light. - Page 42 MB73 (TR-MB7) User’s Guide Basic Operations Approximate charging time The following shows the approximate charging time. Approximate charging time When the clock stops Illuminati Environmental When the clock stops Standards To use the watch for 1 second hand lx (lux) one day movement until each...
-
Page 43: Adjusting Time (Receiving Gps Satellite Signals) (Time)
MB73 (TR-MB7) User’s Guide Adjusting Time (Receiving GPS Satellite Signals) (TIME) Adjusting Time (Receiving GPS Satellite Signals) (TIME) “Notes on Receiving GPS Satellite Signals” on page 44 “Adjusting the Time” on page 45 “Setting the Time Zone and Time” on page 48 “About the Automatic Time Reception Feature”... -
Page 44: Notes On Receiving Gps Satellite Signals
MB73 (TR-MB7) User’s Guide Adjusting Time (Receiving GPS Satellite Signals) (TIME) Notes on Receiving GPS Satellite Signals Receiving GPS satellite signals consumes a lot of power. We recommend using this feature only when necessary. ❏ When the watch is in the following status, you cannot receive signals from the GPS satellites. ❏... -
Page 45: Adjusting The Time
MB73 (TR-MB7) User’s Guide Adjusting Time (Receiving GPS Satellite Signals) (TIME) Adjusting the Time By operating the buttons, you can receive time information from GPS satellite signals and adjust the current date and time. Note: ❏ You need to set the time zone if you want to adjust the time to your travel destination. “Setting the Time Zone and Time”... - Page 46 MB73 (TR-MB7) User’s Guide Adjusting Time (Receiving GPS Satellite Signals) (TIME) Hold down the B button for approximately three seconds, and release when the small second hand points to 0 seconds position The indicator hand points to M. 3 sec. Note: When the B button is released before the small second hand points to 0 seconds position, the watch does not perform time adjustment and displays the reception results (+: success, -;...
- Page 47 MB73 (TR-MB7) User’s Guide Adjusting Time (Receiving GPS Satellite Signals) (TIME) With the dial facing straight up, wait until the reception result is displayed (the small second hand points to + or -) Receiving a signal takes approximately six seconds to one minute. When receiving signals When receiving signals from a GPS satellite, the small second hand points to 5 seconds (when receiving 1 or more signal).
-
Page 48: Setting The Time Zone And Time
MB73 (TR-MB7) User’s Guide Adjusting Time (Receiving GPS Satellite Signals) (TIME) Setting the Time Zone and Time By using the watch buttons, you can receive GPS satellite signals and acquire positional information for your current location. You can specify the time zone based on the acquired positional information, and match it to the current date and time. - Page 49 MB73 (TR-MB7) User’s Guide Adjusting Time (Receiving GPS Satellite Signals) (TIME) Hold down the B button for approximately five seconds, and release when the small second hand points to 30 seconds position After holding down the B button for three seconds, the small second hand points to 0 seconds position, but you need to continue to hold down the button.
- Page 50 MB73 (TR-MB7) User’s Guide Adjusting Time (Receiving GPS Satellite Signals) (TIME) When receiving signals is complete When the small second hand points to + or -, reception is complete. The reception results are displayed for five seconds. Reception successful (+) The date and time are automatically synced based on the positional information acquired.
-
Page 51: About The Automatic Time Reception Feature
MB73 (TR-MB7) User’s Guide Adjusting Time (Receiving GPS Satellite Signals) (TIME) About the Automatic Time Reception Feature Using the Automatic Time Reception feature, the watch automatically receives time information from the GPS satellite signals, and as a general rule, adjusts the time every three days. At the time of purchase, this feature is set to operate when the dial is exposed to strong light, such as sunlight. - Page 52 MB73 (TR-MB7) User’s Guide Adjusting Time (Receiving GPS Satellite Signals) (TIME) When you want to change the settings, hold down the B button for approximately three seconds The small second hand changes to + or -. 3 sec. Press and release the A button Returns to the time display.
-
Page 53: About Receiving Leap Second Information
MB73 (TR-MB7) User’s Guide Adjusting Time (Receiving GPS Satellite Signals) (TIME) About Receiving Leap Second Information A leap second is a second that is inserted (or removed) to adjust the deviation between world time and international atomic clock time. When the watch receives GPS satellite signals after June 1st and December 1st, it also automatically receives leap second information. -
Page 54: Checking Reception Results
MB73 (TR-MB7) User’s Guide Adjusting Time (Receiving GPS Satellite Signals) (TIME) Checking Reception Results You can view the reception results of the last GPS satellite signal and the results of leap second. Checking the reception results for GPS satellite signals Press and release the A button several times to enter TIME mode Press and release the B button The indicator hand points to M. - Page 55 MB73 (TR-MB7) User’s Guide Adjusting Time (Receiving GPS Satellite Signals) (TIME) Check the reception results for GPS satellite signals The reception results (the small second hand points to + or -) are displayed for five seconds, and then the display returns to the time display.
- Page 56 MB73 (TR-MB7) User’s Guide Adjusting Time (Receiving GPS Satellite Signals) (TIME) Checking the reception results for leap second information Press and release the A button several times to enter TIME mode Press and release the B button The indicator hand points to M, and the small second hand indicates the reception results of GPS satellite signals.
- Page 57 MB73 (TR-MB7) User’s Guide Adjusting Time (Receiving GPS Satellite Signals) (TIME) Check the reception results for leap second information The reception results (the small second hand points to + or -) are displayed for five seconds, and then the display returns to the time display.
-
Page 58: Adjusting Time (Manual) (Time)
MB73 (TR-MB7) User’s Guide Adjusting Time (Manual) (TIME) Adjusting Time (Manual) (TIME) “Setting the Time Zone” on page 59 “Setting Daylight Saving Time” on page 63 “Adjusting the Time” on page 65... -
Page 59: Setting The Time Zone
MB73 (TR-MB7) User’s Guide Adjusting Time (Manual) (TIME) Setting the Time Zone If you cannot receive signals from GPS satellites, or if the time zone you are traveling to has been changed since January 2017, set the time zone manually. Note: See the following for details on Daylight Saving Time (DST). - Page 60 MB73 (TR-MB7) User’s Guide Adjusting Time (Manual) (TIME) Push the crown back in to lock it The small second hand returns to the current second display.
- Page 61 MB73 (TR-MB7) User’s Guide Adjusting Time (Manual) (TIME) Time zone display and time difference list As of January 2017, the watch supports 39 time zones. The bezel indicates the time difference from UTC for each time zone. Check the time difference from UTC, and align the center hand to the corresponding time difference on the bezel. *The bezel and the dial ring display may vary depending on the model.
- Page 62 MB73 (TR-MB7) User’s Guide Adjusting Time (Manual) (TIME) Bezel display Time Difference from UTC Representative City +10 hours Sydney +10.5 hours Lord Howe Island +11 hours Nouméa +12 hours Wellington +12.75 hours Chatham Islands +13 hours Nuku'alofa +14 hours Kiritimati -12 hours Baker Island...
-
Page 63: Setting Daylight Saving Time
MB73 (TR-MB7) User’s Guide Adjusting Time (Manual) (TIME) Setting Daylight Saving Time Daylight Saving Time (DST) is not set automatically. You need to set it manually. Note: When Daylight Saving Time (DST) finishes, or when moving from a region that uses DST to a region that does not, make sure you turn off DST. - Page 64 MB73 (TR-MB7) User’s Guide Adjusting Time (Manual) (TIME) Hold down the C button for approximately three seconds You can switch the Daylight Saving Time (DST) setting. On: Advances the time by one hour Off: Returns the time by one hour 3 sec.
-
Page 65: Adjusting The Time
MB73 (TR-MB7) User’s Guide Adjusting Time (Manual) (TIME) Adjusting the Time If you are in a location where GPS signals cannot be received, adjust the time manually. Note: ❏ You can adjust the time manually from any mode. ❏ You cannot adjust the calendar manually. Unlock the crown and pull it out two steps The mode hand points to TIME. - Page 66 MB73 (TR-MB7) User’s Guide Adjusting Time (Manual) (TIME) Push the crown back in to lock it The small second hand begins moving from 0 seconds. Note: If you press the crown back in according to the time signal and so on, you can adjust the time more accurately.
-
Page 67: Stopwatch (Time)
MB73 (TR-MB7) User’s Guide Stopwatch (TIME) Stopwatch (TIME) “Using the Stopwatch” on page 68 “Example Using the Stopwatch” on page 72... -
Page 68: Using The Stopwatch
MB73 (TR-MB7) User’s Guide Stopwatch (TIME) Using the Stopwatch The stopwatch feature allows you to measure up to 99 minutes 59.8 seconds in increments of 0.1 (1/5) second. Note: If the measurable time is exceeded, measuring stops automatically and the measured value is reset. Measuring elapsed time Press and release the A button several times to enter TIME mode Press the C button to start measuring... - Page 69 MB73 (TR-MB7) User’s Guide Stopwatch (TIME) Press the B button to reset measuring The center hand and the measurement hand (short hand/long hand) return to 0, and then the indicator hand points to the remaining battery level. Measuring the halfway point (split) You can measure the amount of time that has elapsed (Split) from the start of measuring.
- Page 70 MB73 (TR-MB7) User’s Guide Stopwatch (TIME) Press the B button to measure a split time Measuring continues. Press the B button to release the split time The display returns to the time during measuring. Press the C button to stop measuring See the following for details on checking your measurement results.
- Page 71 MB73 (TR-MB7) User’s Guide Stopwatch (TIME) Reading the progress <Example> When split time is 26 minutes 28.0 seconds Minutes: Tens/ones position (0 to 9) The short hand indicates tens and the long hand indicates ones. Since the short hand operates with the long hand, they may point between the scale marks on the watch.
-
Page 72: Example Using The Stopwatch
MB73 (TR-MB7) User’s Guide Stopwatch (TIME) Example Using the Stopwatch Depending on the situation, you may need to use the split feature to measure. Use the C button to start/stop measuring. Use the B button to measure/release the split feature. Measuring does not stop while a split is being measured using the B button. - Page 73 MB73 (TR-MB7) User’s Guide Stopwatch (TIME) <When measuring a split/lap for three laps of a track> Start Start measuring. Split Measure split for the timing of the first lap around the track. Record the split/lap for the first lap. Release split Split Measure split for the timing of the second lap around the track.
- Page 74 MB73 (TR-MB7) User’s Guide Stopwatch (TIME) <When measuring the time for two people> Start Start measuring. Split Measures splits at the timing for the first person goal. Stop Measuring stops at the timing for the second person goal. Check the split display on the watch and record the time for the first person. Release split Load and record the time for the second person and record it.
-
Page 75: Altitude Measurements (Alt)
MB73 (TR-MB7) User’s Guide Altitude Measurements (ALT) Altitude Measurements (ALT) “Notes on Measuring Altitude” on page 76 “Measuring Altitude” on page 79 “Calibrating the Altitude” on page 83... -
Page 76: Notes On Measuring Altitude
MB73 (TR-MB7) User’s Guide Altitude Measurements (ALT) Notes on Measuring Altitude Mechanism for measuring altitude The watch is a pressure altimeter that calculates altitude from the atmospheric pressure. By using the atmospheric pressure at the current location, the relative altitude is calculated based on the relationship between the altitude and the atmospheric pressure for International Standard Air (ISA) determined by the International Civil Aviation Organization (ICAO). - Page 77 MB73 (TR-MB7) User’s Guide Altitude Measurements (ALT) About the altitude calibration feature By setting the actual altitude at a location where you already know the altitude, the difference between the relative altitude measured at that location and the actual altitude is stored in the watch as the correction value by the altitude calibration feature.
-
Page 78: Notes And Mechanism For Variometer Feature
MB73 (TR-MB7) User’s Guide Altitude Measurements (ALT) Notes and Mechanism for Variometer Feature Mechanism for variometer The watch comes with a feature known as a variometer that can represent a glider or an airplane. The watch calculates the vertical speed by detecting changes in the altitude from changes in the barometric pressure measured using the built-in pressure sensor. -
Page 79: Measuring Altitude
MB73 (TR-MB7) User’s Guide Altitude Measurements (ALT) Measuring Altitude You can calculate the altitude of your current location by using the pressure sensor built into the watch. The vertical speed is also displayed by using the variometer feature. Important: If the atmospheric pressure changes due to weather conditions or the temperature at the measurement location, the measurement results and the actual altitude may differ. - Page 80 MB73 (TR-MB7) User’s Guide Altitude Measurements (ALT) Press and release the C button to start measuring While measuring (for one minute) the indicator hand points to M. The small second hand moves to 0 (45 seconds position), and the watch starts measuring the vertical speed. Note: While measuring with the C button, the measurement results are updated every second.
- Page 81 MB73 (TR-MB7) User’s Guide Altitude Measurements (ALT) Reading the results <Example> When the altitude is 2,660 m and the vertical speed is +1 m/s Thousandths/hundredths position (0 to 9) The short hand indicates thousands and the long hand indicates hundreds. Since the short hand operates with the long hand, they may point between the scale marks on the watch.
- Page 82 MB73 (TR-MB7) User’s Guide Altitude Measurements (ALT) Vertical speed (m/s) + side: Climbing - side: Descending The following illustration shows that the watch is climbing at 1 m/s. Note: ❏ The altitude display range is 0 to 9,999 m (units: 1 m). The altitude is displayed as 0 when it is less than 0 m. ❏...
-
Page 83: Calibrating The Altitude
MB73 (TR-MB7) User’s Guide Altitude Measurements (ALT) Calibrating the Altitude Move to a location where you know the altitude, and then calibrate the altitude. You can set the altitude within a range of 0 to 9,999 m (units: 1 m). Move to a location where you know the altitude You can check the altitude using maps, signs, the Internet, and so on. - Page 84 MB73 (TR-MB7) User’s Guide Altitude Measurements (ALT) Push the crown back in to lock it The small second hand returns to the current second display. Note: ❏ If you do not know the altitude, adjust the reference value, and then receive GPS satellite signals to correct the altitude. “About the Reference Value Setting”...
- Page 85 MB73 (TR-MB7) User’s Guide Compass Measurements (COM) Compass Measurements (COM) “Notes and Mechanism on Compass Measurements” on page 86 “Checking the Direction” on page 87 “Calibrating the Magnetic Sensor” on page 88 “Setting the Magnetic Declination” on page 91...
-
Page 86: Compass Measurements (Com)
MB73 (TR-MB7) User’s Guide Compass Measurements (COM) Notes and Mechanism on Compass Measurements About compass The watch uses a built-in magnetic sensor to display north. North may not be displayed correctly when the watch is placed in a strong magnetic field. Calibrate the magnetic sensor in the following situations. -
Page 87: Checking The Direction
MB73 (TR-MB7) User’s Guide Compass Measurements (COM) Checking the Direction You can check which direction is north using the magnetic sensor built into the watch. Important: North may not be displayed correctly when the watch is placed in a strong magnetic field. Calibrate the magnetic sensor in the following situations. -
Page 88: Calibrating The Magnetic Sensor
MB73 (TR-MB7) User’s Guide Compass Measurements (COM) Calibrating the Magnetic Sensor North may not be displayed correctly when the watch is placed in a strong magnetic field. Calibrate the magnetic sensor in the following situations. ❏ When using the watch for the first time ❏... - Page 89 MB73 (TR-MB7) User’s Guide Compass Measurements (COM) Make sure you keep the watch horizontal while pressing and releasing the C button The indicator hand points to M, and calibration starts. When the first point has been calibrated, the small second hand moves from 0 seconds to 30 seconds. Make sure you hold the watch horizontal while rotating 180 degrees Make sure you rotate the watch 180 degrees as accurately as possible.
- Page 90 MB73 (TR-MB7) User’s Guide Compass Measurements (COM) While maintaining the status in step 4, press and release the C button again When the second point has been calibrated, the small second hand points to + (success). Note: If the small second hand points to - (failure), make sure there are no magnetic products or strong magnetic fields nearby.
-
Page 91: Setting The Magnetic Declination
MB73 (TR-MB7) User’s Guide Compass Measurements (COM) Setting the Magnetic Declination True north, magnetic north, and magnetic declination There are two geographical terms representing north; true north and magnetic north. ❏ True north (1) This is the north shown on maps. ❏... - Page 92 MB73 (TR-MB7) User’s Guide Compass Measurements (COM) Setting manually In the following situations, you need to set the magnetic declination manually. ❏ When using the watch in a location where it is hard or impossible to receive signals from GPS satellites “Locations Suitable for Receiving Signals from GPS Satellites”...
- Page 93 MB73 (TR-MB7) User’s Guide Compass Measurements (COM) Hold down the C button for approximately three seconds The setting value for the magnetic declination is indicted using three hands. 3 sec. <Example> When the setting value for the magnetic declination is 10 degrees west East +/West - East or west declination are indicated using plus and minus.
- Page 94 MB73 (TR-MB7) User’s Guide Compass Measurements (COM) Tens/ones position (0 to 99) The center hand indicates the number. 10 is displayed in the following illustration. Turn the crown to set the magnetic declination You can set the magnetic declination in 1 degree increments. Push the crown back in to lock it The small second hand returns to the current second display.
-
Page 95: Waypoint Feature (Com)
MB73 (TR-MB7) User’s Guide Waypoint Feature (COM) Waypoint Feature (COM) “About the Waypoint Feature” on page 96 “Using the Waypoint Feature” on page 97... -
Page 96: About The Waypoint Feature
MB73 (TR-MB7) User’s Guide Waypoint Feature (COM) About the Waypoint Feature The Waypoint feature is a feature that allows you to return to the location (base point) registered in advance from your current location. You can check the direction of the base point and the linear distance. You can also change the range (maximum value) for the linear distance displayed in three stages. -
Page 97: Using The Waypoint Feature
MB73 (TR-MB7) User’s Guide Waypoint Feature (COM) Using the Waypoint Feature Registering a base point You need to register the base point in advance to use the Waypoint feature. Move to the location you want to use as the base point Register the base point (Reference Value Setting) “About the Reference Value Setting”... - Page 98 MB73 (TR-MB7) User’s Guide Waypoint Feature (COM) Press and release the A button several times to enter COM mode Unlock the crown and pull it out one step The small second hand points to 0. The center hand points to the Distance Range setting. When you want to change the settings, hold down the A button for approximately three seconds The setting changes in the following order: 100 >...
- Page 99 MB73 (TR-MB7) User’s Guide Waypoint Feature (COM) Push the crown back in to lock it The small second hand returns to the current second display. Image of Distance Range The following illustration shows the Distance Range in concentric circles when a base point has been registered in Tokyo.
- Page 100 MB73 (TR-MB7) User’s Guide Waypoint Feature (COM) Measuring the direction and distance to the base point When you start the Waypoint feature, the direction and linear distance from the current location to the base point is displayed. Depending on the Distance Range setting, the range of distances that can be displayed (maximum values) differs. Check the setting in advance.
- Page 101 MB73 (TR-MB7) User’s Guide Waypoint Feature (COM) Check the Distance Range setting by the center hand This value is used to read linear distances. Note: To change the Distance Range, press and release the C button to stop measuring, and then make setting. “Changing the Distance Range”...
- Page 102 MB73 (TR-MB7) User’s Guide Waypoint Feature (COM) <When the number of satellites acquired is 7> Note: ❏ You need to acquire at least four GPS satellites to acquire positional information. However, reception may fail even if the watch indicates four or more satellites. ❏...
- Page 103 MB73 (TR-MB7) User’s Guide Waypoint Feature (COM) Check the measurement results The measurement results are displayed for one minute. See the following for details on checking your measurement results. “Reading the results” on page 104 Note: ❏ When measuring is complete, the indicator hand points to the battery level, and the small second hand indicates the current seconds.
- Page 104 MB73 (TR-MB7) User’s Guide Waypoint Feature (COM) Reading the results <Example> Linear distance The short hand indicates the first digit from the top, and the long hand indicates the second digit from the top. Since the short hand operates with the long hand, they may point between the scale marks on the watch.
- Page 105 MB73 (TR-MB7) User’s Guide Waypoint Feature (COM) Base point direction Indicates the direction from your current location to the base point. Direction Indicates north. Note: ❏ Depending on the Distance Range setting, the distance (the minimum distance while measuring) represented by one mark on the scale for the measurement hand (long hand) differs.
-
Page 106: Barometric Pressure Measurements (Bar)
MB73 (TR-MB7) User’s Guide Barometric Pressure Measurements (BAR) Barometric Pressure Measurements (BAR) “Notes and Mechanism on Measuring Barometric Pressure” on page 107 “Measuring Barometric Pressure” on page 108 “Calibrating the Barometric Pressure” on page 111... -
Page 107: Notes And Mechanism On Measuring Barometric Pressure
MB73 (TR-MB7) User’s Guide Barometric Pressure Measurements (BAR) Notes and Mechanism on Measuring Barometric Pressure About barometer feature The watch uses a built-in pressure sensor to measure the atmospheric pressure of the current location. Note: This differs from the atmospheric pressure (sea level pressure) displayed in weather charts. Notes on pressure measurements This product is not intended for taking measurements that requires professional precision. -
Page 108: Measuring Barometric Pressure
MB73 (TR-MB7) User’s Guide Barometric Pressure Measurements (BAR) Measuring Barometric Pressure Measuring Press and release the A button several times to enter BAR mode Note: The watch automatically measures pressure approximately every 10 minutes (the indicator hand does not point to M at this time). - Page 109 MB73 (TR-MB7) User’s Guide Barometric Pressure Measurements (BAR) Note: ❏ When measuring is complete, the indicator hand points to the battery level, and the small second hand indicates the current seconds. ❏ To cancel measuring before it is complete, press and release the C button. When measuring is complete, the measurement results are updated every 10 minutes.
- Page 110 MB73 (TR-MB7) User’s Guide Barometric Pressure Measurements (BAR) Barometric tendency + value: Pressure tends to rise - value: Pressure tends to drop In the following illustration, the pressure is rising and indicates a positive (+) trend. Note: ❏ The display range for pressure is 300 to 1,100 hPa (units: 1 hPa). ❏...
-
Page 111: Calibrating The Barometric Pressure
MB73 (TR-MB7) User’s Guide Barometric Pressure Measurements (BAR) Calibrating the Barometric Pressure The pressure sensor built-in to the watch does not normally need to be calibrated. However, if a deviation occurs for any reason, calibrate the measurement value for the barometric pressure. Important: Do not make calibration if you do not know the exact atmospheric pressure. - Page 112 MB73 (TR-MB7) User’s Guide Barometric Pressure Measurements (BAR) Push the crown back in to lock it The small second hand returns to the current second display.
-
Page 113: Recording Measurement Results (Log Feature)
MB73 (TR-MB7) User’s Guide Recording Measurement Results (Log Feature) Recording Measurement Results (Log Feature) “About the Log Feature” on page 114 “Recording Measurement Results” on page 115 “Checking the Log” on page 116 “Deleting the Log” on page 117... -
Page 114: About The Log Feature
MB73 (TR-MB7) User’s Guide Recording Measurement Results (Log Feature) About the Log Feature You can record measurement results on the watch for each measurement mode. Measurement Mode Measurement Results Number of Events Altitude (except for vertical speed) Barometric pressure (not including barometric tendency) Log number and record image A number from 1 to 11 is automatically assigned to recorded logs, and when the number of logs exceeds 11, logs are... -
Page 115: Recording Measurement Results
MB73 (TR-MB7) User’s Guide Recording Measurement Results (Log Feature) Recording Measurement Results Measure in each mode “Measuring Altitude” on page 79 “Measuring Barometric Pressure” on page 108 When measuring is complete (the indicator hand points to the remaining battery level), hold down the C button for approximately three seconds The small second hand points to + and the measurement results are recorded. -
Page 116: Checking The Log
MB73 (TR-MB7) User’s Guide Recording Measurement Results (Log Feature) Checking the Log Check the recorded measurement results (logs). Press and release the A button several times to change modes to ALT or BAR mode Press and release the B button several times to select the log number The small second hand and the outsidenumbers (0/3/6/9) indicate the log number. -
Page 117: Deleting The Log
MB73 (TR-MB7) User’s Guide Recording Measurement Results (Log Feature) Deleting the Log You can delete all of the logs for each mode. You cannot delete logs individually. Note: The altitude and atmospheric pressure (recorded in log No.0) acquired using standard value matching are not deleted. Press and release the A button several times to change modes to ALT or BAR mode Press and release the B button When a log is recorded, the small second hand and the outside numbers (0/3/6/9) indicate the log number. -
Page 118: Maintenance
MB73 (TR-MB7) User’s Guide Maintenance Maintenance “Maintenance” on page 119 “Replacing and Adjusting the Band” on page 120 “About the Reference Value Setting” on page 121 “About Power Source for the Watch” on page 125... -
Page 119: Maintenance
MB73 (TR-MB7) User’s Guide Maintenance Maintenance Make sure you maintain the product regularly to keep it in optimum operating condition. Maintaining the watch ❏ Make sure you frequently wipe off any moisture, sweat, or dirt that sticks to the watch using a soft cloth. ❏... -
Page 120: Replacing And Adjusting The Band
MB73 (TR-MB7) User’s Guide Maintenance Replacing and Adjusting the Band Contact your local dealer or TRUME customer support to replace or adjust the metal band supplied with this watch. “Contact Information” on page 152 Note: Except for at the store of purchase, there may be a fee charged, or we may not be able to perform adjustments or replacements. -
Page 121: About The Reference Value Setting
MB73 (TR-MB7) User’s Guide Maintenance About the Reference Value Setting What is the Reference Value Setting? The Reference Value Setting feature receives signals from GPS satellites and acquires positional information for your current location, and allows you to make the following settings at the same time. Registering a base Uses the Waypoint feature to register positional information you want to use as the point... - Page 122 MB73 (TR-MB7) User’s Guide Maintenance Reference Value Setting Important: Make sure you check the notes when receiving GPS signals. “Notes on Receiving GPS Satellite Signals” on page 44 Move to a location suitable for receiving signals from GPS satellites “Locations Suitable for Receiving Signals from GPS Satellites” on page 35 Press and release the A button several times to change modes to ALT, COM, or BAR mode Hold down the B button for approximately three seconds...
- Page 123 MB73 (TR-MB7) User’s Guide Maintenance With the dial facing straight up, wait until the reception result is displayed (the small second hand points to + or -) Receiving a signal takes approximately 20 seconds to two minutes. When receiving signals The small second hand and the outside numbers (0/3/6/9) indicate the number of GPS satellites acquired.
- Page 124 MB73 (TR-MB7) User’s Guide Maintenance When receiving signals is complete When the small second hand points to + or -, reception is complete. The reception results are displayed for five seconds. Reception successful (+) The reference value is adjusted based on the positional information acquired. Reception failed (-) Reference Value Setting is not performed.
-
Page 125: About Power Source For The Watch
MB73 (TR-MB7) User’s Guide Maintenance About Power Source for the Watch The watch uses a dedicated lithium ion rechargeable battery. Since a secondary battery (a battery that can be repeatedly charged and discharged) is charged using light received by the dial, and do not need to be replaced periodically like a primary battery. However, the capacity and charging efficiency of the secondary battery may decline depending on the long-term use and operating environment. -
Page 126: Troubleshooting
MB73 (TR-MB7) User’s Guide Troubleshooting Troubleshooting “Troubleshooting” on page 127 “Correcting Misalignment of the Hands or the Date” on page 141 “If the Problem Continues (System Reset)” on page 147 “Information on Service and Support” on page 151 “Contact Information” on page 152... -
Page 127: Troubleshooting
MB73 (TR-MB7) User’s Guide Troubleshooting Troubleshooting If you have any problems, check the related page. Problems related to watch operations “Operating buttons and the crown” on page 128 “Hand movement/position” on page 128 Problems related to charging “Charging” on page 130 Problems related to receiving GPS satellite signals (time adjustment and so on) “GPS satellite signal reception”... - Page 128 MB73 (TR-MB7) User’s Guide Troubleshooting Operating buttons and the crown Trouble Causes and Solutions There is no response even You cannot perform operations while the hand/calendar is moving after operating the buttons or forward quickly. the crown Wait until the hand/calendar starts moving normally. If the indicator hand is pointing to , the watch is set to In-flight mode.
- Page 129 MB73 (TR-MB7) User’s Guide Troubleshooting Trouble Causes and Solutions The small second hand has When the small second hand is pointing to 15 seconds, the watch is in stopped moving "Sleep" status. Expose the watch to light at least five seconds, or press any button. “About the Sleep Feature”...
- Page 130 MB73 (TR-MB7) User’s Guide Troubleshooting Charging Trouble Causes and Solutions The battery level does not If the battery runs out, it takes several days to fully charge. reach level 4 even after Charge using the following times as a guide. charging “Approximate charging time”...
- Page 131 MB73 (TR-MB7) User’s Guide Troubleshooting Adjusting time Trouble Causes and Solutions The watch successfully The watch may have been set to a different time zone to the current time received GPS satellite signals, zone. but the time is out of sync You need to set the time zone manually.
- Page 132 MB73 (TR-MB7) User’s Guide Troubleshooting Stopwatch Trouble Causes and Solutions Cannot start measuring Time adjustment (receiving GPS satellite signals) is being performed. Wait until adjusting the time is complete, or press and release the B button to stop receiving the signal. The center hand stops while If you do not operate any of the buttons within 10 minutes, the center measuring...
- Page 133 MB73 (TR-MB7) User’s Guide Troubleshooting Measuring altitude and vertical speed Trouble Causes and Solutions Cannot measure If the indicator hand is pointing to E, there is not enough battery power remaining to perform measurements. Charge the watch until the remaining battery level is 2 or higher. “Charging the watch”...
- Page 134 MB73 (TR-MB7) User’s Guide Troubleshooting Trouble Causes and Solutions Vertical speed measurements Vertical speed measurements are updated every second. When the do not match the speed you vertical speed changes so quickly, the hand may not move smoothly. feel The vertical speed display range is -5 to +5 m/s (units: 0.2 m/s). If the vertical speed measurement value exceeds the display range, the small second hand vibrates at the ±5 m/s position.
- Page 135 MB73 (TR-MB7) User’s Guide Troubleshooting Compass measurements Trouble Causes and Solutions Cannot measure If the indicator hand is pointing to E, there is not enough battery power remaining to perform measurements. Charge the watch until the remaining battery level is 2 or higher. “Charging the watch”...
- Page 136 MB73 (TR-MB7) User’s Guide Troubleshooting Waypoint feature Trouble Causes and Solutions Cannot register a base point A problem has occurred receiving signals from GPS satellites. “GPS satellite signal reception” on page 130 When trying to use the A problem has occurred receiving signals from GPS satellites. Waypoint feature, the small “GPS satellite signal reception”...
- Page 137 MB73 (TR-MB7) User’s Guide Troubleshooting Trouble Causes and Solutions There is a discrepancy The base point may not be set to the intended location when you did not between the measurement register the base point (Reference Value Setting) at the base point that results and actual distance you want to register.
- Page 138 MB73 (TR-MB7) User’s Guide Troubleshooting Barometric pressure measurements Trouble Causes and Solutions Cannot measure If the indicator hand is pointing to E, there is not enough battery power remaining to perform measurements. Charge the watch until the remaining battery level is 2 or higher. “Charging the watch”...
- Page 139 MB73 (TR-MB7) User’s Guide Troubleshooting Log feature Trouble Causes and Solutions Cannot record the You cannot use the log feature in TIME mode or COM mode. measurement results When the indicator hand is pointing to M, the watch is measuring the altitude and barometric pressure.
- Page 140 MB73 (TR-MB7) User’s Guide Troubleshooting Other problems Trouble Causes and Solutions The inside of the watch is Moisture may have entered the watch. misty Stop using the watch, and contact your local dealer or TRUME customer support. “Contact Information” on page 152 The band is broken Stop using the watch, and contact your local dealer or TRUME customer support.
-
Page 141: Correcting Misalignment Of The Hands Or The Date
MB73 (TR-MB7) User’s Guide Troubleshooting Correcting Misalignment of the Hands or the Date The hand positions may shift due to strong magnetism or shocks. If the position of the hands is misaligned, correct the misalignment. Note: ❏ The hour/minute hands are automatically calibrated once every 24 hours and at midnight. ❏... - Page 142 MB73 (TR-MB7) User’s Guide Troubleshooting Hold down the B button for approximately three seconds The small second hand stops at 18 seconds. 3 sec. The calendar moves. You cannot perform operations while the calendar is moving. Confirm that it has stopped, and then perform the following operations.
- Page 143 MB73 (TR-MB7) User’s Guide Troubleshooting Press and release the B button The small second hand stops at 38 seconds. The indicator hand (long hand) and mode hand (short hand) move. Confirm that the hands have stopped, and then perform the following operations. Turn the crown to move the indicator hand (long hand) to F and the mode hand (short hand) to TIME Press and release the B button...
- Page 144 MB73 (TR-MB7) User’s Guide Troubleshooting Hold down the A button for approximately three seconds The hour/minute hands move to "0 hours 0 minutes". 3 sec. The hour/minute hands are automatically calibrated. Make sure the hand have stopped at 0 hours 0 minutes position, and then perform the following operations. Push the crown back in to lock it The clock starts moving.
- Page 145 MB73 (TR-MB7) User’s Guide Troubleshooting Calibrating the center hand/measurement hand (short hand/long hand) Adjust the center hand/measurement hand (short hand/long hand) to the standard position. Hand Types Standard Positions Center hand Measurement hand (short hand) Measurement hand (long hand) Unlock the crown and pull it out two steps Hold down the C button for approximately three seconds The center hand moves.
- Page 146 MB73 (TR-MB7) User’s Guide Troubleshooting Press and release the C button The measurement hand (short hand/long hand) moves. Confirm that the hands have stopped, and then perform the following operations. Turn the crown to adjust the measurement hand (short hand/long hand) to 0 Push the crown back in to lock it The clock starts moving.
-
Page 147: If The Problem Continues (System Reset)
MB73 (TR-MB7) User’s Guide Troubleshooting If the Problem Continues (System Reset) If the problem with the watch cannot be cleared, perform the following operations. Unlock the crown and pull it out two steps Hold down the A button and the B button at the same time for approximately five seconds The small second hand points to 0 seconds, and the hand starts to move. - Page 148 MB73 (TR-MB7) User’s Guide Troubleshooting Hold down the C button for approximately three seconds The center hand moves. Confirm that the hands have stopped, and then perform the following operations. 3 sec. Turn the crown to adjust the center hand to 0 Press and release the C button The measurement hand (short hand/long hand) moves.
- Page 149 MB73 (TR-MB7) User’s Guide Troubleshooting Turn the crown to adjust the measurement hand (short hand/long hand) to 0 Hold down the B button for approximately three seconds The small second hand stops at 18 seconds. 3 sec. Turn the crown to adjust the calendar to 1 Turn the crown quickly to move the calendar forward/backward quickly.
- Page 150 MB73 (TR-MB7) User’s Guide Troubleshooting Press and release the B button The small second hand stops at 38 seconds. Turn the crown to move the indicator hand (long hand) to F and the mode hand (short hand) to TIME Push the crown back in to lock it The clock starts moving.
-
Page 151: Information On Service And Support
MB73 (TR-MB7) User’s Guide Troubleshooting Information on Service and Support About after service ❏ Repairs or tune-ups fall under "Manufacturer's Repairs", so make sure you contact your local dealer or TRUME customer support. ❏ If any problems occur under the warranty period, contact your local dealer or TRUME customer support and make sure you bring your warranty card. -
Page 152: Contact Information
Inquiries about products, warranties, and repairs TRUME customer support TEL: 050-3155-8285 Address of repair center Watch/wearable repair center Seiko Epson Corporation 421-8 Hino, Tokyo 191-8501 Japan TEL: 042-847-3378 ❏ Manufacturing Seiko Epson Corporation 3-3-5 Owa, Suwa City, Nagano Prefecture 392-8502 Japan TEL: 0266-52-3131 ❏... -
Page 153: Product Specifications
MB73 (TR-MB7) User’s Guide Product Specifications Product Specifications “Watch Specifications” on page 154 “Measurement Related Specifications” on page 156... -
Page 154: Watch Specifications
MB73 (TR-MB7) User’s Guide Product Specifications Watch Specifications Size Length 57.2 mm × width 45.9 mm × thickness 15.5 mm (without buttons and crown) Weight Leather band: Approx. 90 g Metal band: Approx. 125 g (accessory) Materi Case Titanium, ceramic bezel Glass Sapphire glass Glass coating... - Page 155 MB73 (TR-MB7) User’s Guide Product Specifications Watch performance and model number You can check the performance and model number on the rear cover of the watch. Indicates the installed features. ❏ SATELLITELINK ❏ LIGHT CHARGE “Features of the Product” on page 16 Indicates the waterproof performance.
-
Page 156: Measurement Related Specifications
MB73 (TR-MB7) User’s Guide Product Specifications Measurement Related Specifications Stopwatch Measurements of 0 hours 0 minutes 0 seconds up to 99 minutes 59.8 seconds (in units of 1/5 seconds) GPS satellite signal Time to measurement: 6 seconds to 1 minute reception Time to positioning: 20 seconds to 2 minutes performance... -
Page 157: Display List Of Time And Measurement Results
MB73 (TR-MB7) User’s Guide Display List of Time and Measurement Results Display List of Time and Measurement Results Display list of time and measurement results Example display of time and measurement results. See the explanations on the related pages for details on making operations. - Page 158 MB73 (TR-MB7) User’s Guide Display List of Time and Measurement Results Stopwatch “Using the Stopwatch” on page 68 <Example> 6 minutes 55.0 seconds 6 min. 55 sec. 0 <Example> 80 minutes 15.0 seconds 80 min. 15 sec. 0...
- Page 159 MB73 (TR-MB7) User’s Guide Display List of Time and Measurement Results Altitude measurements “Measuring Altitude” on page 79 <Example> Altitude is 3,160 m and the vertical speed is +1 m/s 1 m/s climbing 3,100 m 60 m <Example> Altitude is 435m and the vertical speed is -3m/s 3 m/s descending 400 m 35 m...
- Page 160 MB73 (TR-MB7) User’s Guide Display List of Time and Measurement Results Compass measurements “Checking the Direction” on page 87 North North...
- Page 161 MB73 (TR-MB7) User’s Guide Display List of Time and Measurement Results Waypoint feature Depending on the Distance Range setting, the distance (the minimum distance while measuring) represented by one mark on the scale for the measurement hand (long hand) differs. If you change the Distance Range setting, the value indicated by the measurement hands (short hand/long hand) changes even if you measure at the same location.
- Page 162 MB73 (TR-MB7) User’s Guide Display List of Time and Measurement Results Barometric pressure measurements “Measuring Barometric Pressure” on page 108 <Example> 1,005 hPa 5 hPa 1,000 hPa Rising tendency <Example> 915 hPa 15 hPa 900 hPa Falling tendency...
- Page 163 ©2018 Seiko Epson Corporation Rev.1.0 EN...