LG STB-5500 Commercial Mode Setup Manual
Hd commercial interface set-top box
Hide thumbs
Also See for STB-5500:
- Owner's manual (25 pages) ,
- Owner's manual (23 pages) ,
- Owner's manual (21 pages)
Table of Contents
Advertisement
© Copyright 2017 LG Electronics U.S.A., Inc.
HD Commercial Interface Set-top Box
Commercial Mode Setup Guide
STB-5500
Interactive Pro:Centric
Functionality
RF or IP Content Delivery
EXPERIENCED INSTALLER
EZ-Manager Wizard
pages 17 – 26
Custom Master STB Setup
pages 42 – 44
Cloning Procedures
pages 45 – 51
P/N: 206-4310 (Rev A)
®
•
•
Advertisement
Table of Contents
Troubleshooting

Related Manuals for LG STB-5500


Summary of Contents for LG STB-5500
- Page 1 Functionality RF or IP Content Delivery • EXPERIENCED INSTALLER EZ-Manager Wizard pages 17 – 26 Custom Master STB Setup pages 42 – 44 Cloning Procedures pages 45 – 51 P/N: 206-4310 (Rev A) © Copyright 2017 LG Electronics U.S.A., Inc.
-
Page 2: Safety Warnings
• Consult the dealer or an experienced radio/TV technician for help. CAUTION: Do not attempt to modify this product in any way without written authorization from LG Electronics U.S.A., Inc. Unauthorized modification could void the user’s authority to operate this product. -
Page 3: Important Safety Instructions
IMPORTANT SAFETY INSTRUCTIONS Read these instructions. 16. Power Cord Caution: Check the STB specifications in the Owner’s Keep these instructions. Manual to determine power requirements. Heed all warnings. Periodically examine the cord of your appliance, and if its Follow all instructions. appearance indicates damage or deterioration, unplug it, discontinue use of the appliance, and have the cord replaced Do not use this apparatus near water. - Page 4 IMPORTANT SAFETY INSTRUCTIONS 26. Keep the product away from direct sunlight. (Continued from previous page) 27. Do not install this product on a wall if it could be exposed to 21. Outdoor Antenna Grounding oil or oil mist. This may damage the product and cause it to If an outside antenna or cable system is connected to the fall.
-
Page 5: Table Of Contents
USB Configuration ......25 STB-5500 Jack Panels......87 Ez Download Utility . -
Page 6: Stb-5500 Introduction / Setup Checklist
If you are connecting the STB to an LG display panel, the LG remote provided with the display should be sufficient. If you are connecting the STB to a non-LG display panel or if you intend to use multiple STBs/displays in a single room installation environment, an LG Installer Remote dedicated to STB control is available for purchase. -
Page 7: Stb-5500 Cabling Connections
STB. • For newer LG Public Display TVs, when you power ON the TV for the first time, a Welcome Wizard will be displayed, and you will need to complete the first two steps of the wizard before you can successfully connect the STB. -
Page 8: Connect The Stb To The Display Panel
• For LG Hospitality TVs: Use the MPI/MTI cable provided to connect MPI/MTI TELEVISION CONTROL on the STB-5500 front jack panel to the MPI port on the rear jack panel of the display. • For LG Public Display TVs or LG Commercial Monitors: Use the TLM cable provided to connect RS-232C TELEVISION CONTROL on the STB-5500 rear jack panel to the DB9 RS-232 CONTROL connector on the rear jack panel of the display. - Page 9 Output Resolution” on page 16). Note: If you are using a commercial non-LG TV as the display panel, and you do not see video on the display, verify the display panel is on the appropriate HDMI input so that you can complete step 4.
-
Page 10: Stb-5500 Cabling Diagram
STB-5500 Cabling Connections (Cont.) STB-5500 Cabling Diagram See also step 2 of procedure above. STB-5500 Front Panel MPI/MTI EXTERNAL USB IN 2 TELEVISION MPI CONTROL CONTROL IN 1 IN 2 USB IN 1 a) Connect MPI/MTI TELEVISION CONTROL to LG... -
Page 11: Commercial Mode Overview
STB_5500 CPU - CTV or Protocol Translation Controller (PTC) or it resides externally from the STB (i.e., in a device from the solution provider). The STB-5500 is capable of Free-To-Guest (FTG) Mode operation via the STB CPU. 000 INSTALLER SEQ Alternatively, the STB can be configured for Pass-through Mode (default). -
Page 12: Ftg Mode
• STB Zoning and Wi-Fi Zoning options for location-specific configuration. LG’s FTG File Manager PC software enables you to create an FTG Configuration (.tlx) file, which may be used to configure the CPU for FTG Mode. FTG File Manager utilities enable you to create/edit an FTG Channel Map and configure Installer Menu settings. -
Page 13: Determining The Stb Operating Mode
• Local: Configure an individual STB-5500 via its USB port using a USB memory device / “.tlx” file. The file may be either a Clone file (see “Cloning Procedures” on pages 45 to 51) or an FTG Configuration file (see “FTG File Manager Utilities Overview”... -
Page 14: Pro:centric Operation
Pro:Centric Operation Pro:Centric Interactive Menu Features LG’s Pro:Centric application enables guests to locate and select television entertainment using an interactive channel guide, check the daily weather, and view hotel and surrounding amenities via custom billboards and points-of-interest maps. Pro:Centric application features include: •... -
Page 15: Pro:centric Setup
Pro:Centric Operation (Cont.) Pro:Centric Setup Administration and management options for the Pro:Centric server are described in detail in the Pro:Centric Server Admin Client User Guide. This document describes only those settings that must be specified on the STB to enable Pro:Centric remote management and/or the Pro:Centric application. •... -
Page 16: Setting The Video Output Resolution
Setting the Video Output Resolution The first time you turn ON the STB/display panel, a Please Select Video Output Resolution menu will be displayed, and you will need to select the appropriate option—720p, 1080p, 1366 x 768, or 2160p—for the STB’s video output format. You cannot proceed with STB configuration until you make a selection. -
Page 17: Ez-Manager Wizard
EZ-Manager Wizard The primary purpose of the EZ-Manager Wizard is to guide you through the process (automated or manual) of configuring the essential Installer Menu items for Pro:Centric operation. The wizard is initiated once the video output resolution is set (see previous page) and subsequently each time the STB/display panel is turned ON, until one of its configuration methods has been completed or the wizard is exited. -
Page 18: Initiate Configuration Or Exit The Ez-Manager Wizard
EZ-Manager Wizard (Cont.) Initiate Configuration or Exit the EZ-Manager Wizard The Welcome screen provides a brief introduction to the EZ-Manager Wizard. WELCOME TO THE EZ-MANAGER WIZARD Use the EZ-Manager Wizard to configure the STB for Pro:Centric operation or to configure the STB using a USB memory device. -
Page 19: Stb Configuration Options
EZ-Manager Wizard (Cont.) STB Configuration Options From the STB Configuration Options screen, you can choose how to proceed with the configuration of this STB/display (assuming you do not opt to exit the wizard, which you may also do at any time). Note: If you intend to use the Zoning feature(s) on the STB for location-specific configuration purposes, select the “Zones &... - Page 20 EZ-Manager Wizard (Cont.) EZ-Manager Wizard (Cont.) Note: Zoning features are only applicable for STBs that will be configured using a “.tlx” file (local or remote configuration). ZONES, LABEL, AND ROOM NUMBER Wi-Fi Zone If creating Wi-Fi Zones for AP settings, select the appropriate Wi-Fi <...
-
Page 21: Configure Pro:centric Settings
EZ-Manager Wizard (Cont.) Configure Pro:Centric Settings Once you select “NEXT” from the STB Configuration Options screen, the Searching for Pro:Centric Server screen is displayed. Note: Select the “BACK” button, where available, to check previous settings, as necessary. SEARCHING FOR PRO:CENTRIC SERVER... This step automatically searches for the Pro:Centric server. - Page 22 EZ-Manager Wizard (Cont.) (Continued from previous page) If the process is successful, no further user interaction is required, though, in some instances, where the option (for example “NEXT”) is available, you may manually move forward to subsequent steps within the wizard to speed up the process. PROCESSING THE PRO:CENTRIC CONFIGUR...
- Page 23 EZ-Manager Wizard (Cont.) Manual Pro:Centric Configuration 1. With the Searching for Pro:Centric Server screen on display, use the Left/Right arrow keys on the Installer Remote to select MANUAL PRO:CENTRIC at the bottom right of the screen, and then press OK. In the Pro:Centric Manual Configuration screen (see examples below), you will be able to configure the appropriate Pro:Centric settings in the STB.
- Page 24 EZ-Manager Wizard (Cont.) (Continued from previous page) RF Configuration a) In the Media Type field, use the Left/Right arrow keys to select RF. b) In the Data Channel field, use the Left/Right arrow keys to select the RF channel number that will be used by the Pro:Centric server as its data channel.
-
Page 25: Usb Configuration
EZ-Manager Wizard (Cont.) (Continued from previous page) If you opt to initiate a real-time download in the last step, the EZ-Manager Wizard will proceed with the Pro:Centric application and/or E-Z Installation data downloads (see Processing the Pro:Centric Configuration screen example on page 22). When the Pro:Centric configuration is complete, an EZ-Manager Configuration Complete screen (see example on page 22) is displayed, and after 10 seconds, the wizard exits, and the STB turns OFF. -
Page 26: Ez-Manager Wizard
EZ-Manager Wizard (Cont.) 1. Insert the USB memory device with the appropriate file(s) into either of the STB’s USB ports. 2. Use the arrow keys on the Installer Remote to select USB CONFIGURATION, and then press You will be redirected to the STB Manager / USB download options. STB MANAGER Ez Download USB DEVICE... -
Page 27: Ez Download Utility
Ez Download Utility The Ez Download utility, available from the STB Manager, enables you to select multiple files at one time from the files loaded on a USB memory device. You may use this utility to download any one or all of the following to an STB: •... - Page 28 Ez Download Utility (Cont.) (Continued from previous page) 3. If the STB is currently in Pass-through Mode, you would like to transfer (import) a “.tlx” file to the STB via the Ez Download utility, and you intend to use one or both of the STB’s Zoning feature(s), assign the appropriate STB Zone # and/or Wi-Fi Zone # in the STB at this time.
- Page 29 Ez Download Utility (Cont.) (Continued from previous page) USB Device USB 1: Device 1 USB 2: Device 2 7. If it is not currently selected, use the arrow keys to select Ez Download, and then press OK. As illustrated in the example above, when Ez Download is selected, a list of files/file types is displayed on the screen.
-
Page 30: Ez Download Utility
Ez Download Utility (Cont.) (Continued from previous page) 10. When you are ready to continue, use the arrow keys on the Installer Remote to select UPDATE, and then press OK. Update progress will be shown in a new screen. Do NOT remove the USB device while updates are in progress. -
Page 31: Installer Menu
Once you re-enter the correct password (e.g., press 9-8-7-6 + EXIT), the STB Installer Menu will display. Note: If an LG Hospitality TV (for example, LP645H, LT670H, etc.) is being used as the display panel (connected to MPI/MTI TELEVISION CONTROL on the STB) and you press the TV Installer Menu entry sequence + OK, you will access the TV’s Installer Menu instead of the STB’s Installer Menu. -
Page 32: Using The Installer Menu
Installer Menu (Cont.) As part of the Installer Menu header (in all modes), two 3-character acronyms are displayed to indicate the STB’s current configuration mode. The table below lists all possible mode identifiers for the STB-5500. Acronym Description CPU-CTV Pass-through Mode with Channel Lineup in CPU... -
Page 33: Strt Volume
MUTE DISABLE 0 / 1 Set to 1 to disable Mute Function. If set to 1, menu navigation buttons/functions on LG Hospitality and commercial KEY DEFEAT 0 / 1 non-LG display panels are not functional/available. N/A for LG Public Displays or LG Commercial Monitors. -
Page 34: Key Lock
EN NOISE MUTE 0 / 1 (Analog channels only) If set to 1, audio is muted if no signal is present. If set to 1, all LG Hospitality and commercial non-LG display panel button KEY LOCK 0 / 1 functions are locked. N/A for LG Public Displays or LG Commercial Monitors. -
Page 35: Detailed Descriptions Of Installer Menu Items
Installer Menu (Cont.) Installer Menu Items 117 through 122 Item Function Value Range Default Value Brief Description of Function FACT DEFAULT 0 / 1 Set to 1 to restore the factory default settings of all Installer Menu items. Set to 0 to disable. Set from 1 to 135 to match the RF channel number used by 0 –... - Page 36 STB’s menus by pressing MENU on the remote. or 4. If the Start Channel is 3, then the STB will remain locked on Note: This feature does not apply to LG Public Displays or LG channel 3. Commercial Monitors since the STB will always disable those displays’...
- Page 37 Installer Menu (Cont.) 021 - V-CHIP (Parental Control) 039 - REAR AUX EN. (Rear Aux Enable) Set to 1 to activate V-Chip (Parental Control) and have it available Set to 1 to enable display panel rear Aux (AV) input. Set to 0 to to the end user to filter and control or otherwise restrict program- disable display panel rear Aux (AV) input.
- Page 38 Disabled External Speaker (Optical*/HDMI ARC*) 078 - UPN MSB (UPN Most Significant Byte) User programmable number, most significant byte readable by Enabled LG Sound Sync (Optical*) MPI command. Note: Not linked to serial number. Disabled LG Sound Sync (Optical*) Enabled...
- Page 39 Set to 0 to disable Key Lock. Pro:Centric application appears on the display. Note: This feature does not apply to LG Public Displays or LG Note: This item is not available in the Installer Menu when item Commercial Monitors since the STB will always disable panel 119 DATA CHANNEL is set to 0.
- Page 40 Delay value, accordingly. For example, if you are using the STB loaded on a Pro:Centric server, no confirmation is required. with an LG PW1000 or PW1500 projector, it is recommended that Note: Refer to documentation for the applicable display panel(s) you set the delay to 10 or more seconds.
- Page 41 Installer Menu (Cont.) Data Channel Auto Search feature: When this item is set to 255 Random Distribution of Update Time: If this item is set to 128 (default), once every 24 hours, the STB will initiate a search of 10 (OFF), the time at which a Data Channel Auto Search (item 119 predefined channels (10, 20, 30, ...
-
Page 42: Custom Master Stb Setup
Custom Master STB Setup This section describes how to create a customized Master STB Setup for cloning purposes when the STB is in Pass-through Mode. All cloning (export and import) processes on the STB are performed via USB memory device / “.tlx” file. The Master STB Setup may be exported to a Clone (.tlx) file, which can then be used (i.e., imported) to configure either STBs that are to remain in Pass-through Mode or STBs that are to be configured for FTG Mode. -
Page 43: Custom Master Stb Setup Procedure
Custom Master STB Setup (Cont.) Custom Master STB Setup Procedure 1. Turn ON the STB/display panel. The next step depends on whether the EZ-Manager Wizard appears on the screen when you turn ON the STB/display: • If the wizard is displayed, the STB is in the required factory default state. - Page 44 Custom Master STB Setup (Cont.) (Continued from previous page) 4. Set up STB/display panel features. On-screen setup menus control the features of the STB/display. PICTURE PICTURE Press MENU on the Installer Remote, and select the All Settings Picture menu icon from the Quick Settings Menu to access the advanced STB setup menus.
-
Page 45: Cloning Procedures
Cloning Procedures Cloning typically refers to the process of using a Master STB Setup to configure a Target STB. This section describes how to save (export) a Master STB Setup and then transfer (import) it to a Target STB using a USB memory device / Clone (.tlx) file. You can also create an FTG Configuration (.tlx) file using the FTG File Manager and then use the Import Clone File procedure to transfer the configuration to Target STBs. - Page 46 Export Clone File USB DEVICE USB 1: Device Name Ez Download Select the filename, and then select EXPORT below. Insert Background Image(s) Update STB Software STB-5500-UA_1.TLX Update PTC Software Import Clone File Export Clone File Diagnostics EXPORT (Continued on next page)
-
Page 47: Importing A Clone File
9. Modify the filename, as required. While the STB model element of the filename may not be changed, you can differentiate this Clone file from other STB-5500 Clone files by changing the numeric assignment appended to the end of the filename. Select/highlight the filename, and then use the Up/Down arrow keys on the Installer Remote to scroll through numeric assignments until the desired number is shown. - Page 48 Cloning Procedures (Cont.) • If the Target STB is currently in Pass-through Mode and you intend to use the STB’s Zoning feature(s)—i.e., the Clone/Configuration (.tlx) file you are importing contains an FTG Channel Map and/or FTG profile(s) with STB Zone and/or Wi-Fi Zone assignments—make sure to assign the appropriate STB Zone # and/or Wi-Fi Zone # in the STB when directed to do so in the procedure below.
- Page 49 Cloning Procedures (Cont.) (Continued from previous page) Note: In order for the proper location-specific STB Zone and/or Wi-Fi Zone profile data to be applied, the Zone designation(s) must be assigned in the Target STB(s) BEFORE importing is initiated. 4. Insert the USB memory device with the Clone/Configuration (.tlx) file into either of the USB ports on the Target STB.
- Page 50 OK. Note: Filenames of exported Clone files are comprised of the STB model and a numeric element, for example, STB-5500-UA_1.TLX. 11. If the Clone/Configuration (.tlx) file includes an FTG Channel Map with RF channels and Aux inputs only, you can choose the format for the channel tuning/banner display. Use the arrow keys to select the desired Channel Tuning / Channel Banner Display option—either Logical or...
-
Page 51: Cloning Procedures
Cloning Procedures (Cont.) (Continued from previous page) Note: If the Target STB was previously in Pass-through Mode, and the Clone/Configuration (.tlx) file that was imported contained an FTG Channel Map, the Target STB CPU is now in FTG Mode. Upon restart (and, if applicable, confirmation of new video output resolution—see note below), the STB tunes according to the Start Channel setting in the Installer Menu. -
Page 52: Ftg File Manager Utilities Overview
FTG File Manager Utilities Overview This section provides an overview of the FTG File Manager, which is used for FTG Mode via CPU configuration. The software is available online at: www.lg.com/us/business/display-solutions/ftg. Creating an FTG Configuration File The procedure below describes how to use the FTG File Manager utilities (see sample screens on pages 54 to 57) to create an FTG Configuration (.tlx) file that can be saved to a USB memory device. - Page 53 • If it is not already selected, click the down arrow at the right of the Region field, and select North America. Then, click the down arrow at the right of the Chassis field, and select STB-5500 from the drop-down list of available models.
-
Page 54: Ftg File Manager Main Screen
Copy FTG Installer Menu settings to and from FTG Configuration List. Assign Zone as applicable. Load default FTG Installer Menu for STB-5500. SETUP MENU LIST TLX FILE CONTENTS STB setup menu data to be Data contained in opened FTG Configuration (.tlx) file. -
Page 55: Ftg Channel Map Configuration Utility
FTG File Manager Utilities Overview (Cont.) FTG Channel Map Configuration Utility The FTG Channel Map Configuration Utility enables you to create, view, edit, and print a Logical Channel Map. EDIT/ADD MAP PRINT MAP Click to open the FTG Click to display a printable Channel Map Editor to create FTG Channel Map Report. -
Page 56: Ftg Channel Map Editor
FTG File Manager Utilities Overview (Cont.) FTG Channel Map Editor The FTG Channel Map Editor shows a single Logical Channel’s data and the FTG Channel Map. LOGICAL CHANNEL MAPPING CUSTOM CHANNEL LABELS/ICONS SET CHANNEL ATTRIBUTES Select a Logical Channel number. Then, Enter custom labels and select icons Check/select Encrypted, OSD, assign the RF, Major, and Minor channel... -
Page 57: Ftg Installer Menu Configuration Utility
LAN features, including the Wi-Fi Zoning feature. Refer to the Free-To-Guest (FTG) File Manager User Guide for further information. Also, see Reference section, “Using the STB’s Zoning Features,” for additional information on Wi-Fi Zoning. • Hospital parameters are not applicable for the STB-5500. 206-4310... -
Page 58: Ip Environment Setup
IP Environment Setup The IP Environment Menu enables you to set up the network features of the STB. If you intend to create a Master STB Setup for cloning purposes (see Master STB Setup procedure on pages 42 to 44), all IP Environment settings, with the exception of Wired Network Connection settings, the STB name (editable in the Media Share Menu), DIAL, and SoftAP settings, may be cloned. - Page 59 IP Environment Setup (Cont.) Configuring a Wired Network Connection Note: If desired, you can configure both wired and wireless NETWORK SETT... connections. However, note that a wired connection is always prioritized over a wireless connection. That is, when the STB is Network Network / turned OFF and then back ON, if a LAN cable is detected between...
- Page 60 IP Environment Setup (Cont.) (Continued from previous page) If the network is connected successfully, a “Connected to Internet” message will appear just below the progress display. If the network connection is not successful, the progress display will identify the network element in which the connection failed. Check your cabling and/or verify the configuration data, as necessary.
- Page 61 IP Environment Setup (Cont.) IP Stream Control If necessary, due to an audio and/or video stream delay, IP Stream Control options enable you to compensate for synchronization irregularities by allowing audio PTS and video PTS offset modifications. This menu also enables you to specify the IGMP version (2 or 3). Note that any modifications to these settings should be performed by qualified personnel only.
-
Page 62: Pro:centric Setup
IP Environment Setup (Cont.) Pro:Centric Setup Pro:Centric options enable you to configure the STB with the appropriate settings to connect to the Pro:Centric server. Use the Up/Down arrow PRO:CENTRIC keys on the Installer Remote to navigate between fields. Network 1. With the IP Environment Menu on display, use the arrow keys on the Installer Remote to select the Pro:Centric menu option. - Page 63 IP Environment Setup (Cont.) (Continued from previous page) IP Configuration Note: If the server IP address and port number or domain name have already been set in the EZ-Manager Wizard, the specified data will be reflected in the fields displayed. Note: Setting the Media Type to “IP”...
-
Page 64: Media Share Setup
DLNA Certified devices connected to the same LAN as the STB or by wireless ® LG devices using LG’s Smart Share application with Wi-Fi Direct ® • Screen Share: Enables screen sharing with a Miracast or Wireless Display (WiDi) capable ®... -
Page 65: Ip Environment Setup
OK on the Installer Remote. displayed since enabling Bluetooth Sound Sync renders Wireless LG • Select the appropriate values in the Wi-Fi Signal Strength, and Sound Sync unavailable. Select Wi-Fi Channel fields, as required. -
Page 66: Pre-Loaded Applications
IP Environment Setup (Cont.) Pre-loaded Applications This option allows you to select which of the pre-loaded application icons to display in the STB’s Smart Launcher, which appears along the PRE-LOADED... bottom of the screen. Network When the Pro:Centric application is disabled, the Smart Launcher is available to end users via the PORTAL button on the remote control. - Page 67 Reference: Updating STB Software using a USB Memory Device This section describes how to update STB (CPU) and/or PTC software using the STB Manager “Update STB Software” and/or “Update PTC Software” option(s), respectively, though you may also use the Ez Download utility to update software, if desired. See “Ez Download Utility” on pages 27 to 30 for further information.
- Page 68 Reference: Updating STB Software using a USB Memory Device (Cont.) (Continued from previous page) STB MANAGER Ez Download USB DEVICE USB 1: Device Name Ez Download Select the file(s) to download, and then select UPDATE below. Insert Background Image(s) Insert Background Image(s) None Update STB Software Update STB Software...
-
Page 69: Device
Reference: Downloading Background Images using a USB Memory Device Background images are intended for use with the Bluetooth Sound Sync feature. Once a mobile device has been paired with the STB, guests may choose to display a slideshow on the screen (as opposed to a blank screen or the Bluetooth Sound Sync screen) while audio is playing. -
Page 70: Memory Device
Reference: Downloading Background Images using a USB Memory Device (Cont.) (Continued from previous page) STB MANAGER Ez Download USB DEVICE USB 1: Device Name Ez Download Select the file(s) to download, and then select UPDATE below. Insert Background Image(s) Insert Background Image(s) None Update STB Software Update STB Software... -
Page 71: Display Panel Specifications
Interface (MTI) protocol. Use the MPI/MTI cable provided to connect the RJ-12 MPI/MTI TELEVISION CONTROL port on the STB-5500 front jack panel to the MTI (typically labeled “DATA”) port on the rear jack panel of the display. Note that some MTI interface configuration may be required on non-LG TVs. Refer to the TV manufacturer’s documentation to determine if any configuration is required. -
Page 72: Stb Aux Input Configuration
Reference: STB Aux Input Configuration ENABLE MPI DATA MPI DATA DATA STATUS DIRECT ACCESS Installer DATA STATUS STATUS TYPE TYPE 0xD2 Tuning * Menu Item Installer Menu TYPE 0x0D 0x41 SOURCES CURRENT AV 046 START AUX SOURCE (R) ENABLED (R/W) SOURCE (R) AUX SRCE (Start Aux... -
Page 73: Auto Input(S) Sensing Feature
The following table identifies the Installer Menu display code Input # for each Aux input that is available on the STB-5500. The table also identifies the Installer Menu item associated with each Aux input. Remember that in order for auto-sensing to be enabled for an input, that input must also be enabled in the Installer Menu. - Page 74 Reference: Auto Input(s) Sensing Feature (Cont.) Auto Inputs Values Inputs Item 042 Installer Menu Value Display Component HDMI 1 HDMI 2 HDMI 3 Enabled Disabled Disabled Disabled Disabled DDDXXXX0 Disabled Disabled Disabled Disabled Enabled DD5XXXXD Enabled Disabled Disabled Disabled Enabled DD5XXXX0 Disabled Disabled...
-
Page 75: Enabling Or Disabling The Mti Protocol On The Stb
1. Launch the FTG File Manager and open an existing file or create a new file (i.e., load FTG Installer Menu settings for the STB-5500), as necessary. 2. In the FTG Installer Menu Configuration Utility, click on Installer Menu item #113 Panel Type in the Index tab, or click on the STB I/O tab. -
Page 76: Enabling Or Disabling The Mti Protocol On The Stb
Reference: Enabling or Disabling the MTI Protocol on the STB (Cont.) (Continued from previous page) 4. Either: • Click the “MTI Disable” checkbox to remove the checkmark and enable the MTI protocol. • Click the “MTI Disable” checkbox to add the checkmark and disable the MTI protocol. 206-4310... -
Page 77: Restoring Factory Defaults On The Stb(S)
This section describes how to restore a single STB, regardless of its current mode, to a factory default condition. The following procedure requires that you contact LG technical support to obtain a predefined value/password for Installer Menu item 117 FACT DEFAULT that enables access to initiate a factory “IN-STOP”... -
Page 78: Using The Stb's Zoning Features
Installer Menu profile used for standard guest rooms. The STB Zoning feature enables you to save multiple STB-5500 FTG Installer Menu profiles, each with its own Zone assignment, in one FTG Configuration file. If each STB in the aforementioned locations (Zones) has had its STB Zone # set appropriately, as described in the procedure on page 80 or via the EZ-Manager Wizard, the STB(s) will only be configured by the Installer Menu profile that matches its(their) Zone setting. - Page 79 0 designation. If, on the other hand, the STB Zone # is set to 1, the STB will first look in the file for the STB-5500 Installer Menu and/or Setup Menu profile(s) with a Zone 1 designation. If none of the STB-5500 Installer Menu and/or Setup Menu profiles has a Zone 1 designation, the STB will then look for the STB-5500 profile(s) with a Zone 0 designation.
- Page 80 Reference: Using the STB’s Zoning Features (Cont.) Using the Wi-Fi Zoning Feature with Cloning Configuration A location-specific Wi-Fi configuration / Clone (.tlx) file may be saved (exported) from a Master STB and then be used to configure Target STBs. First, the wireless network (i.e., the access point login data) must be configured in the Master STB’s IP Environment Menu (see “Configuring a Wi-Fi Network Connection”...
-
Page 81: Using The Stb's Zoning Features
Reference: Using the STB’s Zoning Features (Cont.) (Continued from previous page) • Label: Allows you to select a North, South, East, or West text label for this STB. Select/highlight the Label field and press OK. Then, use the Up/Down arrow keys to select the applicable label. Press OK when you are finished. -
Page 82: Using Media Share Features
DLNA Certified devices (the devices must be connected to the same LAN as the STB) or by wireless LG devices using LG’s Smart Share application with Wi-Fi Direct. • Screen Share: Allows guests to select a Miracast or WiDi capable device, whose screen can be displayed on the display panel screen. - Page 83 Smart Share with Wi-Fi Direct The following steps describe how to access and use Wi-Fi Direct (i.e., to connect to a wireless LG device). Remember that you must also turn ON Wi-Fi Direct and launch the Smart Share application on the LG device.
- Page 84 Reference: Using Media Share Features (Cont.) (Continued from previous page) 6. Use one of the following methods to access media files/folders, depending on the current configuration of the STB: • If the Pro:Centric application is not loaded, press PORTAL on the Installer Remote, and use the Left/ Right arrow keys to select Music or Photo &...
- Page 85 Reference: Using Media Share Features (Cont.) (Continued from previous page) • If the Pro:Centric application is not loaded, press PORTAL on the Installer Remote. • If the Pro:Centric application is loaded, press SMART on the Installer Remote (see note above regarding remote with SMART button).
-
Page 86: Using Media Share Features
Reference: Using Media Share Features (Cont.) (Continued from previous page) 1. Turn ON the STB/display panel, and press MENU on the Installer Remote to display the STB menus (either the setup menus or the Function Menu depending on whether the STB is or is not in Pass-through Mode). -
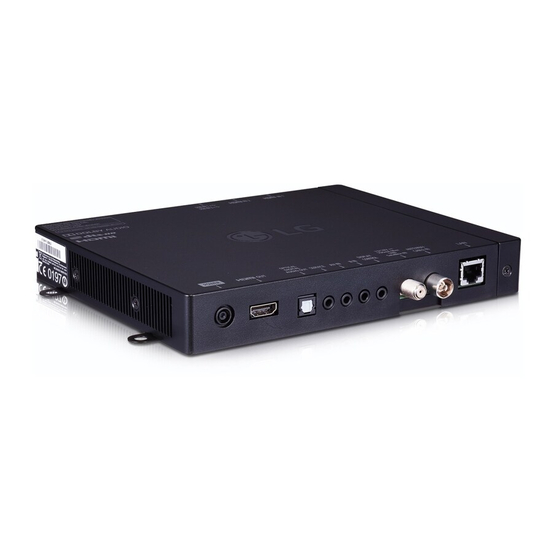
Page 87: Stb-5500 Jack Panels
Only one Television/Display Control connection should be used depending on the type of display panel to be controlled. Refer to “STB-5500 Cabling Connections” on pages 7 to 10, and/or see Reference section, “Display Panel Specifications,” for information on determining the appropriate connection. -
Page 88: External Ir Receiver Specifications
Reference: External IR Receiver Specifications The IR IN 3.5 mm stereo jack on the rear panel of the STB-5500 provides an input for an optional external IR receiver (Example: Sung Nam Electronics EAD61273113). The jack provides external IR VCC of 3.5 volts. -
Page 89: External Audio Line Out Specifications
Reference: External Audio Line Out Specifications The AUDIO LINE OUT 3.5 mm stereo jack on the rear panel of the STB-5500 provides stereo analog audio output for external audio equipment. Installer Menu item 097 AUDIO OUTPUT must be set to either 9 or 10 to make analog audio output available. -
Page 90: Installer Remote Typical Key Functions
Reference: Installer Remote Control Typical Key Functions An LG Installer Remote is required to set up and operate the STB/display panel. The LG Installer Remote illustrated below shows typical remote control functions and is provided for reference only. (POWER) SMART Turns the STB/display ON or OFF Displays the STB’s Smart Launcher. -
Page 91: Stb Installer Remote
Reference: STB Installer Remote If you are using an LG display panel, the LG remote provided with the display panel should be sufficient. However, if you are using a commercial non-LG display panel or if you intend to use multiple STBs/displays in a single room installation environment, an LG Installer Remote dedicated to STB control (see example at right) is available for purchase. -
Page 92: Troubleshooting
Replace batteries. Wrong battery polarity. Check that “+” and “-” match in battery compartment. Too much light in room. Dim room light. Wrong Installer Remote. Requires compatible LG Installer Remote (see examples in this document). Contact your LG representative. 206-4310... -
Page 93: Stb Quick Check
9. If there is still a problem, please display panel? output), either restore the connection to contact your LG representative. HDMI1 or make sure Installer Menu item 100 VIDEO INTERFAC is set in accordance with the HDMI port being used. -
Page 94: Commercial Mode Check
Troubleshooting (Cont.) Commercial Mode Check Use this flowchart to determine whether the STB is currently in Commercial Mode. Press POWER on LG Installer Remote. STB/display See STB Quick turned ON? Check flow chart. Leave STB/display ON, and press MENU on the Installer Remote. -
Page 95: Glossary Of Terms
The process of capturing a Master STB Refers to a particular commercial mode of server.) Setup and transferring it to a Target STB operation within an LG STB. See also FTG using a USB memory device. Mode. Pro:Centric Admin Client... -
Page 96: Document Revision History / Open Source Software Notice 96
In addition to the source code, all referenced license terms, warranty disclaimers and copyright notices are available for download. LG Electronics will also provide open source code to you on CD-ROM for a charge covering the cost of performing such distribution (such as the cost of media, shipping and handling) upon e-mail request to opensource@ lge.com. - Page 97 Pro:Idiom is a registered trademark of Zenith Electronics LLC. Pro:Centric, Smart Share, and the “LG” logo are registered trademarks of LG Electronics Inc. DLNA Certified is a registered trademark of Digital Living Network Alliance. Intel is a registered trademark of Intel Corporation in the U.S.