Table of Contents
Advertisement
Advertisement
Table of Contents

Related Manuals for ABB Pluto Series


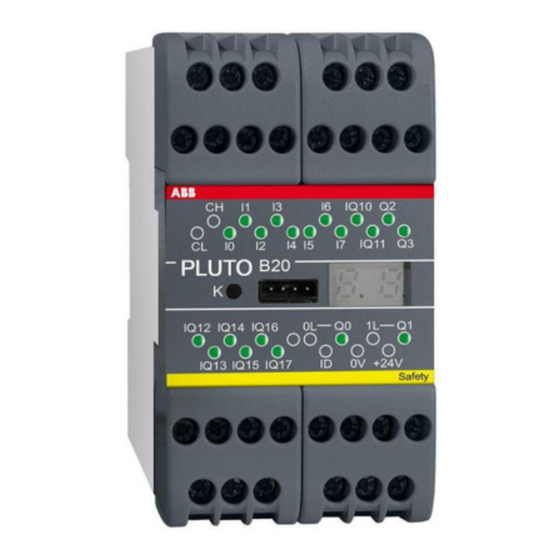
Summary of Contents for ABB Pluto Series
- Page 1 Pluto Gateway ABB Robotics Integration Manual English v5B 2TLC172011M0205_B...
-
Page 2: Table Of Contents
Terminal Setting ..........................4 Additional data ..........................4 Introduction ............................5 Examples............................6 Gateway Device Integration ......................7 DeviceNet address etc ........................7 Adding gateway in the ABB robotic system ..................7 Gateway Default Configuration ......................8 Gateway Configuration........................8 Commissioning..........................8 Gateway Configuration by ABB Robotic System ................9 Precondition ............................9 5.1.1... - Page 3 Set Device Configuration ........................23 Configuration Verification ........................25 ABB Robotic System IO Configuration ...................26 Input IO configuration........................26 7.1.1 Pluto stations 0..........................26 7.1.2 Additional data area 0 ........................27 7.1.3 Pluto stations 1..........................27 7.1.4 Pluto stations 2..........................28 7.1.5 Pluto stations 3..........................29 7.1.6 Pluto stations 4..........................29 7.1.7...
-
Page 4: Important Notes
Regarding other difference see (REF A). 1.2 Size limitations Currently the ABB robotic system has a size limitation 64 bytes for in and out data. This size limitation will give that a ABB robotic system connected to a Pluto system with more then 16 Pluto units (or additional data areas) there is a needs to have two (2) Pluto gateways to be able to read data from all connected Pluto units, see chapter 2.1. -
Page 5: Introduction
ABB robotic system. The integration are described in following steps, • Gateway device integration. This part will describe how to add the gateway into the ABB robotic system, see chapter 3. • Gateway device configuration. This part will describe ho to configure the gateway for correct input and output of data to and from the ABB robotic system. -
Page 6: Examples
If want to read data from Pluto 0 – 24. Use ABB robotic system configuration. There are a need to read data from more then 16 Pluto then use ABB robotic system configuration and also use two Pluto gateway. Configure one Pluto gateway to read data from Pluto 0-11. -
Page 7: Gateway Device Integration
3 Gateway Device Integration 3.1 DeviceNet address etc Before adding the Pluto gateway to the ABB robotic system the gateway need to be given a DeviceNet MAC address and also set to the current DeviceNet bus speed. These settings are done on the gateway DIP switch SW1. -
Page 8: Gateway Default Configuration
4.2 Commissioning During commissioning; • At ABB robotic system start it will do a DeviceNet IO connection with the gateway. • If the MNS LED is steady green the gateway is connected and normal operation. 2TLC172011M0205_B... -
Page 9: Gateway Configuration By Abb Robotic System
3.0 or higher. 5.2 Settings in configuration file This text below is a part of the ABB robotic system configuration file for the DeviceNet configuration. By adding the below text into the configuration file the ABB robotic system will send down these 5 commands to the gateway and set the gateway configuration. -
Page 10: Additional Data
• Enable data to Pluto “plutoNetEnb” value of 3 (DefValue) equal to bits 0011 give that the gateway will retransmit package area 0 and 1 from ABB robotic output data to the Pluto network, see page 18. • Data to Pluto timeout “plutoTimeout” value of 1000 ms (DefValue) give that the gateway will use a timeout of 1000 ms for receiving updates of output data from ABB robotic system, see page 18. - Page 11 • Gateway node number “plutoGatewayNode” value of 0 will tell the gateway to read it’s node number from DIP-switch, see page 19. • Additional data configuration of area 00 to get additional data from node 10 (e.g. Pluto 10) with IO-type 111 (e.g. global data), note DN_Path see 19. •...
- Page 12 -Name "plutoAddData_Node04" -UnitType "plutoGateway" -DefValue "0" -OrderNr 15\ -DN_Path "6,20 64 24 00 30 26,D1,1" -DN_Service 16 -Name "plutoAddData_IO04" -UnitType "plutoGateway" -DefValue "0" -OrderNr 16\ -DN_Path "6,20 64 24 00 30 27,D1,1" -DN_Service 16 -Name "plutoAddData_Node05" -UnitType "plutoGateway" -DefValue "0" -OrderNr 17\ -DN_Path "6,20 64 24 00 30 28,D1,1"...
- Page 13 -DN_Path "6,20 64 24 00 30 3D,D1,1" -DN_Service 16 Normally a gateway connected to ABB robotic system can’t access data areas above this lines, see size limitations page 4. But it’s still a good behavior to add these lines to insure that these areas are disabled by setting default value (node 0 and type 0).
- Page 14 -Name "plutoAddData_Node24" -UnitType "plutoGateway" -DefValue "0" -OrderNr 55\ -DN_Path "6,20 64 24 00 30 4E,D1,1" -DN_Service 16 -Name "plutoAddData_IO24" -UnitType "plutoGateway" -DefValue "0" -OrderNr 56\ -DN_Path "6,20 64 24 00 30 4F,D1,1" -DN_Service 16 -Name "plutoAddData_Node25" -UnitType "plutoGateway" -DefValue "0" -OrderNr 57\ -DN_Path "6,20 64 24 00 30 50,D1,1"...
-
Page 15: Commissioning
5.3 Commissioning During commissioning; • At ABB robotic system start it will do a DeviceNet IO connection with the gateway and also send down the configuration data set above. • If the MNS LED is steady green the gateway is connected and normal operation. -
Page 16: Input Assembly Type
Note that for each Pluto gateway the ABB robotic system can only read data from 16 selected Pluto units. If more than 16 Pluto units must be read by the ABB robotic system there need to be two (2) gateways in the system. - Page 17 Bit mask table for “plutoExpected” value. Enable Pluto Hexadecimal value Decimal value 0x00000001 0x00000002 0x00000004 0x00000008 0x00000010 0x00000020 0x00000040 0x00000080 0x00000100 0x00000200 0x00000400 1024 0x00000800 2048 0x00001000 4096 0x00002000 8192 0x00004000 16384 0x00008000 32768 0x00010000 65536 0x00020000 131072 0x00040000 262144 0x00080000 524288 0x00100000...
-
Page 18: Enable Data To Pluto
0 to 3. This configuration will enable the gateway will retransmit the selected output package part received from ABB robotic system to Pluto network. The value is a bit mask there bit 0 corresponded package 0 and bit 1 to package 1. -
Page 19: Gateway Node Number
The “plutoGatewayNode” command will set the gateway node number on Pluto bus. Normal this node number is read from DIP-switch in the range of 0 – 3. With this parameter it’s possible to set the node number from ABB robotic system in the range of 0 – 16. -
Page 20: Path Description
Value for yy and zz is given from table below depending on additional data area xx. Additional Data Area Node id (0-31) IO-type (0-255) 5.13 Path description This chapter only briefly will describe the cryptically path description “6,20 64 24 00 30 14,C6,1”, 6,20 64 24 00 30 14 The path according to the EDS file. -
Page 21: Gateway Terminal Configuration
6 Gateway Terminal Configuration The terminal configuration is a way to set and store a configuration within the gateway. One major drawback is that this configuration is stored locally in the gateway and when replacing the unit the new unit needs to be configured via terminal in the same way as the old. Therefore this is way of configure the gateway is not recommended because there maybe problems regarding documentation of the gateway setting and the problem related to gateway replacement. -
Page 22: Set Mac Address And Baudrate
By pressing ‘h’ the help command list will be printed. dnet_gw> h <a> Read gateway SysRegister value <p.a> Read Input status <p.a> Read Output status <p.a> Read Globle mem status <p.a> Read Memory bit status <p.a> Read SysMem bit status <p.a>... -
Page 23: Set Device Configuration
To PLUTO timeout will set a timeout regarding minimum update time of data from ABB robotic system to the gateway. It the gateway is not receiving new data within this timeout from the ABB robotic system the output data sent to the Pluto network will be cleared. - Page 24 For more information about the configuration data see the gateway manual. dnet_gw> cs Input Assembly Instance : 0 : Status Only [100] 1 : Data Only [101] 2 : Status/Data [102] Select [1] : 1 Output Assembly Instance : 0 : No Data [112] 1 : To Pluto Data [113] Select [1] : 1...
-
Page 25: Configuration Verification
6.6 Configuration Verification The configuration can be verified with the "bw" command, see below dnet_gw> bw ----------------------------- DeviceNet bus status. ----------------------------- Node number : 3 [0x3] Bus speed : 250 kbits Bus power : VALID Bus status : OFFLINE ----------------------------- Current setup done by PLC system. -
Page 26: Abb Robotic System Io Configuration
7 ABB Robotic System IO Configuration 7.1 Input IO configuration Below is template input IO configuration for the Pluto stations 0 – 15 used to read data from the Pluto system. Data is structured in bits and grouped into registers. Each Pluto will hold registers diPlutoX_iY for the 16 bit input;... -
Page 27: Additional Data Area 0
7.1.2 Additional data area 0 Additional Data When using additional data this example below show how additional data area 0 is mapped e.g. the same as for the old Pluto node 0 (as above). The same mapping will for all other data areas 1 – 31 e.g. -
Page 28: Pluto Stations 2
-Name "diPluto1_i9" -SignalType "DI" -Unit "ioPluto" -UnitMap "41" -Name "diPluto1_i10" -SignalType "DI" -Unit "ioPluto" -UnitMap "42" -Name "diPluto1_i11" -SignalType "DI" -Unit "ioPluto" -UnitMap "43" -Name "diPluto1_i12" -SignalType "DI" -Unit "ioPluto" -UnitMap "44" -Name "diPluto1_i13" -SignalType "DI" -Unit "ioPluto" -UnitMap "45" -Name "diPluto1_i14"... -
Page 29: Pluto Stations 3
-Name "diPluto2_gm9" -SignalType "DI" -Unit "ioPluto" -UnitMap "93" -Name "diPluto2_gm10" -SignalType "DI" -Unit "ioPluto" -UnitMap "94" -Name "diPluto2_gm11" -SignalType "DI" -Unit "ioPluto" -UnitMap "95" -Name "diPluto2_i" -SignalType "GI" -Unit "ioPluto" -UnitMap "64-79" -Name "diPluto2_q" -SignalType "GI" -Unit "ioPluto" -UnitMap "80-83" -Name "diPluto2_gm"... -
Page 30: Pluto Stations 5
-Name "diPluto4_i6" -SignalType "DI" -Unit "ioPluto" -UnitMap "134" -Name "diPluto4_i7" -SignalType "DI" -Unit "ioPluto" -UnitMap "135" -Name "diPluto4_i8" -SignalType "DI" -Unit "ioPluto" -UnitMap "136" -Name "diPluto4_i9" -SignalType "DI" -Unit "ioPluto" -UnitMap "137" -Name "diPluto4_i10" -SignalType "DI" -Unit "ioPluto" -UnitMap "138" -Name "diPluto4_i11"... -
Page 31: Pluto Stations 6
-Name "diPluto5_gm6" -SignalType "DI" -Unit "ioPluto" -UnitMap "186" -Name "diPluto5_gm7" -SignalType "DI" -Unit "ioPluto" -UnitMap "187" -Name "diPluto5_gm8" -SignalType "DI" -Unit "ioPluto" -UnitMap "188" -Name "diPluto5_gm9" -SignalType "DI" -Unit "ioPluto" -UnitMap "189" -Name "diPluto5_gm10" -SignalType "DI" -Unit "ioPluto" -UnitMap "190" -Name "diPluto5_gm11"... -
Page 32: Pluto Stations 8
-Name "diPluto7_i3" -SignalType "DI" -Unit "ioPluto" -UnitMap "227" -Name "diPluto7_i4" -SignalType "DI" -Unit "ioPluto" -UnitMap "228" -Name "diPluto7_i5" -SignalType "DI" -Unit "ioPluto" -UnitMap "229" -Name "diPluto7_i6" -SignalType "DI" -Unit "ioPluto" -UnitMap "230" -Name "diPluto7_i7" -SignalType "DI" -Unit "ioPluto" -UnitMap "231" -Name "diPluto7_i8"... -
Page 33: Pluto Stations 9
-Name "diPluto8_gm3" -SignalType "DI" -Unit "ioPluto" -UnitMap "279" -Name "diPluto8_gm4" -SignalType "DI" -Unit "ioPluto" -UnitMap "280" -Name "diPluto8_gm5" -SignalType "DI" -Unit "ioPluto" -UnitMap "281" -Name "diPluto8_gm6" -SignalType "DI" -Unit "ioPluto" -UnitMap "282" -Name "diPluto8_gm7" -SignalType "DI" -Unit "ioPluto" -UnitMap "283" -Name "diPluto8_gm8"... -
Page 34: Pluto Stations 10
7.1.12 Pluto stations 10 EIO_SIGNAL: -Name "diPluto10_i0" -SignalType "DI" -Unit "ioPluto" -UnitMap "320" -Name "diPluto10_i1" -SignalType "DI" -Unit "ioPluto" -UnitMap "321" -Name "diPluto10_i2" -SignalType "DI" -Unit "ioPluto" -UnitMap "322" -Name "diPluto10_i3" -SignalType "DI" -Unit "ioPluto" -UnitMap "323" -Name "diPluto10_i4" -SignalType "DI" -Unit "ioPluto" -UnitMap "324" -Name "diPluto10_i5"... -
Page 35: Pluto Stations 12
-Name "diPluto11_i15" -SignalType "DI" -Unit "ioPluto" -UnitMap "367" -Name "diPluto11_q0" -SignalType "DI" -Unit "ioPluto" -UnitMap "368" -Name "diPluto11_q1" -SignalType "DI" -Unit "ioPluto" -UnitMap "369" -Name "diPluto11_q2" -SignalType "DI" -Unit "ioPluto" -UnitMap "370" -Name "diPluto11_q3" -SignalType "DI" -Unit "ioPluto" -UnitMap "371" -Name "diPluto11_gm0"... -
Page 36: Pluto Stations 13
7.1.15 Pluto stations 13 EIO_SIGNAL: -Name "diPluto13_i0" -SignalType "DI" -Unit "ioPluto" -UnitMap "416" -Name "diPluto13_i1" -SignalType "DI" -Unit "ioPluto" -UnitMap "417" -Name "diPluto13_i2" -SignalType "DI" -Unit "ioPluto" -UnitMap "418" -Name "diPluto13_i3" -SignalType "DI" -Unit "ioPluto" -UnitMap "419" -Name "diPluto13_i4" -SignalType "DI" -Unit "ioPluto" -UnitMap "420" -Name "diPluto13_i5"... -
Page 37: Pluto Stations 15
-Name "diPluto14_i15" -SignalType "DI" -Unit "ioPluto" -UnitMap "463" -Name "diPluto14_q0" -SignalType "DI" -Unit "ioPluto" -UnitMap "464" -Name "diPluto14_q1" -SignalType "DI" -Unit "ioPluto" -UnitMap "465" -Name "diPluto14_q2" -SignalType "DI" -Unit "ioPluto" -UnitMap "466" -Name "diPluto14_q3" -SignalType "DI" -Unit "ioPluto" -UnitMap "467" -Name "diPluto14_gm0"... -
Page 38: Output Io Configuration
7.2 Output IO configuration Below is template output IO configuration for the package area 0 – 3 used to send data to the Pluto system. Data is structured in bits and grouped into registers. Each package will hold registers doPackageX_bit for the 16 bit information; doPackageX_reg0 and doPackageX_reg1 for 16 bits register value. -
Page 39: Package Area 1
-Name "doPackage0_47" -SignalType "DO" -Unit "ioPluto" -UnitMap "47" -Name "doPackage0_bit" -SignalType "GO" -Unit "ioPluto" -UnitMap "0-15" -Name "doPackage0_reg0" -SignalType "GO" -Unit "ioPluto" -UnitMap "16-31" -Name "doPackage0_reg1" -SignalType "GO" -Unit "ioPluto" -UnitMap "32-47" 7.2.2 Package area 1 EIO_SIGNAL: -Name "doPackage1_0" -SignalType "DO" -Unit "ioPluto" -UnitMap "48" -Name "doPackage1_1"... -
Page 40: Package Area 2
-Name "doPackage1_bit" -SignalType "GO" -Unit "ioPluto" -UnitMap "48-63" -Name "doPackage1_reg0" -SignalType "GO" -Unit "ioPluto" -UnitMap "64-79" -Name "doPackage1_reg1" -SignalType "GO" -Unit "ioPluto" -UnitMap "80-95" 7.2.3 Package area 2 EIO_SIGNAL: -Name "doPackage2_0" -SignalType "DO" -Unit "ioPluto" -UnitMap "96" -Name "doPackage2_1" -SignalType "DO" -Unit "ioPluto" -UnitMap "97" -Name "doPackage2_2"... -
Page 41: Package Area 3
7.2.4 Package area 3 EIO_SIGNAL: -Name "doPackage3_0" -SignalType "DO" -Unit "ioPluto" -UnitMap "144" -Name "doPackage3_1" -SignalType "DO" -Unit "ioPluto" -UnitMap "145" -Name "doPackage3_2" -SignalType "DO" -Unit "ioPluto" -UnitMap "146" -Name "doPackage3_3" -SignalType "DO" -Unit "ioPluto" -UnitMap "147" -Name "doPackage3_4" -SignalType "DO" -Unit "ioPluto" -UnitMap "148" -Name "doPackage3_5"...