Table of Contents
Advertisement
Advertisement
Table of Contents

Related Manuals for Electrolux EDH903BEWA


Summary of Contents for Electrolux EDH903BEWA
- Page 1 EDH903BEWA Tumble Dryer User Manual...
- Page 2 GET IT ON...
-
Page 3: Customer Care And Service
Products must be used, installed and operated in accordance with this manual. You may not be able to claim on the Electrolux manufacturer’s warranty in the event that your product fault is due to failure to adhere to this manual. -
Page 4: Children And Vulnerable People Safety
- Warning; Risk of fire / Flammable materials 1.1 Children and vulnerable people safety WARNING! Risk of suffocation, injury or permanent disability. This appliance can be used by children aged from 8 • years and above and persons with reduced physical,... - Page 5 ENGLISH The appliance can be installed as freestanding or • below a kitchen counter with correct space (refer to the Installation leaflet). Do not install the appliance behind a lockable door, a • sliding door or a door with a hinge on the opposite side, that would prevent the appliance door from being fully open.
-
Page 6: Conditions Of Use
Fabric softeners, or similar products, should only be • used as specified by the product manufacturer’s instructions. Remove all objects from items that could be a source •... -
Page 7: Internal Lighting
ENGLISH • Do not touch the mains cable or the • To replace the internal lighting, mains plug with wet hands. contact the Authorised Service • This appliance complies with the Centre. E.E.C. Directives. 3.5 Care and cleaning 3.3 Use WARNING! WARNING! Risk of injury or damage to... -
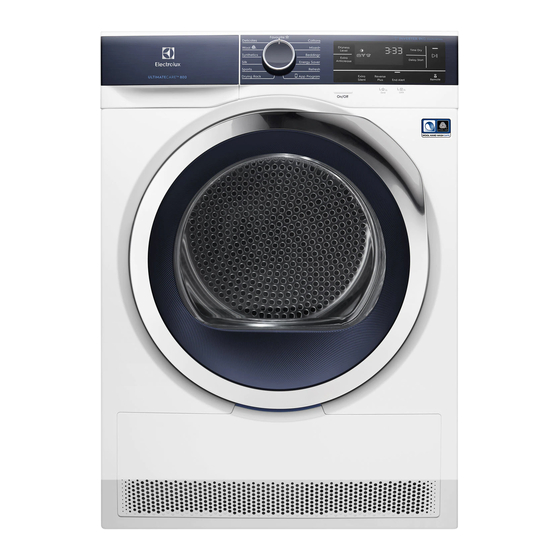
Page 8: Product Description
Waste Electrical and Electronic Equipment (WEEE). 4. PRODUCT DESCRIPTION Water container Control panel Internal light Appliance door Filter Rating plate Airflow slots Heat Exchanger lid Heat Exchanger cover Adjustable feet For ease of loading laundry or ease of installation the door is reversible. - Page 9 ENGLISH Press the touch buttons with your finger in the area with the symbol or name of the option. Do not wear gloves when you operate the control panel. Make sure that the control panel is always clean and dry. 5.1 Display Symbol on the display Symbol description...
-
Page 10: Wi-Fi - Connectivity Setup
1. Go to the App Store on your smart • Wireless network at home with device. internet connection enabled. 2. Download and install App Electrolux • Mobile device connected to wireless Life . network. 3. Make sure you started a Wi-fi connection in the dryer. -
Page 11: Remote Start
3 minute. display. 4. Configure the Electrolux Life app on 2. Press the Start/Pause button to your smart device. activate the Remote Start. 5. If the connectivity is configured,... -
Page 12: Programme Table
7. PROGRAMME TABLE Programme Load Properties / Fabric type The load You can do your configuration of programme depends and options and memorise in the appliance on a mem‐ Favourite Settings - Favourite memory (See chapter " orised pro‐... -
Page 13: Dryness Level
ENGLISH Programme Load Properties / Fabric type 1 kg Wool The wool drying cycle of this machine has been approved by The Woolmark Company for the drying of wool garments labelled as "hand wash" provided that the garments are dried according to the instructions issued by the manufacturer of this machine. -
Page 14: Options Table
8.5 Time Dry on Drying Rack You can activate the End programme Alert option with all programmes. Option suitable for Drying Rack programme . 8.7 Reverse Plus You can set the programme duration, Increase drum reversing frequency to from a minimum of 10 minutes to a reduce items twisting and entanglement. -
Page 15: To Memorise Your Configuration
ENGLISH Extra Re‐ Extra Time Dryness Level Anti‐ verse Programmes Silent crease Plus Delicates ■ ■ 1) Together with the programme you can set 1 or more options. To activate or deactivate them, press the related touch button. 2) See chapter OPTIONS: Time Dry on Drying Rack programme 3) See chapter OPTIONS: Time Dry on Wool programme 9. - Page 16 2. Use the programme knob to set • more dry laundry Favourite position. • standard dry laundry Previously memorised configuration of 5. Press and hold buttons (F) and (E) programme and options will be restore. again until the indicator of the correct level comes on.
-
Page 17: Deactivating The Water Container Indicator
ENGLISH The display shows one of these 2 Deactivating the water configurations: container indicator: • The display shows "Off". After 5 s the display returns to normal 1. Press the on/off button to activate the mode. appliance. • The display shows "On". After 5 s 2. -
Page 18: Stand-By Function
The anti-crease phase reduces creasing. You can delay the start of a programme from a You can remove the laundry before the minimum of 30 minutes anti-crease phase is completed. We to a maximum of 20 recommend, for better results, that you hours. -
Page 19: Care And Cleaning
ENGLISH Fabric label Description Laundry is suitable for tumble drying. Laundry is suitable for tumble drying at higher temperatures. Laundry is suitable for tumble drying at low temperatures only. Laundry is not suitable for tumble drying. 13. CARE AND CLEANING 13.1 Cleaning the filter 5. -
Page 20: Emptying The Water Container
13.2 Emptying the water container You can use the water from the water container as an alternative to distilled water (e.g. for steam ironing). Before you use the water, remove dirt residues with a filter. 13.3 Cleaning the Heat Exchanger... -
Page 21: Cleaning The Control Panel And Housing
ENGLISH 13.5 Cleaning the control panel CAUTION! and housing Do not touch the metal surface with bare hands. Use a standard neutral soap detergent to Risk of injury. Wear clean the control panel and housing. protective gloves. Clean carefully to avoid damaging Use a moist cloth to clean. -
Page 22: Troubleshooting
14. TROUBLESHOOTING Problem Possible solution You cannot activate the appliance. Make sure that the mains plug is connec‐ ted to the mains socket. Check fuse in fuse box (domestic installa‐ tion). The programme does not start. Press Start/Pause. Make sure that the appliance door is closed. -
Page 23: If The Drying Results Are Not Satisfactory
ENGLISH Problem Possible solution The App frequently cannot connect to the Try to move the home router as near the dryer. dryer as possible or consider purchasing a wireless range extender. Turn the microwave off. Avoid using the microwave and the Remote Control of the oven at the same time. -
Page 24: Warranty
This document sets out the terms and Appliance not having purchased conditions of the product warranties the Appliance for re-sale, and for Electrolux Appliances. It is an ‘your’ has a corresponding important document. Please keep it meaning. with your proof of purchase 2. - Page 25 Appliance to and from Electrolux c. the Appliance’s serial number or or its ASC. Travel and transportation warranty seal has been removed will be arranged by Electrolux as part or defaced of any valid warranty claim. 8. How to claim under this warranty: 6.
-
Page 26: Environmental Concerns
ASC may exchange information in meet its obligations under this relation to you to enable Electrolux to warranty. FOR SERVICE AUSTRALIA FOR SPARE PARTS or to find the address of ELECTROLUX HOME or to find the address of your nearest state service... - Page 27 ENGLISH...
- Page 28 2.0, LGPL-2.1, zLib, MIT, ISC, Apache 2.0 and others. It is possible to display the complete copy of the licenses in the Electrolux App that can be downloaded from the corresponding App store from the License menu section. It is possible to download the source code of the open source software used in the product by searching for Wi-Fi...