
Related Manuals for Huawei SUN2000-2KTL-L0


Summary of Contents for Huawei SUN2000-2KTL-L0
- Page 1 SUN2000-(2KTL-5KTL)-L0 User Manual Issue Date 2018-08-30 HUAWEI TECHNOLOGIES CO., LTD.
- Page 2 Notice The purchased products, services and features are stipulated by the contract made between Huawei and the customer. All or part of the products, services and features described in this document may not be within the purchase scope or the usage scope. Unless otherwise specified in the contract, all statements, information, and recommendations in this document are provided "AS IS"...
-
Page 3: About This Document
Indicates a potentially hazardous situation which, if not avoided, could result in equipment damage, data loss, performance deterioration, or unanticipated results. NOTICE is used to address practices not related to personal injury. Issue 01 (2018-08-30) Copyright © Huawei Technologies Co., Ltd. - Page 4 Change History Changes between document issues are cumulative. The latest document issue contains all updates made in previous issues. Issue 01 (2018-08-30) This issue is used for first office application (FOA). Issue 01 (2018-08-30) Copyright © Huawei Technologies Co., Ltd.
-
Page 5: Table Of Contents
6 System Commissioning ......................55 6.1 Checking Before Power-On ............................55 6.2 Powering On the System............................. 56 6.3 Powering Off the System ............................57 7 System Maintenance........................59 7.1 Routine Maintenance ..............................59 Issue 01 (2018-08-30) Copyright © Huawei Technologies Co., Ltd. - Page 6 8.1 Removing the SUN2000 ............................. 66 8.2 Packing the SUN2000 ..............................66 8.3 Disposing of the SUN2000 ............................66 9 Technical Specifications ......................67 A Grid Codes........................... 70 B Acronyms and Abbreviations ....................71 Issue 01 (2018-08-30) Copyright © Huawei Technologies Co., Ltd.
-
Page 7: Safety Precautions
Disclaimer Huawei shall not be liable for any consequence caused by any of the following events: Damage caused by transportation ... - Page 8 To allow proper heat dissipation and installation, maintain appropriate clearances between the SUN2000 and other objects, as shown in Figure 1-1. If you have any questions about the clearances, consult technical support engineers. Issue 01 (2018-08-30) Copyright © Huawei Technologies Co., Ltd.
- Page 9 The high voltage generated by the SUN2000 during operation may cause an electric shock, which can result in serious property damage, serious injury, or death. Strictly comply with the safety precautions in this document and associated documents when operating the SUN2000. Issue 01 (2018-08-30) Copyright © Huawei Technologies Co., Ltd.
- Page 10 The SUN2000 can be powered on only after all faults are rectified. Failing to do so may escalate faults or damage the device. Observe ESD precautions and wear ESD gloves during maintenance. Issue 01 (2018-08-30) Copyright © Huawei Technologies Co., Ltd.
-
Page 11: Product Overview
SUN2000: single-phase grid-tied PV string inverter Power level 2K: The power level is 2K. 3K: The power level is 3K. 4K: The power level is 4K. 5K: The power level is 5K. Issue 01 (2018-08-30) Copyright © Huawei Technologies Co., Ltd. - Page 12 (K) Home load Supported Power Grid The power grids supported by the SUN2000 include TN-S, TN-C, TN-C-S, and TT. In a TT power grid, the N-PE voltage should be lower than 30 V. Issue 01 (2018-08-30) Copyright © Huawei Technologies Co., Ltd.
-
Page 13: Appearance
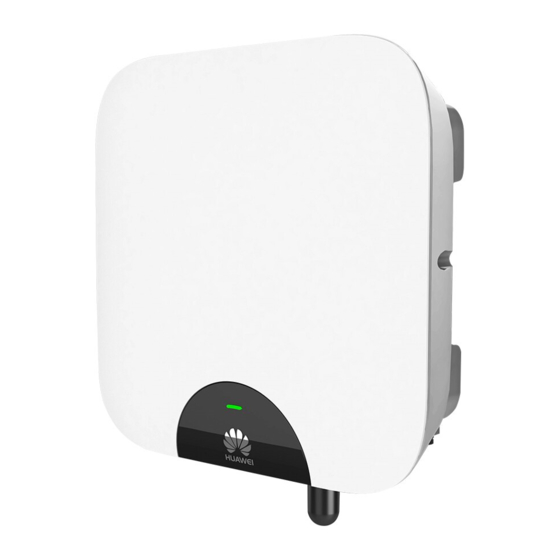
SUN2000-(2KTL-5KTL)-L0 User Manual 2 Product Overview Figure 2-3 Power grid types 2.2 Appearance Front View Figure 2-4 Front view (1) LED 1 (2) LED 2 (3) LED 3 (4) Front panel Issue 01 (2018-08-30) Copyright © Huawei Technologies Co., Ltd. - Page 14 "mobile phone access status: blinking green at long intervals" first.) Blinking green at long intervals (on The mobile phone has for 1s and then off for 1s) connected to the SUN2000. No communication Issue 01 (2018-08-30) Copyright © Huawei Technologies Co., Ltd.
- Page 15 (2) Mounting bracket (3) Heat sink (4) WiFi antenna (optional) (5) 4G module (optional) Only either of the WiFi antenna and 4G module can be installed at the time of setup. Issue 01 (2018-08-30) Copyright © Huawei Technologies Co., Ltd.
- Page 16 Bottom View Figure 2-6 Bottom view Component Silk Screen DC switch DC SWITCH DC input terminals PV+/PV– COM port USB-4G port USB-4G AC output port Ventilation valve Antenna port Ground point Issue 01 (2018-08-30) Copyright © Huawei Technologies Co., Ltd.
- Page 17 SUN2000-(2KTL-5KTL)-L0 User Manual 2 Product Overview Dimensions Figure 2-7 SUN2000 dimensions Figure 2-8 Mounting bracket dimensions Issue 01 (2018-08-30) Copyright © Huawei Technologies Co., Ltd.
-
Page 18: Label Descriptions
SUN2000. Grounding Indicates the position for connecting the protective earthing (PE) cable. Operation warning Do not remove the connector or antenna when the SUN2000 is running. Issue 01 (2018-08-30) Copyright © Huawei Technologies Co., Ltd. - Page 19 QR code for SUN2000 Scan the QR code to WiFi connection connect to Huawei SUN2000 WiFi network (Android) or obtain the WiFi password (iOS). The labels are for reference only. Issue 01 (2018-08-30) Copyright © Huawei Technologies Co., Ltd.
- Page 20 The product does not period (EFUP) mark pollute the environment during the specified period. EU waste electrical and Do not dispose of the electronic equipment product as household (WEEE) mark garbage. Issue 01 (2018-08-30) Copyright © Huawei Technologies Co., Ltd.
-
Page 21: Working Principles
The DC power is then converted into single-phase AC power through an inverter circuit. Surge protection is supported on both the DC and AC sides. Figure 2-10 Conceptual diagram Working Modes Figure 2-11 Working modes Issue 01 (2018-08-30) Copyright © Huawei Technologies Co., Ltd. - Page 22 In Standby or Operating mode, the SUN2000 enters Shutdown mode after detecting a fault or shutdown command. In Shutdown mode, the SUN2000 enters Standby mode after detecting a startup command or that the fault is rectified. Issue 01 (2018-08-30) Copyright © Huawei Technologies Co., Ltd.
-
Page 23: Storage
Regular inspection is required during the storage. Replace the packing materials when necessary. After long-term storage, the SUN2000 needs to be inspected and tested by qualified persons before it is put into use. Issue 01 (2018-08-30) Copyright © Huawei Technologies Co., Ltd. -
Page 24: System Installation
After unpacking the SUN2000, check that the contents are intact and complete. If any damage is found or any component is missing, contact your supplier. For details about the number of contents, see the Packing List in the packing case. Issue 01 (2018-08-30) Copyright © Huawei Technologies Co., Ltd. -
Page 25: Tools And Instruments
Rubber mallet Utility knife Cable cutter Crimping tool (model: Open-end wrench (model: Cable tie H4TC0001; manufacturer: H4TW0001; manufacturer: Amphenol) Amphenol) Vacuum cleaner Multimeter (DC voltage Marker measurement range ≥ 600 V Issue 01 (2018-08-30) Copyright © Huawei Technologies Co., Ltd. -
Page 26: Determining The Installation Position
A salt area refers to the region within 500 meters from the coast or prone to sea breeze. The regions prone to sea breeze vary depending on weather conditions (such as typhoons and monsoons) or terrains (such as dams and hills). Issue 01 (2018-08-30) Copyright © Huawei Technologies Co., Ltd. - Page 27 Install the SUN2000 vertically or at a maximum back tilted angle of 15 degrees to facilitate heat dissipation. Do not install the SUN2000 at forward tilted, excessively back tilted, side tilted, horizontal, or upside down positions. Figure 4-1 Installation angle Issue 01 (2018-08-30) Copyright © Huawei Technologies Co., Ltd.
- Page 28 When installing multiple SUN2000s, install them in horizontal mode if the space is sufficient and install them in staggered mode if the space is insufficient. Stacked installation is not recommended. Figure 4-3 Horizontal installation mode (recommended) Issue 01 (2018-08-30) Copyright © Huawei Technologies Co., Ltd.
- Page 29 SUN2000-(2KTL-5KTL)-L0 User Manual 4 System Installation Figure 4-4 Staggered installation mode (recommended) Issue 01 (2018-08-30) Copyright © Huawei Technologies Co., Ltd.
-
Page 30: Installing The Mounting Bracket
Figure 4-5 Stacked installation mode (not recommended) 4.4 Installing the Mounting Bracket Fixing holes can be used in three combinations. Select a hole combination based on site requirements. Combination A is preferred. Figure 4-6 Hole combinations Issue 01 (2018-08-30) Copyright © Huawei Technologies Co., Ltd. -
Page 31: Wall-Mounted Installation
Step 1 Determine the positions for drilling holes using the mounting bracket. Level the positions of mounting holes using a bubble or digital level, and mark the positions with a marker. Figure 4-8 Determining hole positions Step 2 Install expansion bolts. Issue 01 (2018-08-30) Copyright © Huawei Technologies Co., Ltd. - Page 32 Level the head of the expansion sleeve with the concrete wall after removing the bolt, spring washer, and flat washer. Otherwise, the mounting bracket will not be securely installed on the concrete wall. Figure 4-10 Installing an expansion bolt Step 3 Secure the mounting bracket. Issue 01 (2018-08-30) Copyright © Huawei Technologies Co., Ltd.
-
Page 33: Support-Mounted Installation
Step 1 Determine the positions for drilling holes using the mounting bracket. Level the positions of mounting holes using a bubble or digital level, and mark the positions with a marker. Issue 01 (2018-08-30) Copyright © Huawei Technologies Co., Ltd. - Page 34 Step 2 Drill holes using a hammer drill. You are advised to apply anti-rust paint on the hole positions for protection. Figure 4-13 Drilling holes Step 3 Secure the mounting bracket. Issue 01 (2018-08-30) Copyright © Huawei Technologies Co., Ltd.
-
Page 35: Installing The Sun2000
----End 4.5 Installing the SUN2000 Procedure Step 1 Hold the handles on both sides of the SUN2000, lift the SUN2000 from the packing case, and transport it to the installation position. Issue 01 (2018-08-30) Copyright © Huawei Technologies Co., Ltd. - Page 36 If the bottom of the mounting plate does not snap into place, push the SUN2000 from the front until the bottom of the mounting plate snaps into the mounting bracket. Issue 01 (2018-08-30) Copyright © Huawei Technologies Co., Ltd.
- Page 37 Combination A is preferred. Figure 4-17 Fixing holes Combination A: holes 2 and 3 Combination B: holes 1 and 3 Combination C: holes 1 and 4 Combination D: holes 2 and 4 Issue 01 (2018-08-30) Copyright © Huawei Technologies Co., Ltd.
- Page 38 Figure 4-18 Tightening screw assemblies Step 4 (Optional) Install an anti-theft lock. The function of an anti-theft lock is to secure the SUN2000 to the mounting bracket and protect it from stealing. Issue 01 (2018-08-30) Copyright © Huawei Technologies Co., Ltd.
-
Page 39: Optional) Installing The Wifi Antenna
Only either of the WiFi antenna and 4G module can be installed at the time of setup. Procedure Step 1 Remove the watertight cap from the ANT port. Step 2 Attach the washer to the enclosure. Step 3 Install the WiFi antenna. Issue 01 (2018-08-30) Copyright © Huawei Technologies Co., Ltd. -
Page 40: Optional) Installing The 4G Module
Only either of the WiFi antenna and 4G module can be installed at the time of setup. The USB-4G port can only be used for the access from a 4G module, rather than a USB data cable. Issue 01 (2018-08-30) Copyright © Huawei Technologies Co., Ltd. - Page 41 When reinstalling the 4G module enclosure, ensure that the buckle springs back to the original position. Step 2 Remove the watertight cap from the USB-4G port and fix the 4G module. Figure 4-22 Fixing a 4G module ----End Issue 01 (2018-08-30) Copyright © Huawei Technologies Co., Ltd.
-
Page 42: Electrical Connections
The cable colors shown in the electrical connection diagrams provided in this chapter are for reference only. Select cables in accordance with local cable specifications (green-and-yellow cables are only used for PE). Issue 01 (2018-08-30) Copyright © Huawei Technologies Co., Ltd. -
Page 43: Preparing Cables
600 V DC and a rated current of 20 A. Smart PV Safety Box The Smart PV Safety Box that can Can be purchased from connect to the SUN2000 is Huawei SmartPSB2000L. Issue 01 (2018-08-30) Copyright © Huawei Technologies Co., Ltd. - Page 44 Table 5-2 Cable description Cable Type Conductor Outer Source Cross-sectional Diameter Area Range DC input Standard PV cable in the 4–6 mm 4.5–7.8 mm Purchased by power cable industry (recommended the customer model: PV1-) Issue 01 (2018-08-30) Copyright © Huawei Technologies Co., Ltd.
-
Page 45: Installing The Pe Cable
5.2 Installing the PE Cable Context Do not connect the neutral wire to the enclosure as a PE cable. Otherwise, electric shocks could occur. Procedure Step 1 Crimp the OT terminal. Issue 01 (2018-08-30) Copyright © Huawei Technologies Co., Ltd. - Page 46 Figure 5-2 Crimping an OT terminal (A) Core wire (B) Insulation layer (C) Heat shrink tubing (D) Hydraulic pliers (E) Heat gun Step 2 Connect the PE cable. Ensure that the PE cable is connected securely. Issue 01 (2018-08-30) Copyright © Huawei Technologies Co., Ltd.
-
Page 47: Installing The Ac Output Power Cable
Disable after checking that the SUN2000 is properly grounded. Then the SUN2000 can start normally. If you are not sure whether the SUN2000 connects to such a power grid, confirm it with your supplier or Huawei technical support. Issue 01 (2018-08-30) - Page 48 Ensure that AC terminations provide firm and solid electrical connections. Failing to do so may cause SUN2000 malfunction and damage to its AC connectors. Ensure that the cable is not twisted. Figure 5-4 Assembling an AC connector (three-core wire) Issue 01 (2018-08-30) Copyright © Huawei Technologies Co., Ltd.
- Page 49 For the core wire installation method and stripped length, see the instructions on the side of the plug insert. Figure 5-6 Stripped length Step 2 Connect the AC connector to the AC output port. Issue 01 (2018-08-30) Copyright © Huawei Technologies Co., Ltd.
- Page 50 Before removing the AC connector, ensure that the DC switch at the bottom of the SUN2000 and all the switches connecting to the SUN2000 are OFF. To remove the AC connector from the SUN2000, perform the operations in reverse order. Issue 01 (2018-08-30) Copyright © Huawei Technologies Co., Ltd.
-
Page 51: Installing The Dc Input Power Cable
DC input terminals. Otherwise, the SUN2000 will not comply with its Ingress Protection Rating. Ensure that the following conditions are met. Otherwise, the SUN2000 will be damaged, or even become a fire hazard. Issue 01 (2018-08-30) Copyright © Huawei Technologies Co., Ltd. - Page 52 Use the positive and negative metal contacts and DC connectors supplied with the SUN2000. Using incompatible positive and negative metal contacts and DC connectors may result in serious consequences. The caused device damage is not covered under any warranty. Issue 01 (2018-08-30) Copyright © Huawei Technologies Co., Ltd.
- Page 53 Figure 5-11 Assembling DC connectors (using metal cold forming contacts) (A) Positive metal contact (B) Negative metal contact (C) H4TC0001 crimping tool (D) Positive connector (E) Negative connector (F) H4TW0001 open-end wrench Issue 01 (2018-08-30) Copyright © Huawei Technologies Co., Ltd.
- Page 54 (E) Negative connector (F) H4TW0001 open-end wrench Ensure that the core wires can be seen through the hole on the terminal both before and after the positive and negative metal terminals are crimped. Issue 01 (2018-08-30) Copyright © Huawei Technologies Co., Ltd.
- Page 55 Figure 5-14 Measuring the DC input voltage Before performing Step 3, ensure that the DC switch is OFF. Step 3 Insert the positive and negative connectors into corresponding DC input terminals on the SUN2000. Issue 01 (2018-08-30) Copyright © Huawei Technologies Co., Ltd.
- Page 56 Before removing the positive and negative connectors, ensure that the DC switch is OFF. To remove the positive and negative connectors from the SUN2000, insert an open-end wrench into the notch and press the wrench with an appropriate force. Issue 01 (2018-08-30) Copyright © Huawei Technologies Co., Ltd.
-
Page 57: Installing The Signal Cable
Definition Description 485B1 RS485B, RS485 differential Connects to the RS485 signal signal– port on the power collector. 485A1 RS485A, RS485 differential signal+ 485B2 RS485B, RS485 differential Reserved, can connect to the Issue 01 (2018-08-30) Copyright © Huawei Technologies Co., Ltd. - Page 58 Positive polarity of the 12 V power port Port for grounding the shield Connects to the shield layer of layer the cable. Procedure Step 1 Connect signal cables to appropriate signal connectors. Issue 01 (2018-08-30) Copyright © Huawei Technologies Co., Ltd.
- Page 59 This document takes the connection of two signal lines as an example. If only one signal cable needs to be connected, block the unused cable hole on the seal using a cap and tighten the cable gland. Issue 01 (2018-08-30) Copyright © Huawei Technologies Co., Ltd.
- Page 60 5 Electrical Connections Figure 5-19 Installing a cap Step 2 Connect the signal connector to the corresponding port. Ensure that the signal connector is connected securely. Figure 5-20 Securing a plug ----End Issue 01 (2018-08-30) Copyright © Huawei Technologies Co., Ltd.
-
Page 61: System Commissioning
Unused terminals and ports Unused terminals and ports are locked by watertight caps. The installation space is proper, and the Installation environment installation environment is clean and tidy, without foreign matter. Issue 01 (2018-08-30) Copyright © Huawei Technologies Co., Ltd. -
Page 62: Powering On The System
(on and the SUN2000 is not (on for 1s and for 1s and then exporting power to the power then off for 1s) off for 1s) grid. Issue 01 (2018-08-30) Copyright © Huawei Technologies Co., Ltd. -
Page 63: Powering Off The System
Step 1 Send a shutdown command from the FusionHome app. Step 2 Turn off the AC switch between the SUN2000 and the power grid. Step 3 Turn off the DC switch at the bottom of the SUN2000. Issue 01 (2018-08-30) Copyright © Huawei Technologies Co., Ltd. - Page 64 SUN2000-(2KTL-5KTL)-L0 User Manual 6 System Commissioning Step 4 Turn off the DC switch between the PV string and the SUN2000 if there is any. ----End Issue 01 (2018-08-30) Copyright © Huawei Technologies Co., Ltd.
-
Page 65: System Maintenance
From then on, perform not scratched. the maintenance once Unused DC input terminals, COM ports, every 6 to 12 months. ANT ports, and USB-4G ports are locked by watertight caps. Issue 01 (2018-08-30) Copyright © Huawei Technologies Co., Ltd. -
Page 66: Troubleshooting
The following is the mapping between PV strings and alarm cause IDs: Cause ID = 1: string 1 Cause ID = 2: string 2 Issue 01 (2018-08-30) Copyright © Huawei Technologies Co., Ltd. - Page 67 3. If the fault persists for a long time, check the connection between the AC switch and the output power cable. Issue 01 (2018-08-30) Copyright © Huawei Technologies Co., Ltd.
- Page 68 If no, contact the local power operator. If yes, modify the grid underfrequency protection threshold with the consent of the local power operator. Issue 01 (2018-08-30) Copyright © Huawei Technologies Co., Ltd.
- Page 69 The voltage between 3. Check whether the output is the SUN2000 neutral connected to an isolation wire and ground transformer. If so, set Grounding exceeds the upper inspection to Disable. threshold. Issue 01 (2018-08-30) Copyright © Huawei Technologies Co., Ltd.
- Page 70 61440 Monitoring Unit Minor Cause ID = 1 Contact your dealer to rectify the Faulty fault. The flash memory is insufficient. The flash memory has bad sectors. Issue 01 (2018-08-30) Copyright © Huawei Technologies Co., Ltd.
- Page 71 Self-Produced Power communications cable is mode, the power correctly connected. collector communication is interrupted. Contact your dealer if all failure analysis procedures listed above are completed and the fault still exists. Issue 01 (2018-08-30) Copyright © Huawei Technologies Co., Ltd.
-
Page 72: Handling The Sun2000
8.3 Disposing of the SUN2000 If the SUN2000 service life expires, dispose of it according to the local disposal rules for electrical equipment and electronic component waste. Issue 01 (2018-08-30) Copyright © Huawei Technologies Co., Ltd. -
Page 73: Technical Specifications
Maximum inverter backfeed current to the PV array Minimum startup 120 V voltage MPPT voltage 90–500 V range */85 120–480 V 160–480 V 210–480 V 260–480 V Rated input voltage 380 V Issue 01 (2018-08-30) Copyright © Huawei Technologies Co., Ltd. - Page 74 (rated power) Protection Item SUN2000-2KTL-L SUN2000-3KTL-L SUN2000-4KTL- SUN2000-5KTL-L Anti-islanding Supported protection Input reverse Supported polarity protection Output short-circuit Supported protection RCMU Supported AC surge protection Supported DC surge protection Supported Issue 01 (2018-08-30) Copyright © Huawei Technologies Co., Ltd.
- Page 75 Weight 10.6kg (excluding the mounting plate)/13.2kg (including the package) –30° C to +60° C (derated above +45° C) Operating temperature Humidity 0%–100% RH Operating altitude 0–4000 m (derated above 2000 m) Issue 01 (2018-08-30) Copyright © Huawei Technologies Co., Ltd.
-
Page 76: A Grid Codes
Grid codes are subject to change. The listed codes are for your reference only. Table A-1 Grid codes (SUN2000-2KTL/3KTL/4KTL/5KTL-L0) Grid Code Description Grid Voltage Grid Frequency EN50438-NL Netherlands 230 V 50 Hz power grid Issue 01 (2018-08-30) Copyright © Huawei Technologies Co., Ltd. -
Page 77: B Acronyms And Abbreviations
Acronyms and Abbreviations alternating current direct current identifier light emitting diode LVRT low voltage ride-through Media Access Control MPPT maximum power point tracking personal computer protective earthing photovoltaic RCMU residual current monitoring unit Issue 01 (2018-08-30) Copyright © Huawei Technologies Co., Ltd. - Page 78 SUN2000-(2KTL-5KTL)-L0 User Manual B Acronyms and Abbreviations relative humidity serial number THDi total distortion of the input current waveform waste electrical and electronic equipment WEEE Wireless Fidelity WiFi Issue 01 (2018-08-30) Copyright © Huawei Technologies Co., Ltd.