Table of Contents
Advertisement
Advertisement
Table of Contents

Related Manuals for Philips HearLink Series


Summary of Contents for Philips HearLink Series
- Page 1 HearLink In-the-Ear Hearing Aids User Guide...
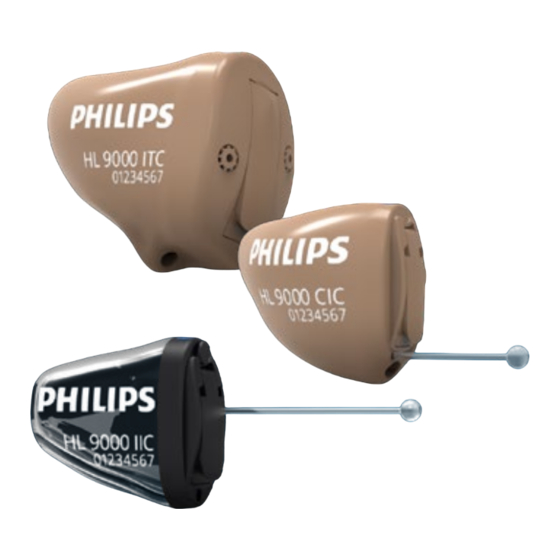
- Page 3 Model overview This booklet is valid for the Philips HearLink family in the following hearing aid models, battery sizes, styles, filter types and options. To be filled out by your hearing care professional. Models/CTNs HearLink 9000 – HL 9000 (HEI9000, HEI9001, HEI9002) GTIN: 05714464002788 HearLink 7000 –...
- Page 4 Your individual hearing aid settings Settings overview for your hearing aid Left Right Volume Control Program Button Mute Volume Control indicators Beeps at min/max volume Clicks when changing volume Beeps at preferred volume Battery indicators Low battery warning...
-
Page 5: Warranty Certificate
Warranty certificate Name of owner: Hearing care professional: Hearing care professional address: Hearing care professional phone: Purchase date: Warranty period: Month: Model right: Serial no.: Model left: Serial no.: Battery size:... -
Page 6: International Warranty
International warranty Your hearing aid is covered by an international limited warranty issued by the manufacturer for a period of 24 months from the date of delivery. This limited warranty covers manufacturing and material defects in the hearing aid itself, but not in accessories such as batteries, tubing, speakers, earpieces and filters, etc. - Page 7 Introduction to this booklet This booklet shows you how to use and maintain your new Philips hearing aid. Please read the booklet carefully including the warning sections. This will help you to achieve the full benefit of your new hearing aid.
-
Page 8: Intended Use
Intended use The hearing aid is intended to amplify and transmit sound to the ear and thereby compensate for impaired hearing within mild to severe hearing loss. This hearing aid is intended for use by adults and children older than 36 months. Important notice The hearing aid amplification is uniquely adjusted and optimized to your hearing... - Page 9 Identify your hearing aid Philips is offering a wide variety of in-the-ear hearing aids. Please see the model overview for your style and battery size. This will make it easier for you to navigate through this booklet.
-
Page 10: Table Of Contents
Table of contents Size 10 battery (CIC style shown) Size 312 battery (ITC style shown) Identify left and right hearing aid MultiTool for handling batteries and cleaning Turn the hearing aid on and off When to replace a battery Replace the battery Insert the hearing aid Remove your hearing aid Caring for your hearing aid... - Page 11 Change volume with Volume Control Mute the hearing aid Other options General warnings for all hearing aids Warning to hearing aid dispensers Troubleshooting guide Water & dust resistance Conditions of use Mobile phone Technical information Technical Data...
-
Page 12: Size 10 Battery (Cic Style Shown)
Size 10 battery (CIC style shown) What it is and does Program Button Sound outlet (optional) Sound out Mute, change Microphone inlet volume and Sound in program Battery drawer Contains the battery and functions as on/off switch Pull-out string Vent Vent Pull out the hearing aid... -
Page 13: Size 312 Battery (Itc Style Shown)
Size 312 battery (ITC style shown) What it is and does Program Button Volume (optional) Control Mute, change (optional) volume and Change program volume Battery drawer Contains the battery and functions as on/off switch Microphone inlet Sound in Vent Sound outlet Sound out Vent... -
Page 14: Identify Left And Right Hearing Aid
Identify left and right hearing aid It is important to distinguish between the left and the right hearing aid as they might be shaped and programmed differently. A BLUE shell, dot or text identifies the LEFT hearing aid* A RED shell, dot or text identifies the RIGHT hearing aid* * Shell and dot is only available for IIC... -
Page 15: Multitool For Handling Batteries And Cleaning
MultiTool for handling batteries and cleaning The MultiTool contains a magnet that makes it easier to replace the battery in the hearing aid. It also contains a brush and a wire loop for cleaning and removing ear wax from your earpiece. -
Page 16: Turn The Hearing Aid On And Off
Turn the hearing aid on and off The battery drawer is also used to switch the hearing aid on and off. To preserve the battery, make sure your hearing aid is switched off when you are not wearing it. If you wish to return to the standard settings of the hearing aid programmed by your hearing care professional, simply open and then close the battery drawer. -
Page 17: When To Replace A Battery
When to replace a battery When it is time to replace the battery, you will hear three beeps repeated at moderate intervals until the battery runs out. Three beeps Four beeps The battery is running low The battery has run out Battery tip To make sure the hearing aid is always working, bring spare batteries with you, or... -
Page 18: Replace The Battery
Replace the battery 1. Remove Fully open the battery drawer. Remove the battery. 2. Uncover Remove the sticky label from the + side of the new battery. Tip: Wait 2 minutes so that the battery can draw air, to ensure optimal functioning. - Page 19 4. Close Close the battery drawer. The hearing aid will play a jingle through the earpiece. Hold the earpiece close to your ear to hear the jingle. The MultiTool can be used for battery change. Use the magnetic end to remove and insert batteries.
-
Page 20: Insert The Hearing Aid
Insert the hearing aid Step 1 Place the tip of the hearing aid in your ear canal. Step 2 Gently pull your ear outwards and push the hearing aid into the ear canal, twisting slightly if necessary. Follow the natural contour of the ear canal. -
Page 21: Remove Your Hearing Aid
Remove your hearing aid Hold the hearing aid by the pull-out string (if available). Gently pull the hearing aid from the ear canal. If your hearing aid doesn’t have a pull-out string, you can remove it by pulling on the edge of the hearing aid. -
Page 22: Caring For Your Hearing Aid
Caring for your hearing aid When handling your hearing aid, hold it over a soft surface to avoid damage if you drop it. Cleaning the hearing aid Carefully brush away debris from the microphone inlets with a clean brush. Gently brush the surface. -
Page 23: Important Notice
Vent If the vent is very small, a special tool may be required. Please consult your hearing care professional. Vent Important notice Use a soft, dry cloth to clean the hearing aid. It must never be washed or immersed in water or other liquids. -
Page 24: Filter Replacement
Filter replacement The filters keep wax and debris from damaging the hearing aid. If the filters become clogged, please replace the filters or contact your hearing care professional: • ProWax miniFit filter protects the sound outlet. • O-Cap and T-Cap protect the microphone inlet. -
Page 25: Replace Prowax Minifit Filter
Replace ProWax miniFit filter New filter 1. Tool Remove the tool from the shell. The tool has two pins, one empty for removal and one with the new ProWax miniFit filter. New filter 2. Remove Push the empty pin into the ProWax miniFit filter in the hearing aid and pull it out. -
Page 26: Replace T-Cap Filter
Replace T-Cap filter (hearing aids with size 10 batteries) 1. Tool New filter Remove the tool from the packaging. The tool has two ends, one for removal and one with the new T-Cap filter. 2. Remove Push the tool fork under the top edge of the used T-Cap filter and lift it out. -
Page 27: Replace O-Cap Filter
Replace O-Cap filter (hearing aids with size 312) 1. Tool Remove the tool from the New filter packaging. The tool has two ends, one for removal and one with the new O-Cap filter. 2. Remove Push the pointed end of the tool into the existing O-Cap filter and pull it out. -
Page 28: Optional Features And Accessories
Optional features and accessories The features and accessories described on the following pages are optional. Please contact your hearing care professional to find out how your hearing aid is programmed. If you experience difficult listening situations, a special program may be helpful. These are programmed by your hearing care professional. -
Page 29: Change Programs
Change programs Your hearing aid can have up to 4 different programs. These are programmed by your hearing care professional. Press the button to change program. Use a short press if the Program Button is used for program change only and a long press if it is also used for Volume Control. - Page 30 To be filled out by the hearing care professional Program Sound you will hear When to use when activated “1 beep” “2 beeps” “3 beeps” “4 beeps” Program change: Independent Synchronized* LEFT RIGHT Short press Long press *Only available for models with NFMI...
-
Page 31: Change Volume With Program Button
Change volume with Program Button The Program Button allows you to adjust the volume. You may hear a click when you turn the volume up or down. A short press on the RIGHT hearing aid increases the volume A short press on the LEFT hearing aid decreases the volume Maximum You will hear 2 beeps at... -
Page 32: Change Volume With Volume Control
Change volume with Volume Control The Volume Control allows you to adjust the volume. You may hear a click when you turn the volume up or down. Turn forward to turn up volume Turn backwards to turn down the volume Down... -
Page 33: Mute The Hearing Aid
Mute the hearing aid Use the mute function if you need to silence the hearing aid. Only available for hearing aids with Program Button. Apply a very long press (4 seconds) to the Program Button to mute the hearing aid. To reactivate the hearing aid, push the Program Button briefly. -
Page 34: Other Options
Other options Telecoil – only optional for some styles Telecoil helps you hear better when using a telephone with a built-in loop or when you are in buildings with teleloop systems such as theaters, churches, or lecture rooms. This symbol or a similar sign is shown wherever a teleloop has been installed. -
Page 35: General Warnings For All Hearing Aids
General warnings for all hearing aids You should familiarize yourself fully with the following general warnings before using your hearing aid for your personal safety and to ensure correct use. Please note that a hearing aid will not restore normal hearing and will not prevent or improve a hearing impairment resulting from organic conditions. - Page 36 Choking hazards & risk of swallowing batteries and other small parts • Hearing aids, their parts and batteries should be kept out of reach of children and anyone who might swallow these items or otherwise cause injury to themselves. • Batteries have occasionally been mistaken for pills.
- Page 37 instance if the batteries have expired or if the tubing is blocked by moisture or ear wax. Active implants • Caution must be taken with active implants. • In general, follow the guidelines recommended by manufacturers of implantable defibrillators and pacemakers regarding use with mobile phones and magnets.
- Page 38 • The chemicals in cosmetics, hairspray, perfume, aftershave lotion, suntan lotion and insect repellent can damage the hearing aid. Always remove your hearing aid before applying such products and allow time to dry before use. Power aid • Special care should be exercised in selecting, fitting and using a hearing aid where maximum sound pressure capability exceeds 132 dB SPL (IEC 711), as there may...
- Page 39 Interference • The hearing aid has been thoroughly tested for interference, according to the most stringent international standards. However, interference between the hearing aid and other devices (e.g. some mobile telephones, citizens band systems and shop alarm systems and other devices) may occur. If this occurs, increase the distance between the hearing aid and the interfering device.
-
Page 40: Warning To Hearing Aid Dispensers
Warning to hearing aid dispensers A hearing aid dispenser should advise a prospective hearing aid user to consult promptly with a licensed physician (preferably an ear specialist) before dispensing a hearing aid if the hearing aid dispenser determines through inquiry, actual observation, or review of any other available information concerning the prospective user, that the prospective user has any of the following conditions:... - Page 41 Special care should be exercised in selecting and fitting a hearing aid whose maximum sound pressure level exceeds 132 decibels because there may be risk of impairing the remaining hearing of the hearing aid user. (This provision is required only for those hearing aids with a maximum sound pressure capability greater than 132 decibels [dB].) Important notice for prospective hearing aid...
- Page 42 The audiologist or hearing aid dispenser will conduct a hearing aid evaluation to assess your ability to hear with and without a hearing aid. The hearing aid evaluation will enable the audiologist or dispenser to select and fit a hearing aid to your individual needs. If you have reservations about your ability to adapt to amplification, you should inquire about the availability of a trial-rental or...
- Page 43 Notes...
-
Page 44: Troubleshooting Guide
Troubleshooting guide Symptom Possible causes Dead battery Clogged sound outlet No sound Clogged microphone inlet Hearing aid microphone muted Clogged sound outlet Intermittent or Moisture reduced sound Dead battery Hearing aid not inserted properly Squealing noise Ear wax accumulated in ear canal... - Page 45 Solutions Replace the battery Clean sound outlet* or replace the wax filter Clean microphone inlet* or replace filter (T-Cap or O-Cap) Un-mute the hearing aid microphone Clean sound outlet or replace the wax filter Wipe battery and hearing aid with a dry cloth Replace the battery Re-insert the hearing aid Have ear canal examined by your doctor...
-
Page 46: Water & Dust Resistance
Water & dust resistance Your hearing aid is dust-tight and protected against ingress of water (IP68) which means it is designed to be worn in all daily life situations. Therefore, you do not have to worry about sweat or getting wet in the rain. Should your hearing aid come in contact with water and stop working, please follow these guidelines:... -
Page 47: Conditions Of Use
Conditions of use Temperature: +34 °F to +104 °F Operating Relative humidity: conditions 5 % to 93 % , non-condensing Temperature and humidity should not exceed the following limits for extended periods during transportation Storage and and storage: transportation conditions Temperature: –13 °F to +140 °F Relative humidity:... -
Page 48: Mobile Phone
Mobile phone Some hearing aid users have reported a buzzing sound in their hearing aid when they are using mobile phones, indicating that the mobile phone and hearing aid may not be compatible. The ANSI C63.19 standard determines the prediction of compatibility between a specific hearing aid and a mobile phone by adding the numerical value of the rating for the hearing aid immunity to the... - Page 49 and 5 (T2 + T3) for the telecoil coupling. According to the guideline given above, both types of coupling will thereby be acceptable, with the acoustic coupling indicating excellent performance and the telecoil coupling indicating normal use. The above equipment performance measurements, categories and system classifications are based upon the best information available, but it cannot be...
-
Page 50: Technical Information
Technical information The hearing aid contains two radio technologies, which are described below. The hearing aid contains a radio transceiver using short range magnetic induction technology working at 3.84 MHz. The magnetic field strength of the transmitter is very weak and is always below 15nW (-40 dBuA/m at 10 meter distance). - Page 51 USA and Canada The hearing aid contains a radio module with the following certification ID numbers: CIC NFMI aids contain a module with: FCC ID: 2ACAH-AUCIC IC: 11936A-AUCIC ITC: Battery size 312: FCC ID: 2ACAH-AUITE312 IC: 11936A-AUITE312 The device complies with Part 15 of the FCC Rules and with Industry Canada’s licence- exempt RSSs.
- Page 52 The manufacturer declares that this hearing aid is in compliance with the essential requirements and other relevant provisions of Directive 2014/53/EU. Declaration of Conformity is available from the manufacturer. SBO Hearing A/S Kongebakken 9 DK-2765 Smørum Denmark www.hearingsolutions.philips.com E2105...
- Page 53 Description of symbols used in this booklet or on the packaging label Warnings Text marked with a marking symbol must be read before using the product. Manufacturer The product is produced by the manufacturer whose name and address are stated next to the symbol.
- Page 54 REACH Declaration: REACH requires Philips Hearing Solutions to provide chemical content information for Substances of Very High Concern (SVHC) if they are present above 0.1% of the article weight. No substances on the REACH SVHC list applicable at the time of manufacturing is present in Product HearLink.
-
Page 55: Technical Data
Technical Data In-the-Ear Hearing Aids (ITE) IIC, CIC, ITC Additional Information “2cc” refers to a coupler according to IEC 60318-5:2006. Applied standard: ANSI S3.22:2014. Full-on gain is measured with the gain control of the hearing aid set to its full-on position minus 20 dB and with an input SPL of 70 dB. - Page 56 2cc Coupler HearLink 9000 Speaker Speaker Speaker Speaker OSPL90, HFA (dB SPL) Full-on Gain, HFA (dB) Reference Test Gain (dB) 26 Operating Current (mA) 1.1 Distortion 2 | 2 | 2 < 2 | 2 | < 2 1 ...
- Page 57 2cc Coupler HearLink 9000 – ITC 100- Speaker Speaker Speaker Speaker OSPL90, HFA (dB SPL) Full-on Gain, HFA (dB) Reference Test Gain (dB) 27 Operating Current (mA) 1.8 Distortion < 2 | < 2 | < 2 < 2 | < 2 | < 2 < ...
- Page 58 2cc Coupler – OSPL 90 HearLink 9000 – IIC/CIC Frequency in Hertz (Hz) HearLink 7000, 5000, 3000, 2000 – IIC/CIC Frequency in Hertz (Hz) Legend: 85-Speaker CIC 85-Speaker IIC 75-Speaker CIC 75-Speaker IIC...
- Page 59 2cc Coupler – OSPL 90 HearLink 9000 – ITC Frequency in Hertz (Hz) HearLink 7000, 5000, 3000, 2000 – ITC Frequency in Hertz (Hz) Legend: 100-Speaker ITC 90-Speaker ITC 85-Speaker ITC 75-Speaker ITC...
- Page 60 2cc Coupler – Frequency Response Curve HearLink 9000, 7000, 5000, 3000, 2000 – IIC 75-Speaker 85-Speaker 1k6 2k 2k5 8k 10k 1k6 2k 2k5 8k 10k Frequency (Hz) Frequency (Hz) Legend: HL 9000 HL 7000, 5000, 3000, 2000 HearLink 9000, 7000, 5000, 3000, 2000 – CIC 75-Speaker 85-Speaker 1k6 2k 2k5...
- Page 61 2cc Coupler – Frequency Response Curve HearLink 9000, 7000, 5000, 3000, 2000 – ITC 75-Speaker 85-Speaker 1k6 2k 2k5 8k 10k 1k6 2k 2k5 8k 10k Frequency (Hz) Frequency (Hz) Legend: HL 9000 HL 7000, 5000, 3000, 2000 90-Speaker 100-Speaker 1k6 2k 2k5 8k 10k 1k6 2k 2k5...
- Page 62 2cc Coupler – Input-Output Curve HearLink 9000, 7000, 5000, 3000, 2000 – IIC 75-Speaker 85-Speaker Input/dB SPL Input/dB SPL Legend: 1600 Hz 800 Hz 500 Hz HearLink 9000, 7000, 5000, 3000, 2000 – CIC 75-Speaker 85-Speaker Input/dB SPL Input/dB SPL...
- Page 63 2cc Coupler – Input-Output Curve HearLink 9000, 7000, 5000, 3000, 2000 – ITC 75-Speaker 85-Speaker Input/dB SPL Input/dB SPL Legend: 1600 Hz 800 Hz 500 Hz 90-Speaker 100-Speaker Input/dB SPL Input/dB SPL...
- Page 64 197372/US...
- Page 65 < > 8,15 mm Placeholder for FSC logo < 15 mm >...
- Page 66 Philips and the Philips Shield Emblem are registered trademarks of Koninklijke Philips N.V. and are used under license. This product has been manufactured by or for and is sold under the responsibility of SBO Hearing A/S, and SBO Hearing A/S is the warrantor in relation to this product.