KitchenAid 5KSB5553 Manual
Hide thumbs
Also See for 5KSB5553:
- Instructions for use manual (19 pages) ,
- Manual (16 pages) ,
- Manual (19 pages)
Table of Contents
Advertisement
Advertisement
Table of Contents

Related Manuals for KitchenAid 5KSB5553


Summary of Contents for KitchenAid 5KSB5553
- Page 1 5KSB5553...
- Page 3 English ................5 Deutsch ................25 Français ................45 Italiano ................65 Nederlands ..............85 Español ................105 Português ............... 125 Ελληνικά ................. 145 Svenska ................165 Norsk ................185 Suomi ................205 Dansk ................225 Íslenska ................245 Русский ................265 Polski ................
-
Page 5: Table Of Contents
TROUBLESHOOTING ..................19 BLENDER TIPS....................... 20 CULINARY BLENDER JAR TIPS ................. 22 WARRANTY AND SERVICE ................23 NOTE: DUE TO THE UNIQUE CONTAINER AND BLADE DESIGN, READ THESE INSTRUCTIONS AND RECIPES BEFORE USING YOUR NEW KITCHENAID BLENDER TO ACHIEVE MAXIMUM PERFORMANCE RESULTS. -
Page 6: Blender Safety
BLENDER SAFETY IMPORTANT SAFEGUARDS When using electrical appliances, basic safety precautions should always be followed, including the following: 1. Read all instructions. Misuse of appliance may result in personal injury. 2. This appliance is not intended for use by persons (including children) with reduced physical, sensory, or mental capabilities, or lack of experience and knowledge, unless they have been given supervision... - Page 7 Authorised Service Centre for examination, repair, or adjustment. 12. Do not let the cord hang over the edge of table or counter. 13. The use of attachments not recommended or sold by KitchenAid may cause fire, electrical shock, or injury.
- Page 8 BLENDER SAFETY 14. Do not use the appliance outdoors. 15. Blades are sharp. Care should be taken when handling the sharp cutting blades, emptying the jar, and during cleaning. 16. Be careful if hot liquid is poured into the Blender as it can be ejected out of the appliance due to sudden steaming.
-
Page 9: Electrical Requirements
BLENDER SAFETY Electrical Requirements Volts: 220-240 Volts Hertz: 50 Hz NOTE: This product is supplied with a Y-type power cord. If the power cord is damaged, it must be replaced by the manufacturer or its service agent in order to avoid a hazard. Do not use an extension cord. -
Page 10: Blender Features
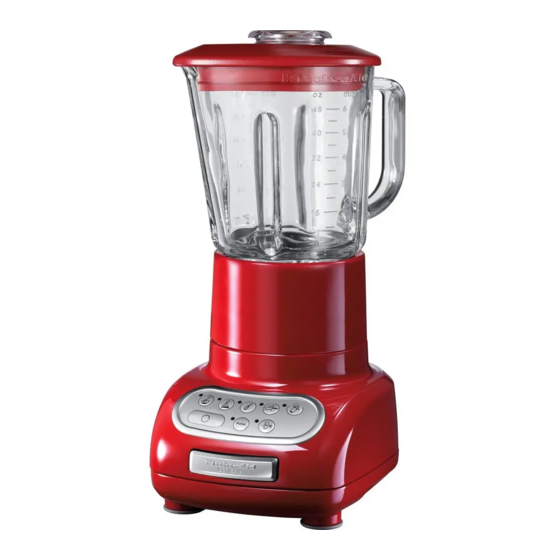
BLENDER FEATURES Stay-Put Lid with Clear 60 mL Ingredient Cup Easy Pour 1.5 L Glass Pitcher Stainless Steel Blade Locking Collar and Blade Assembly Speed Selection Buttons Durable Steel-Reinforced Couplers Clean Touch Control Pad Die-Cast Metal Base WARNING: Flashing light indicates ready to operate. Do not touch blades. - Page 11 Ingredient Cup through density changes when ingredients Provides a strong seal. The flexible lid are added. This advanced KitchenAid design will maintain its tight seal throughout maintains an optimal blending speed for the life of the Blender. The lid incorporates each culinary task and control-pad setting.
-
Page 12: 0.75 L Culinary Blender Jar Features
0.75 L CULINARY BLENDER JAR FEATURES Culinary Blender Jar Lid with Drizzle Cap* 0.75 L Culinary Blender Jar *On the lid, the following caution is written: “CAUTION: DO NOT OPERATE WITHOUT THIS COVER IN PLACE.” Shatter-Resistant Culinary Blender Jar Culinary Blender Jar Lid with Drizzle Cap Clear jar is shatter-, scratch-, and stain- resistant (BPA-free material). -
Page 13: Preparing The Blender For Use
PREPARING THE BLENDER FOR USE Before First Use 3. Align the pitcher (or culinary jar) tabs with the slots of the locking collar. Before using your Blender for the first time, wipe Blender base with a warm, sudsy cloth, then wipe clean with a damp cloth. Dry with a soft cloth. -
Page 14: Using The Blender
- Do not remove pitcher (or culinary jar) lid. properly secured in the locking collar Operating the Blender and assembly is positioned on the Blender base. The KitchenAid Blender has five speeds: STIR ( , CHOP ( ), MIX ( PUREE ( ), and LIQUEFY ( ). -
Page 15: Crush Ice
USING THE BLENDER NOTE: If a gap exists between the locking CRUSH ICE collar and the base, the pitcher (or culinary Your KitchenAid Blender offers a CRUSH jar) might not be locked into the locking ICE ( ) feature. When selected, the... -
Page 16: Pulse Mode
USING THE BLENDER PULSE Mode 5. To turn off the PULSE ( ) mode Your KitchenAid Blender offers PULSE feature, press “O”. The Blender is now ) mode, which allows a “Pulse-at-any- ready for continuous operation. Speed” feature. 6. Before removing the pitcher (or culinary... -
Page 17: Speed Control Guide
SPEED CONTROL GUIDE Item Speed Item Speed Blended ice drink ....Gravy ......Cheesecake . -
Page 18: Care And Cleaning
CARE AND CLEANING To Clean Without Disassembly The Blender pitcher, culinary jar, locking collar, and blade assembly can be easily 1. Put the pitcher (or culinary jar) on the cleaned as individual components or Blender base, fill half full with warm together without disassembly. -
Page 19: Troubleshooting
TROUBLESHOOTING The Blender does not operate when a setting is selected: Check to see if the Blender is plugged into an outlet. If it is, press “O” (OFF), then unplug the Blender. Plug it back in to the same outlet. If the Blender still does not work, check the fuse or circuit breaker on the electrical circuit the Blender is connected to and make sure the circuit is... -
Page 20: Blender Tips
BLENDER TIPS Quick Tips How To ... • In order to produce a smoother texture, Reconstitute frozen juice: For a 175 mL blend with CRUSH ICE ( ) if you’re can of orange juice concentrate, combine making beverages using ice. the juice and correct amount of water in •... - Page 21 BLENDER TIPS Chop fruits and vegetables: Put 2 cups Combine flour and liquid for thickening: (475 mL) of fruit or vegetable chunks in Place flour and liquid in pitcher. Cover and pitcher. In PULSE ( ) mode, cover and blend blend at STIR ( ) until smooth, about 5 to at STIR (...
-
Page 22: Culinary Blender Jar Tips
CULINARY BLENDER JAR TIPS Culinary blender jar This Culinary blender jar complements the Artisan 1.5 L glass pitcher. This small The Culinary blender jar is ideal for blending Culinary blender jar performs better and salad dressings, fresh mayonnaise, salsa, or faster for smaller amounts, and processing pesto and just the right size for single serving will result in a finer texture: such as baby... -
Page 23: Warranty And Service
KITCHENAID DOES NOT ASSUME ANY RESPONSIBILITY FOR INDIRECT DAMAGES. Customer Service In U.K. and Ireland: For any questions, or to find the nearest KitchenAid Authorised Service Centre, please find our contact details below. NOTE: All service should be handled locally by an Authorised KitchenAid Service Centre.