LG ESS Home 10 Installation Manual
Energy storage system
Hide thumbs
Also See for ESS Home 10:
- Installation manual (336 pages) ,
- Owner's manual (176 pages) ,
- User manual (100 pages)
Table of Contents
Advertisement
Quick Links
29/04/2019
INSTALLATION MANUAL
Energy Storage
System
Please read this manual carefully before installing
your set and retain it for future reference.
MODEL
LG ESS Home 10 (D010KE1N211)
LG ESS Home 8 (D008KE1N211)
*MFL71429501*
https://www.lg.com/global/business/ess/residential/dc-8-10
Copyright © 2019 LG Electronics Inc. All Rights Reserved.
Advertisement
Table of Contents

Related Manuals for LG ESS Home 10


Summary of Contents for LG ESS Home 10
- Page 1 Energy Storage System Please read this manual carefully before installing your set and retain it for future reference. MODEL LG ESS Home 10 (D010KE1N211) LG ESS Home 8 (D008KE1N211) *MFL71429501* https://www.lg.com/global/business/ess/residential/dc-8-10 Copyright © 2019 LG Electronics Inc. All Rights Reserved.
-
Page 2: Getting Started
Electrical shock hazard. Do not touch uninsulated wires when the product cover is removed. In the event of fault, the system must not be restarted. Product maintenance of repairs must be If the connected batteries are not LG battery, not only the batteries but also the PCS is not guaranteed by LG Electronics. - Page 3 Getting Started Indicates a situation where damage or injury could occur. If CAUTION it is not avoided, minor injury and/or damage to property may result. This product is intended for residential use only and should not be used for commercial or industrial.
- Page 4 Connecting the product to external devices could result in serious damage to your equipment. Serving of batteries should be performed or supervised by LG service person or trained installer. The battery does not discharged when the load is under the certain level.
-
Page 5: Product Features
Getting Started Product Features This product is intended to store direct current (DC) electricity generated from photovoltaic (PV) to the connected Lithium-Ion Battery, and convert direct current (DC) electricity from the connected battery and PV to alternating current (AC) electricity and feed this into the power grid. And, the battery supplies power to the household load in an emergency. -
Page 6: Table Of Contents
Table of Contents Table of Contents Getting Started Safety Information ..............2 Product Features . - Page 7 Installing 'LG EnerVu Plus' App ........
- Page 8 Getting Started Symbol used on the Label Label Symbol Description Direct current input Three phase four wire alternating current conductor IP21 is exposed to vertically dripping water. This product should not be disposed of with other household waste. Disposal regulations should be observed in this country.
- Page 9 Getting Started Abbreviations on this Manual Abbreviation Designation Explanation Energy Storage System Inverter system that stores energy into a battery and uses it. Power Conditioning A device intended to convert DC electricity System generated from PV system to AC electricity and feed it to household appliances.
- Page 10 Getting Started Glossary Terms Explanation Azimuth degrees the module surface deviates from a full south aspect. In the southern hemisphere, it indicates the deviation from a full north aspect. The azimuth angle is counted with positive values within the range from south (0°) to west (90°) and it counted with negative values within the range from south (0°) to east (-90°).
-
Page 11: Unpacking
Getting Started Unpacking Contents of this Product Power conditioning system Wall bracket (1EA) Lower cover (1EA) Grid cable plug Battery cable plugs (2 EA each) Energy meter plug Heat Pump Plug (option) Communication connector Lower cover screws (2EA) Quick Installation Manual & User Manual (1EA each) -
Page 12: Additional Components For Installation
Getting Started Additional Components for Installation Applied to Additional Components Stainless steel screws with diameter 6 mm - 8mm Wall mounting Anchors MC4 connectors PV connections Lead wires with the cross-sectional area 4 mm - 6 mm Battery Connections Lead wires with the cross-sectional area 4 mm - 6 mm Lead wires with the cross-sectional area 4 mm or thicker... -
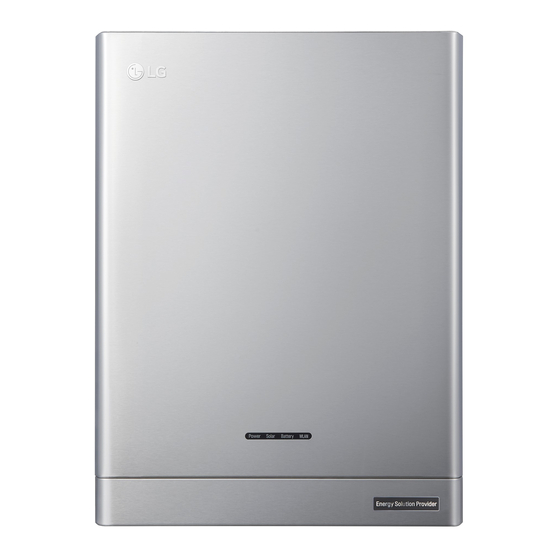
Page 13: Name Of Each Part
Getting Started Name of Each Part Front and Rear A PCS body D Bracket connected part B LED Indications E Screw holes for wall mounting C Lower Cover... -
Page 14: Led Indications
Getting Started LED Indications Color Description Grid is not connected. Power White Grid is connected. White (Blink) PCS Fault Energy is not being generated. Solar Green Energy is being generated. White (Blink) PCS Fault Stand by Green Battery is in charging Battery Blue Battery is in discharging... -
Page 15: Bottom
Getting Started Bottom A Battery DC cable connectors 1 I Ethernet port B Battery DC cable connectors 2 J Meter connector C ATS, BMS, EV METER Communication terminals L Wireless connection button D Black start button E PV switch (DC Disconnect) N AC grid cable connector F PV1(+ and -) connectors G PV2 (+ and -) connectors... -
Page 16: Installation
Installation Choice of location Mounting Location This product is designed to be installed indoor use only. Do not install this product outdoor. Install this product on the place where PV cables, energy meter cables, grid cables and battery cables are easily accessible. This product is designed to be installed on the wall only. - Page 17 Installation Do not install this product to highly humid area such as bathroom. This product generates low levels of noise at certain times, it should > 85% not be installed close to living areas. Do not install the product where there is vibration. Do not install this product in a place with ammonia, corrosive vapours, acids or salts.
-
Page 18: Minimum Clearance
Installation Minimum Clearance 3 0 0 m m 3 0 0 m m 3 0 0 m m 3 0 0 m m 3 0 0 m m 1 6 0 0 m This product must be installed with clearance at the left, right, top, bottom and front of the product Only the battery can be installed at the bottom clearance space of the product. -
Page 19: Wall Mounting
Installation Wall Mounting This product must be installed on the wall considering appropriate environments described in securely. Place the wall bracket on a wall where meets every installation conditions and clearance. And indicate the positions to drill using a pencil or the like. And drill holes on the 5 3 8 m indicated positions. - Page 20 Installation Hang this product to the wall bracket. Make sure that at least two persons work together to move the product. CAUTION and installing Drill holes on the screw hole positions and anchors. WARNING It is important to ensure the drilling locations are not located on any electrical wiring within the wall.
- Page 21 Installation NOTE Hold the lower cover when attaching or removing the lower cover. Care with handling the lower cover.
-
Page 22: Connections
Installation Connections Connection Overview Battery 1 Grid Energy meter Battery 2 PV Array 3 PV Array 1 PV Array 2 WARNING Electrical shock hazard. Do not touch uninsulated wires when the PCS cover is removed. Before starting electrical cable connections or removing the cover, turn off the AC circuit breaker, PV switch and DC circuit breaker of the battery. -
Page 23: Connection Diagram
Battery 1 Output GRID L1 L2 L3 N L1 L2 L3 N PV1+ PV1- PV2+ PV2- PV3+ PV3- BMS2 Battery2 BMS 1 Battery1 Batt LG ESS PCS Grid Comm. L1 L2 L3 N Energy Power Meter Meter L1 L2 L3 N... -
Page 24: Pv Array Connections
Installation PV Array Connections You can connect up to three PV arrays directly to the MC4 connectors on this product. WARNING Make sure the AC circuit breaker, PV switch and DC circuit breaker of the battery are disconnected before starting electrical cable connections. CAUTION Before connecting PV array, make sure that the open circuit voltage of PV array is less than 1000 V. - Page 25 Installation PV2 Connection Connect DC cables of a PV array to PV2 connectors on this product. PV2+ PV2- PV array2 PV3 Connection Connect DC cables of a PV array to PV3 connectors on this product. PV3+ PV3- PV array3...
- Page 26 Installation WARNING Do not mismatch the connection of the electric poles + to - and - to + when installing. It may cause electric shock or the product may permanently be damaged. PV+ and PV- cables from one PV array must be connected to the same PV connector number. (PV1+ and PV1-, PV2+ and PV2-, PV3+ and PV3-) Mismatched connection may cause electric shock or the product may permanently be damaged.
- Page 27 Installation Do not connect PV arrays in parallel connection to the one PV input on the product. It may cause electric shock or the product may permanently be damaged. NOTE If there is only one PV array connection needed on the system, use PV1+, PV1- connectors. And insert safety caps on unused connectors (PV2+, PV2-, PV3+, PV3-).
-
Page 28: Battery Connections
Installation Battery Connections You can connect a battery to this product. The electricity generated from the connected PV array will be stored in the battery. The battery for this product are not included with this product package. Before connecting the battery to this product, install the battery on the place where the battery cables are easily accessible to this product. - Page 29 Installation Open the spring using a screwdriver NOTE For battery cable connections, lead wire with cross-sectional area 4 mm – 6 mm recommended. Battery cable is not supplied on this product package. The system installer is responsible for selecting proper components for the installation. Strip both + and –...
- Page 30 Installation Push the insert into the sleeve and fasten Connect the both battery cable plugs to the battery DC cable connectors at the bottom of the product. Disconnecting the plug A Insert the screwdriver into one of the four openings. B Leave the screwdriver in the opening.
-
Page 31: Ats, Bms, Ev Meter Communication Connections
Installation ATS, BMS, EV METER Communication Connections Connect the supplied communication connector to the battery, ATS and EV communication. After making a connection, connect the commnication connector to the PCS. BMS1 o Enable BMS 1 BMS2 k Enable BMS 2 EV Meter EV Meter Connect / Disconnect the connector... -
Page 32: Grid Connections
Installation Grid Connections To use or sell the generated energy through grid connection, you should connect grid to this product. This product converts DC electricity generated from PV array to AC electricity. The generated energy can be sold to the electric utility or used for the household appliance. WARNING Make sure the AC circuit breaker, PV switch and DC circuit breaker of the battery are disconnected before starting electrical cable connections. - Page 33 Installation Pass the AC cable through the cable gland, rubber seal and housing as NOTE For AC cable connections, lead wire with cross-sectional area 4 mm or thicker is recommended. AC cable is not supplied on this product package. The system installer is responsible for selecting proper components for the installation.
- Page 34 Installation Connect the wires to the corresponding wire holes on the contact carriers. Wire hole 1 Grid wire L1 Wire hole 2 Grid wire L2 Wire hole 3 Grid wire L3 Wire hole N Grid wire N Wire hole 6 Grounding wire PE And then fasten the screws on the NOTE...
- Page 35 Installation Assemble the rubber seal into the housing and fasten the cable gland to the Connect the AC cable plug to the AC grid cable connector at the bottom of the product. Disconnecting the plug Press down the release knob with a screw driver, and separate the plug from the connector. WARNING current.
-
Page 36: Energy Meter And Internet Connection
Installation Energy Meter and Internet Connection this product is not included with this product package. Before connecting the energy meter to this product, install the energy meter. Refer to installation manual of the energy meter for more information about energy meter installation. Internet connection is required to use variety of functions such as network update, EnerVu monitoring system, etc. - Page 37 Installation Internet Connection (Not supported) Energy Meter and LAN Connection Diagram Internet Router Internet (Hotspot) Disconnection Bi-Directional Energy Meter Grid Switch Meter Distribution Load Load Load PV Array1 PV Array2...
-
Page 38: Wlan Dongle Connection
Installation WLAN Dongle Connection The installer settings and power monitoring can be viewed only in the mobile device connected with the product package must be connected to the product. Turning on the Product Turning off the Product The order of turning off the product is the reverse order of turning on. -
Page 39: Installer Settings
Installing 'LG EnerVu Plus' App LG EnerVu Plus NOTE LG EnerVu Plus app will be available in version of the software as follow; - iOS O/S : iPhone 6 (9.0) or later... -
Page 40: Connecting To A Mobile Device
Settings Connecting to a Mobile Device To connect the system to a mobile device, the LG EnerVu Plus mobile application must be installed Google Play store. Connect directly to ESS connection method selection screen appears. - Page 41 Settings Press and hold the wireless connection button next step. NOTE The password input screen appears. NOTE The last 2 characters of the SSID are the same as the last 2 characters of the system registration number. Example : (LGE-ESS-DE1710BKRH00685E)
- Page 42 Settings connect to the system. outside of the PCS. NOTE If the connection failed, try after turning off the mobile data option on your mobile device. Android : If the connection is successful, main iOS :...
-
Page 43: Entering [Installer Settings] Screen
Settings Entering [Installer Settings] screen Initial password is the case-insensitive registration number printed outside of the PCS. It is... -
Page 44: Mandatory Settings
Settings Mandatory settings The system need to be set mandatory settings in following order when the system is turned on for [PV/Meter] settings You can check the PV and Meter information. energy meter information is displayed. [PV], [PV1], [PV2] and [PV3] 1. - Page 45 Settings [PCS] settings You can set or check the PCS settings and status. information is displayed. [PCS] All the setting options and values of PCS information are displayed manually. Set the options as described below. 1. Select the currently selected value. Input menu appears on the screen.
- Page 46 Settings [Network] Settings status of the network connection is displayed. If you want to connect the EnerVu server, tap off the option. and uploaded to the server in every minute. saved. And it is not uploaded to the server. To use the EnerVu service, you need to subscribe to the EnerVu service and activate the devics.
- Page 47 Settings Wireless Network Setting connection options are displayed. SSID which your ESS is connected and then tap option. And then input password of the SSID in the is displayed on the screen. allocated an IP address from local area network set network connection manually depending on options manually.
- Page 48 Settings NOTE or modem. After connecting the product to the home network, quickly power off and/or disconnect the power cable of the home network router or cable modem. Then power on and/ or connect the power cable again. Depending on the internet service provider (ISP), the number of devices that can receive internet service may be limited by the applicable terms of service.
- Page 49 Settings [Operating Test] Settings does not work. operating test menu is displayed. You should perform 4 operating tests. To start automatically. You can also run tests separately by tapping It is recommended to run all the tests at once Charging (from Grid) : The operating test for battery charging through grid.
-
Page 50: Additional Settings
Settings Additional Settings [Battery] Settings 1. Select the currently selected value of each option to change. Input menu appears on the screen. 2. Input the desired value. CAUTION battery can be completely discharged and cannot be used anymore. Be sure not to stop using the battery for a long period of time. - Page 51 Settings [Registration] To use the EnerVu web monitoring system, the ESS system and its owner must be registered to the EnerVu web server. Use this option to register the system conveniently without accessing EnerVu screen on the web browser. mobile application. [System Log] You can see the list of mode changes, system fault and system warning log.
- Page 52 Settings [Other function] Settings [Reboot] [Password Change] changing. [Factory Reset] settings to its original default. All the settings and system logs will be deleted after resetting. [Dump Log] memory card with this option. Front cover of the system must be removed to insert a SD memory card.
-
Page 53: Enervu Settings
An internet browser installed computer, tablet or mobile with internet access is needed to access EnerVu web monitoring system. The system owner must create a LG ESS account before registering the product. Refer to Creating a New Account (Owner) On your browser, visit LG EnerVu page at http://enervu.lg-ess.com. - Page 54 Settings your e-mail address. On your e-mail,...
- Page 55 Settings On the account creation page, select account. Available LG account services are displayed on the screen.
-
Page 56: Creating A New Account (Administrator)
Creating a New Account (Administrator) An administrator can manage the installers belonging to your company and your branches. And an administrator also have all the roles that the installers have. On your browser, visit LG EnerVu page at http://enervu.lg-ess.com. page appears. -
Page 57: Adding A New Installer
Settings installer account. Adding a New Installer On your browser, visit LG EnerVu page at http://enervu.lg-ess.com. page appears. And then address and the password and select page. new user input page. installer. has not authority to add user or subsidiary. -
Page 58: Registering The Pcs (Web Browser)
Settings Registering the PCS (Web browser) On your browser, visit LG EnerVu page at http://enervu.lg-ess.com. page appears. And then address and the password and select If the installer does not have an account, account. information. - Page 59 Settings The ESS information will automatically be information.
-
Page 60: Registering The Pcs (Mobile App)
Registering the PCS (Mobile App) Preparation The mobile application (LG EnerVu Plus) installed tablet or mobile device is needed. The system owner must create a LG ESS account before registering the product. Refer to device. The main screen appears on the screen. NOTE For complete registering the system, the registration with incomplete status. - Page 61 When incomplete registration status If the registration is in incomplete status, the system should be activated through one of the following methods. Method 1 (For installer) On your browser, visit LG EnerVu page at http://enervu.lg-ess.com. appears. And then system name you are going to activate.
- Page 62 Settings Method 2 (For owner) Inform the system owner to make an owner account and login at EnerVu page. The registration number input screen appears as in NOTE for more information of making a new account.
-
Page 63: Troubleshooting
Troubleshooting Error Codes and Messages PCS Error Codes Do not leave the ESS in the Fault standby state for a long time because of the battery discharge may occur during the long standby state. If the battery fault occurs immediately after starting PCS it means Battery failure. Check the battery SOC also voltage and fault information, and turn off the power of the ESS until service action is taken. - Page 64 Troubleshooting Code Message Description Solution P410 Battery Under Voltage Voltage level of the battery is Contact service center Fault lower than the limitation and the state is maintained for more than 10 minutes P411 Battery MisWiring Battery MisWiring Contact service center Fault P460 Grid L1 Under Voltage Voltage level of the grid (L1) is...
- Page 65 Troubleshooting Code Message Description Solution P474 Grid L3 DC Offset DC offset current is added on Automatically restart after Current grid(L3) detecting fault PV Insulation Insulation resistance level on PV is Automatically restart after Resistance lower than the limitation PV IR is normal Inverter Over Temp.
- Page 66 Troubleshooting Code Message Description Solution PVC Over Current Current level of the PV C is Automatically restart after Instant instantaneously higher than the PV C limitation Batt 1 Over Current Current level of the battery 1 is Automatically restart Instant instantaneously higher than the after Battery 1 Current is limitation...
- Page 67 Troubleshooting Code Message Description Solution PVC Over Current PVC level is higher than the Automatically restart after limitation detecting fault Grid Relay1 Grid relay is not operable (L1-1) Automatically restart after detecting fault Grid Relay2 Grid relay is not operable (L1-2) Automatically restart after detecting fault Grid Relay3...
- Page 68 Troubleshooting Code Message Description Solution Voltage level of Inverter L2 is Automatically restart after higher than the limitation detecting fault Voltage level of Inverter L3 is Automatically restart after higher than the limitation detecting fault PV Source Invalid PV source connection Automatically restart after Unmatching detecting fault...
-
Page 69: Battery Error Code
Troubleshooting Battery Error Code Each battery is indicated by # 1, # 2, each battery share a code error. Code Message Description Solution B184 Under SOC Warning SOC Voltage level of battery cell is Automatically restart after lower than the limitation detecting fault Over SOC Warning SOC Voltage level of battery cell is... - Page 70 Troubleshooting Code Message Description Solution B610 Temperature Temperature differences between Automatically restart after Deviation Fault the batteries are over the limitation detecting fault B611 Under Temperature The battery temperature is lower Automatically restart after fault than the limitation detecting fault B612 Over Temperature The battery temperature is Higher...
- Page 71 Troubleshooting Code Message Description Solution B627 Under Temperature The battery temperature is lower Contact service center fault than the limitation B628 Over Temperature The battery temperature is Higher Contact service center fault than the limitation B630 Cell Under Voltage Cell Voltage level of battery cell is Contact service center Fault lower than the limitation...
-
Page 72: Battery Dc-Dc Converter Error Code
Troubleshooting Code Message Description Solution B628 Over Temperature The battery temperature is Higher Contact service center fault than the limitation B630 Cell Under Voltage Cell Voltage level of battery cell is Contact service center Fault lower than the limitation B631 Cell Over Voltage Cell Voltage level of battery cell is Contact service center... - Page 73 Troubleshooting If you have technical problems or questions, contact installation company or LG Electronics. 1. Installation Company Address : Tel : 2. Customer Service LG Electronics ESS | Solar Service Tel : Germany: 0049 (0)39484 / 976 380 E-Service Haberkorn GmbH Austria: 0043 (0)720 / 11 66 01 Augustenhöhe 7...
-
Page 74: Appendix
Appendix Maintenance Cleaning the Product Wipe off the outside of the product with a soft towel with lukewarm water and wipe it with a clean hand towel so that dirt will not occur when using a neutral detergent. When cleaning the outside of the product, do not brush it with a rough brush, toothpaste, or - It may cause discoloration of the product or damage to the product. -
Page 75: Specifications
Appendix PV Input LG ESS Home 8 LG ESS Home 10 Input Voltage Range Max. DC Power (per channel) 12 kW (6 kW) Usable MPP Voltage Range Max. Input Current per MPPT 13 A Max. inverter backfeed current to the array... - Page 76 If you are installing in a place sensitive to noise, please consult the installer. www. lg.com/global/business/ess SIMPLIFIED EU DECLARATION OF CONFORMITY Hereby, LG Electronics declares that the radio equipment type The full text of the EU declaration of conformity is available at the following internet address: http://www.lg.com/global/support/cedoc/cedoc# This device is a 2.4 GHz wideband transmission system, intended for use in all EU member states and EFTA countries.
-
Page 77: Others
Appendix Others Shift factor / effective characteristic cos (P) cos φ P/P Emax Name Description Default Value Available Value Uint cosphi(P) Start cosphi at starting point cosphi(P) End cosphi at end point cosphi(P) Active power at starting Power Start point (P/Pmax) cosphi(P) Active power at End point Power End... -
Page 78: Reactive Power / Voltage Characteristic Q(U)
Appendix Reactive power / voltage characteristic Q(U) Voltage U/Un Default Available Name Description Uint Value Value of point Q(U) Xa Grid voltage point-a (U/Un) Q(U) Xb Grid voltage point-b (U/Un) Q(U) Xc Grid voltage point-c (U/Un) Q(U) Xd Grid voltage point-d (U/Un) Q(U) Ya Reactive power point-a (Q/Sr) 43,6... -
Page 79: Active Power Feed-In At Overfrequency P(F)
Appendix Active power feed-in at overfrequency P(f) P(f) Start Freq (50,2) Network Network Default Available Name Description Uint Value Value P(f) Active Active power gradient at Power overfereuency P(f) Start Freq P(f) function starting frequency P(f) Reset Freq P(f) function reset frequency Waiting time of active power P(f) wait time gradient after reset frequency... -
Page 80: Voltage Controlled Active Power Control P(U)
Appendix Voltage controlled active power control P(U) P(U) Start Voltage P(U) End Voltage (110) (112) Default Available Name Description Uint Value Value P(U) Active Active power gradient at overvoltage Power P(U) Start P(U) function starting voltage (U/Un) Voltage P(U) End P(U) function end voltage (U/Un) Voltage P(U) wait time...