Table of Contents
Advertisement
Before using this product and document, please read the following document carefully.
Also, please keep this document to the place where you can see any time.
-
Safety Precautions and Regulatory Notices for GT Series
Standard SIP Video Terminal
User Guide (ST500)
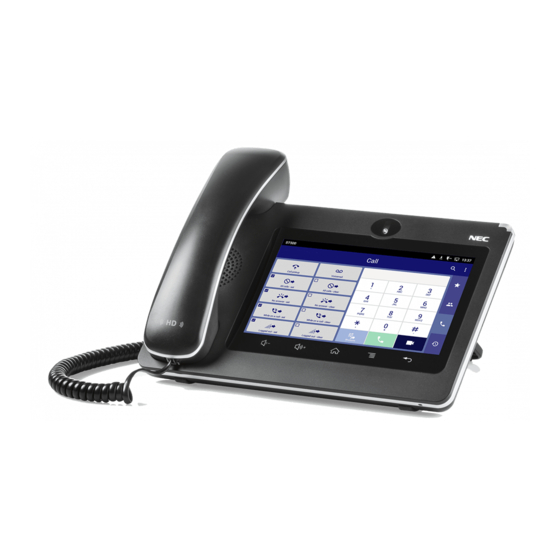
IP Phone GT890
GVT-105198-001
Issue 1.0
July, 2019
Advertisement
Table of Contents

Related Manuals for NEC UNIVERGE GT890


Summary of Contents for NEC UNIVERGE GT890
- Page 1 Standard SIP Video Terminal IP Phone GT890 User Guide (ST500) Before using this product and document, please read the following document carefully. Also, please keep this document to the place where you can see any time. Safety Precautions and Regulatory Notices for GT Series GVT-105198-001 Issue 1.0 July, 2019...
- Page 2 Caution: Changes or modifications to this product not expressly approved by NEC, or operation of this product in any way other than as detailed by this manual, could void your manufacturer warranty. Caution: User ID and password are important information. Be careful when handling them. Default password is given for initial maintenance and operational settings.
- Page 3 FCC Caution: FCC Statement This equipment has been tested and found to comply with the limits for a Class B digital device, pursuant to part 15 of the FCC Rules. These limits are designed to provide reasonable protection against harmful interference in a residential installation.
- Page 4 ETSI EN 300 328 V2.1.1 (2016-11); EN 301 893 V2.1.1 (2017-05) ETSI EN 301 489-1 V2.1.1 (2017-02); ETSI EN 301 489-17 V3.1.1 (2017-02) EN 60950-1:2006+A11:2009+A1:2010+A12:2011+A2:2013 EN 62311: 2008; EN62479: 2010 Manufacturer: NEC Corporation 7-1, Shiba 5-chome, Minato-ku, Tokyo 108-8001, Japan EUT Feature Tx/Rx Frequency 2402~2480 MHz...
- Page 5 20 cm between the radiator and your body. CE Authentication Hereby, NEC Corporation declares that the radio equipment GT890 is in compliance with Directive 2014/53/EU. The full text of the EU declaration of conformity is available at the following internet address:...
- Page 6 THE TERMS AND CONDITIONS OF SOFTWARE The software embedded in GT890 contains certain third party open source software components which are provided under the terms and conditions designated at https://mind.bcom.nec.co.jp/customernet/soft-license/GT890_OSS.html...
-
Page 7: Table Of Contents
Table of Contents Document Purpose ..................... 12 Product Overview ......................13 Model Line Up of GT890 Series ......................13 Feature Highlights ..........................13 Supporting Communication Servers ....................... 13 GT890 Technical Specifications ......................14 About ST500 ............................16 Call features ............................16 Network Configuration Example ...................... - Page 8 Getting to Know ST500 ....................43 Screen names and features ......................... 43 Primary features and operations ....................43 General screen structure ......................44 Favorites screen ........................... 45 Contacts screen ..........................46 Contact detail screen ........................47 Management contacts screen ...................... 48 Call screen ............................
- Page 9 To preset access codes for Call Forwarding ................122 To operate call forwarding ......................127 Call pickup ............................129 To preset access codes for call pickup ..................129 To operate call pickup ......................... 131 Voicemail ............................132 To preset access codes for voicemail ..................132 To access voicemail ........................
- Page 10 Import/Export Contacts ........................181 Download Contacts ..........................182 Sort Contacts ............................. 183 Send Contacts to Desktop Shortcut ....................183 Share Contacts via Bluetooth ......................183 Add Group ............................184 Add contacts to Group ........................184 Contacts Storage Status ........................185 Call History ........................
- Page 11 Bluetooth ............................221 Turn On/Off Bluetooth ......................... 221 Change Bluetooth Device Name ....................222 Pair with a Bluetooth Device ....................... 222 Unpair a Bluetooth Device ......................223 Bluetooth Settings Shortcut ......................223 EHS Headset ............................. 225 USB Headset ............................. 225 USB ..............................
- Page 12 Creating a custom plan ........................273 To create a new dial plan ......................273 To copy a preset dial plan ......................280 List of dial plan presets ........................285 Japan ............................285 France ............................285 North America ..........................286 Australia ............................286 New Zealand ..........................
-
Page 13: Document Purpose
Document Purpose This document describes how to configure the GT890 via phone's LCD menu and Web GUI menu to fully manipulate phone's features. To learn advanced functions of GT890, please refer to "Standard SIP Video Terminal IP Phone GT890 Administration Guide (ST500)". This manual covers following topics: ... -
Page 14: Product Overview
Product Overview Model Line Up of GT890 Series Table 1: GT890 Model Line Up Model Name Description ITX-3370-1(BK)TEL Standard SIP Video Terminal (Black) for North America ITX-3370-1W(BK)TEL Standard SIP Video Terminal (Black) for Global Feature Highlights The following tables contain the major features of the GT890. Table 2: GT890 Features in a Glance ... -
Page 15: Gt890 Technical Specifications
GT890 Technical Specifications The following table resumes all the technical specifications including the protocols/standards supported, voice codecs, languages and upgrade/provisioning settings for the phone GT890. Table 4: GT890 Technical Specifications (1/2) SIP RFC3261, TCP/IP/UDP, RTP/RTCP, HTTP/HTTPS, ARP, ICMP, DNS (A Protocols/Standards record, SRV, NAPTR), DHCP, PPPoE, SSH, TFTP, NTP, STUN, LLDP-MED, ®... - Page 16 Table 4: GT890 Technical Specifications (2/2) English, German, Italian, French, Spanish, Portuguese, Russian, Croatian, Multi- System simplified and traditional Chinese, Korean, Japanese, Arabic, Dutch, language Norwegian, Danish, Swedish, Greek, Turkish, Romanian, Polish, Catalan, Hebrew, Ukrainian English(GB,US,AU), Japanese, Chinese(Traditional, Simplified), Dialer Portuguese(Portugal, Brazil), Spanish(Spanish, Mexico), French, German, Dutch, Arabic English, German, Italian, French, Spanish, Portuguese, Russian, Croatian,...
-
Page 17: About St500
About ST500 ST500 is a pre-installed app for enabling extension calls on smart devices. By operating on smart devices, ST500 integrates with a communication server (UNIVERGE SV Series) and is incorporated into an IP telephone system to provide high-quality voice calls. ST500 offers video calls as well. Call features The following table shows call related features available on ST500. -
Page 18: Network Configuration Example
Network Configuration Example VOICE Wi-Fi GT890 VIDEO ACCESS POINTS ST500 COMMUNICATION SERVER (SV9500/SV9300/SV9100) Figure 1: Network configuration example. -
Page 19: Getting Started
Getting Started This chapter provides basic installation instructions including the list of the packaging contents and also information for obtaining the best performance with the GT890. Equipment Packaging Table 6: Equipment Packaging GT890 1x Main Case. 1x Handset. ... -
Page 20: Description Of The Gt890
Description of the GT890 Front View Figure 3: GT890 Front View Table 7: GT890 Front View Item Name Description Mega pixel front camera. The angle can be adjusted, and the camera can be blocked by scrolling up/down the wheel on the back of the Front Camera camera. -
Page 21: Back View
Back View Figure 4: GT890 Back View Table 8: GT890 Back View Item Name Description Camera Adjusting Wheel Scroll up/down to adjust the camera angle. Adjust the phone stand angle to place the phone on the desk. Phone Stand (built-in) Handset Port RJ9 handset connector port. -
Page 22: Side View
Side View Figure 5: GT890 Side View Table 9: GT890 Side View Item Name Description HDMI Port Connect display device to the HDMI port via HDMI cable. Connect SD storage device to the SD Card Slot. SD Card Port 3.5mm Headset Port Connect 3.5mm headset. -
Page 23: Connecting And Setting Up The Gt890
Connecting and Setting Up the GT890 The GT890 can be installed using the built-in stand or attached on the wall using the slots for wall mounting. Figure 6: Built in Stand and Mounting Slots on GT890 Figure 7: GT890 Back / Side View Using the Phone Stand The GT890 has a built-in phone stand. -
Page 24: Using The Slots For Wall Mounting
Using the Slots for Wall Mounting 1. Attach the wall mount to the slots on the back of the phone; 2. Pull out the tab from the handset cradle (see figure below); 3. Rotate the tab and plug it back into the slot with the extension up to hold the handset while the phone is mounted on the wall. -
Page 25: Getting To Know Gt890
Getting to Know GT890 Use the Touchscreen When the phone boots up in HOME screen, the LCD will display as below. The Status Bar shows time, network connectivity, signal strength, notification information etc... Date and Time Shortcut: Call screen Shortcut: Management Contacts Figure 10: GT890 Default Home Screen Swipe from right to left to show the application menu of the phone. - Page 26 To fully manipulate the GT890 capacitive touch screen, use your fingers to operate the following on the GT890 icons, buttons, menu items, onscreen keyboard etc. Figure 12: GT890 Finger Gestures on the Touch Screen Slightly touch the screen with fingertip to initiate menu, options or applications. For example, to select items on the screen (e.g., setting options, apps etc.);...
-
Page 27: Use The Desktop
Zoom In/Zoom Out Place two fingers on the screen, then pinch them together (zoom out) or spread them apart (zoom in). Double Tap Quickly touch the screen twice with fingertip to switch between default display and zoomed-in display. This is usually used when viewing photos or web pages. -
Page 28: Add Widget To Desktop
Add Widget to Desktop The GT890 provides widgets like weather forecast, clock etc. Users could conveniently add those widgets to the desktop as preferred. To add a widget: 1. Tap the Menu key or long press on an empty space on the idle screen and select Widgets. 2. - Page 29 Figure 15: Open Clock Widget Certain widgets such as Clock can be resized on the desktop. To resize a widget, touch and press the widget for about 2 seconds. Then lift your finger from the screen. This will bring up the white frame as shown in .
-
Page 30: Set Wallpapers
Move/delete Application/Widget To move a shortcut/widget to a different spot on the desktop or to a different idle screen, hold the item until a recycle bin icon shows up on the top of the screen. Drag the item up/down/left/right to the destination spot on the screen. -
Page 31: Manage Running Applications
Figure 18: GT890 Choose Wallpaper Manage Running Applications On the GT890 desktop, press an empty spot for about 2 seconds then select “Management” or select "Management" after pressing Menu button Figure 19: GT890 Recent Applications Users could use the thread manager to do the following: ... -
Page 32: Idle Screen
Tap on icon to delete all running threads. Idle Screen Switch Idle Screens The GT890 supports multiple idle screens by sliding the screen horizontally. On the GT890 screen, swipe left or right using your finger to switch between different idle screens. Figure 20: GT890 Switch Idle Screens Set Up Idle Screen ... - Page 33 Figure 21: Set up Home Idle Screen Add/Delete idle screen As shown in , this section shows the available desktop screens. [Figure 21: Set up Home Idle Screen] Users could add or delete idle screen. Add idle screen. Tap on to add a new idle screen.
-
Page 34: Use The Status Bar
Delete idle screen. Tap on to delete the Idle screen. Please make sure the apps, shortcuts or widgets on the idle screen are removed first. Otherwise, the icon won't show for the idle screen. Figure 23: Delete an Idle Screen Use the Status Bar The status bar on the top of the GT890 screen provides visual notifications for the system settings and status, as well as quick access for important system settings. - Page 35 For more options on the Status Bar (brightness, screenshot…) users can pull down the status bar twice, or once with two fingers. Figure 25: Status Bar - More Options The running process and notifications will show up in the list. For example, the following figures indicate that there is a notification for Wi-Fi has no Internet access.
- Page 36 For more information about specific features in the notification bars, you can press the bottom of the feature in question. Figure 27: GT890 Top status Bar - Get more information For example, you can see the available Wi-Fi Networks. Wi-Fi point 1 Wi-Fi point 2 Wi-Fi point 3 Wi-Fi point 4...
-
Page 37: Notifications In Status Bar
Notifications in Status Bar The following table describes the icons used on the status bar for notification purpose. Table 10: GT890 Status Bar Notification Icons Network connected via Ethernet cable. Trying to connect to the network via Ethernet cable. Network disconnected via Ethernet cable. Handset is off-hook. - Page 38 Bluetooth is enabled but not connected. Bluetooth is enabled and connected. Bluetooth headset is connected. Bluetooth headset is being used for calls. Downloading files via Bluetooth. Alarm is set up and enabled. Silent mode is enabled. When it's on, the incoming call/message won't produce ring tone/notification tone from phone's speaker.
- Page 39 ST500 is ready. The call is connected. The call is on hold. There is a missed call. Connecting to communication server.
-
Page 40: System Settings In Status Bar
System Settings in Status Bar Slide down the top status bar and select System Settings. Users will see the following settings. Switch RJ9 headset Turn on/off Bluetooth. or other. Go to phone Settings. Turn on/off the voice of the phone. Hide/Show Turn on/off LCD display. -
Page 41: Use The Gt890 Keys
Use the GT890 Keys Figure 30: GT890 Keys Table 11: GT890 Keys Tap to turn down the call volume and media volume. Volume Down Volume Up Tap to turn up the call volume and media volume. Tap to go back to Home screen; or touch and press for about 2 Home seconds to take a screenshot. -
Page 42: Use The On-Screen Keyboard
Use the On-Screen Keyboard The GT890 onscreen keyboard can be activated by tapping on an input field. English Keyboard This is the default keyboard on GT890. Figure 31: GT890 Onscreen Keyboard - English Keyboard To switch input between lowercase and uppercase, tap on (lowercase) or (uppercase). -
Page 43: Use The Message Waiting Indicator
Tap on to access more symbols. Figure 34: English Keyboard - More Symbols Note: To configure keyboard and input options, go to the application menuSettingsBasic Language & KeyboardKeyboard and Input Methods. Users could touch and press the key on the keyboard for about 2 seconds to input the alternative character. -
Page 44: Getting To Know St500
Getting to Know ST500 Note: ST500 does not operate normally while VoIP applications other than ST500 (paid/free call application etc.) are operating. Do not install the VoIP application other than ST500, as it may be operating in the background even if you are not making a call with the above application. Screen names and features Primary features and operations The following are the primary screens (Favorites, Contacts, Call, History, and Settings) of ST500. -
Page 45: General Screen Structure
General screen structure Figure 36: General screen structure. Table 13: General screen functions. Item Name Description Displays the status of ST500. Connecting to the main server. Profile is not available. Registration status icon Ready. Hold. Displays current tab screen name. Tab name Displays setting menus for each tab screen. -
Page 46: Favorites Screen
Favorites screen Figure 37: Favorites screen. Table 14: Favorites screen functions. Item Name Description Displays the picture that is registered in the Phonebook of the Picture terminal. When a picture is not registered, ST500 default picture is displayed. Displays a name registered in the Phonebook of the terminal. Name Displays a number that was selected when registered to Favorites. -
Page 47: Contacts Screen
Contacts screen Figure 38: Contacts screen. Table 15: Contacts screen functions. Item Name Description Displays the picture that is registered in the Phonebook of the terminal. Picture When a picture is not registered, ST500 default picture is displayed. Displays the name that is registered in the Phonebook of the Name * terminal. -
Page 48: Contact Detail Screen
Contact detail screen Figure 39: Contact detail screen. Table 16: Contact detail screen functions. Item Name Description Displays the name that is registered in the Phonebook of the Name * terminal. Displays the number type that is registered in the Phonebook of the Number type * terminal. -
Page 49: Management Contacts Screen
the field size. Management contacts screen GT890 supports Management contacts. To access contacts, on the Home screen, tap on icon on the right panel. The following figure shows Contacts. Figure 40: GT890 Management Contacts Table 17: Management Contacts Item Name Description ... - Page 50 Displays the name that is registered in the Phonebook of the Name terminal. Displays the number that is registered in the Phonebook of the Number terminal. Originates a voice call. Tap and hold activates hands-free mode. Voice call icon The option menu is displayed. More button It can be import/export/download/sort contacts, and batch operation.
-
Page 51: Call Screen
Call screen Figure 41: Call screen. Table 18: Call screen functions. Item Name Description Displays entered numbers. Number input field Used for entering telephone numbers. Dial pad Originates a video call to the number that is displayed in the number Video call icon input field. - Page 52 Shortcut list Table 19: Shortcut icons. Icon Description Shortcut to Call pickup. Shortcut to access Voicemail. Shortcut to call forward for All calls. Shortcut to clearing call forward settings for All calls. Shortcut to call forward for No answer. Shortcut to clearing call forward settings for No answer.
-
Page 53: History Screen
History screen Figure 42: History screen. Table 20: History screen functions. Item Name Description Displays all histories. Displays incoming call histories. Incoming Displays outgoing call histories. Outgoing Displays missed call histories. Missed Displays call types (outgoing, incoming, missed). * Call type icons When registered in the Phonebook of the terminal, name is Name displayed. - Page 54 Note: Depends on usage environment, the time setting information will be deleted by turning on/off the main unit power. In that case, call histories are not recorded unless fix date & time setting. Set the date & time again under Settings > Basic > Date and time on the application menu. Call type list Table 21: Call type icons.
-
Page 55: History Detail Screen
History detail screen Figure 43: History detail screen. Table 22: History detail screen functions. Item Name Description Displays the name that is registered in the Phonebook of the Name * terminal. When name is not registered, the first number that is registered is displayed here. - Page 56 Type Displays call type (incoming/outgoing). Voice call icon Originates a voice call. Tap and hold activates hands-free mode. Video call icon Originates a video call. Delete Tap and hold on a history deletes individual history data. Note: Items marked with * are the end of the value is displayed with […] if the input value is longer than the field size.
-
Page 57: Voice Call Screen
Voice call screen Two-way call Figure 44: Two-way call. Table 23: Voice call screen functions. Item Name Description Call status Displays call status. When registered in the Phonebook of the terminal, name is displayed. Name When not registered in the Phonebook of the terminal, the number is displayed. - Page 58 Switches mute/unmute. When muted, a slash appears over the Mute icon icon. Switches receiver and speaker for audio output source. When Output source switch speakers are ON, the slash on the icon disappears. icon When Bluetooth is enabled, a selection screen is displayed. (See When Bluetooth is selected for output source Disconnect icon...
- Page 59 Call status list When use the voice call, ST500 display one of below on top left. Table 25: Call status list. Display Status Displays when ST500 is dialing. Displays when ringing a call. Displays while on a call. Displays when ended a call. Displays also message: Call disconnected.
- Page 60 When Bluetooth is selected for output source The Speaker icon changes to the Bluetooth icon. Figure 46: Speaker icon on the voice call screen. Figure 47: Output source list.
- Page 61 Figure 48: Bluetooth icon on the voice call screen. Note: It is not possible to answer/disconnect using the Bluetooth headset.
-
Page 62: Video Call Screen
Video call screen Connected Default Video Call Screen Sarah Kendrick Connected 4009 0:00:21 Good Figure 49: Video call screen 1. Table 26: Video call screen 1. Item Name Description Displays the status of the call. (Ringing) Call Status Displays call duration. Call duration Displays the connection status. - Page 63 Mutes the microphone. When muted, the icon has a slash over it. Mute Switches to voice call. Switch to Voice Call Disconnects the video call. Disconnect Displays the video what camera of other party is shooting. When PartnerPicture other party stop send video, screen is black out. Tap this icon;...
- Page 64 Option Buttons on Video Call Screen Sarah Kendrick Connected 4009 0:00:21 Good Figure 50: Video call screen 2. Table 27: Video call screen 2. Item Name Description Tap this icon; the PartnerPicture flips vertically. Flip vertical Tap this icon; the PartnerPicture flips horizontally. Flip horizontal Switches receiver and speaker for audio output source.
-
Page 65: Incoming Call Screen
Incoming call screen Show foreground Figure 51: Incoming call screen. Table 28: Incoming call screen. Item Name Description Displays a photo if registered in the Phonebook of the terminal. Displays a default picture if not registered in the Phonebook of the Photo terminal. - Page 66 Show heads up notification Figure 52: Incoming call screen (notification only). Table 29: Incoming call screen (notification only). Item Name Description Displays a photo if registered in the Phonebook of the terminal. Photo Displays a default picture if not registered in the Phonebook of the terminal.
-
Page 67: Before Using St500
Before using ST500 The following operations are required before you can start using ST500. (Details are described in “Standard SIP Video Terminal IP Phone GT890 Administration Guide (ST500)”.) Setting the device and user on ST500 Office data setting on communication server (SV9500/SV9300/SV9100) Note: Since the re-registration operation will be performed after 1 minute at the maximum, if you want to register immediately, perform the immediate resist operation by re-selecting the profile to be used by "Select... -
Page 68: Starting/Closing St500 App
Starting/Closing ST500 app Starting ST500 Tap the ST500 icon on the application menu. Figure 53: ST500 icon on the application menu. ST500 opens and the Favorites primary screen is displayed. Figure 54: Favorites screen is displayed. -
Page 69: Closing St500
Closing ST500 to display the pull-down menu and tap Exit. - A confirmation message is displayed. Figure 55: Display pull-down menu to exit ST500. Figure 56: Pull-down menu on the contacts screen. - Page 70 Tap Yes. Figure 57: Exit ST500.
-
Page 71: Make Phone Calls
Make Phone Calls Register SIP Accounts The GT890 supports up to 16 independent SIP accounts. Each account can have separate SIP servers, usernames and NAT configurations. Account Status On the primary screens, the extension number and registration status are displayed. ... -
Page 72: Originating A Call
Originating a call Note: If you enter pause (,) as the calling number, the number before the pause will be sent as the called number and the number after the pause will be sent as DTMF. After entering numbers, long-tap [*] on the dial pad to enter a pause (,). - Page 73 Figure 60: Call Screen On the Call screen, enter the extension number you want to call. Figure 61: Enter the extension number.
- Page 74 Do either of the following operations. For voice calls: Tap or off-hook the handset. For video calls: Tap Voice Call Video Call Figure 62: Tap either one of icons to originate a call. Note: To make a video call, tap and then off-hook the handset.
- Page 75 Voice call screen. Ringing. Figure 63: Voice call screen while ringing 1. Connected. You can start talking when the other party answers. Figure 64: Voice call connected 1.
- Page 76 Video call screen. Ringing. Figure 65: Video call screen while ringing 1. Connected. Figure 66: Video call connected 1. Note: When the destination party does not support video call or responds with voice call, the call is switched to voice call.
-
Page 77: Dial A Number Via Contact
Dial a Number via Contact On the Contacts screen, tap a contact. Figure 67: To originate a call from the Contacts screen. Do either of the following operations. For voice calls: Tap For video calls: Tap Voice call Video call Figure 68: Contacts detail screen to originate a call. - Page 78 Note: Tap and hold the enables hands-free mode.
-
Page 79: Dial A Number After Searching A Contact
Dial a Number after searching a contact On the Contacts screen, tap Figure 69: To originate a call after searching a contact. Enter a search key such as a contact name, phonetic name, and phone number. - Members that have partial match of the entered keyword in their data are displayed. Enter a search key. - Page 80 From the search result, tap a member you want to call. Figure 71: Searched a contact on the contacts screen. Do either of the following operations. For voice calls: Tap icon. For video calls: Tap icon. Voice call Video call Figure 72: Searched a contact screen.
-
Page 81: Dial A Number Via History
Dial a Number via History To make a voice call: Tap icon on the History screen. - A voice call is made. Figure 73: To originate a call on the History screen. Figure 74: Voice call screen while ringing 4. Note: Tap and hold the enables hands-free mode. - Page 82 To make a voice or video call (from History detail screen) Tap a history on the History screen. Figure 75: Select a history on the History screen. Do either of the following operations. For voice calls: Tap icon. ...
- Page 83 Note: Tap and hold the enables hands-free mode.
-
Page 84: Dial A Number Via Favorites Screen
Dial a Number via Favorites screen to display the Favorites screen. Figure 77: To originate a call from the Favorites screen. Do either of the following operations. For voice calls: Tap For video calls: Tap Voice call Video call... - Page 85 Note: Tap and hold the enables hands-free mode.
-
Page 86: Dial A Number Via Emergency
Dial a Number via Emergency When ST500 is screen locked, you can originate a call number that is registered to emergency call list without unlock screen. Tap EMERGENCY on bottom of the lock screen. - The emergency call screen is displayed. Do either of the following operations. - Page 87 Enter the number registered to the emergency call list and tap , or off-hook the handset. Figure 79: Enter the number to originate an emergency call. The emergency call is originated. Figure 80: Ringing screen of an emergency call. Note: The number unregistered to the emergency call list cannot be originated from this screen.
- Page 88 Narrow the phone number If multiple numbers are registered, you can narrow down the candidates by entering the numbers. Figure 81: There are multiple numbers. Figure 82: The candidates are narrowed down.
-
Page 89: Redial
Redial Users can dial out the last dialed number if there is dialed call log, using the same SIP account making the call last time. On the Call screen, tap icon. - Latest call history is displayed. Figure 83: Tap icon to redial. icon again to originate a call. - Page 90 Voice call screen. Figure 85: Voice call screen while ringing 7. Video call screen. Figure 86: Video call screen while ringing 6. Note: Tap and hold enables hands-free mode.
-
Page 91: Answer A Call
Answer a call To answer an Incoming Call (Standard operation) Do either of the following operations. For voice calls, tap or off-hook the handset. For video calls, tap - The display switches to the Connected screen. For reject a call, see Decline a call. - Page 92 Voice call screen: Connected. Figure 88: Connected voice call 2. Video call screen: Connected. Figure 89: Connected video call 2.
- Page 93 Heads up notification is displayed while using ST500 Depending on the settings, the ST500 will display a head-up notification while using the ST500. Do either of the following operations. to answer an incoming a call as a voice call. ...
-
Page 94: To Answer An Incoming Call (Heads Up Notification)
To answer an Incoming Call (Heads Up Notification) Depending on the settings, if there is an incoming call while you are operating on other apps or your terminal is displaying Home screen, Heads Up Notification is displayed instead of ST500 Incoming Call screen. Do either of the following operations. -
Page 95: To Answer An Incoming Call (From Notification Bar)
To answer an Incoming Call (from Notification Bar) You can answer an incoming call from the notification bar. Swipe down the upper side of any screen to display the terminal tool bar. Figure 92: Swipe down to display the tool bar Incoming call notification is displayed. - Page 96 Figure 93: To answer an incoming call from notification bar. Note: When the caller uses voice call, VIDEO ANSWER is not displayed.
- Page 97 When ST500 does not display “Heads Up Notification” and “notification bar” incoming call When the Heads Up Notification and notification bar are not displayed, confirm the two settings of the terminal with the following steps. OFF the Block all Tap the Settings from the application menu.
- Page 98 Figure 96: Tap the Notification Center on the Settings screen (Firmware version 1.0.4.50 or later). Tap the ST500 from Notification Center screen. Figure 97: Select the ST500 on the Notification Center screen.
- Page 99 OFF the Block all. The bottom figure shows the screen of Block all is OFF. Figure 98: Block all is OFF. ON the Incoming call notification to display the pull-down menu, and tap Settings. - The Settings screen is displayed. Figure 99: Open the pull-down menu.
- Page 100 Figure 100: Tap the Settings to enable notification. On the Settings screen, tap the Profiles. - The Profiles screen is displayed. Figure 101: Tap the Profiles to enable notification.
- Page 101 On the Profiles screen, tap a profile. - The Profile screen is displayed. Figure 102: Tap a profile to enable notification. On the Profile screen, tap the Telephone service. - The Telephone service screen is displayed. Figure 103: Tap the Telephone service to enable notification.
- Page 102 On the Telephone service screen, tap the Notifications. - The Notifications screen is displayed. Figure 104: Tap the Notifications to enable notification. On the Notifications screen, tap Incoming call notification to enable. Figure 105: Tap the Incoming call notification.
-
Page 103: Decline A Call
Decline a Call or DROP for an incoming call. - The call is disconnected. Figure 106: To decline a call 1. Figure 107: To decline a call 2. - Page 104 Figure 108: To decline a call 3. Figure 109: To decline a call 4.
-
Page 105: Missed Call
Missed Call Do not accept/decline an incoming call. - When caller disconnects, the call becomes a missed call. Figure 110: Do not accept/decline an incoming call. A badge is displayed on the History tab. The number in the badge indicates the number of missed calls. Figure 111: A badge is displayed. -
Page 106: Call Hold
Note: The badge on the history tab is displayed even if the setting of [Incoming call notification] is OFF. If there is a missed call, displayed in the notification bar as shown below and can transition to the history tab. - Page 107 - Your screen transits to the previously-displayed screen with Hold call list. - You will hear dial tone from the receiver. (On hands-free call or the device without hook operation will be silenced.) Holding user. Figure 114: Screen of Holding user. - The opposite party is put on hold and hears music-on-hold.
- Page 108 Do either of the following operations. To release the held call: Tap - The held call is released and you can speak with the held caller again. Figure 116: Unhold a call. For transfer a call: see Call Transfer.
-
Page 109: Call Transfer
Call Transfer Please perform this operation after implementing Call Hold No. 1. Do one of the following to hide the hold call list for continuing transfer operations. - You will hear dial tone from the receiver. (On hands-free call or the device without hook operation will be silenced.) ... - Page 110 From one of the following screens, select a destination and transfer the call. From the Contacts screen: Tap the Contacts icon and a member to transfer the call to. Figure 118: Transfer from the Contacts screen. The Contact details screen is displayed. Tap Anna Figure 119: Contact detail screen while holding.
- Page 111 From the Call screen: Tap the Call icon and enter the destination telephone number. And tap Figure 120: Transfer from the Call screen. From the History screen: Tap the History icon and a member to transfer the call to. And tap Figure 121: Transfer from the History screen.
- Page 112 From the Favorites screen: Tap the Favorites icon and a member to transfer the call to. And tap Figure 122: Transfer from the Favorites screen. Note: If you need to display the hold call list again, tap Figure 123: Display the hold call list.
- Page 113 Tap the Transfer icon when it is displayed during ringing. - The held caller and the party to whom you transferred the call are connected. Figure 124: Transfer while ringing. - After talking with the party to whom you transferred the call, tapping the Transfer icon connects the caller on hold with the party to whom you transferred the call.
- Page 114 Note: If the call to transfer destination fails after the transfer operation in ST500, In order to perform transfer call operation again, return to the original call by retrieving the hold party once, you need to restart from the hold operation. * You cannot perform the transfer call operation again without performing the hold retrieving operation.
-
Page 115: Three-Way Call
Three-Way Call This section describes three-way call feature. The conference icon is displayed while talking to the transfer destination. Please perform this operation after implementing Call Hold No.1 and Call Transfer No.1 to 2. After the transferred party answered, the Conference icon is displayed. Figure 126: The Conference icon is displayed. - Page 116 Note: The screen display during a three-way call will be similar to the two-way call as described above, but the audio will be in a three-way call state. In the three-way call, the operations of hold and disconnect are varied depending on the communication server.
- Page 117 Held party: Places on hold. Regardless of Other parties: organizer or Two parties hear convener of three- music on hold way call, the call is Return to three-way All parties are SV9100 with call in switched over to call. disconnected. progress.
-
Page 118: Handling An Incoming Call From The Locked Screen
Handling an incoming call from the locked screen. To answer a call from the locked screen. If there is an incoming call while your smart device screen is locked, it is notified on the locked screen. You can answer the call without unlocking the screen. Tap Accept;... -
Page 119: Decline A Call From The Locked Screen
Note: If Notification only is selected on Notification settings, Ringtone work and you can answer a call by off- hook. However, incoming call screen is not displayed unless unlock the screen, meaning you cannot see any information of originator until answer. Decline a Call from the Locked Screen If there is an incoming call while your smart device screen is locked, it is notified on the locked screen. -
Page 120: Call Hold From The Locked Screen
Call Hold from the Locked Screen You can answer an incoming call and hold the call without unlocking your smart device screen. Tap Hold; the screen transits to the Hold call list. Figure 131: To hold a call from the locked screen. Figure 132: The hold call list. -
Page 121: Unlock The Screen While On A Call
You can operate following while on a call from the locked screen. Hold/Unhold the call. End the call. Transfer without using the Contacts/History/Favorites screen after holding the call. Hold the conference without using the Contacts/History/Favorites screen after holding the call. Note: You need to unlock the screen for do any operation but above. - Page 122 ST500 starts and automatically transits to the voice call screen. You can continue any operation from here. Figure 134: The Holding screen after screen unlocked. Note: If the call was answered as a video call, it switches to a voice call when the Home button is tapped.
-
Page 123: Call Forward
Call Forward This section describes how to configure some additional services such as call forwarding, call forwarding on no answer, call forwarding on busy, and out of service call forwarding. Note: Previous configuration of access codes is required to use additional services. Access codes are configured according to your environment. - Page 124 Figure 136: Tap Settings 1. On the Settings screen, tap Profiles. - The Profiles screen is displayed. Figure 137: Tap Profiles on the Settings screen 1.
- Page 125 Tap a profile. - The Profile screen is displayed. Figure 138: Tap a profile 1. On the Profile screen, tap Telephone service. - The Telephone service screen is displayed. Figure 139: Tap Telephone service on the Profile screen 1.
- Page 126 On the Telephone service screen, tap Call forward settings. To use Call Pickup, see To preset access codes for call pickup. Figure 140: Tap Call forward settings. On the Call forward settings screen, tap a service to set. - The Call forward settings screen is displayed. Figure 141: The Call forward settings screen.
- Page 127 Enter the access code for this call forward settings and tap OK. Enter the access code for call forwarding. Figure 142: Field to enter the access code. Repeat the above procedure for each call forwarding setting.
-
Page 128: To Operate Call Forwarding
To operate call forwarding In this section, setting call forwarding - All calls is used for an example. Required procedures are the same for other call forwarding types. - Access code registered is dialed automatically. Figure 143: To operate call forwarding. After the Connected call status is displayed, tap the Keypad icon. - Page 129 Dial the number of your desired transfer destination.
-
Page 130: Call Pickup
Call pickup This section describes how to set Call Pickup. To preset access codes for call pickup To use Call Pickup, configure access code for the service. Please perform this operation after implementing To preset access codes for call forwarding No1 to 4. - Page 131 On the Call pick up access code screen, enter the access code and tap OK. Enter the access code. Figure 146: Field to enter access code 2.
-
Page 132: To Operate Call Pickup
To operate call pickup To use the Call pickup feature, you need to create a call pickup group with other extensions. If there is an incoming call to one of the group members while the member is away, you can pick up the call from your extension terminal by dialing access code for Call Pickup. -
Page 133: Voicemail
Note: When the call is picked up, the screen shows the number of call destination (and name when it registered to contacts). When the call cannot be picked up, the screen shows “Your call was disconnected by the system (404)”. - Page 134 Figure 150: Tap the Settings 2. On the Settings screen, tap Profiles. - The Profiles screen is displayed. Figure 151: Tap profiles on the Settings screen 2.
- Page 135 On the Profiles screen, tap a profile. - The Profile screen is displayed. Figure 152: Tap a profile 2. On the Profile screen, tap Telephone service. - Telephone service screen is displayed. Figure 153: Tap Telephone service on the Profile screen 2.
- Page 136 On the Telephone service screen, tap Voice mail access code. To set voicemail notification, see To restrict/allow voicemail notification. Figure 154: Tap Voice mail access code. Enter the access code for voicemail and tap OK. Enter the access code for voicemail.
-
Page 137: To Access Voicemail
To access voicemail Figure 156: To access voicemail. Access code registered is dialed automatically. When you are connected with voicemail service center, operate your phone according to the guidance. Figure 157: Dial to access voicemail. -
Page 138: To Restrict/Allow Voicemail Notification
To restrict/allow voicemail notification You can choose if you want to receive voicemail notifications. If you allow notification, you will be notified every time a new voicemail arrives. Please perform this operation after implementing To preset access codes for voicemail No1 to 4. -
Page 139: To Check Voicemail
To check voicemail New voicemail is notified in the following ways: A badge on the Call tab Notice on the notification bar (Voicemail notification needs to be enabled on the Settings screen.) Badge notification Badge on the Call tab. You have a new voicemail Notification Bar... - Page 140 【Restrictions on voicemail notification】 Some communication servers have restrictions on icon display and receiving messages. The details are listed below. Table 31: Restrictions on voicemail notification. Communication Server Icon Display Receiving Messages If you receive a new message when Icon display does not go away you have already had one or more SV9300 until all messages are saved or...
-
Page 141: Video Call
Video Call Turn on Video during Audio Call. Tap the Video icon during a voice call. - A video call starts. Figure 161: Switching to video calls. Tap the Switch to Voice Call icon during a video call. - A voice call starts. Figure 162: Switching to voice call. -
Page 142: Video Image Control
Video image control To flip PartnerPicture horizontally Tap the Handle PartnerPicture icon to display more icons. Figure 163: Tap icon during video call to display more icons 1. Tap the Flip horizontal button during a video call. - The PartnerPicture flips horizontally. Figure 164: Displayed more icons 1. -
Page 143: To Flip Partnerpicture Vertically
Tap the Flip horizontal button again to return to the original picture. Figure 165: Flipped display 1. To flip PartnerPicture vertically Tap the Handle PartnerPicture icon to display more icons. Figure 166: Tap icon during video call to display more icons 2. - Page 144 Tap the Flip vertical button during a video call. - The PartnerPicture flips vertically. Figure 167: Displayed more icons 2. Tap the Flip vertical button again to return to the original picture. Figure 168: Flipped display 2.
-
Page 145: To Stop Sending Preview Picture
To stop sending preview picture Tap the Stop sending preview picture button during a video call. - Sending preview picture stops. Figure 169: Tap the Stop sending preview picture. Tap the Stop sending preview picture button again to start sending preview picture. Figure 170: Stopped sending preview picture. -
Page 146: To Hide Preview Picture
To hide preview picture Tap the Hide preview picture button during a video call. - Preview picture disappears. Figure 171: Tap the Hide preview picture button. Tap the Hide preview picture button again to start displaying the preview picture. Figure 172: Hiding preview picture. -
Page 147: Call Status And Contact Information Display
Call status and contact information display. While Ringing Call status and photo, name, and number are displayed. Figure 173: Call status and contact information while ringing. When Connected After being connected to the other party for 1.5 seconds, call status, name, extension number, and call duration disappear. - Page 148 1.5 seconds later. Figure 175: Disappear the information. This information can be displayed by tapping anywhere on the screen other than icons. Anna Connected 4017 0:00:21 Figure 176: The information can be displayed.
-
Page 149: Permissions For Camera
Permissions for camera. If you don’t provide permissions for Camera at startup, you cannot use video call functions. Video call icons have a slash over them. Figure 177: Cannot use video call. Note: You can still register them to Favorites. ... -
Page 150: To Enable Video Call After Starting Up St500
To enable video call after starting up ST500 You can enable video call after starting up ST500. Tap a disabled Video Call icon. Figure 178: Tap a disabled Video call icon 1. When you are asked to provide permissions for Video call, tap OK. Figure 179: Provide permissions message is displayed 1. - Page 151 When you are asked to provide permissions to take pictures and record video, tap ALLOW. Figure 180: Allow to take pictures and record video. A video call is originated. Figure 181: Video call is originated. Note: If you tap DENY, video call is not originated. ...
-
Page 152: To Enable Video Call After Selecting The Don't-Ask-Again Checkbox
To enable video call after selecting the don’t-ask-again checkbox If you select the Don’t ask again checkbox and tap DENY, the video call you were trying to make is cancelled. The following procedure shows how to enable video call once you performed this operation. Tap The Settings from the application menu. - Page 153 Figure 184: Tap the Application Management (Firmware version 1.0.4.50 or later). Tap ST500 from the Application Management screen. Figure 185: Select ST500 from the Application Management screen.
- Page 154 Tap Permissions. Figure 186: Tap Permissions. Allow Camera manually. Figure 187: Allow Camera manually.
- Page 155 Go back to ST500 app and make a video call. Figure 188: Video call is available...
-
Page 156: Notes When Using Video
Notes when using video Note: When the Video icon is grayed out, video call is not available. Figure 189: Grayed out video icon. When the other party switches to video call, the video call begins. Your video will be sent to the other party. - Page 157 During a video call, if the video image data cannot be received 5 seconds or more, the screen displaying calling party is changed to black. Before using the video function please check the whether it works correctly or not with the video test. The video test is available in [Settings] →...
-
Page 158: Favorites
Favorites Editing favorites To add a favorite telephone number You can add telephone numbers that are registered in the Phonebook of the terminal to Favorites. On the Contacts screen, tap a member to add to the Favorites. - The Contact details screen is displayed. Figure 191: Tap a member to add to the Favorites. - Page 159 Figure 192: Tap icon to add to the Favorites. - The telephone number is added to Favorites. Figure 193: Add the telephone number to Favorites.
- Page 160 Tap Back. Figure 194: Icons with a star mark. Icons with a yellow star indicates that they are added to Favorites. Figure 195: The telephone number is added to Favorites. Note: You cannot copy your Favorites data to another device. If you sync the phonebook of your terminal with a cloud service, the Favorites data will be deleted when you un-sync.
-
Page 161: To Undo Favorites
To undo favorites You can undo favorites. On the Contacts screen, tap a member to undo the favorites. - The Contact details screen is displayed. Figure 196: Tap a member to undo Favorites. Figure 197: Tap icon to undo Favorites. - Page 162 to undo favorites. Figure 198: Undo the telephone number from Favorites. Tap Back. Figure 199: Back from edit mode.
- Page 163 Icons with no yellow star indicates that they are not added to Favorites. Figure 200: Star mark is removed.
-
Page 164: To Change The Order Of Telephone Numbers On The Favorites Screen
To change the order of telephone numbers on the Favorites screen You can change the display order of the telephone numbers that are registered to the Favorites. icon to display the pull-down menu; tap Reorder. Figure 201: Display the pull-down menu 3. Figure 202: Pull-down menu of the Favorites screen. - Page 165 Drag to where you want it. Figure 203: Drag icon to reorder. Figure 204: Dragging icon.
-
Page 166: To Delete A Telephone Number From Favorites
Tap Done to save the changes or tap "Cancel" to cancel the changes. Figure 205: Tap Done to save reorder. To delete a telephone number from favorites You can delete telephone numbers that are registered to Favorites. icon to display the pull-down menu; tap Select Delete. Figure 206: Display the pull-down menu 4. - Page 167 Figure 207: Tap Select delete from Favorites. Select check boxes next to the data you want to delete; tap Remove selected. Figure 208: Select and tap Remove selected.
-
Page 168: To Delete All Telephone Numbers From Favorites
To delete all telephone numbers from favorites You can delete all telephone numbers that are registered to Favorites at one time. icon to display the pull-down menu, and tap Delete all. Figure 209: Display the pull down menu 5. Figure 210: Tap Delete all from Favorites. - Page 169 Tap Yes. - All Favorites are deleted. Figure 211: Pop-up message for delete all favorites.
-
Page 170: Searching A Number From Favorites
Searching a number from favorites You can search a telephone number on the Favorites screen. On the Favorites screen, tap Figure 212: Searching a number from Favorites screen. Enter a search key such as a contact name, phonetic name, and phone number. Figure 213: Enter a search key on the Favorites screen. -
Page 171: Contacts
Contacts This section describes what Contacts screen is able to. Adding a telephone number to Contacts You can add a telephone number to Contacts. On the Contacts screen, tap icon to display the pull-down menu; tap Add contact. Figure 214: Display the pull-down menu 6. - Page 172 Figure 215: Tap Add contact. Tap Create new contact. Figure 216: Tap Create new contact.
- Page 173 On the Create contact screen, tap the ▼ button to display the pull down menu; tap terminal type. Figure 217: Select terminal type on the Create contact screen. On the Create contact screen, enter the name, the phonetic name, the phone number, and other information you need.
- Page 174 Tap Save. Figure 219: The information was entered. Note: The name is required item. If it hasn’t entered, “Contact name is cannot be empty.” message is appeared. Contacts can be added up to 1000. A contact that is not registered the phonetic name is assign to index per the letter only when first letter is alphabet, hiragana, katakana.
-
Page 175: Using Index Search
Using index search ayed on the right. On the Contacts screen, index is displ The below example shows index "A" because a person named alice is registered. There is no index "D" because there is n o one whose name starts with D registered in the Phonebook of the terminal. - Page 176 The screen transits to the first person that is registered to the index. Figure 222: Transits to the first person of the index. When scrolling the screen, the index of the contact that is displayed on the top is highlighted. In the right example, index “C”...
-
Page 177: Editing A Contact
When registration is performed using a Chinese keyboard, contacts whose phonetic name is not registered are assigned to the alphabet index based on Pinyin notation. Editing a Contact You can edit existing contact information. On a Contact detail screen, tap Figure 224: Tap icon to edit a contact. -
Page 178: Searching A Contact
Tap Save. Figure 226: Save edited. Searching a Contact On the Contacts screen, tap Figure 227: Searching a contact from the Contacts screen. Enter a search key such as a contact name, phonetic name, and phone number. - Members that have partial match of the entered keyword in their data are displayed. - Page 179 Figure 228: Enter a search key on the Contacts screen.
-
Page 180: Management Contacts
Management Contacts This section describes what Management Contacts screen is able to. Once the contacts are added, users could navigate in the contacts list to make a call and manage the contacts. Select Contacts 1. Scroll up/down to find the contact in the list. 2. -
Page 181: Editing A Contact
Editing a Contact 1. Tap on a contact from the contacts list 2. Tap on to edit the contact. Searching a Contact 1. Open Contacts. 2. Tap on the search field 3. Enter a contact's name, the phonetic name, or a number to search. The search result will be automatically updated and displayed when entering the key words. -
Page 182: Import/Export Contacts
Import/Export Contacts If you have a phonebook file saved in local storage or external storage device that has been plugged into the phone, the phonebook file can be directly imported to the Contacts. There are two different formats supported for the phonebook file:"vcard", and "xml". You can manually create contacts first and export the phonebook file in vcard or xml format to take a look on the phonebook file. -
Page 183: Download Contacts
To Export Contacts: 1. Open Contacts. 2. Tap the More on the upper right corner of the Contacts screen. 3. Select "Export Contacts" to bring up dialog below. 4. Select the file encoding and file type for the exported phonebook file. By default, the GT890 is using "UTF-8"... -
Page 184: Sort Contacts
Figure 233: GT890 Contacts - Download Contacts Sort Contacts Open Contacts. Tap the More on the upper right corner of the Contacts screen. Select "Sort". Select either of “First name” or “Last name”. Note: Contacts with phonetic names are not affected by index sorting because the phonetic name field is not split. -
Page 185: Add Group
2. Select “Send” from the menu then choose the Bluetooth device that you want to share the contact with. Sharing a batch of contacts: 1. Select the contacts as described in Select Contacts. 2. Press on to share the selected contacts via Bluetooth Add Group to access “Group”. -
Page 186: Contacts Storage Status
Contacts Storage Status The phone’s default maximum contacts storage is up to 1000. To check contact storage status, tap on More on the upper right corner of the contacts screen to bring up contacts options, select "Storage Status". Figure 235: GT890 Contacts - Storage Status... -
Page 187: Call History
Call History Editing call history To delete a history record from the History screen You can delete call history records. On the History screen, tap to display the pull down menu; tap Select Delete. Figure 236: Display the pull-down menu 7. - Page 188 Figure 237: Tap Select delete from History. On the History screen, select check boxes next to the data you want to delete and tap the Remove selected button. Figure 238: Select the data and Tap the Remove select. Note: If you are displaying filtered results, the next screen also displays filtered results only.
-
Page 189: To Delete All History Records From The History Screen
To delete all history records from the History screen You can delete all call history records at one time. On the History screen, tap to display the pull down menu; tap Delete all. Figure 239: Display the pull-down menu 8. Figure 240: Tap Delete all on the History screen. -
Page 190: To Delete A History Record From The History Detail Screen
Tap Yes. Figure 241: Pop-up message for delete history. Note: Even if you are displaying filtered results, this operation deletes all history. To delete a history record from the History detail screen You can delete a call history record from the History detail screen. On the History screen, tap a history to delete. - Page 191 On the History detail screen, tap and hold the history record you want to delete. - A pop-up message appears. Figure 243: Tap and hold a history record. Tap Yes to delete the history. - Tapping No closes the popup. Figure 244: Pop-up message to delete the history.
-
Page 192: Grouping History Records
Grouping history records You can display call history records grouped by phone number. When displaying All calls, the Total number of call history records latest call type is displayed. for this telephone number. Figure 245: Grouping history records. This display is enabled/disabled from Settings. to display the pull down menu;... - Page 193 Figure 247: Tap the Settings to grouping history records. On the Settings screen, tap Profiles. - The Profiles screen is displayed. Figure 248: Tap Profiles on the Setting screen 3.
- Page 194 Tap a profile. - The Profile screen is displayed. Figure 249: Tap a profile on the Profiles screen 3. On the Profile screen, tap Telephone service screen. - Telephone service screen is displayed. Figure 250: Tap Telephone service on the Profile screen 2.
- Page 195 On the Telephone service screen, tap Call history settings screen. - Call history settings screen is displayed. Figure 251: Tap Call history settings on the Telephone service screen. On the Call history settings screen, tap Display history. - The Display history screen is displayed. Figure 252: Tap Display history.
- Page 196 On the Display history screen, tap Group by phone number. To disable, tap Do not group by phone number. Figure 253: Select Group by phone number. Note: This setting is saved per profile.
-
Page 197: Shortcuts
Shortcuts To use various call features with ST500, entering access codes that specify which call feature you want to use is required. You can save some of the most-used access codes settings to ST500 so that you don’t have to memorize them. This option is called a shortcut. You can access each of the shortcuts by tapping them on the left side of Call screen. - Page 198 Tap Create new. - The Create shortcut mode starts. Figure 255: Create new shortcut. Enter the shortcut name and access code; tap Save. Figure 256: Enter the shortcut information. Note: You can create up to 10 shortcuts.
-
Page 199: Editing A Shortcut
Editing a shortcut User-created shortcuts in the Shortcuts screen. These can be edited and deleted on here. Default shortcuts require access code setting on the Setting screen. For details, see the following. Call forward Call pickup Voicemail On the Call screen, tap and hold a shortcut you created. - Page 200 Edit the shortcut. Tap Save to save the change. Tap Delete to delete the shortcut. Tap Cancel to end edit mode. Figure 258: Shortcut Editing screen. Note: You cannot edit the ten default shortcuts from this screen. If you want to do that, see Call forward.
-
Page 201: File Manager
File Manager File Manager is a tool that allows users to delete, move, copy/paste, send and rename files. It helps users to access and manage files in local storage as well as external storage devices (e.g, SD card/USB flash drive). Tap on the application menu to launch File Manager application. - Page 202 Figure 260: Paste File Note: If user wants to go to top of "All” for "copy" or "move" the file from the location accessed from "All, tap "All" of the location bar. The "All" on the left side menu is not available. Figure 261: GT890 File Manager –...
-
Page 203: Move Files
Move Files The steps to move a file are similar to the steps to copy/paste a file. The difference is once the file is moved, the file will not be kept in the source folder. Follow the steps below to move a file to the phone. 1. -
Page 204: Send Files
Figure 263: GT890 File Manager – All Send Files The users can send a file via Bluetooth. Please make sure Bluetooth is turned on and connected to the Bluetooth devices. Otherwise, you will be directed to set up Bluetooth before the file can be sent out. To send a file: 1. -
Page 205: Delete Files
Figure 264: GT890 File Manager – Options Delete Files 1. Open file manager and navigate to the directory of the file to be deleted. Tap and hold on the file for about 2 seconds until more options appear. 2. Scroll down and select “Delete” 1. -
Page 206: Rename A File
Figure 265: Delete File(s) via File Manager Rename a File 1. Open file manager and navigate to the directory of the file to be renamed. Touch and press on the file for about 2 seconds until more options appear 2. Tap on "Rename". A new dialog window will pop up for users to enter the new name. 3. -
Page 207: File Categories
File Categories The file manager will categorize the files stored on local/external storage based on the type of files. The available categories are All: gives access to all internal storage files as well as external storage devices Pictures: contains all the pictures stored on the phone including screenshots, camera pictures and external pictures ... -
Page 208: Camera
Camera The phone has a built-in Camera to support taking pictures and recording videos. To access Camera to take pictures and videos, tap on Camera icon on idle screen. Show gallery: Once pressed it will redirect you to the device pictures gallery. -
Page 209: Gallery
Gallery The phone has built-in Gallery for users to view pictures and play videos from internal storage. You can also perform basic editing tasks on pictures under Gallery page. To access the recently taken pictures or recorded videos, click on the right top corner of the camera sceen. Figure 268: Recent pictures and videos page On this page, users have the ability to perform operations, such as: ... - Page 210 Figure 269: Edit picture Note: Videos cannot be edited from the gallery Gallery page To access the Gallery, open the camera click on the circular key on the right top corner of the camera sceen. Figure 270: Access to the Gallery -1...
- Page 211 Tap on Figure 271: GT890 Gallery -2 Tap on Figure 272: GT890 Gallery -3...
- Page 212 Camera Screenshot Figure 273: GT890 Gallery -4 On this page from the upper left corner, users can sort the pictures and videos by Album, Location or Time. View pictures Access one group of pictures and videos and select "Grid View" or "Filmstrip View" from upper left corner of the screen to set view mode of the pictures.
-
Page 213: Screensaver
Take picture/video the upper right of the Gallery page to start taking pictures or videos using the built-in camera. Select multiple pictures Tap and hold on one of the pictures for about 2 seconds until the picture is highlighted in blue. Tap on other pictures to select multiple pictures. - Page 214 Figure 276: Use Network Images Click on Use network images and set the path of the remote screensaver folder. Figure 277: Network Image Path...
-
Page 215: Browser
Browser The browser can be used similar to a PC-based web browser. You can open web pages, bookmarks, view history, search …etc. Tap on the idle screen to launch the Browser application. Figure 278: GT890 Web Browser Touch the screen and scroll up/down/left/right to view the web page. ... - Page 216 To open a new window, tap on icon on the right side of the tab. Figure 280: Open New Window in Browser To open Bookmarks, History and Saved Pages, tap on the upper right of the Browser. Figure 281: GT890 Web Browser-Bookmarks...
-
Page 217: Connect To Network And Devices
Connect to Network and Devices The phone supports a variety of network connections (Ethernet, Wi-Fi) and device connections, including EHS headset (Poly), USB, SD card and Bluetooth device. You can connect the phone and transfer files from/to the GT890 using a USB connection, SD card or Bluetooth. Ethernet Ethernet connection is turned on as DHCP by default. -
Page 218: Turn On/Off Wi-Fi
Turn On/Off Wi-Fi 1. Go to the application menuSettingsNetworkWi-Fi. 2. Check or uncheck the option for Wi-Fi. Or, users could open the top status bar and tap on Wi-Fi icon to turn it on/off. Connect to Wi-Fi Networks 1. Once Wi-Fi is turned on, the phone will automatically start the scanning within the range. 2. - Page 219 6. The previous steps allow the phone to connect the Wi-Fi network with DHCP setting by default. If it needs to be connected the Wi-Fi with static IP settings, please scroll down the setting window and tap to check the “Advanced options”. Then the window will show up the IP settings at the bottom. If the Static is selected, the system will require end user to input IP address, Gateway, Network prefix length and DNS 1 and DNS 2 addresses.
-
Page 220: Wi-Fi Settings Shortcut
Figure 284: Wi-Fi - Add network Wi-Fi Settings Shortcut Users can access the Wi-Fi settings by sliding the Status Bar, then long Press on the Wi-Fi icon. Figure 285: Wi-Fi Settings Shortcut -Or- Press the letter under Wi-Fi icon this will show the list of the Wi-Fi networks detected. Press “More Settings” to access the Wi-Fi settings. - Page 221 Wi-Fi point 1 Wi-Fi point 2 Wi-Fi point 3 Wi-Fi point 4 Figure 286: Wi-Fi Shortcut - Wi-Fi List For more information about how to use Wi-Fi, please refer to “IP Phone GT890 Administration Guide (ST500)”.
-
Page 222: Bluetooth
Bluetooth Bluetooth is a proprietary, open wireless technology standard for exchanging data over short distances from fixed and mobile devices, creating personal area networks with high levels of security. The GT890 supports Bluetooth, version 4.0 + EDR. Users could use Bluetooth to transfer files, share contact information with other Bluetooth portable devices, use Bluetooth headset for making calls, switch calls to the GT890 from mobile devices using Bluetooth hands-free profile, and listen to media (music or other audio output) from the GT890. -
Page 223: Change Bluetooth Device Name
Change Bluetooth Device Name The phone uses "ITX-3370_XXXXXX" as Bluetooth device name by default where “XXXXXX” are the last 6 digits of the phone’s Bluetooth MAC address. The device name will be visible to other devices when connecting them. Follow the steps below to change the name: 1. -
Page 224: Unpair A Bluetooth Device
Device 1 Device 2 Figure 287: GT890 Bluetooth - Paired Device Unpair a Bluetooth Device 1. In the Bluetooth settings, tap the icon corresponding to the Bluetooth device. 2. Select Unpair. Bluetooth Settings Shortcut You can access the Bluetooth settings by sliding the Status Bar, then long Press on the Bluetooth icon. Figure 288: Bluetooth Settings Shortcut... - Page 225 Press the letter under Bluetooth icon this will show the list of the paired devices. Press “More settings” to access the Bluetooth settings. Device 1 Figure 289: Bluetooth Setting shortcut 2 For more information about Bluetooth feature on the phone, please refer to “Standard SIP Video Terminal IP Phone GT890 Administration Guide (ST500)”.
-
Page 226: Ehs Headset
EHS Headset The phone supports normal RJ9 headset and EHS headset. To use Poly EHS headset: 1. Go to the application menuSettingsBasicPeripherals: and enable option “Plug in RJ9/EHS headset”. 2. Change Headset Type Plantronics under GUISystem SettingsPreferencesAudio Control. After saving the setting change, please reboot the phone. 3. - Page 227 Figure 291: USB Headset Connected Figure 292: USB Headset Used for Call USB headset is automatically enable. You can switch Speaker or Handset by tap...
- Page 228 Figure 293: Switch between Speaker and handset mode Note: USB port is disable on the default setting. For enable the USB Port, check off the Disable USB Port feature under Web GUISystem SettingsPreferencesPeripherals interface ManagementDisable USB Port.
-
Page 229: Usb
The phone supports USB connection with USB storage devices. To connect and access a USB storage device: 1. Insert an USB storage device into USB port at the back. 2. It will take a few seconds for the GT890 to prepare the connection. Then the USB storage icon will show on the status bar. -
Page 230: Sd Card
SD Card 1. Insert your SD card into SD Card slot at the back of the phone. With the side where you can see the terminal (metal part) of the SD card facing you, insert it in the direction shown in the figure below. Please make sure the SD Card is inserted with right direction on the phone as indicated on the SD card slot. -
Page 231: Hdmi
SD Card is disable on the default setting. For enable the SD card, check off the Disable SD card feature under Web GUISystem SettingsPreferencesPeripherals interface ManagementDisable SD card. HDMI If HDMI output device is connected, GT890 automatically switch audio output destination to HDMI device. When it is needed to change it to GT890, switch on/off under GT890 menu... -
Page 232: Data Backup
Data Backup The following data is not backed up automatically by GT890. Please backup manually to avoid the loss of data caused by terminal failure and factory reset. ・Phonebook data ・Configuration data of the phone ・Image ・Audio ・Video ・Downloaded data Note: Favorites’... -
Page 233: Configuration Data Of The Phone Backup
4. The exported contacts data is saved on choose directory. Please save the data in a place other than internal storage. [Bluetooth] 1. Select the contact which you want to backup. . Pop-up is displayed, Select “Turn on”. 2. Tap on 3. - Page 234 Figure 297: Image/Audio/Video/Download Data Backup - 1 2. Insert USB memory to USB port. 3. USB memory is displayed on “All >” of “File Manager”. Copy the data to USB memory.
- Page 235 [SD card] 1. SD card is disable on the default. Enabled the SD card by using Web GUI. Uncheck the “Disable SD Card”, and save. Web GUI>System Settings>Preferences>Peripherals Interface Management> Disable SD Card Figure 298: Image/Audio/Video/Download Data Backup - 2 2.
-
Page 236: Faq And Troubleshooting
FAQ and troubleshooting This section describes how to check operations and change configurations of ST500. Menu options Checking operations of ST500 Table 35: Checking operations of ST500. When You Want To… Check the status of ST500. Start ST500. Changing configurations of ST500 Table 36: Changing configurations of ST500. - Page 237 When accommodated in the SV9500, the originating side will continue to listen to the RBT if the other side rejects the incoming call after making a call from the own terminal. You can listen to ROT by setting SV9500 ...
-
Page 238: Checking Operations Of St500
Checking operations of ST500 To check operating status of ST500 Refer to Registration status icon of General screen structure. To check operating status of ST500 from task bar While your terminal does not display ST500 screen, you can still check the status of ST500 and missed calls from task bar. -
Page 239: To Start St500
To start ST500 When ST500 is not started, you cannot receive a call with ST500. On the Home screen, check if one of the following icons is displayed on the status bar. Figure 300: Icons which is displayed on the status bar. Figure 301: Check the status bar on the Home screen. - Page 240 When the above icons are not displayed, tap the ST500 icon. Figure 302: When the status icon of ST500 is not displayed.
-
Page 241: Changing Configurations Of St500
Changing configurations of ST500 To register/add a contact from call history You can add a contact information from call history of ST500 to the Phonebook of the terminal. Adding a new contact and editing an existing contact information are both available. Tap a call history you want to register in the Phonebook of the terminal. - Page 242 On the Add to contact screen, tap Create new contact or select the existing contact. Figure 305: Create new contact or select the existing contact. On the Add new contact screen, enter necessary data. The phone number is preset. The phone number is also preset when an existing contact is selected. The telephone number is preset.
-
Page 243: To Change Ringtone Per Call Type
To change ringtone per call type to display the pull-down menu, and tap Settings. - The Settings screen is displayed. Figure 307: Display the pull-down menu 10. Figure 308: Tap the Settings to change ringtone. On the Settings screen, tap Profiles. - The Profiles screen is displayed. - Page 244 Tap a profile. - The Profile screen is displayed. On the Profile screen, tap Telephone service screen. - The Telephone service screen is displayed. On the Telephone service screen, tap Ringtone. - The Ringtone screen is displayed. Figure 309: Tap Ringtone. For example, to change the ringtone for extension calls, tap Extension, and then Ringtone.
-
Page 245: To Change Ringtone Per Contact
Figure 311: Change ringtone. Note: This setting is saved per profile. To change ringtone per contact to display the pull-down menu, and tap Settings. - The Settings screen is displayed. Figure 312: To change ringtone per contact... - Page 246 Figure 313: Tap Settings to enable ringtone for each contact On the Settings screen, tap Profiles. - The Profiles screen is displayed. On the Profiles screen, tap a profile. - The Profile screen is displayed. On the Profile screen, tap Telephone service screen. - Telephone service screen is displayed.
- Page 247 On the Contact settings screen, tap Use the ringtone of device’s internal contacts to enable. Figure 315: Tap to enable using ringtone Back to the Contacts screen, select the contact whose ringtone you want to change. Figure 316: Select the contact whose you want to edit.
- Page 248 On the contact detail screen, tap Figure 317: Tap edit icon to change ringtone On the Edit contact screen, tap the ▼ button of Ringtone to display the pull down menu. Figure 318: Tap Ringtone...
- Page 249 10. Select a ringtone, and tap OK. Figure 319: Select a ringtone 11. Tap to save. Figure 320: Save ringtone changing Note: Even if set ringtone for each contact, it will not work unless enable item described in step 6. Furthermore, the item described in step 6 is saved per profile.
-
Page 250: To Change The Volume Of Ringtone
To change the volume of ringtone Operate the volume buttons on the screen lower of your terminal while ringing. Change receiving volume with a hardware key Operate the volume buttons on the screen lower of your terminal while audio output. To change sending/receiving voice volume Although the sending/receiving voice volume of ST500 is adjusted to the optimum value by the product itself, it may sound small depending on the environment. - Page 251 Figure 322: Tap the Settings to change voice volume. 13. On the Settings screen, tap Profiles. - The Profiles screen is displayed. 14. Tap a profile. - The Profile screen is displayed. 15. On the Profile screen, tap Telephone service screen. - Telephone service screen is displayed.
-
Page 252: To Change Ringing Setting Of Digit Tone
Figure 324: Sliders to adjust the volume. Note: This setting is saved per profile. To change ringing setting of digit tone Note: Digit tone is set to ring as default. to display the pull-down menu, and tap Settings. - The Settings screen is displayed. - Page 253 Figure 325: Display the pull-down menu 12. Figure 326: Tap the Settings to change setting the digit tone. On the Settings screen, tap Profiles. - The Profiles screen is displayed. Tap a profile. - The Profile screen is displayed. On the Profile screen, tap Telephone service screen. - Telephone service screen is displayed.
- Page 254 Figure 327: Tap Digit tones on the Telephone service screen. Note: This setting is saved per profile.
-
Page 255: To Change The Volume Of Digit Tone
To change the volume of digit tone Operate the volume buttons on the screen lower of your terminal while displaying ST500 Call screen. To switch on/off of the Message Waiting Indicator Some items can be switch on/off of the Message Waiting Indicator. to display the pull-down menu, and tap Settings. - Page 256 On the Settings screen, tap Profiles. - The Profiles screen is displayed. Tap a profile. - The Profile screen is displayed. On the Profile screen, tap Telephone service screen. - The Telephone service screen is displayed. On the Telephone service screen, tap Ringtone. - The Ringtone screen is displayed.
- Page 257 Tap checkbox next to Lamp to switch on/off of that. Figure 332: Tap checkbox of Lamp. Note: This setting is saved per profile. You can change the incoming call lamp settings for missed calls in Notifications> Missed call lamp setting on the Service settings screen in step 5, and the setting is saved per profile.
-
Page 258: To Change Tone Locale When Using St500 Abroad
To change tone locale when using ST500 abroad When you use ST500 abroad, you can change the tones of ST500 to the ones used in the country or region where you are located. Note: Countries and regions available are: Japan, the United States, Canada, Australia, Hong Kong, Malaysia, Singapore, Philippines, Vietnam, the United Kingdom, Mexico, Taiwan, New Zealand, Korea, Brazil, China, Thailand, Sri Lanka, Germany, Italy, the Netherlands, Denmark, Sweden, Spain, Austria, Belgium, Greece, Switzerland, South Africa, and Russia. - Page 259 Figure 335: Tap Settings to change tone locale. On the Settings screen, tap Profiles. - The Profiles screen is displayed. Tap a profile. - The Profile screen is displayed. On the Profile screen, tap Telephone system screen. - Telephone system screen is displayed. Figure 336: Tap Telephone system 1.
- Page 260 Figure 337: Tap Tone location on the Telephone system screen.
- Page 261 On the Tone locale screen, select a country or a region and tap OK. Select a country or a region where you are located. Figure 338: Select a country or a region. Note: This setting is saved per profile.
-
Page 262: To Show Connection Status During A Call
To show connection status during a call You can display the connection status during a call. Default setting is disable, so operate following. to display the pull-down menu, and tap Settings. - The Settings screen is displayed. Figure 339: Display the pull-down menu 14. Figure 340: Tap Settings to show connection status during a call. - Page 263 On the Settings screen, tap General. - The General screen is displayed. On the General screen, enable Show connection status during a call by checking. - Connection status will be displayed on Voice/Video call screen during a call. Figure 341: Enable Show connection status during a call.
-
Page 264: Dial Prefix Feature
Dial prefix feature What is dial prefix? Some of the prefix numbers (a set of specific numbers that should be added to the beginning of a telephone number) that are commonly used, but differ from country/region to country/region, are pre-set to ST500 as Preset Dial Plan. -
Page 265: Operating Dial-Prefix
Operating dial-prefix You can make an international call by entering “+” instead of international prefix numbers. On the Call screen, press and hold the number key “0”. - ”+” is entered. Figure 343: Press and hold the number key "0". “+”... -
Page 266: Selecting A Preset Plan
Selecting a preset plan Some of the prefix numbers that are commonly used, but differ from country/region to country/region, are preset to ST500 as Preset Dial Plan. (Default is “None”). You can change the country/region to suit your needs. You can also customize preset plans. For details, see Creating a custom plan. - Page 267 Figure 346: Tap Settings to selecting a preset dial plan. On the Settings screen, tap Profiles. - The Profiles screen is displayed. Tap a profile. - The Profile screen is displayed. On the Profile screen, tap Telephone service screen. - Telephone service screen is displayed. On the Telephone service screen, tap Dial plan.
- Page 268 On the Dial plan screen, tap Using plan. You can set whether you use a dial plan or not, and if you do, you can choose which country’s or region’s dial plan you want to use. Figure 348: Tap Using plan on the Dial plan screen. On the Using plan screen, select a country or a region.
-
Page 269: Checking Contents Of Preset Plan
Checking contents of preset plan to display the pull-down menu, and tap Settings. - The Settings screen is displayed. Figure 350: Display the pull-down menu 16. Figure 351: Tap the Settings to check contents of preset plan. - Page 270 On the Settings screen, tap Profiles. - The Profiles screen is displayed. Tap a profile. - The Profile screen is displayed. On the Profile screen, tap Telephone service screen. - Telephone service screen is displayed. On the Telephone service screen, tap Dial plan. - Dial plan screen is displayed.
- Page 271 On the Edit plans screen, tap a country or a region whose dial plan you want to check. - The Rules screen is displayed. Figure 353: Tap a country or a region to check preset plan. Figure 354: Rules are displayed.
-
Page 272: Understanding And Creating A Rule
Understanding and creating a rule Dial plan rules are written in regular expressions. This section explains how to read and create a rule taking custom rules for Japan_copy as an example. You can also customize preset plans. For details, see Creating a custom plan. - Page 273 ■ How to read regular expressions Regular expressions are used to create rules. This section explains how to read regular expressions. Table 39: Regular expressions. Sample Regular Meaning Expression Beginning of a pattern Half-width digit \d[46] 4 or 6 \d[2-9] One of 2 to 9 \d{8,15} 8 to 15 sets of numbers...
-
Page 274: Creating A Custom Plan
Creating a custom plan You can create a new dial plan on the Dial plan screen by selecting Edit plan, or copying and editing an existing preset dial plan. Up to 20 dial plans can be created. To create a new dial plan to display the pull-down menu, and tap Settings. - Page 275 Figure 357: Tap the Settings to create new dial plan. On the Settings screen, tap Profiles. - The Profiles screen is displayed. Tap a profile. - The Profile screen is displayed. On the Profile screen, tap Telephone service screen. - Telephone service screen is displayed. On the Telephone service screen, tap Dial plan.
- Page 276 On the Edit plans screen, tap Create a new plan. - The Create a new plan screen is displayed. Figure 359: Create a new plan. On the Create a new plan screen, tap OK. Figure 360: Tap OK on the field for enter a plan name. Note: If you tap OK without entering dial plan name, Custom plan is automatically created.
- Page 277 Tap Custom Plan. - The Rules screen is displayed. Figure 361: Tap a plan created. 10. On the Rules screen, tap Exception. - The Rule screen is displayed. Figure 362: Tap Exception on the Rules screen.
- Page 278 11. On the Rule screen, create a rule. Figure 363: Create a rule on the Rule screen. 12. Back to the Rules screen, tap Create a new rule. Figure 364: Tap Create a new rule. Note: You can create up to 50 rules. Note: Custom Plan settings can be configured not only by the above method, but also by .imr file import.
- Page 279 13. On the Create a new rule screen, tap OK. Figure 365: Tap OK on the field for enter a rule name. Note: If you tap OK without entering a rule name, “Custom Rule” is automatically created. 14. Tap and hold Custom Rule. You can change the name of copy or delete a rule.
- Page 280 15. To change priority of order tap on Edit order and move (scroll) next to the rule whose priority you want to change. After the edit is finished, tap Order to fix. Figure 367: Tap Edit order. Figure 368: Move icon to edit order. Note: The top rule has the highest priority.
-
Page 281: To Copy A Preset Dial Plan
To copy a preset dial plan to display the pull-down menu, and tap Settings. - The Settings screen is displayed. Figure 369: Display the pull-down menu 18. Figure 370: Tap the Settings to copy a preset dial plan. On the Settings screen, tap Profiles. - The Profiles screen is displayed. - Page 282 - The Profile screen is displayed. On the Profile screen, tap Telephone service screen. - Telephone service screen is displayed. On the Telephone service screen, tap Dial plan screen. - Dial plan screen is displayed. On the Dial plan screen, tap Edit plans. Figure 371: Tap Edit plans on the Dial plan screen.
- Page 283 Tap Copy. - On taping Copy a popup "Copy dial Plan?" is displayed, then click on Yes. Figure 373: Tap Copy. Tap a copy plan. - The Rules screen is displayed. Figure 374: Tap a plan copied.
- Page 284 10. Tap a copied preset plan. - The Rule screen is displayed. Figure 375: Tap a copied preset plan. 11. On the Rule screen, tap Pattern. Figure 376: Tap Pattern on the Rule screen.
- Page 285 12. Edit the pattern and tap OK. Figure 377: Edit the pattern.
-
Page 286: List Of Dial Plan Presets
List of dial plan presets This section provides lists of dial plan presets for various countries and regions written in regular expressions. Japan Table 40: Dial plan for Japan. Rule Enable Pattern Add Prefix Sample ^1\d{2}$ 0312345678 National ^0\d{9,10}$ 09012345678 ^18[46]0\d{9,10} 1840312345678 184/186 phone calls... -
Page 287: North America
North America Table 42: Dial plan for North America. Rule Enable Pattern Add Prefix Sample International ^9\d{9}$ 9011 9123456789 11234567890 Long Distance ^1\d{10}$ 15145321234 2123456789 Local AC ^[2-8]\d{9}$ 4123456789 8123456789 Local 9 AC ^9\d{10}$ 91234567890 +11234567890 +1 Dialing ^\+[1-9]\d{10}$ +51234567890 +91234567890 Australia Table 43: Dial plan for Australia. -
Page 288: New Zealand
New Zealand Table 44: Dial plan for New Zealand. Rule Enable Pattern Add Prefix Sample Emergency ^111$ Local Numbers ^\d{7}$ 1234567 021818459 Mobile ^02\d{7,9}$ 02123456789 Full National Numbers ^0\d{8}$ 093568499 FreeCall Vodaphone ^0508\d{6}$ 0508123456 0800123456 FreeCall Spark ^0800\d{6,7}$ 08001234567 Premium service ^0900\d{5}$ 090012345 +67722442... -
Page 289: Fiji (Fintel)
Fiji (Fintel) Table 46: Dial plan for Fiji (Fintel). Rule Enable Pattern Add Prefix Sample Emergency ^911$ All Fiji numbers ^\d{7}$ 1234567 Operator services ^0\d{2}$ 0800 ^0800\d{7}$ 08001234567 112/132 ^1\d2\d{3}$ 112142 +67722442 International ^\+\d{8,15}$ +4698066800 +61412582921 Papua New Guinea Table 47: Dial plan for Papua New Guinea. Rule Enable Pattern... -
Page 290: Singapore
Singapore Table 48: Dial plan for Singapore. Rule Enable Pattern Add Prefix Sample Emergency ^9\d{2}$ Full National Numbers ^\d{8}$ 91059944 International ^\+\d{8,15}$ 9001 +811234567890 Thailand Table 49: Dial plan for Thailand. Rule Enable Pattern Add Prefix Sample Emergency ^1\d{2,3}$ 1999 022591192 Full National Numbers ^\d{9,10}$... -
Page 291: Indonesia
Indonesia Table 51: Dial plan for Indonesia. Rule Enable Pattern Add Prefix Sample Emergency ^1\d{2}$ 0215201215 Full National Numbers ^\d{10,12}$ 08567808808 001305201215 ^\+\d{8,15}$ International 9001 +811234567890 Vietnam Table 52: Dial plan for Vietnam. Rule Enable Pattern Add Prefix Sample Emergency ^1\d{2}$ Full National Numbers ^\d{11}$... -
Page 292: Philippines
Philippines Table 54: Dial plan for Philippines. Rule Enable Pattern Add Prefix Sample Emergency ^[19]\d{2}$ 123456789 Full National Numbers ^\d{9,11}$ 0215201215 07582221434 FULL National 7 ^\d{7}$ 1234567 International ^\+\d{8,15}$ +811234567890 China Table 55: Dial plan for China. Rule Enable Pattern Add Prefix Sample Emergency... -
Page 293: Hong Kong
Hong Kong Table 57: Dial plan for Hong Kong. Rule Enable Pattern Add Prefix Sample Emergency ^9\d{2}$ Full National Numbers ^\d{8}$ 23134555 International ^\+\d{8,15}$ +811234567890 Macau Table 58: Dial plan for Macau. Rule Enable Pattern Add Prefix Sample Emergency ^9\d{2}$ Full National Numbers ^\d{8}$ 23134555... -
Page 294: Italy
Italy Table 60: Dial plan for Italy. Rule Enable Pattern Add Prefix Sample 012345678 National ^0\d{8,13}$ 01234567890123 312345678 Cellular ^3\d{8,9}$ 3123456789 +123456 International ^\+\d{6,15}$ +123456789012345... -
Page 295: Notices
Notices Do not reprint or copy this manual in whole or in part without the express permission of NEC. The contents of this manual are subject to change without prior notice in the future. This manual is published under strict quality control standards. If, however, you have any questions, spot an error, or find a description lacking, please feel free to contact us. - Page 296 * NEC, NEC logo and UNIVERGE are trademarks or registered trademarks of NEC Corporation that may be registered in Japan and other jurisdictions. * Android is a trademark of Google LLC. © 2002-2019 OpenVPN Inc. OpenVPN is a registered trademark of OpenVPN Inc.
- Page 297 Standard SIP Video Terminal IP Phone GT890 User Guide (ST500) GVT-105198-001 July, 2019 Issue 1.0 NEC Corporation...