Huawei NetCol5000-A050 Quick Manual
In-row air cooled smart cooling product
Hide thumbs
Also See for NetCol5000-A050:
- User manual (360 pages) ,
- Quick manual (31 pages) ,
- Quick manual (25 pages)
Advertisement
Quick Links
NetCol5000-A050 In-row Air Cooled
Smart Cooling Product
Quick Guide
Issue: 05
Code: 31500BLX
Date: 2020-07-08
1
Overview
The quick guide describes how to install the indoor units, outdoor units, and water cooling modules.
The indoor unit is used with the outdoor unit or water cooled module.
Category
Product Model
Indoor Unit
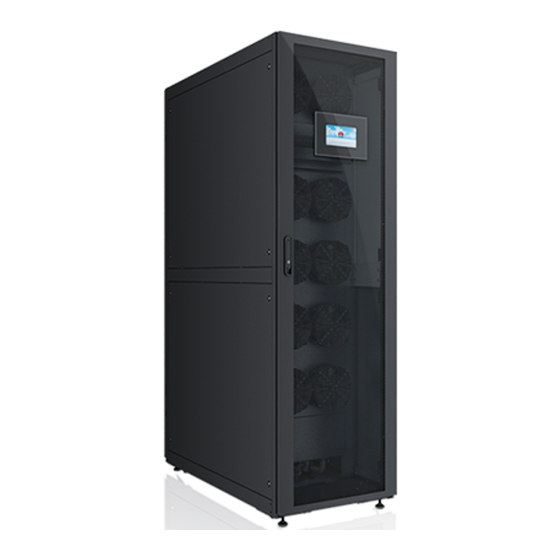
NetCol5000-A050
NetCol500-A060(52273539)
NetCol500-A060
Outdoor Unit
NetCol500-A080(52273541-005)
NetCol500-A120(52273755-002)
Water cooling
NetCol500-W055
Module
Copyright © Huawei Technologies Co., Ltd. 2020 All rights reserved.
Dimensions Without Packing (mm) (H x W
x D)
2000 x 600 x 1200
1107 (677) x 1356 (1217) x 1094
BOM number 52273539-005:
1107 (655) x 1356 (1217) x 1094
BOM number 52273539-006:
1156 (703) x 1356 (1217) x 1094
1107 (655) x 2186 (2047) x 1094
1107 (655) x 1356 (1217) x 2188
530 x 1510 x 262
1
Advertisement

Related Manuals for Huawei NetCol5000-A050


Summary of Contents for Huawei NetCol5000-A050
- Page 1 Issue: 05 Code: 31500BLX Date: 2020-07-08 Copyright © Huawei Technologies Co., Ltd. 2020 All rights reserved. Overview The quick guide describes how to install the indoor units, outdoor units, and water cooling modules. The indoor unit is used with the outdoor unit or water cooled module.
- Page 2 Onsite Preparations Gas pipe requirements: outer diameter of 7/8 inch (22.22 mm) ; thickness of 1.2 Man- Refrigerant mm; operating pressure ≥ 4.5 MPa dator pipe Liquid pipe: L ≤ 60 m: outer diameter of 5/8 inch (15.88 mm) ; wall thickness of 1.0 mm; operating pressure >...
- Page 3 Refrigerant R410A Do not use inferior refrigerant. Otherwise, Huawei has no responsibility for the damage caused by the inferior refrigerant. Refrigerant Authenticity Verification Method: 1. Dial the hotline of the refrigerant producer to confirm its reliability. 2. Put the refrigerant indoor for 24 hours. Then use a thermometer to measure the external surface temperature of the refrigerant cylinder (figure 1) , and connect a pressure gauge to the cylinder to measure its internal pressure (figure 2) .
- Page 4 Refrigerant side needle valve Cooling water side needle valve Installing the Indoor Unit 1. Read the related user manual or instructions before installing the NetCol5000-A. 2. The unit in this document is a fully configured NetCol5000-A. If some components are not configured, skip the corresponding steps.
- Page 5 Securing to the Floor or Base Combining Cabinets Installing Sealing Plates to the Front and Rear Doors NOTE Sealing plates are not in the fittings bag of the smart cooling product but supplied by the smart module or purchased independently. (Optional) Installing the Outdoor Unit •...
- Page 6 Scenario 1: Horizontal installation top view Scenario 2: Vertical installation top view Unit: mm Horizontal Installation b. Install the four legs. a. Remove the straight flanges. c. Secure the legs to the concrete base. Unit: mm...
- Page 7 Vertical Installation Unit: mm (Optional) Installing the Water Cooling Module Installation environment: enclosed indoor environment in which the temperature and humidity can be controlled within the ranges of 4℃ to 45℃ and 5% RH to 90% RH respectively. If the indoor installation position is ventilated, it should be more than 5 km away from the sea or pollution sources (such as salt lakes, chemical plants, mineral plants, thermal power plants, and coal mines).
- Page 8 4. When the indoor unit is higher than the outdoor unit, the maximum height difference is 8 m. When the indoor unit is lower than the outdoor unit, the maximum height difference is 30 m. 5. When welding pipes, ensure that the pipes are dry. You are recommended to weld the pipes between the indoor and outdoor units, then connect the two ends of the pipe to the indoor unit and outdoor unit.
- Page 9 Welding the Indoor Unit Ports Take protective measures, such as spreading a piece of wet cloth, around the welding position, to avoid burning the bottom panel, top panel, side panel, internal components, needle valves, other pipes, thermal insulation foam, power cables, labels, and tags. Top pipe routing Thermal 7/8 inch...
- Page 10 (Optional) Welding the Low Welding the Water Cooling Temperature Component Pipes Module To outdoor unit gas pipe 7/8 inch gas pipe To outdoor 5/8 inch unit liquid pipe liquid pipe To indoor unit To indoor unit gas pipe liquid pipe Connecting Water Pipes (Optional) Connecting the Humidifier Water Inlet Pipe Top pipe routing...
- Page 11 Figure2 • If a humidifier water inlet hose is delivered with the smart cooling product, pull the hose out of the smart cooling product and connect the hose, as shown in Figure 1. For details, refer to connection methods A and B. •...
- Page 12 Connecting the Water Supply and Return Pipes of the Water Cooling Module Connecting the steel pipe (1) Reserved device port (2) Steel pipe (1) Refrigerant side needle valve (2) Cooling water side needle valve Performing a Leakage Test with Water for the Water Cooling Module Manually open the water valve.
- Page 13 Connecting the Indoor Unit Power Cable and Equipotential Ground Cable Bottom cable routing Dual power Single power supplies supply Equipotential ground ports Equipotential ground ports Top cable routing Dual power Single power supply supplies Equipotential ground ports Equipotential ground ports...
- Page 14 If the indoor unit BOM number is 52274052, connect the indoor units power cable and equipotential ground cable as shown in the following figure. (1) Equipotential ground position (2) Equipotential bottom cable hole (3) Equipotential top cable hole Connecting the Power Cable and the (Optional) Signal Cable Between Indoor and Outdoor Units 1.
- Page 15 Connecting the Power Cables to the Outdoor Units If the outdoor unit is NetCo500-A120, connect the power cables of the two indoor units to the QF1 and QF3 of the outdoor unit respectively. Power cable hole Signal cable hole Outdoor unit power cables supply on the indoor units Outdoor unit power cable...
- Page 16 (Optional) Connecting the Signal Cable Between Indoor and Outdoor Units Perform this operation only for outdoor units configured with an intelligent monitoring board. The outdoor units are 52273539. Power cable hole Signal cable hole Signal cables for the outdoor units Signal cables for the indoor units Connecting the Low-Temperature Component Power Cable Low-temperature...
- Page 17 Connecting the Power Cable and Signal Cable for the Water Cooling Module Water cooling module Power cable hole power cables supply on the Indoor unit Signal cable hole Signal cables for the indoor units Water cooling Water cooling module module Connecting T/H Sensors Outside Cabinets 1.
- Page 18 (Optional) Connecting the Teamwork Network Cable Teamwork CAN networking (CAN Protocol) In CAN networking, a maximum of 32 smart cooling products can be teamworked. If CAN networking is required onsite, set Networking mode on the Teamwork Settings screen of all smart cooling products to CAN network, and set Teamwork CAN resistor enable on the Teamwork Settings screen of the first and last smart cooling products to Yes.
- Page 19 • Connecting network cables for NetEco COM monitoring (Modbus-RTU protocol) Third-Party NMS Monitoring (SNMP/Modbus-RTU Protocol) When the host monitors the smart cooling product through a third-party NMS, connect the monitoring network cable based on whether the smart cooling product is cascaded. •...
- Page 20 Post-Installation Check Item Content Result Ports are connected properly. The pipeline has oil traps, inverted U-shaped traps, gradients (for the refrigerant pipes) , and pipe supports. Pipes are □Passed securely connected. All pipes are wrapped with thermal insulation foam, and Refrigerant □Failed pipe...
- Page 21 11.3 Precharging Refrigerant If the R410A refrigerant is provided by Huawei, put the refrigerant steel vessel upside down when charging in the refrigerant. If the refrigerant is not provided by Huawei, check with the refrigerant provider whether the steel vessel has a siphon. If the vessel has a siphon, put it upside up when charging in refrigerant.
- Page 22 Scenarios without a low-temperature component 1. Leak checking 2. Vacuuming 3. Precharging refrigerant • Vacuum pump Left pressure gauge is low pressure gauge. Right pressure gauge is high pressure gauge. • The specification of needle valve is 7/16-20UNF. Low-pressure needle valve Discharge Reducing Refrigerant cylinder...
- Page 23 Power-On Power-On 12.1 • Users are classified into admin and operator. The preset password is 000001 for both types of users. • After powering on, the smart cooling product is in shutdown mode. • After powering on, the compressor starts preheating, and the system generates an alarm indicating that the compressor is preheating (for 12 hours) .
- Page 24 Startup and Wizard Startup • Download the Service Expert app from Huawei app store and runs on Android. Apply for permission after downloading the app. • Ensure that no combustion-supporting materials (air or additives) enter the air conditioning system during commissioning.
- Page 25 1. First startup flowchart 2. Wizard startup flowchart Start Start Tap Start on the home screen. Precautions After tapping Yes, the barcode and the Select verification code are shown on the screen. Fail Commissioning Commissioning items interrupted Open the Service Expert app. (Handle the fault by Fail...
- Page 26 When the compressor is 3000 rpm, the following table lists the proper system values. Ambient Proper Discharge Pressure Proper Suction Pressure Proper Overheating Temperature Range (Running > Device Range (Running > Device Degree (Running > Details > Compressor) Details > Compressor) Device Details >...
- Page 27 Unit: mm Huawei Technologies Co., Ltd. Huawei Industrial Base, Bantian, Longgang Shenzhen 518129 People's Republic of China www.huawei.com...