Table of Contents
Advertisement
Quick Links
Advertisement
Table of Contents

Related Manuals for Pioneer AVH-Z9290BT


Summary of Contents for Pioneer AVH-Z9290BT
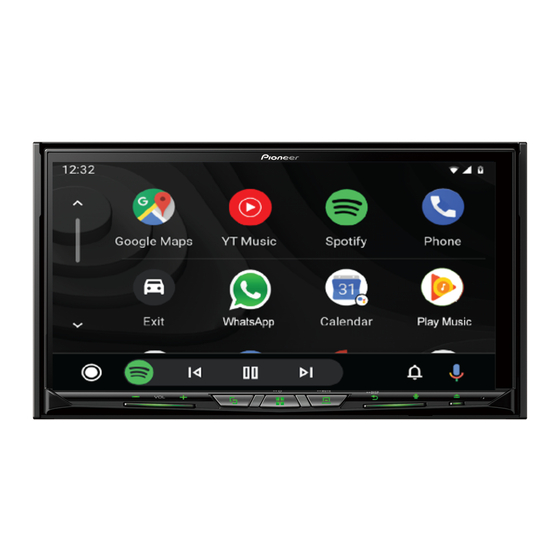
- Page 1 AVH-Z9290BT MONITOR RDS AV RECEIVER Owner’s Manual...
-
Page 2: Table Of Contents
Using WebLink............29 Setting the anti-theft function ......50 ■ Starting procedure............ 29 Restoring this product to the default Bluetooth ......11 Thank you for buying this Pioneer Using the audio mix function........ 30 ■ settings..............50 ■ product. Bluetooth connection ..........11 Apple CarPlay.... -
Page 3: Precaution
• If you notice smoke, a strange noise or odour from this product, or any other abnormal signs on the LCD screen, turn off the power immediately and consult your dealer or the nearest authorised Pioneer Service Station. Using this product in this condition may result in permanent damage to the system. -
Page 4: To Ensure Safe Driving
Before using this product, be sure to read and fully understand the following safety If you attempt to watch video image while driving, the warning “Viewing of front seat information: video source while driving is strictly prohibited.” will appear on the screen. To watch •... -
Page 5: Handling The Usb Connector
This manual uses diagrams of actual screens to describe operations. However, the recover the data. Pioneer accepts no liability for damages, costs or expenses arising from data loss or screens on some units may not match those shown in this manual depending on the corruption. -
Page 6: Parts And Controls
Press to activate the voice recognition mode with a connected iPhone or Parts and controls smartphone. Press and hold to display the connectable device list screen or device search screen. Main unit RESET Press to reset the microprocessor (page 7). SD card slot Refer to Inserting and ejecting an SD memory card (page 23). -
Page 7: Basic Operation
RETURN Press to return to the specified point and start playback from there. Basic operation Press to pause or resume playback. For audio: Press and hold to perform fast reverse or fast forwards. For video: Press to perform fast reverse or fast forwards. Press to return to the previous track (chapter) or go to the next track (chapter). -
Page 8: Preparing The Remote Control
Preparing the remote control Important • Do not store the remote control in high temperatures or direct sunlight. • Do not let the remote control fall onto the floor, where it may become jammed under the brake or Remove the insulation sheet before use. accelerator. -
Page 9: Using The Touch Panel
Restore the default setting (page 50). Operating the time bar Using the touch panel You can operate this product by touching the keys on the screen directly with your fingers. NOTE You can change the playback point by dragging the key. To protect the LCD screen from damage, be sure to touch the screen only with your finger gently. -
Page 10: Top Menu Screen
The hidden function keys appear. Top menu screen NOTE This key does not appear for some AV sources. Operating the on-screen keyboard Favourite source icons TIPS • When you connect the external navigation system to this unit, the navigation mode key is displayed at the middle of the right side of the display. •... -
Page 11: Bluetooth
Connected device key Bluetooth Displays connected device. Switches the source or application with connected devices such as WebLink, external navigation system, Apple CarPlay, Android Auto. TIPS Bluetooth connection • When a device with a compatible application is connected, the favourite application key appears. -
Page 12: Hands-Free Phoning
Menu Item Description [Connection] Connect, disconnect, or delete registered Bluetooth device manually. Touch to delete registered device. To connect a registered Bluetooth device manually, touch the name of the device. To disconnect the device, touch the name of the connected device in the list. - Page 13 • For using this function with a smartphone, the device must be compatible with Android Auto. For Using the preset dial lists using the voice recognition function with a smartphone, launch Android Auto beforehand. Press ▶Registering a phone number Touch You can easily store up to six phone numbers per device as presets.
-
Page 14: Bluetooth Audio
• If the phone book in the phone contains image data, the phone book may not be Adjusting the other party’s listening volume transferred correctly. • Depending on the mobile phone, phone book transfer may not be available. This product can be adjusted to the other party’s listening volume. Touch to switch between the three volume levels. -
Page 15: Wi-Fi
Wi-Fi You can connect your Wi-Fi certfied mobile device to this product via Wi-Fi connection. Wi-Fi connection Turn on the Wi-Fi function on the device. Press Switches between playback and pause. Touch then Touch [Wi-Fi Settings]. Skips files forwards or backwards. •... -
Page 16: Wi-Fi Audio
Wi-Fi audio AV source Before using the Wi-Fi audio player, connect the device to this product via Apple CarPlay (page 31) or Android Auto wirelessly (page 33). Press then touch Supported AV source Touch [Wi-Fi Audio]. You can play or use the following sources with this product. The Wi-Fi audio playback screen appears. -
Page 17: Selecting A Source
Recalls equaliser curves (page 43). Adjusting the range of favourite source icons area NOTE This function is available only when you stop your vehicle in a safe place and apply the handbrake. Selecting a source Press Touch and hold appears at the top left of the favourite source icons. Source on the AV source selection screen Drag to the desired position. -
Page 18: Setup For Ipod/Iphone Or Smartphone
Touch [Smartphone-related Settings]. Setup for iPod/iPhone or Touch [Smartphone Setup]. smartphone Touch [iPhone/iPod]. The available function icons are displayed. Touch [OK]. When using an iPod/iPhone or a smartphone with this product, configure settings of this product according to the device to be connected. This section describes the settings Smartphone (Android™... -
Page 19: Radio
Searches for a broadcast by PTY information (page 19). Radio TIPS • By pressing then touch , you can also switch the preset channels. Starting procedure • By pressing then touch and hold and releasing it, you can also perform seek tuning. Searching by PTY information Press then touch... -
Page 20: Radio Settings
*1 This setting is available when the source is turned off. Radio settings *2 This function is available only when you receive the FM band. Press Touch then The system setting screen appears. Touch [AV Source Settings]. Touch [Radio Settings]. The menu items vary according to the source. -
Page 21: Disc
Audio source Disc Audio source screen 1 Inserting and ejecting a disc You can play a normal music CD, Video-CD, or DVD-Video using the built-in drive of this product. WARNING Keep hands and fingers clear of this product when opening, closing, or adjusting the LCD panel. Be especially cautious of children’s hands and fingers. - Page 22 Searches for the part you want to play. Video source Touch [Title], [Chapter], [10key], or [Track] then input the desired number from [0] to [9]. CAUTION To start playback from the number you registered, touch For safety reasons, video images cannot be viewed while your vehicle is in motion. To view video TIPS images, stop in a safe place and apply the handbrake.
-
Page 23: Compressed Files
Displays the DVD menu keypad. Compressed files If items on the DVD menu appear, the touch panel keys may overlay them. If so, select an item using these touch panel keys. Touch , or to select the menu item then touch NOTE Inserting and ejecting media The way to display the menu differs depending on the disc. -
Page 24: Starting Procedure
Touch to open the LCD panel. Unplugging a USB storage device Insert an SD memory card into the SD card slot. Pull out the USB storage device from the USB cable. Press NOTES NOTES • Check that no data is being accessed before pulling out the USB storage device. •... - Page 25 Audio source Audio source screen 2 (Example: USB) Audio source screen 1 (Example: USB) Selects the previous folder or the next folder. Displays the link search screen. Sets a repeat play range for all files/the current folder/the current file. Touch the song to play back followed by touching the song information, after switching to Music Browse mode (page 25).
- Page 26 Sets a repeat play range for all files/the current folder/the current file. Once the database is created in the USB storage, there is no need to create the database again as long as the same contents are saved. To enter the Music Browse mode directly, touch and then touch [Tag] before selecting the song.
-
Page 27: Ipod
Switches between playback and pause. iPod Switches the following media file types. [Music]: Compressed audio files [Video]: Compressed video files Connecting your iPod [Photo]: Image files Skips files forwards or backwards. When connecting an iPod to this product, the settings are automatically configured according to the device to be connected. - Page 28 Audio source Audio source screen 2 Audio source screen 1 Changes the audiobook speed. Displays the link search screen. Normal—Fast—Slow Select a song from the list related to the song currently playing. NOTE The audiobook speed icon may not change depending on the connected iPod/ If you touch the artwork, the list of songs in the album is displayed.
-
Page 29: Weblink
This function may not be used depending on your Apple Music account status. Skips tracks forwards. Important • Pioneer is not liable for any issues that may arise from incorrect or flawed app-based content. • The content and functionality of the supported applications are the responsibility of the App providers. -
Page 30: Using The Audio Mix Function
Using the audio mix function WebLink You can output the audio mixing AV source and an application for iPhone or smartphone when WebLink is used. NOTE Depending on the application or AV source, this function may not be available. Start up the WebLink. Press VOL (+/-). -
Page 31: Apple Carplay
Apple CarPlay in the Bluetooth setting menu of the device (page 11). • PIONEER IS NOT RESPONSIBLE AND DISCLAIMS LIABILITY FOR THIRD PARTY (NON-PIONEER) APPS Turn on the Wi-Fi function on the device. AND CONTENT, INCLUDING WITHOUT LIMITATION ANY INACCURACIES OR INCOMPLETE INFORMATION. -
Page 32: Adjusting The Volume
• Android Auto allows access to applications other than those listed that are subject to limitations while driving. • PIONEER IS NOT RESPONSIBLE AND DISCLAIMS LIABILITY FOR THIRD PARTY (NON-PIONEER) APPS AND CONTENT, INCLUDING WITHOUT LIMITATION ANY INACCURACIES OR INCOMPLETE Touch to mute. -
Page 33: Starting Procedure
Touch a desired device on the screen. Touch [Smartphone-related Settings]. The unit configures the connection then start the application. Touch [Driving Position]. [Left] You can use voice recognition function by pressing once Android Auto is activated. Select for a left-hand drive vehicle. NOTES [Right] •... -
Page 34: Hdmi
NOTE HDMI Android Auto will launch automatically only when an Android Auto compatible device is correctly connected to this product. Press CAUTION Touch then For safety reasons, video images cannot be viewed while your vehicle is in motion. To view video Touch [Smartphone-related Settings]. -
Page 35: Aux
Basic operation AUX screen You can display the video image output by the device connected to video input. CAUTION For safety reasons, video images cannot be viewed while your vehicle is in motion. To view video images, stop in a safe place and apply the handbrake. NOTES •... -
Page 36: Av Input
Basic operation AV input AV source screen You can display the video image output by the device connected or the camera to video input. For details, refer to Using AV input (page 55). CAUTION For safety reasons, video images cannot be viewed while your vehicle is in motion. To view video images, stop in a safe place and apply the handbrake. -
Page 37: Wireless Mirroring
Basic operation Wireless Mirroring Wireless Mirroring screen (Example) (This function is available only for Android device.) Wireless Mirroring is a wireless display designed to mirror your mobile device on this product screen via Wi-Fi connection. Starting procedure Wireless Mirroring operations and procedures vary depending on the connected mobile device. -
Page 38: Settings
• Apple CarPlay (page 31) CAUTION • Android Auto™ (page 32) Pioneer recommends the use of a camera which outputs mirror reversed images, otherwise the screen [Android Auto Auto- Select [On] to automatically launch Android Auto when an image may appear reversed. - Page 39 • When the screen changes to full-screen rear view camera image during normal driving, switch to the Menu Item Description opposite setting in [Reverse Gear Setting.]. [Parking Assist Guide Adjusting the guidelines by dragging or touching • If you touch while the camera image is displayed, the displayed image turns off temporarily.
- Page 40 [Manual] Switches the dimmer to on or off manually. Service Station. • Please use a PIONEER wiring harness for each car model when [Time] Switches the dimmer to on or off at the time you adjusted. [With Adapter] mode is engaged, otherwise select [W/o [Day/Night] Setting the dimmer duration by day or night.
- Page 41 * With some pictures, you cannot adjust [Hue] and [Colour]. Menu Item Description NOTES [Dimmer Duration] Adjust the time that the dimmer is turned on or off by • The adjustments of [Brightness], [Contrast], and [Dimmer Level] are stored separately when your dragging the cursors or touching vehicle's headlights are off (daytime) and on (nighttime).
-
Page 42: Theme Settings
Menu Item Description Theme settings [3D Calibration Status] Check the sensor learning status, such as the degree of learning. You can also check the current sensor values and CAUTION the total number of speed pulses. Do not turn off the engine while importing an image from the external storage device. To delete the learned results stored in the sensor, follow the below instructions. -
Page 43: Audio Settings
Touch the item you want export. Menu Item Description [Illumination] [Theme] Select the theme colour. [Theme] [Splash Screen] You can preview the top menu screen or the AV operation screen [Select All] by touching [Home] or [AV] respectively. Touch [Export]. [Clock] Select the style of the clock from the preset image. - Page 44 Menu Item Description Menu Item Description [Fader/Balance] Touch to adjust the front/rear speaker balance. [Speaker Level] Adjust the speaker output level of the listening position. Set [Front] and [Rear] to [0] when using a dual speaker Listening position*1*2 Touch to select the listening position then system.
- Page 45 *2 If you change the listening position setting, the output levels of all the speakers will change in Menu Item Description conjunction with the setting. [Save Settings] Save to recall the following current sound settings by *3 To use this function, the vehicle’s acoustics must be measured in advance. touching [OK]: slope, subwoofer phase, speaker level, *4 This function is available only when the [Listening Position] setting is set to [Front Left] or [Front Graphic EQ, HPF/LPF, listening position, crossover, time...
- Page 46 – Rear speakers (left/right) NOTE – Noise The Bluetooth connection is disconnected before the process starts. – Microphone for acoustical measurement (sold separately) Exit the vehicle and keep the doors closed until the countdown finishes. – Low battery When the countdown finishes, a measurement tone (noise) is emitted from the ▶Performing Auto EQ speakers and Auto EQ measurement begins.
-
Page 47: Video Settings
Video settings Menu Item Description [Parental] Set restrictions so that children cannot watch violent or The menu items vary according to the source. adult-oriented scenes. You can set the parental lock level in steps as desired. Touch [0] to [9] to input a four-digit code number. [DVD/DivX Setup] Touch Registers the code number, and you can now set the... -
Page 48: Favourite Menu
Menu Item Description Favourite menu [DVD Auto Play] Set to display the DVD menu automatically and start [On] [Off] playback from the first chapter of the first title when a DVD disc with a DVD menu is inserted. Registering your favourite menu items in shortcuts allows you to quickly jump to the NOTE registered menu screen by a simple touch on the [Favorites] screen. -
Page 49: Other Functions
[Trimming] An image is displayed across the entire screen with the horizontal-to-vertical ratio Other functions left as is. If the screen ratio differs from the image, the image may be displayed partly cut off either at the top/bottom or sides. NOTE [Trimming] is for image files only. -
Page 50: Setting The Anti-Theft Function
Touch 1, followed by 2, and then touch 3 (page 50). Important Touch [Clear Password]. If you forgot your password, contact the nearest authorised Pioneer Service Station. Touch [Yes]. Setting the password Touch [OK]. -
Page 51: Connection
Pioneer does not recommend that you install this product yourself. This product is designed out, it could result in fire generation of damaged, resulting in a short circuit or for professional installation only. -
Page 52: Notice For The Blue/White Lead
The position of the speed detection circuit and the position of the handbrake switch vary depending on the vehicle model. For details, consult your authorised Pioneer dealer or an installation professional. Speaker leads No ACC position ACC position •... -
Page 53: Power Amp (Sold Separately)
Power cord Power amp (sold separately) Left Right Front speaker (STD) or high range Important speaker (NW) The speaker leads are not used when this connection is in use. Rear speaker (STD) or middle range speaker (NW) White White/black Grey Grey/black Green Green/black... -
Page 54: Ipod/Iphone And Smartphone
Middle range output (NW) iPod/iPhone and Yellow/black (MUTE) If you use an equipment with Mute function, wire this lead to the Audio Mute lead on smartphone that equipment. If not, keep the Audio Mute lead free of any connections. This product NOTES System remote control •... -
Page 55: Smartphone (Android™ Device)
• The image area of full-screen images • Some appropriate settings are required NOTE Smartphone (Android™ displayed while backing or checking the to use rear view cameras. For details, refer The appropriate setting is required to use device) rear of the vehicle may differ slightly. to [Camera settings] (page 38). -
Page 56: Securing The High Speed Hdmi
passengers in the rear seats to watch the NOTE NOTE Rear display video source. The appropriate setting is required to use When you connect the High Speed HDMI™ the external video component. For details, Cable, use the lock tie to fix it securely refer to AUX (page 35). -
Page 57: Installation
– Places exposed to direct sunlight, such Position this product so that its screw Installation as on top of the dashboard. holes are aligned with the screw holes – Places that may be exposed to rain, of the bracket, and tighten the screws at such as close to the door or on the three locations on each side. -
Page 58: Installing The Gps Aerial
Installing the GPS When installing the aerial inside the vehicle (on the dashboard or rear shelf) aerial WARNING CAUTION Do not install the GPS aerial over any sensors or vents on the dashboard of the vehicle, as Do not cut the GPS aerial lead to shorten it doing so may interfere with the proper functioning of such sensors or vents and may or use an extension to make it longer. -
Page 59: Installing The Microphone
Installing the microphone • Install the microphone in a place where its direction and distance from the driver make it easiest to pick up the driver’s voice. • Be sure to turn off (ACC OFF) the product before connecting the microphone. •... -
Page 60: Appendix
– Update the iPod software version. – Stop playback once, then restart. and apply the handbrake. authorised Pioneer service facility. → An error has occurred. → The handbrake interlock is activated. – Reconnect the iPod with the USB The picture is stretched, with an incorrect –... -
Page 61: Error Messages
– Check that the disc is loaded correctly. check the screen on the smartphone. Your device is not authorized to play this → There is an electrical or mechanical dealer or your nearest Pioneer service DivX protected video. centre. error. - Page 62 → Security for the connected external Pioneer Service Station. – Select a file that can be played. HUB Error storage device (USB, SD) is enabled. → The connected USB hub is not –...
-
Page 63: Handling And Care Of Discs
instructions, please reconnect the Codec High Definition) format. Do not Detailed information Ambient conditions for playing a device. insert in AVCHD discs. If inserted, the disc disc may not be ejected. for playable media Handling and care of • At extremely high temperatures, a Playing DualDisc temperature cutout protects this product discs... - Page 64 characteristics, scratches or dirt on the • Some USB storage devices connected to • Up to 64 characters can be used for the SD memory cards disc, or dirt, scratches or condensation on this product may generate noise on the name of the subtitle file, including the •...
- Page 65 and folder name. Depending on the USB storage device/SD memory card • Some special operations may be TRANSMISSION RATE USB: 48 kbps to display area, this product may try to prohibited because of the composition of 320 kbps (CBR), CODEC FORMAT MP3, WMA, display them with a reduced font size.
-
Page 66: Bluetooth
Maximum frame rate 30 fps FLAC registered trademarks owned by Bluetooth SIG, POSSIBILITY OF SUCH DAMAGE. .mov Inc. and any use of such marks by PIONEER CORPORATION is under license. Other Copyright © 2000-2009 Josh Coalson DivX Compatible video codec MPEG4, H.264, trademarks and trade names are those of their Copyright ©... - Page 67 App Store while using this product. Please back up • Pioneer is not liable for any issues that your iPod data regularly. may arise from incorrect or flawed app- Important App Store is a service mark of Apple Inc.
- Page 68 In that case, please consult your For details about the open source licenses from the heater may break the LCD dealer or the nearest authorised Pioneer for the functions that this product is Notice regarding video screen, and cool air from the cooler may Service Station.
- Page 69 Durable temperature range: <Network Mode> DVD drive <USB audio> -10 ˚C to +60 ˚C (Power off ) HPF (High): MP3 decoding format: System: Frequency: MPEG-1/Layer-1, MPEG-1/Layer-2, MPEG- DVD-V, VCD, CD, MP3, WMA, AAC, DivX, Audio 1.25 kHz/1.6 kHz/2 kHz/2.5 kHz/3.15 1/Layer-3 MPEG player Maximum power output:...
- Page 70 AAC decoding format: Wi-Fi MPEG-2 AAC-LC, MPEG-4 AAC-LC Frequency channel: WAV signal format: 1, 6, 11 ch (2.4 GHz) Linear PCM 149, 151, 155 ch (5 GHz) FLAC signal format: Security: Ver. 1.3.0 WPA 2 (personal) Output power: <SD image> +16 dBm Max (2.4 GHz) JPEG decoding format: +13 dBm Max (5 GHz)
- Page 72 © 2019 PIONEER CORPORATION. All rights reserved. <QRB3811-A> ID...