Huawei SUN2000-55KTL Series Quick Manual
Hide thumbs
Also See for SUN2000-55KTL Series:
- Quick manual (20 pages) ,
- User manual (122 pages) ,
- Installation manual (7 pages)

Related Manuals for Huawei SUN2000-55KTL Series


Summary of Contents for Huawei SUN2000-55KTL Series
- Page 1 SUN2000-(55KTL, 60KTL)-Serie Quick Guide Issue: 06 Part Number: 31508435 Date: 2019-06-30 HUAWEI TECHNOLOGIES CO., LTD.
-
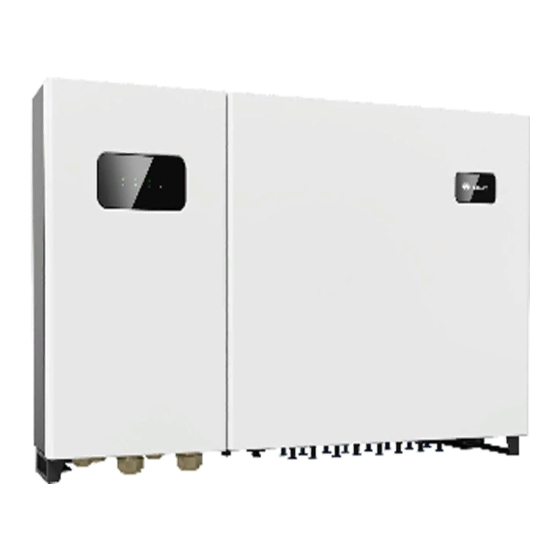
Page 2: Product Overview
5. Use insulated tools when installing the device. For personal safety, wear proper personal protective equipment (PPE). 6. Huawei shall not be liable for any consequence caused by violation of the storage, moving, installation, and operation regulations specified in this document and the user manual. - Page 3 Indicator Status Description Communication The SUN2000 receives data indicator Blinking green over RS485 or PLC communication. The SUN2000 has not received data over RS485 or PLC communication for 10 seconds. Alarm/Maintenan Blinking red at long intervals (on A warning alarm is generated. ce indicator for 1s and then off for 4s) Blinking red at short intervals (on...
-
Page 4: Installation Requirements
SUN2000 Dimensions Mounting Bracket Dimensions Installation Requirements Installation Angle... -
Page 5: Installation Space
Installation Space For ease of installing the SUN2000 on the mounting bracket, connecting cables to the bottom of the SUN2000, and maintaining the SUN2000 in future, it is recommended that the bottom clearance be between 600 mm and 730 mm. Installing the SUN2000 The SUN2000 mounting bracket has four groups of tapped holes, each group containing four ... - Page 6 1. Set the security torx wrench aside after removing it from the mounting bracket. 2. You are advised to apply anti-rust paint on the hole positions for protection.
-
Page 7: Electrical Connections
Electrical Connections Installing the Ground Cable • The ground point on the enclosure is preferred to connect to the PE cable for the SUN2000. • The ground point in the maintenance compartment is mainly used for connecting to the ground cable included in the multi-core AC power cable. -
Page 8: Installing Ac Output Power Cables
2. Open the maintenance compartment door and install the support bar, which is bound to the inductor cover at the bottom of the chassis. If the screws on the chassis door are lost, obtain spare screws from the fitting bag bound to the inductor cover at the bottom of the chassis. - Page 9 1. Remove the locking cap from the AC OUTPUT connector and then remove the plug. 2. Choose whether to use rubber fittings based on the cable outer diameter and select one or more rubber fittings if required. Route the cable through the locking cap and then the rubber fitting. •...
-
Page 10: Installing Dc Input Power Cables
5. Route the AC output power cable through the AC OUTPUT connector at the bottom of the enclosure. 6. Connect the AC output power cable to the terminal block, and then tighten the nut using a torque wrench that has an extension rod. •... - Page 11 Ensure that the PV module output is well insulated to ground. Before inserting the positive and negative connectors respectively into the positive and negative DC input terminals of the SUN2000, check that the DC voltage does not exceed 1500 V using a multimeter and that the cables are connected correctly.
- Page 12 Installing DC Input Power Cables (Cold Forming Metal Contact) Positive metal terminal Positive connector UTXTC0001 Negative (Amphenol) Negative metal terminal Click Ensure that the cable connector Recommended: PV cable cannot be removed after that meets the 1500 V crimped. standard Ensure Use a multimeter that the...
-
Page 13: Selecting A Communication Mode
Selecting a Communication Mode The SUN2000 supports either PLC or RS485 communication mode. If PLC is used, you do not have to connect any communications cable to the SUN2000, but have to connect the PLC CCO module or SmartLogger2000 to the AC power cable. For detailed operations, see the PLC CCO01A User Manual or SmartLogger2000 User Manual. - Page 14 5. Bind the communications cable. 4. Install the terminal base on the terminal block, and connect the shield layer to the ground point. NOTE When connecting the shielded cable, choose whether to crimp the OT terminal based on site requirements. 6.
-
Page 15: Checking After Installation
3. Insert the RJ45 connector into the RJ45 4. Bind the communications cable. network port in the SUN2000 maintenance compartment. 5. Tighten the thread-lock sealing nut and seal the waterproof connector. Checking After Installation Yes □ No □ N/A □ 1. -
Page 16: Dc Input Detection
DC Input Detection After the DC input power cable connects to the SUN2000 of this model, the SUN2000 detects the DC input voltage of each route using the power generated by PV modules. After one PV string correctly connects to the MPPT1 circuit, the SUN2000 can start the DC input detection function. DC input detection can be performed automatically or manually. -
Page 17: Powering On The System
2. Mobile phone operating system: Android 4.0 or later, iOS 7.0 or later. When the iOS is used, the app supports only Bluetooth connection. 3. Access the Huawei app store (http://appstore.huawei.com), Google Play (https://play.google.com), or App Store (iOS), search for SUN2000, and download the SUN2000 app software package. -
Page 18: Troubleshooting
Selecting a Connecting Switching Login screen connection mode Bluetooth between users Quick Main menu settings screen The preset passwords for Common User, Advanced User, and Special User are 00000a. Use the initial password upon first power-on and change it immediately after login. To ensure account security, change the password periodically and keep the new password in mind. - Page 19 Huawei Technologies Co., Ltd. Huawei Industrial Base, Bantian, Longgang, Shenzhen 518129, People's Republic of China www.huawei.com...