Toshiba IPedge IP5000 Series Installation Instructions Manual
Hide thumbs
Also See for IPedge IP5000 Series:
- User manual (322 pages) ,
- Quick reference manual (13 pages) ,
- Quick start manual (12 pages)

Related Manuals for Toshiba IPedge IP5000 Series


Summary of Contents for Toshiba IPedge IP5000 Series
- Page 1 Effective July 1, 2017, all Telecom product ordering, maintenance, warranty, and support obligations have been transferred to Mitel Networks, Inc. IP Telephone Installation Title Page February 2015...
- Page 2 To view the latest version of this or other documents please refer to the Toshiba FYI web site. Toshiba America Information Systems shall not be liable for any commercial losses, loss of revenues or...
- Page 3 In accordance with U.S. Copyright Law, a license may be required from the American Society of Composers, Authors and Publishers, or other similar organization, if radio or TV broadcasts are transmitted through the music-on-hold feature of this telecommunication system. Toshiba America Information Systems, Inc., strongly recommends not using radio or television broadcasts and hereby disclaims any liability arising out of the failure to obtain such a license.
- Page 4 IPedge and VIPedge system or gateway. User further acknowledges that any interruption in the supply or delivery of electricity or network availability is beyond Toshiba’s control and that Toshiba shall have no responsibility for losses arising from such interruption.
- Page 5 Mitel is able to provide (i) existing transferable license to use the Software and Documentation Toshiba customers and partners and (ii) new Mitel customers and partners, solely for the following purposes: access to existing Toshiba products and services.
- Page 6 Corporation or reprinted with authorization from third parties Software License Key, which will be conveyed to You upon including Toshiba, 2007-2017; All rights reserved and any such payment of the applicable license fees for the Software or rights in copyrighted material rests with the owner. You shall accompanying software, including any extensions thereof.
- Page 7 warranty of non-infringement or otherwise, and Mitel and its serviced or maintained by anyone other than Mitel, (b) suppliers will have no obligation to defend or indemnify You for maintenance is performed on the Software by anyone not any claims, demands, losses, damages, legal costs or expenses authorized by Mitel, (c) the Software is not properly installed, made against or incurred by You for infringement of any third integrated or used in combination with products that are not...
- Page 8 nature). The Software has risks inherent to all software Government, the Contractor/Manufacturer is Mitel Networks, applications and, as such to the extent permitted by law or Inc., 1146 N. Alma School Road, Mesa, Arizona 85201. Mitel’s contractual obligations, Mitel disclaims and will not be liable for any loss, damage, injury or non-performance, cost or expense directly or indirectly occasioned thereby.
-
Page 9: Table Of Contents
Contents Chapter 1 – IP Telephone INSTALL IP TELEPHONES ............1-1 SUPPORTED IP TELEPHONES . - Page 10 IP5122-SDC Headset Transmit Level Adjustment ........1-20 EXTERNAL SPEAKER/RINGER AMPLIFIER (BESCB1A) .
- Page 11 Bearer Capability ............2-5 Display DN .
- Page 12 Base UDP Port for IP Telephone Media Channel ........2-12 Group .
-
Page 13: Chapter 1 - Ip Telephone
Chapter 1 – IP Telephone INSTALL IP TELEPHONES This document covers the installation of the IP5000-series IP Telephones (IPTs) on IPedge and VIPedge systems. Unless indicated the procedures for IPedge and VIPedge are the same. Install the IP Telephones and cables with the same care and considerations as any other device connected to the local network. -
Page 14: Ip5000-Series Ip Telephones
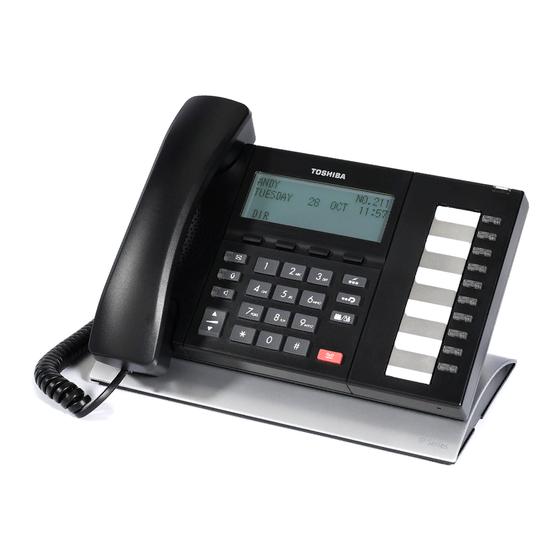
SUPPORTED IP TELEPHONES IP5000-Series IP Telephones IP5000-Series IP The IP5000 series IP Telephone models are shown in the table below. Telephones Part Type Description Number IP5122-SD 4 Line LCD (with backlight), 10 Programmable keys IP5622-SD IP5022-SD 4 Line LCD (without backlight), 10 Programmable keys IP5522-SD 4 Line LCD (with backlight), 10 Programmable keys, and CO Line circuit Telephones... -
Page 15: Ip5000-Series Physical Specifications
SUPPORTED IP TELEPHONES IP5000-Series Physical Specifications IP5000-Series Physical Specifications Width Depth 1 in. (25 mm) Table 1-1 IP5000-Series Telephones and ADMs Physical Dimensions Depth Device Width Without Tilt IP5000 series telephones 10.16 in. (258 mm) IDM5060 10.16 in. (258 mm) 6.10 in. - Page 16 SUPPORTED IP TELEPHONES IP5000-Series Telephone Tilt Angles Tilt Stand Extension Figure 1-1 IP5000-Series Desk-top Tilt Angle With Tilt-Stand Extension 0° (no) Tilt -20° Tilt Figure 1-2 IP5000-Series Wall Mount Angles IPT Installation Manual Feb,, 2015...
-
Page 17: Station Wiring, Power
STATION WIRING, POWER IP5000-Series Telephone Tilt Angles STATION WIRING, POWER The IP5000-series IPTs can be powered by a local power supply at each station or a 802.3af compliant Power-Over-Ethernet (PoE) device. Use IEEE CAT5E (minimum) IP cable with a connector boot length not greater than 1.6 inches (40 mm). -
Page 18: Ip5000-Series Cable Connections
IP5000-Series Cable Connections IP5000-Series Telephone Tilt Angles IP5000-Series Cable The connectors on the IP5000-series telephones are identified with icons. Connections The connector icons and their meaning are shown below. Icon Function Add-On Module (ADM) Cable Connector AC Power Adapter (12 VDC) Input DC IN 12V Handset Cord Headset Cord... - Page 19 IP5000-Series Cable Connections IP5000-Series Telephone Tilt Angles Local Power ACO Line (SDC Station only) LAN Cable LAN Connection External Speaker from internal switch (optional) Handset Cord cable Headset Cord The IP5000-series telephones include the special long-tail handset cords required to fit the tilt bases. Figure 1-3 IP5000-series Telephone Connectors IPT Installation Manual Feb,, 2015...
-
Page 20: Ip5000 Series Telephone Power Ratings
IP5000 SERIES TELEPHONE POWER RATINGS IP5000-Series Telephone Tilt Angles IP5000 SERIES Power Consumption (IEEE802.3af 48Vdc) of IP5000-series stations and TELEPHONE POWER add-on modules. RATINGS Table 1-3 IP5000 Series POE Power Ratings Option Telephone Current Typical Typical Power Rating IEEE802.3af (Watts) PD class Model Watts... -
Page 21: Wall Mounting
WALL MOUNTING ADM Installation procedure: WALL MOUNTING All of the IP5000-series telephones wall mount in the same manner. Attach two screws to the wall, slide the telephone down over the screw heads to secure. Wall Mount Holes 3.94 in. (100 mm) Wall mounting requires two pan head screws spaced vertically 100 mm (3 inches) apart. - Page 22 ADD-ON MODULE INSTALLATION ADM Installation procedure: attached, that cable runs from the first ADM “OUT” connector to the second ADM “IN” connector. Refer to Figure 1-4. 4. Plug in the IP5000-series telephone power cord if using a local power supply. Plug in the LAN cable. ADM cable Service loops IP5000-series Telephone...
-
Page 23: Initial Start-Up
INITIAL START-UP ADM Installation procedure: INITIAL START-UP When an IP5000-series telephone is connected to power it will initialize then attempt to connect to the IPedge system. The start-up sequence indicators are described below. 1. All of the Feature Buttons (FB) will light green. 2. -
Page 24: Connecting
CONNECTING IPedge CONNECTING The next step in connecting the IPT to your IPedge or VIPedge system is to program the stations into the system database. Refer to Chapter 2– Programming in this manual. After the stations are entered in the database the connection process is rather straightforward. -
Page 25: End-User Reference Guide
END-USER REFERENCE GUIDE Backlight Options END-USER REFERENCE GUIDE Backlight Options Available on IP5000-series, except IP5022-SD, telephones and LM models. This setting adjusts when the backlight comes on and how long it stays lit. 1. Press Hold+3+6+9 (simultaneously). Change Backlight Settings (all except 2. -
Page 26: Lcd Contrast Adjustments
END-USER REFERENCE GUIDE LCD Contrast Adjustments 5. Change the LCD back light brightness on the IP5131Press Hold+3+6+9 (simultaneously). 6. Press the Others soft key. 7. Use the Soft Keys to select: BL Bright. 8. Use the dial-pad to enter a value of 0 ~ 3. 0 for dim, 3 for brightest. 9. -
Page 27: Reset Ipt To Default
RESET IPT TO DEFAULT Four Line Phones RESET IPT TO DEFAULT This process resets the IPT to the default, new, ‘out of the box’ condition. This resert to default process is only required when using a telephone that has been configured or previously installed on another system. The four line display phones use a different procedure than the nine line (large) display phones. -
Page 28: Nine Line Phones
CARBON HANDSET and HEADSET SETTING Four Line Display Phones CARBON HANDSET and There exist two types of headsets: ECM and Carbon. The default setting HEADSET SETTING on the telephones is AUTO. When the headset is connected to the Headset Modular Connector of the telephone, the AUTO setting enables the headset I/F current detector to determine which headset type is connected (EMC or Carbon). -
Page 29: Nine Line Phones
IP5122-SDC with CO LINE CONNECTION Nine Line Phones IP5122-SDC with CO LINE The IP5122-SDC supports a feature key, programmed as a Analog CONNECTION Central Office (ACO) key, for accessing a Local Analog Loop-Start Line (CO-Line) connected the station. The ACO key is assigned on one of the Flexible Keys. -
Page 30: Ip5122-Sdc And Co-Line Connection
WARNING! Avoid using an IP5122-SDC connected to a CO Line during a thunderstorm. There is a slight chance of electric shock from lightning. Toshiba recommends disconnecting the CO Line cord from the IP5122-SDC when lighting is forecast. -
Page 31: Ipt Initialization
CO Line Specifications IPT Initialization • Loop start only • REN (Ringer Equivalence Number) is one • DTMF dialing • No AROH (Automatic Release Of Hold) • Ring frequency: 15.3 Hz to 68 Hz • Ring voltage: Must be greater than 30 vrms •... - Page 32 CO Line Specifications IP5122-SDC Headset Transmit Level Adjustment VIPedge based features, such as transfer or conference are available. No IPT features such as speaker phone or calling number display are available. A CO Line can be shared between an IP5122-SDC and another analog device like a fax machine or modem.
-
Page 33: Ip5122-Sdc Headset Transmit Level Adjustment
CO Line Specifications IP5122-SDC Headset Transmit Level Adjustment 3. Set the headset transmit level using FB1, FB2 and FB3 as shown in the table below. Headset Transmit Levels Transmit Level IPT Level ACO Level Max. (louder) +12 dB +8 dB +8 dB +8 dB +4 dB... -
Page 34: External Speaker/Ringer Amplifier (Bescb1A)
EXTERNAL SPEAKER/RINGER AMPLIFIER (BESCB1A) IP5122-SDC Headset Transmit Level Adjustment EXTERNAL SPEAKER/ The BESCB1A is a multi-functional, external, amplifier. It can be used to RINGER AMPLIFIER power a paging speaker, an amplified talk back speaker, or Loud Ringer (BESCB1A) for a telephone. There are two options utilizing an BESCB1A: •... -
Page 35: External Speaker Specifications
EXTERNAL SPEAKER/RINGER AMPLIFIER (BESCB1A) Telephone External Ringer 5.125 in. 130 mm 6.5 in. 2.125 in. 166 mm 54.5 mm Figure 1-8 BESCB1A External Amplifier Telephone External Ringer The loud ringing bell option enables the voice-first or ringing signal tone to be amplified without the use of other manufacturers’... -
Page 36: Wall Mount And Wiring The Bescb1A
EXTERNAL SPEAKER/RINGER AMPLIFIER (BESCB1A) Wall Mount and Wiring the BESCB1A • For Low impedance External Speaker - 8 ohm ~ 16 ohm (8 ohm recommended.) • 1 Watt (in 8 ohm External Speaker) • 0.5 Watt (in 16 ohm External Speaker) Wall Mount and Wiring the WARNING! Ensure the DC plug is not plugged into the BESCB1A. - Page 37 EXTERNAL SPEAKER/RINGER AMPLIFIER (BESCB1A) Wall Mount and Wiring the BESCB1A Mounting Screw Hole Mounting Screw Hole Figure 1-9 BESCB1A Rear View IPT Installation Manual Feb,, 2015 1-25...
-
Page 38: Telephone To External Speaker Connection
EXTERNAL SPEAKER/RINGER AMPLIFIER (BESCB1A) Telephone to External Speaker Connection Volume Control DC Power In Figure 1-10 BESCB1A Circuit Board Telephone to External The HESC1A-65 cable is used to connect the BESCB1A to the Speaker Connection telephone. This cable is used to connect the telephone to the BESCB1A as a Telephone External Ringer. - Page 39 EXTERNAL SPEAKER/RINGER AMPLIFIER (BESCB1A) Telephone to External Speaker Connection DKT/IPT To IOU (In Talkback) (See Note) To DKT/IPT Refer to Figure 1-13 for To IOU (No Talkback) Wiring connections. To MDFB 8 - 16 ohm To External Speaker 2K - 10K ohm Note: Some BESCB1A units were shipped with silk screen marks showing the DKT/IPT connections on terminals 3, 5, and 7, instead of 3, 4, and 5 as shown above.
-
Page 40: External Telephone Ringer
EXTERNAL SPEAKER/RINGER AMPLIFIER (BESCB1A) External Telephone Ringer External Telephone Ringer Using the BESCB1A as the interface and amplifier for a loud ringer external speaker. This option functions a an external loud ringer for an IPT telephone set. External Speaker BESCB AC Adapter IP5000-series Telephone External Ringer... -
Page 41: Chapter 2 - Programming
Chapter 2 – Programming All stations on the IPedge and VIPedge systems are either Toshiba IP5000 Series telephones or SIP telephones. The IP5131-SDL, IP5531-SDL, P5631-SDL IP telephones and the IP4100 SIP DECT are compatible with the VIPedge solution. Analog stations require an FXS gateway. These stations are programmed in the IPedge system as SIP stations. -
Page 42: Station Programming
STATION PROGRAMMING Add a Station STATION PROGRAMMING Station > Station Assignment Add a Station Click on the Add icon to add a new station. Edit a Station Click on a station in the list then, click on the Edit icon to change a station. -
Page 43: Station Assignment
Prime DN Enter an existing PDN or enter a PDN you wish to create for a new station. Station Type • IPT - Toshiba IP Telephones • SIP - SIP Telephones • Attendant - PC Attendant Console (IPedge systems only) •... -
Page 44: System Call Forward
PREFERENCE System Call Forward System Call Forward System Call Forward group number. Group number = 0~48 (Default = 0) Create New Mailbox If the Create New mailbox is check-marked (default) the Enterprise Manager will create the mailbox automatically when the station assignment is saved. -
Page 45: Qpl Night
PREFERENCE QPL Night QPL Night Queuing Restriction Level for Night mode. Value = 1~ 16 (default = 1) Note: Refer to System feature; Day Night Service LCR Group Least Cost Routing Group Number. Value = 1~ 16 (default = 1) Dialing Progress Tone Type of Tone to hear after dialing LCR access code. - Page 46 PREFERENCE Remote CF/DND Password Remote CF/DND Password to remotely set or cancel DND or Station Call Forward from Password another IPedge/VIPedge station. (default = no data) Travel COS Change Privilege to Change the Traveling Class of Service Override Code. Enabled or Disabled (default = Disabled) TGAC Override Trunk Group Access Code Override for Attendant console.
- Page 47 PREFERENCE CO Park & Hold CO Park & Hold Enabled: When this station parks a line call, CO or GCO buttons of the parked line that appear on other stations will be on hold. This will allow the other stations to press the CO or GCO button to pickup the parked call.
- Page 48 PREFERENCE LCR PDN Code LCR PDN Code Enter the number of digits that determine when to send the LCR PDN code. The PDN code is registered in the LCR Modified Digits Table. Four digits or three digits (default = three) Speaker OCA Enable or disable Speaker OCA on an IP telephone.
- Page 49 SUPPORTING ASSIGNMENTS Copy Icon SUPPORTING System > Class of Service ASSIGNMENTS LCR/DR > DR Guide Access the Destination Restriction Wizard LCR/DR > LCR Guide Access the Least Cost Routing Wizard The time a call remains parked until the systems signals the parking station - Park Recall Timer: Range 10 - 600 seconds (Default = 120 seconds) FLEXIBLE FEATURE...
- Page 50 KEY ASSIGNMENTS Ring Down Ring Down If this is to be a Ring Down station set Emergency Ring Down to Enabled. Set the Emergency Ring Down Timer to the number of seconds to wait before the IPT station rings down to the Emergency Ring Down Destination.
- Page 51 SIP terminal. You can use A-Z, a-z and 0-9 up to 64 characters. It doesn't have to be unique in the system. Toshiba recommends using a password for every SIP terminal to help prevent unauthorized users connecting to the system.
- Page 52 SYSTEM PORT NOTES Base UDP Port for IP Telephone Media Channel telephones. When a call is established between IP telephones, the system will check the assignment of secondary audio codecs. If there is matching assignment, it will be applied. If there is not, the user will hear reorder tone.
- Page 53 Chapter 4 – IPT Initialization, Reset and Auto Registration The processes described below requires an IP Telephone that is in factory default mode. If the telephone has been programmed, configured, or connected to a system it is no longer in default mode. To reset the IPT to default mode initialize the telephone then unplug the telephone to remove power before it restarts.
- Page 54 then, Getting Server Address This indicates that the IPT is not programmed into a VIPedge database. This process will take about 10 ~ 20 seconds. Getting Server Address Serial# not register The IPT will change to on-premise mode then, restart. Set to onpremise mode And restart...
- Page 55 The IPT will save the IP address of the IPedge server. IP Address Setting The IPT will register to the IPedge server. Registering to Primary Server In about five to 10 seconds the IPT will change to ready. The IPT is now ready for use.
- Page 56 In rare cases it may be necessary to manually set the server IP address in the telephone. If the telephone does not automatically register contact your network administrator or Toshiba’s Technical Support department. IPT Installation Manual July, 2013...
- Page 57 THIS IS THE END OF THE DOCUMENT.