
Related Manuals for Zanussi ZPHNL3W1


Summary of Contents for Zanussi ZPHNL3W1
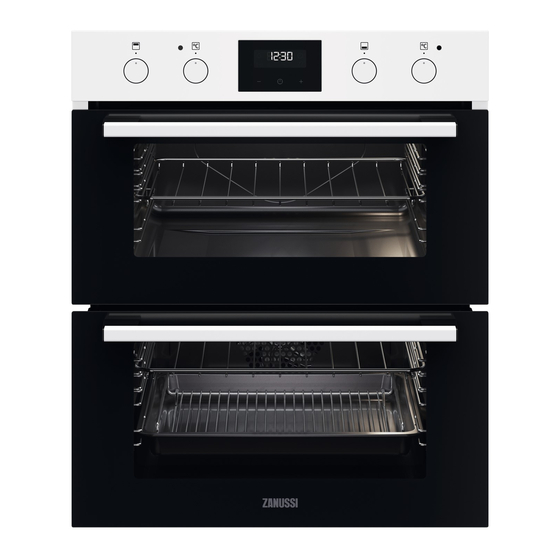
- Page 1 User Manual GETTING STARTED? EASY. ZPHNL3W1 ZPHNL3X1 EN User Manual Built-Under Double Oven...
-
Page 2: Safety Information
VISIT OUR WEBSITE TO: Get usage advice, brochures, trouble shooter, service and repair information: www.zanussi.com/support SAFETY INFORMATION Before the installation and use of the appliance, carefully read the supplied instructions. The manufacturer is not responsible for any injuries or damage that are the result of incorrect installation or usage. -
Page 3: Safety Instructions
Disconnect the appliance from the power supply before • carrying out any maintenance. If the mains power supply cable is damaged, it must be • replaced by the manufacturer, its Authorised Service Centre or similarly qualified persons to avoid an electrical hazard. The control panel must be connected to specified heating unit •... -
Page 4: Electrical Connection
• If the mains socket is loose, do not connect the Cabinet width 600-605 mm mains plug. • Do not pull the mains cable to disconnect the Cabinet depth 550 mm appliance. Always pull the mains plug. Height of the front of 715 mm •... -
Page 5: Internal Lighting
– do not put water directly into the hot • If you use an oven spray, follow the safety appliance. instructions on its packaging. – do not keep moist dishes and food in the INTERNAL LIGHTING appliance after you finish the cooking. –... -
Page 6: Product Description
PRODUCT DESCRIPTION GENERAL OVERVIEW Knob for the top oven functions Knob for the top oven temperature Temperature indicator / symbol for the top oven Display Knob for the main oven functions Temperature indicator / symbol for the main oven Knob for the main oven temperature Heating element Lamp Shelf support, removable... -
Page 7: Before First Use
A. Clock functions B. Timer BEFORE FIRST USE WARNING! Refer to Safety chapters. BEFORE FIRST USE The oven can emit an odour and smoke during preheating. Make sure that the room is ventilated. Preheat both ovens. Heat up one oven at a time. Step 1 Step 2 Step 3... -
Page 8: Main Oven Functions
Heating function Application To bake and roast food on one shelf position. Conventional Cooking To brown bread, cakes and pastries. To finish cooked dishes. Top Heat To bake cakes with crispy bottom and to preserve food. Bottom Heat To grill thin pieces of food and to toast bread. Grill To grill thin pieces of food in large quantities and to toast bread. -
Page 9: Clock Functions
NOTES ON: MOIST BAKING When you use this function the lamp automatically turns off. This function was used to comply with the energy efficiency class and ecodesign requirements For the cooking instructions refer to "Hints and tips" according to EU 65/2014 and EU 66/2014. Tests chapter, Moist Baking. - Page 10 How to set: Duration Step 1 Set an oven function and the temperature. Step 2 - press repeatedly. - starts to flash. Step 3 - press to set the duration. The display shows: - flashes when the set time ends. The signal sounds and the oven turns off. Step 4 Press any button to stop the signal.
-
Page 11: Using The Accessories
How to set: Minute Minder Step 1 - press repeatedly. - starts to flash. Step 2 - press to set the time. The function starts automatically after 5 sec. When the set time ends, the signal sounds. Step 3 Press any button to stop the signal. Step 4 Turn the knobs to the off position. -
Page 12: Trivet And Grill- / Roasting Pan
Deep pan: Push the tray between the guide bars of the shelf support. Wire shelf, Deep pan: Push the tray between the guide bars of the shelf support and the wire shelf on the guide bars above. TRIVET AND GRILL- / ROASTING PAN Step 1 Put the trivet into a deep pan. -
Page 13: Hints And Tips
HINTS AND TIPS BAKING Refer to Safety chapters. For the first baking, use the lower temperature. You can extend the baking time by 10 – 15 minutes if you bake cakes on more than one shelf position. DOUBLE OVEN Cakes and pastries at different heights do not Top oven always brown equally. - Page 14 Food Temperature (°C) Time (min) Shelf position Bread 200 - 220 30 - 35 Bread rolls / buns 170-180 10 - 15 Cakes: - Small & Queen 160 - 170 18 - 25 - Sponges 160 - 175 20 - 30 - Victoria Sandwich 160 - 170 18 - 25...
- Page 15 Food Temperature (°C) Time (min) Shelf position - Baked Jacket Potatoes 180 - 190 60 - 90 - Roast Potatoes 180 - 190 60 - 90 Yorkshire Pudding: - Large 200 - 210 25 - 40 - Individual 210 - 220 15 - 25 MOIST BAKING For the best results follow suggestions listed in the...
-
Page 16: Roasting Tables - Main Oven
Real cooking (°C) (min) time (min) Macaroons, baking tray or drip- 35 - 45 24 pieces ping pan Muffins, 12 baking tray or drip- 35 - 45 pieces ping pan Savory pas- baking tray or drip- 30 - 40 try, 20 pieces ping pan Short crust baking tray or drip-... - Page 17 Food Quantity Temperature (°C) Time (min) Shelf position Roast beef or fillet: per cm of thick- 170 - 180 8 - 10 well done, preheat ness the empty oven Pork Food Quantity Temperature (°C) Time (min) Shelf position Shoulder, neck, ham 1 - 1.5 160 - 180 90 - 120...
- Page 18 Poultry Food Quantity Temperature (°C) Time (min) Shelf position Poultry pieces 0.2 - 0.25 each 200 - 220 35 - 50 Half chicken 0.4 - 0.5 each 190 - 210 35 - 50 Poultry 1 - 1.5 190 - 210 45 - 75 Duck 1.5 - 2...
-
Page 19: Defrost - Main Oven
Food Time (min) Toasted Sandwiches 3 - 4 Steaks: - Rare 4 - 6 - Medium 6 - 8 - Well Done 12 - 15 Grilling - Main oven Time (min) Food Temperature (°C) Shelf position 1st side 2nd side Roast beef 210 - 230 30 - 40... -
Page 20: Care And Cleaning
Quantity Defrosting Further defrost- Food Comments (kg) time (min) ing time (min) Cream 2 x 0.2 80 - 100 10 - 15 Whip the cream when still slightly frozen in places. Gateau CARE AND CLEANING WARNING! Refer to Safety chapters. NOTES ON CLEANING Clean the front of the oven with a soft cloth with warm water and a mild detergent. - Page 21 Step 3 Pull the rear end of the shelf support away from the side wall and remove it. Step 4 Install the shelf supports in the opposite sequence. HOW TO REMOVE AND INSTALL: DOOR CAUTION! Carefully handle the glass, You can remove the door and the internal glass especially around the edges of the panels to clean it.
-
Page 22: Troubleshooting
Step 7 Clean the glass panel with wa- ter and soap. Dry the glass panel carefully. Do not clean the glass panels in the dish- washer. Step 8 After cleaning, do the above steps in the opposite se- quence. Step 9 Install the smaller panel first, then the larger and the door. -
Page 23: Service Data
Product number (PNC) ......... Serial number (S.N.) ......... ENERGY EFFICIENCY PRODUCT INFORMATION AND PRODUCT INFORMATION SHEET* Supplier's name Zanussi ZPHNL3W1 944171732 Model identification ZPHNL3X1 944171733 Top oven: 106.8 Energy Efficiency Index Main oven: 95.9 Top oven: A Energy efficiency class... -
Page 24: Energy Saving
Residual heat ENERGY SAVING When the cooking duration is longer than 30 min, The oven has features which help you reduce the oven temperature to minimum 3 - 10 save energy during everyday cooking. min before the end of cooking. The residual heat inside the oven will continue to cook. - Page 28 WWW.ZANUSSI.COM/SHOP...