Table of Contents
Advertisement
Available languages
Available languages
Quick Links
English ��������������������������������������������� 3
中文 ������������������������������������������������ 21
한글 ������������������������������������������������ 37
ไทย
�������������������������������������������������� 55
Operating Instructions
Rechargeable Shaver
(Household)
Model No.
ES‑BST6Q
ES‑BST2Q
Advertisement
Chapters
Table of Contents

Related Manuals for Panasonic Lamdash ES‑BST6Q


Summary of Contents for Panasonic Lamdash ES‑BST6Q
- Page 1 Operating Instructions Rechargeable Shaver (Household) ES‑BST6Q Model No. ES‑BST2Q English ��������������������������������������������� 3 中文 ������������������������������������������������ 21 한글 ������������������������������������������������ 37 ไทย �������������������������������������������������� 55...
-
Page 3: Table Of Contents
Charging the shaver ��������������������������10 Removing the built-in rechargeable How to use ����������������������������������������� 11 battery�������������������������������������������������20 Cleaning the shaver ��������������������������14 Specifications ������������������������������������20 Thank you for purchasing this Panasonic product. Before operating this unit, please read these instructions completely and save them for future use�... -
Page 4: Safety Precautions
WARNING Safety precautions To reduce the risk of injury, loss of life, electric shock, fire, and damage to property, always observe the following safety precautions. ►This product This shaver has a built-in rechargeable battery� Do Explanation of symbols not throw into fire, apply heat, or charge, use, or The following symbols are used to classify and describe the level leave in a high temperature environment�... - Page 5 WARNING Disconnect the AC adaptor when cleaning the shaver with water� ‑ Failure to do so may cause electric shock or injury. ►Power supply Regularly clean the power plug, the appliance plug and Do not connect or disconnect the adaptor to a the charging plug to prevent dust from accumulating�...
- Page 6 WARNING ►Note the following precautions Do not wrap the cord around the adaptor when storing� ‑ Doing so may cause the wire in the cord to break with the The supply cord cannot be replaced� If the cord is load, and may cause fire due to a short circuit. damaged, the AC adaptor should be scrapped�...
- Page 7 Handling of the removed battery when disposing If the battery fluid leaks out and comes in contact with the eyes, do not rub the eyes, and thoroughly rinse with clean water, such as tap water� DANGER ‑ Failure to do so may cause eye injury. Consult a physician immediately.
-
Page 8: Intended Use
• Treat yourself to wet lather shaves for at least three weeks and notice the difference. Your Panasonic WET/DRY shaver requires a little time to get used to because your skin and beard need ... -
Page 9: Before Use
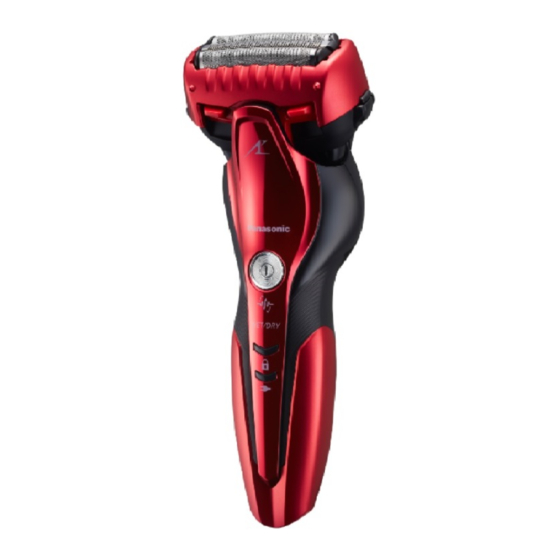
A Main body B AC adaptor (RE7-87) Before use 1 System outer foil Adaptor 2 Foil frame Power plug ► Using the carrying holder 3 Foil frame release buttons Cord The shaver can be kept vertically. When transporting the shaver, 4 Cleaning shutter ... -
Page 10: Charging The Shaver
• After charging is completed, turning the power switch ON with Charging the shaver the shaver plugged in will cause the charge status lamp ( ) to light up and then turn off after 5 seconds. • Turn the shaver off. This shows that the shaver is fully charged. -
Page 11: How To Use
How to use ES-BST6Q Charging with the charging stand 1. Insert the appliance plug into the ► Usable facial cleansers, etc� charging stand. 2. Place the shaver on the charging stand. Shaving 3. Plug in the adaptor into a household Shaving foam mode outlet. - Page 12 • When the switch lock lamp ( ) blinks after the power switch is Making foam ES-BST6Q pressed, the shaver will not operate as it is locked. Press the power switch for more than 2 seconds to unlock. (See page 14.) It is easier to make foam this way than by hand.
- Page 13 ► Using the trimmer Tips for better shaving Slide the trimmer handle up. Place at a right Apply the whole system outer foil angle to your skin and move downwards to trim perpendicularly against the skin and your sideburns. shave by slowly gliding the shaver over the face against the grain of the beard.
-
Page 14: Cleaning The Shaver
►Unlocking the power switch • The shaving sensor may not respond depending on the type and quantity of the shaving gel or the quantity of the foam. This is not 1. Press for more than 2. Once the shaver starts abnormal. - Page 15 ▼ ▼ ▼ ▼ To remove light dirt To remove heavy dirt 7. Wipe off any drops of water with a dry cloth. 8. Dry the outer foil section, the shaver, 4. Slide the cleaning shutter 4. Turn the shaver off after and the trimmer completely.
-
Page 16: Replacing The System Outer Foil And The Inner Blades
Cleaning with the brush ► Attaching the outer foil section After turning the water inlet surface to the front, securely attach the outer foil section to the shaver Remove the outer foil section and the inner blades. (See this page.) until it clicks. -
Page 17: Faq
6 months, so make if not used for an Panasonic for repair. sure to perform a full charge at extended period of time? least once every 6 months. - Page 18 Problem Action Problem Action Clean the beard trimmings from Although the shaver can be used the shaver. for about 2 weeks after a full When the shaver is extremely charge (assuming dry‑shave dirty, remove the foil frame and usages for 3 minutes per day), the wash with water.
-
Page 19: Battery Life
Problem Action Problem Action Apply oil. Apply oil. The blades will not move This can be improved by cleaning smoothly when there is no oil on every time after shaving. the blades, requiring more power. Replace the system outer foil and/ The shaver makes a high‑pitched or inner blades. -
Page 20: Removing The Built-In Rechargeable
Removing the built-in rechargeable battery Specifications Remove the built-in rechargeable battery before disposing of See the name plate on the AC adaptor. Power source the shaver� (Automatic voltage conversion) Please make sure that the battery is disposed of at an officially Motor voltage designated location if there is one. - Page 21 使用說明書 充電式 鬚刨 (家用) ES‑BST6Q 型號 ES‑BST2Q 目錄 安全須知 ............22 更換外層網面及內層刀片 ......33 用途 ..............25 常見問答集 ...........34 部件說明 ............26 疑難排解 ............34 使用前 ............27 電池壽命 ............36 充電 ..............27 拆除內置充電電池 ........36 使用方法 ............28 規格 ..............36 清洗 ..............31 感謝您購買本 Panasonic 產品。 使用本產品之前,請仔細閱讀本說明書,並妥善保存以供未來使用。...
-
Page 22: 安全須知
警告 安全須知 為減低受傷,死亡、觸電、火災及財物損失的風險,請務必遵照以 ► 本產品 下安全預防措施。 本鬚刨內建充電電池。請勿丟入火中、接觸熱源或在高 符號說明 溫的環境中充電、使用,或留置在高溫的環境中。 ‑ 否則可導致過熱、燃燒或爆炸。 以下符號用於為危險、傷害及財物損失的級別分類和作出解釋。若 不理會此等符號,不當使用本產品就可能會導致所述的危險、人身 切勿改裝或自行維修產品。 ‑ 否則可能導致火警、觸電或受傷。 傷害及財物損失。 請聯絡 Panasonic 直屬服務站進行維修(更換電池等) 。 危險 切勿拆卸本產品,棄置時除外。 表示潛在的危險會導致嚴重受傷或致命。 ‑ 否則可能導致火警、觸電或受傷。 ► 若發生異常現象或故障 警告 表示潛在的危險可能會導致嚴重受傷或致命。 若產品出現異常或故障情況,請立即停止使用產品及拔 除轉接器。 ‑ 否則會造成火災、觸電或受傷。 注意 < 異常或故障情況 > 表示可能會導致輕微受傷或財產損失的危險。 • 主機、充電座、轉接器或電源線變形或異常灼熱。... - Page 23 警告 如果不小心誤食潤滑油,不可催吐,請喝下大量的水, 然後就醫。 如果潤滑油沾到眼睛,請立刻用清水沖洗,然後就醫。 切勿將電源供應器和充電座浸在水中或用水洗滌。 ‑ 否則可能導致身體不適。 切勿將電源供應器和充電座置於裝滿水的水槽、浴缸上 方或附近。 ► 也請留意下列注意事項 如電源供應器損壞,或電源插頭未緊接家用電源插座上, 患有體能、感官或智力減退,或缺乏經歷和知識之人士 切勿使用本產品。 (含小孩) ,在無人監護或未獲告知如何使用的情況下不 切勿損壞、改裝或用力弄彎、拉址或纏繞電源線。此外, 得使用本產品。 切勿將重物放在電源線上或夾緊電源線。 請勿讓小孩使用本產品。 ‑ 否則可能會因短路而導致觸電或火警。 ‑ 否則可能導致意外或受傷。 切勿以超出家用電源插座或配線額定值的方式使用產品。 請勿自行換電源線,電源線一但損壞應當廢棄本電源供 ‑ 將太多插頭插至同一插座上,以致超出額定值,可能會因 應器,勿再使用。 過熱而導致火警。 ‑ 否則可能導致意外或受傷。 切勿使用非隨附的電源供應器和充電座於其他任何用途。 此外,切勿使用隨產品附上的電源供應器和充電座為任 何其他產品充電。 (請參閱第 26 頁。 ) ‑ 否則可能會因短路而導致灼傷或火警。 請務必使用與電源供應器上標示之額定電壓相符的電源...
- Page 24 注意 切勿掉落,或者與其他物體發生碰撞。 ‑ 否則可導致受傷。 不充電時,應從家用電源插座拔出轉接器。 ► 保護皮膚 ‑ 否則可因絕緣劣化造成漏電,導致觸電或火警。 請勿施加過大力量,將外層網面加壓在嘴唇或臉上及其 他部位。 如何處置從廢棄產品中拆下的電池 請勿在痘疤或受傷的皮膚上,直接使用外層網面。 切勿接觸內層刀片的刀片(金屬)部分。 ‑ 否則可能會導致身體皮膚受傷。 危險 切勿用力壓下外層網面。此外,使用時,切勿用手指或 指甲觸碰外層網面。 • 本充電電池僅能用於搭配此本產品使用。請勿將本電池 切勿將本產品運用在頭髮或身體任何其他部位的毛髮上。 搭配其他產品使用。 ‑ 否則可能導致皮膚受傷或縮短外層網面的壽命。 • 將電池從產品拆除後,請勿進行充電。 • 請勿丟入火中或加熱。 使用前,請檢查外層網面是否有破裂或變形。 • 請勿撞擊、拆解、改裝或以指甲穿刺。 ‑ 否則可能導致皮膚受傷。 • 請勿讓電池的正極和負極端子透過金屬物質相互接觸。 攜帶或存放時,務必將鬚刨放在便攜座中。 • 請勿將電池與金屬飾品, 如項鍊及髮夾等一起攜帶或存放。 ‑...
- Page 25 拆除充電電池後,切勿放在孩童或嬰兒可取得的地方。 式剃鬚。此鬚刨具防水功能,因此可在淋浴時使用,也可在水中 ‑ 若意外吞下電池,會傷害身體。 清洗。以下標誌表示可在盆浴或淋浴時使用。 若發生此狀況,請立即就醫。 若電池液體外漏且接觸到眼睛,請勿揉搓眼睛,並使用 清水(如自來水)徹底沖洗。 ‑ 否則可能會導致眼睛受傷。 請立即就醫。 ► 註 • 連續三周使用剃鬚泡進行濕式剃鬚,然後您能體會到一些變化。 注意 由於您的皮膚和鬍鬚需要大約一個月的時間來適應新的剃鬚方式, 因此您可能需要一點時間來適應此款 Panasonic 乾 / 濕兩用鬚刨。 • 請勿讓外層網面與堅硬的物體接觸。 若電池液體外漏且接觸到皮膚或衣物,請使用清水(如 自來水)沖洗。 否則可能會損壞刀片,因為刀片非常薄且很容易變形。 • 切勿使用吹風機或加熱風扇為主體風乾。 ‑ 否則可能導致發炎。 否則可能會造成故障或部件變形。 • 拆卸網層後,切勿讓鬚刨直接曝曬在陽光下。 否則可能造成防水橡膠劣化並減損防水功能,此可能造成故障。 • 使用後將鬚刨收納在低濕度的地方。 否則可能造成水氣凝結或鏽蝕,此可能造成故障。 • 將內層刀片保持在原有位置。如只有一塊內層刀片,鬚刨可能已...
-
Page 26: 部件說明
A 主體 外層網面部分 部件說明 1 外層網面 拆除外層網面的按鈕 2 網層 入水處 3 網層拆除按鈕 B 電源供應器 (RE7‑87) 正面 背面 4 清潔窗板 轉接器 5 手握位置 電源插頭 6 電源開關 電源線 可開啟與關閉鬚刨電源, ... -
Page 27: 使用前
使用前 充電 ► 使用便攜座 • 關掉電源。 • 裝上便攜座,以免刮傷外層網面。 您可以垂直方向存放鬚刨。攜帶鬚刨時,可使用便攜座來保護外層 • 擦去充電插座和充電座上的水滴。 網面。 • 攜帶鬚刨時,請務必在裝上便攜座前,清除所有的刮落鬍鬚。 將電源線插頭插入鬚刨。 將轉接器插入家用插座。 • 充電約 1 小時後完成。 充電時間可能會因充電容量而異。 ► 安裝便攜座 如圖所示裝上便攜座。 • 凸起部位 (a) 朝前,確實地對準鬚刨頭方向裝上便攜座,直到卡 住為止。 充電完成後,請拔除轉接器。 • 對電池充電 1 小時以上,並不會影響電池效能。 註 您無法在充電時使用鬚刨。 充電時 充電完成後 非正常充電期間 ►... -
Page 28: 使用方法
• 鬚刨第一次充電時或未使用超過 6 個月時,充電時間可能會有所 使用方法 改變,或者充電狀態指示燈( )可能會幾分鐘無法亮起。如繼 續保持連結,最後會亮起。 ► 可用的洗面乳等。 • 建議的充電環境溫度為 10 ℃到 35 ℃。在溫度極高或極低的情況 下對電池充電,可能需要較長的時間,或是電池可能無法正確充 泡沫製造模式 電。 剃鬚 ES-BST6Q 充電發生問題時,充電狀態指示燈( )會每秒閃爍兩次。 剃鬚泡沫 — 在建議的周遭環境溫度範圍內將鬚刨充電。 • 完全充電後,鬚刨大約可以使用 2 週。 (此是根據每天在 剃鬚劑 剃鬚凝膠 20 ℃ 到 30 ℃的環境溫度範圍內使用乾式剃鬚 3 分鐘) 剃鬚膏... - Page 29 在您的手掌上輕輕地按下刀片,並 ES-BST6Q 製造泡沫 混合手掌周圍的洗面乳等、在刀片 上下挪動以製造泡沫。 用這方法製造泡沫比用手製泡沫簡單。 • 若泡沫不足,增加少許水、熱水、或洗 取適量的洗面乳等在您的手掌上。 面乳,會更容易增加泡沫。 ► 註 • 製造泡沫前,檢查刀片是否有破裂或變形,並檢查清潔窗板是否 關閉。 加入適量的水或熱水。 • 切勿使用剃鬚劑(不包括剃鬚泡沫) 、洗面乳(含磨砂膏) 、或肥 皂,因為它們可能使刀片阻塞或無法製造泡沫。 剃鬚 按住電源開關 2 秒鐘或兩秒鐘以 按下 開始剃鬚。 • 當開關鎖定燈( )閃爍時將無法開啟 上,以轉換至泡沫製造模式。 電源,因為電源開關已經鎖定。 按著電源開關超過 2 秒以解除鎖定。 (請 參閱第 31 頁。 ) 開關鎖定燈號(...
- Page 30 ► 使用修剪器 達成更好的剃鬚方式建議 將修剪器推桿推起。放於與皮膚成直角的位置, 以外層網面垂直的方式靠緊皮膚,並將鬚 向下推動即可修剪鬢角。 刨輕輕朝您臉部的鬍渣處滑動以剃鬚。 • 此可伸展皮膚,讓鬍鬚立起,更徹底地 剃除下巴下方與喉嚨周圍的鬍鬚。 ► 使用修剪器的建議 輕輕地使修剪器邊緣垂直於皮膚,然後緩慢地往下移動。 • 為避免損壞外層網面,切勿在僅有一部 份的外層網面接觸的情況下剃鬚。 修剪鬢毛 預刮長鬍鬚 您也可以使用握筆方式握住鬚刨。 ► 註 • 「偵感」刀頭震動系統會根據鬍鬚濃密自動調整功率運作。 完成後,請按下 。 此將在鬍鬚濃密的地方以高功率剃鬚,在鬍鬚較少的地方降低功 率以減低對皮膚的磨擦。 • 剃鬚前,請確認清潔窗板有確實關上。 電池電量不足時 • 濕式剃鬚之後,請用水清洗主體,然後在外層網面上油。 操作鬚刨時,充電狀態指示燈( )會每秒閃爍 • 依鬍鬚濃密度或鬚刨頭的鬍鬚修剪量而定, 「偵感」刀頭震動系統 一次。 可能無法做出反應,且驅動聲音可能不變。這不是異常情況。 鬚刨關閉後會發出兩次嗶聲。 •...
- Page 31 開關鎖定的操作與顯示 清洗 ► 鎖定電源開關 我們建議在每次使用後即清潔鬚刨。 1. 將鬚刨關閉,並中斷連接電源供應器。 1. 按下 一次,然 3. 然後放開 。 2. 按著 超過 2 秒。 2. 在外層網面上塗抹一些肥皂和水。 • 開關鎖定燈 後放開。 • 關上清潔窗板。 • 鬚刨開始運作。 ( )將亮起 3. 打開鬚刨電源。 5 秒然後熄滅。 • 按住電源開關 2 秒鐘或兩秒鐘以上,以轉換至 • 鬚刨將停止運作。 ES-BST6Q 泡沫製造模式。...
- Page 32 ▼ ▼ ▼ ▼ 清除輕微鬍渣 清除大量鬍渣 7. 用乾布擦去水滴。 8. 讓外層網面部分、鬚刨和修剪器完全風 4. 滑動清潔窗板,直到發出 4. 10–20 秒後,關掉鬚刨電源。 乾。 「卡嗒」聲。 5. 取出外層網面部分並打開鬚 • 將鬚刨在陰暗處自然風乾,避免陽光 刨電源。 直射。 9. 請使用潤滑劑潤滑鬚刨。 此可讓刀片運作更順暢,並保持舒適的 剃鬚體驗。 5. 用清水清潔外層網面部分。 1. 在每層外層網面上放上一滴潤滑油。 2. 升起修剪器,並放上一滴油。 6. 用清水清潔鬚刨和外層網面 3. 啟動鬚刨,然後運作約五秒。 部分。 4. 關掉鬚刨,然後以軟布抹去外層網 面多餘的潤滑油。...
-
Page 33: 更換外層網面及內層刀片
► 更換內層刀片 1. 拆掉內層刀片。 ► 用短毛刷清潔 2. 一次插入內層刀片到定位。 • 利用毛刷依所示方向來清潔內層刀片。 • 切勿以跟刀片垂直的方向使用短刷,因此 舉會損壞內層刀片,使刀片不鋒利。 更換外層網面及內層刀片 ► 註 外層網面 每年一次 請勿丟棄網層。 內層刀片 每兩年一次 ► 更換零件 您可以在經銷商或 Panasonic 直屬服務站購買更換零件。 ► 取下外層網面部分 按下網層拆除按鈕,並向上提起外層網面部分。 外層網面 WES9087 ES‑BST6Q/ES‑BST2Q 的更換 零件 內層刀片 WES9068 ► 裝上外層網面部分 將入水處面轉到前面之後,將外層網面部分牢固安裝 到鬚刨直至聽到「卡嗒」一聲。... -
Page 34: 常見問答集
兩次嗶聲? 請將鬚刨充電。 洗。 (請參閱第 32 頁。 ) 疑難排解 即使鬚刨未與皮膚接觸, 更換外層網面或內層刀片。 「偵感」刀頭震動系統仍會 外層網面和內層刀片的預期使用壽命: 有反應。 請執行以下操作。 外層網面: 如果仍然無法解決問題,請與您購買本機的商店聯繫,或洽 約 1 年 Panasonic 直屬服務站進行維修。 內層刀片: 約 2 年 問題 措施 在泡沫製造模式下無法製 視洗面乳的類型而定,可能會難以製 ES-BST6Q 解除鎖定開關鎖定。 造泡沫。 造泡沫,所以請調整水量或洗面乳。 電源開關無法切換到開啟。 (請參閱第 31 頁。 ) 在泡沫製造模式中,所製 製造泡沫之前,把任何鬍鬚屑沖洗... - Page 35 問題 措施 問題 措施 建議的充電環境溫度為 10 ℃到 可以藉由在每次剃鬚後加以清潔來 臭味越來越濃。 35 ℃。如果在建議的環境溫度以 改善。 無法對鬚刨充電。 外的氣溫中充電,鬚刨可能會需要 鬚刨非常髒時,請先使用清潔毛刷 較長的充電時間或完全無法充電。 即使將水從入水處倒出後, 清除刮落的鬍子。 雖然充飽電後鬚刨約可使用 2 週 仍無法妥善清潔鬚刨。 或者,除去網層並用水清洗。 (假設每天使用乾式剃鬚 3 分鐘) , (請參閱第 32 頁。 ) 但依據使用鬚刨的方式和地點(例 可以藉由在每次剃鬚後加以清潔來 如用於濕式剃鬚) ,使用天數可能 改善。 即使充飽電,操作時間仍 會減少。 若鬍子沾黏到內層刀片,請使用毛 刮落的鬍子四處飛濺。 然很短。...
-
Page 36: 電池壽命
電池壽命 規格 電池使用壽命為 3 年。使用者不應自行更換本鬚刨中的電池。請交 請參閱電源供應器上標籤。 由 Panasonic 直屬服務站來更換電池。 電源 (自動變壓) 拆除內置充電電池 發動機電壓 3.6 V 充電時間 約一小時 此鬚刨內的電池請勿由消費者自行替換。 如您的國家/地區有指定認可棄置電池的地方,請確保將電池棄置 此產品只適於家居內使用。 於這些地方。 下圖只能用於棄置鬚刨時。切勿使用下圖作維修之用。若您自行拆 解鬚刨,產品就不再具有防水功效,並可能會導致產品損壞。 • 將鬚刨從電源供應器上拆除。 • 按電源開關接通電源,保持電源的開啟狀態直至電池完全放電。 • 執行步驟 1 至 6 以拉出並拆除電池。 • 請小心,不要讓已移除電池的正負極端子發生短路,且必須在端 子上使用膠帶使其絕緣。 ... - Page 37 면도기 충전 ........43 내장된 충전식 배터리 분리 ....53 면도기 사용 ........45 사양 ..........54 면도기 청소 ........48 본 Panasonic 제품을 구입해 주셔서 감사합니다 . 이 기기를 사용하기 전에 , 이 사용 설명서를 잘 읽고 다음을 위해 보관하십시오 .
-
Page 38: 안전 주의 사항
경고 안전 주의 사항 부상 , 사망 , 감전 , 화재 및 재산상의 피해 위험을 줄이려면 항상 ►본 제품 다음의 안전 주의 사항을 준수하십시오 . 본 면도기에는 충전식 배터리가 내장되어 있습니다 . 기호 설명 면도기를 불 속에 폐기하거나 , 열을 가하거나 , 고온 환경에서... - Page 39 경고 전원 플러그 , 기기 플러그와 충전 플러그를 정기적으로 청소하여 먼지가 축적되지 않게 하십시오 . ‑ 이렇게 하지 않으면 습도로 인해 절연 장애가 발생하여 AC 어댑터와 충전 스탠드를 물에 담그거나 물로 화재를 초래할 수 있습니다 . 세척하지 마십시오 . ►사고 예방 물이...
- Page 40 주의 코드를 잡은 상태로 어댑터 또는 기기 플러그를 뽑지 마십시오 . ‑ 이렇게 하면 감전이나 부상을 초래할 수 있습니다 . ►피부 보호 가족 또는 다른 사람과 면도기를 공유해서 사용하지 면도망을 입술이나 기타 안면 부위에 댈 때는 너무 세게 마십시오 . 누르지...
- Page 41 • 최소한 3 주간 습식 면도 거품으로 면도해 보시고 그 차이를 확인하십시오 . 여러분의 피부 및 수염은 새로운 면도 방식에 충전식 배터리를 분리한 후에는 어린이와 유아의 손에 적응하는 데에 약 한 달이 소요되기 때문에 Panasonic WET/DRY 닿지 않도록 보관하십시오 . 면도기의 사용에 익숙해지는 데에는 다소 시간을 필요로 합니다 .
-
Page 42: 부품 명칭
트리머 핸들 C 충전 스탠드 (RC9‑86) 부품 명칭 ES-BST6Q 면도망 부위 면도망 분리 단추 D 충전 플러그 급수 주입구 E 스탠드 소켓 앞면 뒷면 B AC 어댑터 (RE7‑87) 부속품 어댑터 D 휴대 홀더 ... -
Page 43: 면도기 충전
► 휴대 홀더 장착 면도기 충전 휴대 홀더를 그림과 같이 장착하십시오 . • 돌출부 ( a ) 가 앞쪽을 향하게 한 상태로 , 찰칵 소리가 날 때까지 • 면도기 전원을 끕니다 . 면도기 헤드의 방향에 맞춰 휴대 홀더를 면도기에 확실히 •... - Page 44 • 충전이 완료된 후 , 면도기를 연결한 상태로 전원 스위치를 켜면 ES-BST6Q 충전 스탠드를 사용하여 충전 충전 표시 램프 ( ) 에 불이 켜졌다가 5 초 후에 꺼집니다 . 1. 충전 스탠드에 기기 플러그를 면도기가 완전히 충전되었음을 나타냅니다 . • 면도기를 처음으로 충전하거나 6 개월 이상 사용하지 않은 연결합니다...
-
Page 45: 면도기 사용
면도기 사용 ES-BST6Q 거품 만들기 손으로 하는 것보다 이 방법이 더 쉽게 거품을 만들 수 있습니다 . ► 사용 가능한 안면 세정제류 손바닥에 적절한 양의 안면 면도 거품 세정제를 묻힙니다 . 모드 면도 ES-BST6Q 면도 거품 — 면도 에이전트 면도 젤 면도... - Page 46 • 전원 스위치를 누른 후 스위치 잠금 램프( )가 깜박이는 최적 면도를 위한 도움 정보 경우는 면도기가 잠겨 있어 작동하지 않습니다 . 전원 면도망 전체가 피부에 수직으로 닿도록 스위치를 2 초 이상 눌러 잠금을 해제하십시오 . 접촉시키고 얼굴에서 면도기를 수염이 (47 페이지를...
- Page 47 ► 트리머 사용 스위치 잠금의 작동과 표시 트리머 핸들을 위로 밉니다 . 피부와 각도를 맞춘 후 면도기를 아래로 이동하면서 귀밑털을 ►전원 스위치 잠그기 정리합니다 . 1. 일단 을 누른 에서 손을 을 2 초 이상 후 손을 뗍니다 . 누릅니다 . 뗍니다...
-
Page 48: 면도기 청소
►전원 스위치 해제하기 ▼ ▼ 가벼운 이물질 제거 다량의 노폐물 제거 방법 을 2 초 이상 누릅니다 . 2. 면도기가 작동을 시작하면 • 스위치 잠금 램프 ( ) 가 4. 찰칵 소리가 날 때까지 4. 10–20 초 후에 면도기를 꺼집니다 . 클리닝... -
Page 49: 면도망과 내부 면도날 교환
▼ ▼ 솔을 사용하여 청소 7. 마른 천으로 물기를 제거합니다 . 면도망 부위 및 내부 면도날을 제거합니다 . 8. 면도망 부위 , 면도기 및 트리머를 ( 이 페이지를 참조하십시오 .) 완전히 건조시켜야 합니다 . 제공된 청소용 솔만 사용하십시오 . • 면도기를 그늘에 놓고 말리고 ►... -
Page 50: 자주 묻는 질문
► 면도망 교환 자주 묻는 질문 1. 면도망 분리 단추를 누르고 면도망을 아래쪽으로 누릅니다 . • 면도망 분리 단추를 과도한 힘으로 질문 대답 누르지 마십시오 . 6 개월 이상 사용하지 않으면 지키지 않으면 면도망이 구부러져 면도망 얼마 동안 사용하지 배터리의 성능이 떨어지므로 프레임에... -
Page 51: 문제 해결
청소하십시오 . 다음과 같은 조치를 취하십시오 . 면도기가 매우 더러워진 경우 , 그래도 문제가 해결되지 않으면 제품을 구입한 매장이나 면도망 프레임을 분리하여 물로 Panasonic 공인 서비스 센터에 연락하여 수리를 받으십시오 . 세척하십시오 . (48 페이지를 참조하십시오 .) 면도기가 피부에 닿지 문제... - Page 52 문제 조치 문제 조치 이 면도기는 완충 후 약 2 주 동안 오일을 바르십시오 . 사용할 수 있지만 (하루 3 분씩 면도날에 윤활유가 없는 경우 건식 면도할 경우), 사용 가능 면도날은 부드럽게 움직이지 일수는 면도기 사용 방식이나 장소 않으며 더 많은 출력이 필요합니다 . (예...
-
Page 53: 배터리 수명
내장된 충전식 배터리 분리 문제 조치 오일을 바르십시오 . 면도기를 폐기하기 전에 내장된 충전식 배터리를 분리합니다 . 이 문제는 면도 후마다 면도기를 현지에 지정 폐기 장소가 있는 경우 이 폐기 장소에 배터리를 청소하면 개선될 수 있습니다 . 폐기해야 합니다 . 면도망... - Page 54 AC 어댑터의 제품 레이블을 참조하십시오 . 전원 (자동 변압 방식 채택) 모터 전압 3.6 V 충전 시간 약 1 시간 본 제품은 가정에서만 사용할 수 있습니다 . 품 명:Rechargeable shaver 모델명:ES‑BST6Q/ES‑BST2Q/RE7‑87 상호명:Panasonic Corporation 제조자:Panasonic Corporation (Panasonic Corporation Hikone Factory) Made in Japan 제조일자:제품내 별도각인표시 R‑REM‑Pa3‑ES‑BST6Q...
- Page 55 การท� า ความสะอาดเครื ่ อ งโกนหนวด ......65 ขอขอบคุ ณ ที ่ ส ั ่ ง ซื ้ อ ผลิ ต ภั ณ ฑ์ ข อง Panasonic ก่ อ นใช้ ง านเครื ่ อ งนี ้ โปรดอ่ า นคู ่ ม ื อ การใช้ ง านโดยละเอี ย ดและเก็ บ รั ก ษาคู ่ ม ื อ นี ้ ไ ว้ เ พื ่ อ ใช้ ง านในอนาคต...
-
Page 56: ข้ อ ควรระวั ง ด้ า นความปลอดภั ย
ข้ อ ควรระวั ง ด้ า นความปลอดภั ย ค� า เตื อ น เพื ่ อ ลดความเสี ่ ย งจากการบาดเจ็ บ การเสี ย ชี ว ิ ต ไฟฟ้ า ช็ อ ต ไฟไหม้ และความเสี ย หายต่ อ ทรั พ ย์ ส ิ น ควรศึ ก ษาข้ อ ควรระวั ง ด้ า นความปลอดภั ย ต่ อ ไปนี ้ เ สมอ ►ผลิ... - Page 57 ค� า เตื อ น ►การป้ อ งกั น อุ บ ั ต ิ เ หตุ อย่ า วางอุ ป กรณ์ ไ ว้ ใ นที ่ ท ี ่ เ ด็ ก หรื อ ทารกเอื ้ อ มถึ ง และไม่ ใ ห้ เ ด็ ก ใช้ ง าน เครื...
- Page 58 ข้ อ ควรระวั ง วิ ธ ี จ ั ด การกั บ แบตเตอรี ่ ท ี ่ ถ ู ก ถอดออกจากเครื ่ อ ง อั น ตราย อย่ า ใช้ แ รงกดตะแกรงใบมี ด และอย่ า ให้ น ิ ้ ว หรื อ เล็ บ สั ม ผั ส ตะแกรงใบ มี...
-
Page 59: วั ต ถุ ป ระสงค์ ข องการใช้ ง าน
ค� า เตื อ น วั ต ถุ ป ระสงค์ ข องการใช้ ง าน • เครื ่ อ งโกนหนวดนี ้ ส ามารถใช้ ส � า หรั บ การโกนหนวดขณะตั ว เปี ย กโดยใช้ ค ู ่ ก ั บ น� ้ า ยาโกน หลั... -
Page 60: การจ� า แนกส่ ว นต่ า งๆ
A ตั ว เครื ่ อ งหลั ก B หม้ อ แปลงไฟฟ้ า (RE7‑87) การจ� า แนกส่ ว นต่ า งๆ 1 ตะแกรงใบมี ด อะแดปเตอร์ 2 กรอบแผ่ น ป้ อ งกั น ปลั ๊ ก ไฟ ด้... -
Page 61: ก่ อ นใช้ ง าน
ก่ อ นใช้ ง าน วิ ธ ี ก ารชาร์ จ เครื ่ อ งโกนหนวด • ปิ ด เครื ่ อ ง ► การใช้ อ ุ ป กรณ์ ป ้ อ งกั น ด้ า มจั บ • ประกอบอุ ป กรณ์ ป ้ อ งกั น ด้ า มจั บ โดยไม่ ใ ห้ ข ี ด ข่ ว นกั บ ตะแกรงใบมี ด เครื... -
Page 62: วิ ธ ี ใ ช้ ง าน
• หลั ง จากการชาร์ จ เสร็ จ เรี ย บร้ อ ยแล้ ว การเปิ ด สวิ ต ช์ ไ ฟขณะที ่ เ สี ย บปลั ๊ ก เครื ่ อ งโกนหนวด วิ ธ ี ใ ช้ ง าน อยู ่ จะท� า ให้ ไ ฟสถานะการชาร์ จ ( ) สว่ า งขึ ้ น และจะดั บ ลงหลั ง จากนั ้ น 5 วิ น าที สถานะนี... - Page 63 ใช้ ฝ ่ า มื อ กดใบมี ด เบาๆ เพื ่ อ ผสม การท� า โฟม ES-BST6Q ผลิ ต ภั ณ ฑ์ ล ้ า งหน้ า ฯลฯ เลื ่ อ นใบมี ด ขึ ้ น ลง การท� า โฟมด้ ว ยวิ ธ ี น ี ้ จ ะง่ า ยกว่ า การใช้ ม ื อ เพื...
- Page 64 ► การใช้ ใ บมี ด ตกแต่ ง เคล็ ด ลั บ เพื ่ อ การโกนหนวดที ่ ด ี ย ิ ่ ง ขึ ้ น เลื ่ อ นใบมี ด ส� า หรั บ ตกแต่ ง ขึ ้ น ให้ อ ยู ่ ใ นมุ ม ขวากั บ ผิ ว ของคุ ณ และ ใช้...
-
Page 65: การท� า ความสะอาดเครื ่ อ งโกนหนวด
การท� า งานและการแสดงล็ อ คสวิ ต ช์ การท� า ความสะอาดเครื ่ อ งโกนหนวด เราแนะน� า ให้ ท � า ความสะอาดเครื ่ อ งโกนหนวดทุ ก ครั ้ ง หลั ง การใช้ ง าน ► การล็ อ คสวิ ต ช์ ไ ฟ 1. - Page 66 ▼ ▼ ▼ ▼ การเอาสิ ่ ง สกปรกเล็ ก ๆ ออก ในการน� า สิ ่ ง สกปรกจ� า นวนมากออก 7. เช็ ด หยดน� ้ า ออกด้ ว ยผ้ า แห้ ง 8. เช็ ด ส่ ว นของตะแกรงใบมี ด เครื ่ อ งโกนหนวด และใบ 4.
-
Page 67: การเปลี ่ ย นตะแกรงใบมี ด และใบมี ด ด้ า นใน
► เปลี ่ ย นระบบแผ่ น ป้ อ งกั น ด้ า นนอก การท� า ความสะอาดด้ ว ยแปรง 1. กดปุ ่ ม ปลดตระแกรงใบมี ด ออกและกดตระแกรงใบมี ด ลง • อย่ า กดปุ ่ ม ปลดตั ว เครื ่ อ งชั ้ น นอกแรงเกิ น ไป น�... -
Page 68: ค� า ถามที ่ พ บบ่ อ ย
แบตเตอรี ่ จ ะเสื ่ อ มสภาพหรื อ ไม่ บริ ก ารที ่ ไ ด้ ร ั บ อนุ ญ าตจาก Panasonic เพื ่ อ ท� า การซ่ อ มแซม กว่ า 6 เดื อ น ดั ง นั ้ น ควรตรวจสอบว่ า มี ก ารชาร์ จ... - Page 69 ปั ญ หา การแก้ ไ ข ปั ญ หา การแก้ ไ ข น� า เศษหนวดเคราออกจากเครื ่ อ งโกนหนวด ใช้ เ ครื ่ อ งในอุ ณ หภู ม ิ แ วดล้ อ มตั ้ ง แต่ 5 หรื อ °C เมื ่ อ เครื ่ อ งโกนหนวดสกปรกมาก ให้ ถ อดกรอบ สู...
-
Page 70: อายุ ก ารใช้ ง านแบตเตอร
อายุ ก ารใช้ ง านแบตเตอรี ่ ปั ญ หา การแก้ ไ ข ปั ญ หานี ้ ส ามารถแก้ ไ ขได้ โ ดยการท� า ความสะอาด อายุ ก ารใช้ ง านแบตเตอรี ่ ค ื อ 3 ปี แบตเตอรี ่ ท ี ่ อ ยู ่ ใ นเครื ่ อ งโกนหนวดไม่ ไ ด้ ผ ลิ ต ขึ ้ น มาเพื ่ อ ให้ เครื... -
Page 71: รายละเอี ย ด
รายละเอี ย ด ดู แ ผ่ น ป้ า ยชื ่ อ บนหม้ อ แปลงไฟฟ้ า แหล่ ง ไฟฟ้ า (เปลี ่ ย นแรงดั น ไฟฟ้ า อั ต โนมั ต ิ ) แรงดั น ไฟฟ้ า มอเตอร์ 3.6 V เวลาชาร์... - Page 72 Panasonic Corporation http://www.panasonic.com © Panasonic Corporation 2018 Printed in Japan F EN, HK, KO, TH ES9700BST6Q1J Y0418‑0...