Advertisement
Quick Links
Ceiling Mount Bracket
Operating Instructions
WV-Q155C
Model No.
WV-Q155CE
WV-Q155S
WV-Q155SE
Before attempting to connect or operate this product,
please read these instructions carefully and save this manual for future use.
The model number is abbreviated in some descriptions in this manual.
Advertisement

Related Manuals for Panasonic WV-Q155C


Summary of Contents for Panasonic WV-Q155C
- Page 1 Ceiling Mount Bracket Operating Instructions WV-Q155C Model No. WV-Q155CE WV-Q155S WV-Q155SE Before attempting to connect or operate this product, please read these instructions carefully and save this manual for future use. The model number is abbreviated in some descriptions in this manual.
- Page 2 This bracket can be used for an area with weak pull-out strength such as plasterboard in a double ceiling. This bracket is an embedded type to reduce the exposed portion of the camera body. • WV-Q155C: Clear dome cover • WV-Q155S: Smoked dome cover (approx. 50 % of transmittance) Precautions •...
- Page 3 • Select an installation area that can support the total weight. If a selected area is too weak to support the total weight, a fall of the product may occur resulting in injury. Installation work shall be started after sufficient reinforcement. •...
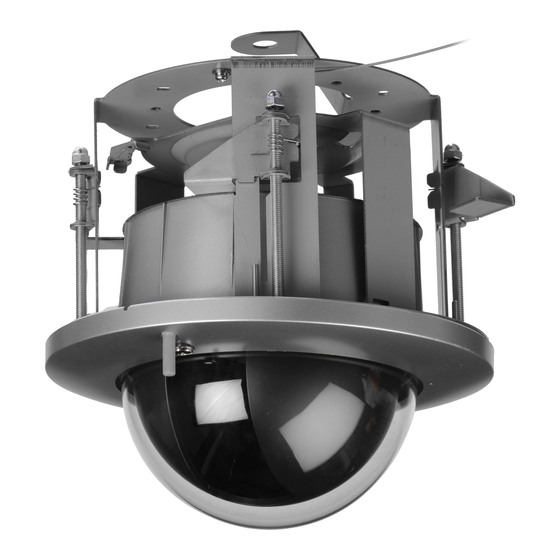
- Page 4 Major Operating Controls and Their Functions Mounting base Camera mounting plate Fixing screw to be used for cover fall prevention Hole for microphone cable Microphone stand* Decorative cover Dome cover * If a microphone is used, mount the microphone on the rubber-made microphone stand. Unless the microphone is used, cut the rubber with a nipper or conduct another treatment.
- Page 5 Installations Be sure to read "Precautions" before installation. The Installation Guide of the network camera shall be read as well. 1. Remove the decorative cover. q Loosen the fixing screw (unremov- able) to be used for cover fall pre- vention. Fixing screw to be used for cover fall prevention w Unhook the decorative cover from...
- Page 6 3. Put Template A (accessory) against the ø12 mm {1/2"} Ceiling face ceiling and make a hole. (4 positions) q Make 4 holes of 12 mm {1/2"} in diam- ø160 mm {6-5/16"} eter. w Remove the center part from the tem- plate.
- Page 7 5. Mount the safety wire angle (accessory) on the 2nd anchor bolt and connect the safe- ty wire (accessory) to the angle. q Disconnect the safety wire from the Upper side Anchor bolt Mark w safety wire angle. w Engage the face marked q with the anchor bolt.
- Page 8 7. Insert the mounting base into the hole made in Step 3. 8. Secure the mounting base to the ceil- ing board with the ceiling board fixing 1st anchor bolt screws (4 positions). q Engage the top of the mounting base Insert the anchor bolt with the 1st anchor bolt.
- Page 9 10. Install the inner cover. Inner cover Slide the covers located on the both lat- eral sides of the camera and put the inner cover on the camera until the hooks inside the inner cover are held in the holes of the camera (until a click is heard).
- Page 10 11. Mount the camera on the camera Camera fixing mounting plate. screw q Put the camera onto the camera mounting plate with aligning the lock plate of the camera with the guide of the camera mounting plate and Rotating portion aligning the center of the camera mounting plate with the center of the Stationary portion...
- Page 11 Important: The mark, "FRONT", shall be aligned with the Panasonic logo. 16. Tighten the fixing screw to be used for cover fall prevention. (Recommended tightening torque: 1.6 N·m {16 kgf·cm}) Projections...
- Page 12 Panasonic Canada Inc. 5770 Ambler Drive, Mississauga, Ontario, L4W 2T3 Authorised Representative in EU: Canada Panasonic Testing Centre 1-877-495-0580 Panasonic Marketing Europe GmbH https://www.panasonic.com/ca/ Winsbergring 15, 22525 Hamburg, Germany © Panasonic i-PRO Sensing Solutions Co., Ltd. 2019 Ns1010-5109 3TR006652FZA Printed in China...