Beko SIM 3122 T User Manual
Hide thumbs
Also See for SIM 3122 T:
- User manual (141 pages) ,
- User manual (36 pages) ,
- User manual (125 pages)
Table of Contents
Advertisement
Available languages
Available languages
Quick Links
Advertisement
Table of Contents

Related Manuals for Beko SIM 3122 T


Summary of Contents for Beko SIM 3122 T
- Page 1 Steam Iron User Manual SIM 3122 T EN TH VN CN ID 01M-8814923200-1319-01...
- Page 2 CONTENTS ENGLISH 9-21 22-36 ภาษาไทย 37-51 TIẾNG ANH 52-63 英文 BAHASA INDONESIA 64-78 2 / EN Steam Iron / User Manual...
- Page 3 10 11...
- Page 4 30 sec. 30 sec. 8 min. Auto-Off Auto-Off Auto-Off...
- Page 6 OPERATION SHOCK STEAM AUTOMATIC SHUTDOWN การใช้ ง าน การพ่ น ไอน� ้ า ปิ ด เครื ่ อ งอั ต โนมั ต ิ VẬN HÀNH HƠI NƯỚC SỐC NHIỆT TẮT NGUỒN TỰ ĐỘNG 操作 冲击蒸汽 自动关闭 PENGOPERASIAN UAP KEJUT PEMATIAN OTOMATIS CLEANING AND CARE SELF-CLEAN การท�...
- Page 7 Meanings of the symbols manual first! Following symbols are used in the Dear Customers, various section of this manual: Thank you for selecting a Beko Important information product. We hope that you get the and useful hints about best results from your product usage.
-
Page 8: Technical Data
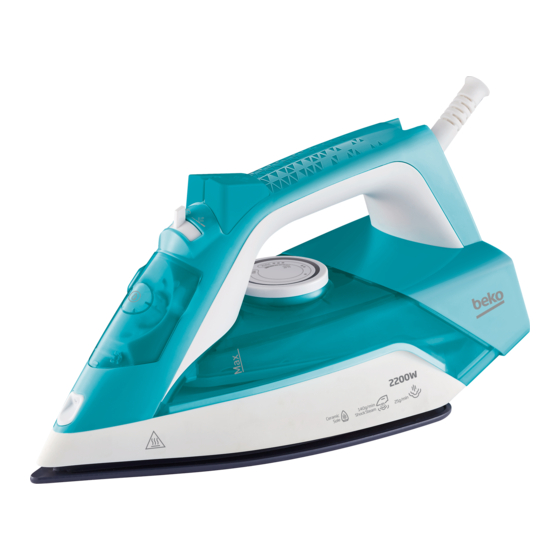
Technical data 1. Power cable 2. Iron base plate Voltage : 220-240V/50-60Hz 3. Water tank Power consumption : 4. Thermostat indicator and Auto- 2200 W Off light 5. Temperature adjustment knob Insulation class : I 6. Soleplate Shock steam amount : 7. -
Page 9: Important Safety And Environmental Instructions
1 Important safety and environmen- tal instructions This section contains safety instructions that will help protect from risk of personal injury or property damage. Failure to follow these instructions invalidates the granted warranty. 1.1 General safety This appliance complies with the international •... - Page 10 1 Important safety and environmen- tal instructions Do not leave the product unattended while it is • plugged in. Unplug the product before filling the water reser- • voir with water. Operate and store the appliance on a stable sur- •...
- Page 11 1 Important safety and environmen- tal instructions Only use the original parts or parts recommended • by the manufacturer. Do not attempt to dismantle the appliance. • Your mains power supply should comply with • the information supplied on the rating plate of the appliance.
-
Page 12: Compliance With Weee Directive And Disposing Of The Waste Product
1 Important safety and environmen- tal instructions The soleplate and its surrounding area can be • extremely hot. Contacting hot surfaces may cause burns. Therefore while or just after using the appliance, pay attention not to touch the hot surfaces. Never use the appliance in or near to combusti- •... -
Page 13: Compliance With Rohs Directive
1 Important safety and environmen- tal instructions 1.3 Compliance with RoHS Directive The product you have purchased complies with EU RoHS Directive (2011/65/EU). It does not contain harmful and prohibited materials speci- fied in the Directive. 1.4 Package Information Packaging materials of the product are manufactured from recy- clable materials in accordance with our National Environment Regulations. -
Page 14: Operation
2 Operation 2.1 Intended use This appliance is intended only for household use and ironing; it is not suitable for professional use. 2.2 Initial use Prior to initial use, fill twice and vaporize to remove the manufacturing residues. Meanwhile, use shock steam button (11) frequently. You can smell a mild odour or see white sediments coming out of the soleplate holes. -
Page 15: Setting The Temperature
2 Operation 2.4 Setting the temperature • After the appliance is plugged in, set the temperature according to the type of your fabric by turning the temperature adjustment knob (5) in clockwise direction (see. 2.5). - Thermostat indicator light (4) will light up. •... -
Page 16: Steam Ironing
2 Operation WARNING: Before ironing first check the label of the garment. 2.6 Steam ironing WARNING: • For ironing with steam, temperature adjustment knob should be between “ “ and “max” position. • Turn the steam adjustment button(9) to desired steam level. -
Page 17: Vertical Steam
2 Operation 2.8 Vertical steam WARNING: • Hold the appliance 15-30 cm away from the garment and curtains. • During the ironing if the thermostat indicator light (4) turns on, before proceeding with the shock steam process wait for the light to turn off. •... -
Page 18: Automatic Shutdown (Auto-Off)
2 Operation 2.12 Automatic Shutdown (Auto-Off) • In case of automatic turn off the auto-off light (4) flashes. • If the appliance is moved in horizontal position it will be turned on. • It may take 60 seconds for the soleplate (6) to reach the previously set temperature. -
Page 19: Cleaning And Maintenance
3 Cleaning and maintenance 3.1 Cleaning WARNING: • When you are finished with ironing, unplug the appliance. You can drain the water in the reservoir by opening the refill lid (8) and tilting the iron to the front. • Do not use gasoline, solvent and abrasive cleaning agents or hard brush to clean the appliance. - Page 20 3 Cleaning and maintenance 3.4 Handling and transportation • During handling and transportation, carry the appliance in its original packaging. The packaging of the appliance protects it against physical damages. • Do not place heavy loads on the appliance or the packaging. The appliance may be damaged.
-
Page 21: Troubleshooting
4 Troubleshooting Although the appliance is plugged in, soleplate (6) does not heat up. The appliance may be connected improperly. >>> Check the plug and power cable (1) of the appliance. Temperature adjustment knob (5) may be at the Min. position. >>> Turn the temperature adjustment knob in the clockwise direction up to the steam sign. - Page 22 ข อ บ ค ุ ณ ส � า ห ร ั บ ก า ร เ ล ื อ ก ผลิ ต ภั ณ ฑ์ ข อง Beko เราหวั ง ว่ า ข ้ อ มู ล ที ่ ส� า คั ญ แ ล ะ...
- Page 23 ข้ อ มู ล ทางเทคนิ ค 1. สายไฟ 2. แผ่ น ฐานของเตารี ด แรงดั น ไฟฟ้ า : 220-240 โวลต์ ~ 3. แทงค์ บ รรจุ น � ้ า 50/60 เฮิ ร ตซ์ 4. ไฟแสดงเทอร์ โ ทสแตตและไฟ ก� า ลั ง ไฟฟ้ า : การปิ...
- Page 24 1 ค� า แนะน� า ด้ า นความปลอดภั ย และสิ ่ ง แวดล้ อ ม ที ่ ส � า คั ญ ในบทน ี ้ ป ระกอบด ้ ว ยค � า แนะน � า ด ้ า นความปลอดภ ั ย ที...
- Page 25 อาการเส ี ย อ ื ่ น ๆ ให ้ ต ิ ด ต ่ อ ต ั ว แทนบร ิ ก ารท ี ่ ไ ด ้ ร ั บ การร ั บ รองจาก BEKO ห ้ า มใช ้ ง านเคร ื ่ อ ง...
- Page 26 1 ค� า แนะน� า ด้ า นความปลอดภั ย และสิ ่ ง แวดล้ อ ม ที ่ ส � า คั ญ ให ้ ใ ช ้ ช ิ ้ น ส ่ ว นอะไหล ่ ด ั ้ ง เด ิ ม หร ื อ ช ิ ้ น ส ่ ว นอะไหล ่ ท ี ่ •...
- Page 27 1 ค� า แนะน� า ด้ า นความปลอดภั ย และสิ ่ ง แวดล้ อ ม ที ่ ส � า คั ญ แผ ่ น ร ี ด และผ ิ ว รอบๆ สามารถเก ิ ด ความร ้ อ น • ส...
- Page 28 1 ค� า แนะน� า ด้ า นความปลอดภั ย และสิ ่ ง แวดล้ อ ม ที ่ ส � า คั ญ 1.2 การปฏิ บ ั ต ิ ต ามข้ อ ก� า หนดการคั ด แยกขยะทางไฟฟ้ า และอิ เ ล็ ค ทรอนิ ก ส์ (WEEE) และการก� า จั ด ผลิ ต ภั ณ ฑ์ ไ ม่ ใ ช้ แล้...
- Page 29 2 การใช้ ง าน 2.1 วั ต ถุ ป ระสงค์ ก ารใช้ ง าน เครื ่ อ งใช้ น ี ้ ไ ด้ ก � า หนดไว้ ส � า หรั บ การใช้ ง านในครั ว เรื อ นและส� า หรั บ การรี ด ผ้...
- Page 30 2 การใช้ ง าน 2.4 การตั ้ ง ค่ า อุ ณ หภู ม ิ • หลั ง จากเสี ย บปลั ๊ ก ไฟของอุ ป กรณ์ แ ล้ ว ให้ ต ั ้ ง ค่ า อุ ณ หภู ม ิ โ ดยสอดคล้ อ งกั บ ประเภทของเส้ น ใยผ้ า ของ ค...
- Page 31 2 การใช้ ง าน ค� า เตื อ น: ก่ อ นการรี ด ผ้ า ให้ ต รวจสอบป้ า ยก� า กั บ บน เสื ้ อ ผ้ า ก่ อ น 2.6 การรี ด ผ้ า ด้ ว ยไอน� ้ า ค�...
- Page 32 2 การใช้ ง าน 2.8 การพ่ น ไอน� ้ า ในแนวตั ้ ง ค� า เตื อ น: • ควรจั บ ยึ ด เตารี ด ให้ ห ่ า งจากผ้ า และผ้ า ม่ า น 15-30 ซม. • ในระหว่ า งการรี ด ผ้ า หากไฟแสดงสถานะความร้ อ นของ เคร...
- Page 33 2 การใช้ ง าน 2.12 การปิ ด เครื ่ อ งอั ต โนมั ต ิ • ในกรณี ก ารปิ ด เครื ่ อ งอั ต โนมั ต ิ ไฟสถานะการปิ ด อั ต โนมั ต ิ (4) จะกระพริ บ • หากเตารี ด ถู ก เคลื ่ อ นย้ า ยในแนวราบ เตารี ด จะเปิ ด อั...
- Page 34 3 การท� า ความสะอาดและการบ� า รุ ง รั ก ษา 3.1 การท� า ความสะอาด ค� า เตื อ น: • เมื ่ อ คุ ณ เสร็ จ สิ ้ น การรี ด ผ้ า แล้ ว ให้ ถ อดปลั ๊ ก เตารี ด ออก คุ...
- Page 35 3 การท� า ความสะอาดและการบ� า รุ ง รั ก ษา 3.4 การจั ด การและการขนส่ ง • ในระหว่ า งการจั ด การและการขนส่ ง ให้ ใ สเครื ่ อ งใช้ ไ ว้ ใ นบรรจุ ภ ั ณ ฑ์ ุ เ ดิ ม ของเคร ื ่ ่ อ งใช ้ น ั ้ น กล ่ อ งบรรจ ุ ภ ั ณ ฑ ์ ข องเตาร ี ด ให ้ ก ารป ้ อ งก ั น เตาร ี ด จากการได้...
- Page 36 4 การแก้ ไ ขปั ญ หา แม้ ว ่ า เตารี ด ถู ก เสี ย บปลั ๊ ก เข้ า ไปแล้ ว แต่ แ ผ่ น รี ด (6) ยั ง ไม่ ร ้ อ น อาจจะเสี ย บปลั ๊ ก เตารี ด ไม่ ถ ู ก ต้ อ ง >>> ตรวจสอบปลั ๊ ก ไฟและสายไฟ (1) ของเตารี ด ปุ...
- Page 37 Các biểu tượng sau đây được sử dụng trong nhiều Cảm ơn bạn đã chọn sản phần khác nhau của hướng phẩm Beko. Chúng tôi hy dẫn này: vọng bạn có được những kết quả tốt nhất từ sản phẩm Thông tin quan...
-
Page 38: Thông Số Kỹ Thuật
Thông số kỹ thuật 1. Dây điện 2. Tấm đế sắt Điện áp: 220-240V~ 50/60 3. Bình nước 4. Đèn chỉ báo bộ điều chỉnh Mức tiêu thụ điện: nhiệt và đèn Tự Động Tắt 2200 W 5. Núm vặn điều chỉnh nhiệt Lớp cách điện: I độ... - Page 39 1 Các hướng dẫn quan trọng về an toàn và môi trường Phần này bao gồm các hướng dẫn an toàn giúp ngăn ngừa nguy cơ chấn thương cá nhân hoặc thiệt hại về tài sản. Việc không tuân theo những hướng dẫn này sẽ...
- Page 40 1 Các hướng dẫn quan trọng về an toàn và môi trường Trẻ em không nên thực hiện quá trình vệ sinh và bảo dưỡng trừ khi chúng được kiểm soát bởi người lớn. Không rời mắt khỏi sản phẩm trong •...
- Page 41 1 Các hướng dẫn quan trọng về an toàn và môi trường Khi không sử dụng thiết bị hoặc đang • giảm nhiệt, giữ cho thiết bị và dây điện tránh xa tầm với của trẻ em dưới 8 tuổi. Thiết bị...
- Page 42 1 Các hướng dẫn quan trọng về an toàn và môi trường Không kéo dây điện khi rút phích cắm • thiết bị. Rút phích cắm thiết bị trước khi vệ • sinh. Không quấn dây cáp vòng quanh thiết •...
-
Page 43: Thông Tin Trên Bao Bì
1 Các hướng dẫn quan trọng về an toàn và môi trường 1.2 Tuân thủ Chỉ thị WEEE và Xử lý Chất thải: Sản phẩm này tuân thủ Chỉ thị EU WEEE (2012/19/ EU). Sản phẩm này có biểu tượng phân loại chất thải thiết bị... -
Page 44: Mục Đích Sử Dụng
2 Vận hành 2.1 Mục đích sử dụng Thiết bị này chỉ dành cho sử dụng trong hộ gia đình và là ủi; không thích hợp cho việc sử dụng chuyên môn. 2.2 Sử dụng lần đầu tiên Trước khi sử dụng lần đầu tiên, đổ đầy hai lần và làm bay hơi để... -
Page 45: Thiết Lập Nhiệt Độ
2 Vận hành 2.4 Thiết lập nhiệt độ • Sau khi thiết bị được cắm điện, hãy thiết lập nhiệt độ tùy theo loại vải bằng cách xoay núm vặn điều chỉnh nhiệt độ (5) theo chiều kim đồng hồ (xem. 2.5). - Đèn chỉ... - Page 46 2 Vận hành CẢNH BÁO: Trước khi ủi đầu tiên, hãy kiểm tra nhãn của quần áo. 2.6 Ủi hơi nước CẢNH BÁO: • Đối với việc ủi bằng hơi nước, núm vặn điều chỉnh nhiệt độ nên ở vị trí “ ” hoặc “tối đa”. •...
- Page 47 2 Vận hành 2.8 Hơi nước đứng CẢNH BÁO: • Giữ thiết bị cách xa quần áo và rèm cửa khoảng 15-30 cm. • Trong khi ủi nếu đèn chỉ báo bộ điều chỉnh nhiệt (4) sáng lên, trước khi tiến hành quá trình hơi nước sốc nhiệt hãy chờ...
- Page 48 2 Vận hành Với hệ thống chống nhỏ giọt, bạn có thể là một cách hoàn hảo ngay cả trên những loại vải mỏng nhất. 2.12 Tắt nguồn tự động (Tự Động Tắt) • Trong trường hợp tự động tắt nguồn đèn tự động tắt (4) sẽ...
- Page 49 3 Vệ sinh và bảo trì 3.1 Vệ sinh CẢNH BÁO: • Khi bạn hoàn tất việc ủi, hãy rút phích cắm thiết bị. Bạn có thể xả nước trong bình chứa bằng cách mở nắp nạp (8) và nghiêng bàn ủi về...
- Page 50 3 Vệ sinh và bảo trì 3.4 Xử lý và vận chuyển • Trong quá trình xử lý và vận chuyển, hãy để thiết bị trong bao bì nguyên gốc. Bao bì của thiết bị bảo vệ nó khỏi thiệt hại vật lý. •...
-
Page 51: Xử Lý Sự Cố
4 Xử lý sự cố Mặc dù thiết bị đã được cắm điện, mặt đế (6) không nóng lên. Thiết bị có thể được kết nối không đúng cách.>>> Kiểm tra ổ cắm và dây điện (1) của thiết bị. Núm vặn điều chỉnh nhiệt độ... - Page 52 请首先阅读本手册! 符号含义 亲爱的顾客, 在本手册的不同章节使用了 下列符号: 感谢您选购 Beko 产品。我 们的产品具有高品质,且采 有关使用的重要信 用先进的技术生产,希望您 息和有用的提示。 能从中获取最大的效益。因 此,使用本产品前,请仔细 阅读完整的用户手册和其他 警告:有关生命和 随附文件,并妥善保管,以 财产安全之危险情 备日后使用。如果将本产品 况的警告。 移交他人,请一并移交用户 手册。请遵循用户手册中包 高温表面 警告: 含的所有警告和信息。 之警告。 风险或蒸汽导致的 灼伤和烫伤 本产品由高度环保的现代化工厂制造。 遵守 WEEE 指令 其不含 PCB。...
- Page 53 1. 电源线 技术数据 2. 熨斗底座 电压:220-240V~ 50/60 Hz 3. 水槽 4. 恒温器指示灯和自动关 功率消耗: 2200 W 闭灯 5. 温度调整旋钮 绝缘等级:I 6. 底板 冲击蒸汽量: 7. 喷水嘴 最多 110 克/分钟 8. 加水盖 持续蒸汽量:最高 30 克/分钟 9. 蒸汽调整/自清洁按钮 10. 喷水按钮 11. 冲击蒸汽按钮 保留技术和设计变更权。 产品标识或其附带之印刷材料上注明的数值是根据相关标准,在实验室中获得的。这些数值可能因设备使用和环境条件之不同 而异。...
- Page 54 1 重要的安全和环境说明 本节包含的安全须知有助于避免发生人身 伤害或财产损失之风险。 若未遵循这些说明将导致保修条款失效。 1.1 一般安全 本设备符合国际安全标准。 • 如果有人负责监管和提供有关安全使 • 用该装置及相关危险的指导,该装置 可以由 8 岁及以上的儿童和体力、感 知力和智力下降以及技术不熟练或无 经验之人员使用。儿童不得摆弄本设 备。如果没有成人监督,不得由儿童 执行清洁和用户维护步骤。 本 产 品 使 用 期 间 , 必 须 始 终 在 旁 监 • 管。 在水槽加水前,应拔下产品插头。 • 在稳定的表面操作和存放本产品。 • 本装置放置在底座时,确保底座下方...
- Page 55 1 重要的安全和环境说明 如果电源线或装置本身损坏,请勿使 • 用本设备。请与授权服务部门联系。 如 果 装 置 掉 落 、 漏 水 , 或 有 其 他 故 • 障,请与授权服务部门联系。在维修 妥当后,方可继续使用本装置。 在不使用本装置或等待其冷却时,注 • 意本装置和电源线远离 8 岁以下之儿 童。 本装置不适合户外使用。 • 只能使用原装零件或制造商建议的零 • 件。 请勿试图拆解本装置。 • 确 保 电 源 符 合 设 备 铭 牌 上 提 供 的 信 •...
- Page 56 1 重要的安全和环境说明 清洁前,应拔下装置插头。 • 请勿在本装置周围缠绕电缆。 • 本装置插头插入插座时,请勿使用湿 • 手接触本装置或其插头。 底板或周围区域可能很热。接触高温 • 表面可能导致灼伤。因此,使用本装 置 时 或 之 后 , 注 意 不 要 接 触 高 温 表 面。 切勿在燃烧或可燃位置和材料附近使 • 用本装置。 如果保留包装材料,应置于儿童不可 • 及之处。 1.2 符合 WEEE 指令和废旧产品处置 本产品符合欧盟 WEEE 指令 (2012/19/EU)。本产 品带有《报废电子电气设备指令》(WEEE)分类标...
- Page 57 1 重要的安全和环境说明 1.3 RoHS 指令合规 您购买的产品符合欧盟 RoHS 指令 (2011/65/EU)的规定, 不包含指令中规定的有害物质和禁止使用的物质。 1.4 包装信息 本产品的包装材料根据我国的环境管理规定采用可 回收材料制成。请勿将包装材料与生活垃圾或其它 垃圾一起处置。应将包装材料运送至当地机构指定 的包装材料回收点。 57 / CN 蒸汽熨斗 / 用户手册...
- Page 58 2 操作 2.1 预期用途 本装置仅供家庭使用和熨烫;不得用于专业环境。 2.2 初次使用 初次使用前,加水两次,并蒸发,清除制造残留。同时, 频繁使用冲击蒸汽按钮(11)。 其可能散发出轻度的异味或有白色沉淀物从底 板孔出现。执行两次蒸发过程后,此类异味和 沉淀物将消失。此外,在水槽可能形成水滴, 这是正常的。 2.3 重新加满水槽 本 装 置 设 计 使 用 自 来 水 。 如 果 自 来 水 硬 度 过 高,建议您使用自来水与应用水的混合物。 2.4 设置温度 • 装置插头插入后,在顺时针方向转动温度设置 旋钮 (5),根据面料类型设置温度(请参见2.5 )。...
- Page 59 2 操作 2.5 温度和蒸汽设置表 设置装置温度时,考虑下表。 面料类型 温度控制 温度要求 • 低温 丝绸 •• 中等温度 羊毛 ••• 高温 棉,麻 最高 高温 亚麻 - 牛仔 • 如果不了解衣物面料,首先在衣物不可见部分 熨烫,并确定正确的熨烫温度。 • 为了防止混纺面料(例如丝绸)上形成亮斑, 应在面料背面熨烫。请勿使用喷水功能,以免 形成污点。 警告: 熨烫前,应首先检查衣物标签。 2.6 蒸汽熨烫 警告: • 对于使用蒸汽熨烫,温度调整旋钮应位于“ ”或“max”(最大)位置。 • 转动蒸汽调整按钮(9)至合适的蒸汽状态。 • 熨斗竖直放置时立刻就会产生蒸汽。 59 / CN 蒸汽熨斗...
- Page 60 2 操作 2.7 冲击蒸汽 警告: • 再次按下冲击蒸汽按钮(11),等候几秒钟。重 复按这个按钮可能会让水和蒸汽同时从底板 (6)喷出。 • 在熨烫开始后,开始的几次熨烫可能不会产生 冲击蒸汽。想要产生冲击蒸汽,温度旋钮应该 在 “ ”或更高的位置。 • 若要使用冲击蒸汽功能,恒温器指示灯 (4)应 当熄灭。 2.8 垂直蒸汽 警告: • 在距离衣物和窗帘 15-30 cm 的位置握住本装 置。 • 熨烫期间,如果恒温器指示灯 (4) 亮起,继续 使用冲击蒸汽处理前,等待指示灯熄灭。 • 蒸汽不得对着人或宠物。 2.9 喷水 使用喷水功能,可以轻松去除褶皱。 2.10 干法熨烫 若要进行干法熨烫,将蒸汽设置按钮...
- Page 61 2 操作 装置中有水将很有利,您可以在必要时使用喷 水按钮(10)。 2.11 防滴漏 该熨斗具有防滴漏功能:熨斗的温度过低时会自动停止出 整齐状态,防止水从底板处滴漏出来。 防滴漏设计可您可以放心熨烫任何面料,即使最娇贵的面 料也能胜任。 2.12 自动关闭 (Auto-Off) • 如果自动关闭,自动关闭指示灯(4)将闪烁。 • 如果装置在水平位置移动,其将开启。 • 底板 (6) 需要 60 秒时间达到之前设置的温度。 61 / CN 蒸汽熨斗 / 用户手册...
- Page 62 3 清洁和维护 3.1 清洁 警告: • 完成熨烫后,拔下装置插头。您可以打开加水 盖(8),并向前方倾斜熨斗,排出水槽中的水。 • 清洁本装置时,请勿使用汽油、溶剂和磨蚀性 清洁剂,或硬毛刷子。 3.2 防水垢 水槽内的过滤器可以软化水质,防止底板出现水垢。这是 一个永久性过滤器,不需要更换。 3.3 保存 如果打算长时间不使用本装置,请小心存放。 • 抬高本装置前,应拔下插头,并等待其完全冷却。 • 清空水槽。 • 本装置及其附件应存放在原始包装中。 • 在凉爽、干燥的位置存放。 • 本装置应置于儿童不可及之处。 3.4 处置和运输 • 处置和运输期间,应在原始包装中存放本装置。装置的包 装可以防止其受到物理损坏。 • 请勿在本装置或包装上放置重物。否则,装置可能受损。 • 本装置掉落可能导致其不可操作或发生永久损坏。 62 / CN 蒸汽熨斗...
- Page 63 4 故障排除 装置插入插头后,底板 (6) 未加热。 装置可能未适当连接。>>> 检查装置插头和电源线(1)。 温度调整旋钮(5)可能位于最低位置。>>> 在顺时针方向转动温度调整旋 钮至蒸汽符号。 装置不产生蒸汽。 水槽可能没有足够的水。>>> 使用水杯在水槽加水,至最高液位。 蒸汽设置按钮 (9)可能位于无蒸汽位置。>>> 将蒸汽设置按钮置于蒸汽 位置。 冲击蒸汽 – 垂直蒸汽不工作。 可能在极短时间内频繁使用这些功能。>>> 在水平位置熨烫,并稍候片 刻,而后使用冲击蒸汽功能。 >>> 底板(6)可能不够热。在顺时针方向 转动温度调整旋钮(5)至蒸汽符号。装置在垂直位置安放妥当,并等待底 板加热。 熨烫期间,有水珠滴落在面料上。 您可能没有牢牢关闭加水盖(8)。>>> 牢牢关闭加水盖。 您可能在 • 或 ••的温度水平使用冲击蒸汽。>>> 调高温度水平。 熨烫期间,沉淀物和残留从底板 (6)掉落。 如果装置使用的水硬度过高,可能形成此类沉淀物。>>> 一次或多次使 用自清洁功能 。对于后续熨烫,在装置水槽加入自来水和饮用水的混 合物。...
- Page 64 Simbol-simbol berikut digunakan di Yth. Pelanggan, berbagai bagian panduan ini: Terima kasih telah memilih produk Informasi penting dan Beko. Semoga Anda mendapatkan petunjuk bermanfaat hasil terbaik dari produk Anda yang mengenai penggu- telah diproduksi dengan teknologi naan.
-
Page 65: Data Teknis
Data teknis 1. Kabel listrik 2. Pelat alas besi Tegangan: 220-240V~ 50/60 Hz 3. Tangki air Konsumsi daya: 4. Indikator termostat dan lampu 2200 W Mati Otomatis 5. Kenop penyesuaian suhu Kelas isolasi: I 6. Alas setrika Jumlah uap kejut: 7. - Page 66 1 Petunjuk keselamatan dan ling- kungan penting Bagian in berisi petunjuk keselamatan yang akan membantu melindungi dari risiko cedera pribadi atau kerusakan pribadi. Kegagalan mematuhi petunjuk ini akan membatal- kan garansi yang diberikan. 1.1 Keselamatan umum Produk ini mematuhi standar keselamatan in- •...
- Page 67 1 Petunjuk keselamatan dan ling- kungan penting Jangan biarkan produk tanpa pengawasan saat • sedang tersambung ke listrik. Cabut produk sebelum mengisi wadah air den- • gan air. Operasikan dan simpan produk di permukaan • yang stabil. Saat produk ditempatkan pada pelat alasnya, •...
- Page 68 1 Petunjuk keselamatan dan ling- kungan penting Hanya gunakan komponen asli atau komponen • yang direkomendasikan oleh produsen. Jangan mencoba membongkar produk. • Catu daya utama Anda harus sesuai dengan • informasi yang diberikan pada pelat nominal produk. Catu daya produk harus diamankan dengan •...
- Page 69 1 Petunjuk keselamatan dan ling- kungan penting Alas setrika dan area sekitarnya dapat sangat • panas. Menyentuh permukaan panas dapat menyebabkan luka bakar. Karenanya, saat atau tepat setelah menggunakan produk, perhatikan untuk tidak menyentuh permukaan yang panas. Jangan pernah menggunakan produk di atau •...
- Page 70 1 Petunjuk keselamatan dan ling- kungan penting 1.3 Kepatuhan dengan Direktif RoHS Produk yang Anda beli sesuai dengan Direktif RoHS UE (2011/65/EU). Produk tidak mengandung bahan berbahaya dan terlarang sesuai keten- tuan Direktif. 1.4 Informasi Kemasan Bahan kemasan produk diproduksi dari bahan daur ulang sesuai dengan Peraturan Lingkungan Nasional.
-
Page 71: Tujuan Penggunaan
2 Pengoperasian 2.1 Tujuan penggunaan Produk ini hanya ditujukan untuk penggunaan rumah tangga dan meny- etrika; tidak cocok untuk penggunaan profesional. 2.2 Penggunaan awal Sebelum penggunaan awal, isi dua kali dan uapkan untuk menghilangkan residu produksi. Sementara itu, gunakan tombol uap kejut (11) sesering mungkin. - Page 72 2 Pengoperasian 2.4 Mengatur suhu • Setelah alat tersambung ke stopkontak, atur suhu sesuai dengan jenis kain Anda dengan memutar kenop penyesuaian suhu (5) searah jarum jam (lihat. 2.5). - Lampu indikator termostat (4) akan menyala. • Ketika produk mencapai suhu yang diatur, lampu indikator termostat (4) akan padam dan produk siap digunakan.
- Page 73 2 Pengoperasian 2.6 Penyetrikaan uap PERINGATAN: • Untuk penyetrikaan dengan uap, kenop penyesuaian suhu harus berada di antara posisi “ “ dan “maks”. • Putar tombol penyesuaian uap(9) ke tingkat uap yang diinginkan. • Uap dihasilkan segera setelah setrika dipegang secara horizontal.
- Page 74 2 Pengoperasian 2.8 Uap vertikal PERINGATAN: • Tahan produk sejauh 15-30 cm dari pakaian dan tirai. • Jika lampu indikator termostat (4) menyala saat menyetrika, tunggu hingga lampu padam sebelum melanjutkan dengan proses uap kejut. • Jangan pernah mengarahkan uap ini ke orang atau hewan peliharaan.
- Page 75 2 Pengoperasian 2.12 Pematian Otomatis (Auto-Off) • Jika pematian otomatis aktif, lampu pematian otomatis (4) akan berkedip. • Jika produk dipindahkan ke posisi horizontal, produk akan menyala. • Diperlukan sekitar 60 detik agar alas setrika (6) mencapai suhu yang diatur sebelumnya. 75 / ID Setrika Uap / Panduan Pengguna...
-
Page 76: Pembersihan Dan Perawatan
3 Pembersihan dan perawatan 3.1 Pembersihan PERINGATAN: • Setelah Anda selesai menyetrika, cabut produk dari stopkontak. Anda dapat menguras air di wadah dengan membuka tutup isi ulang (8) dan memiringkan setrika ke depan. • Jangan gunakan bensin, pelarut, dan bahan pembersih abrasif atau sikat keras untuk membersihkan produk. - Page 77 3 Pembersihan dan perawatan 3.4 Penanganan dan pengangkutan • Selama penanganan dan pengangkutan, bawa produk di dalam kemasan aslinya. Kemasan produk melindunginya dari kerusakan fisik. • Jangan letakkan benda berat di atas produk atau kemasan. Produk dapat rusak. • Menjatuhkan produk akan membuatnya tidak berfungsi atau menyebabkan kerusakan permanen.
-
Page 78: Pemecahan Masalah
4 Pemecahan masalah Meskipun produk terhubung ke stopkontak, alas setrika (6) tidak memanas. Alat mungkin tidak terhubung dengan benar. >>> Periksa steker dan kabel listrik (1) produk. Kenop penyesuaian suhu (5) mungkin di posisi Min. >>> Putar kenop penyesuaian suhu searah jarum jam arah hingga ke tanda uap. - Page 79 www.beko.com...